ancos注册中心、网关和静态化freemarker、对象存储服务MinIO
1、docker安装ancos
Nacos 分布式注册中心
①:docker拉取镜像
docker pull nacos/nacos-server:1.2.0
②:创建容器
docker run --env MODE=standalone --name nacos --restart=always -d -p 8848:8848 nacos/nacos-server:1.2.0
③:访问地址:http://192.168.200.130:8848/nacos
2、 网关
2.1 pom.xml文件导入依赖
<dependencies>
    <dependency>
        <groupId>org.springframework.cloud</groupId>
        <artifactId>spring-cloud-starter-gateway</artifactId>
    </dependency>
    // nacos依赖
    <dependency>
        <groupId>com.alibaba.cloud</groupId>
        <artifactId>spring-cloud-starter-alibaba-nacos-discovery</artifactId>
    </dependency>

     <dependency>
            <groupId>com.alibaba.cloud</groupId>
            <artifactId>spring-cloud-starter-alibaba-nacos-config</artifactId>
        </dependency>
    <dependency>
        <groupId>io.jsonwebtoken</groupId>
        <artifactId>jjwt</artifactId>
    </dependency>
</dependencies>
2.2 创建微服务(搜索微服务、登录微服务等)
启动类需要加上@EnableDiscoveryClient注解
@SpringBootApplication
@EnableDiscoveryClient  //开启注册中心
public class AppGatewayApplication {

    public static void main(String[] args) {
        SpringApplication.run(AppGatewayApplication.class,args);
    }
}
bootstrap.xml
注意:配置文件bootstrap.yml ,这里不要配置在application.yml/properties中 有加载顺序原因
server:
   # 网关端口
  port: 51601
spring:
  application:
    name: leadnews-app-gateway
  cloud:
    nacos:
      discovery:
        server-addr: 192.168.200.130:8848
      config:
        server-addr: 192.168.200.130:8848
        file-extension: yml
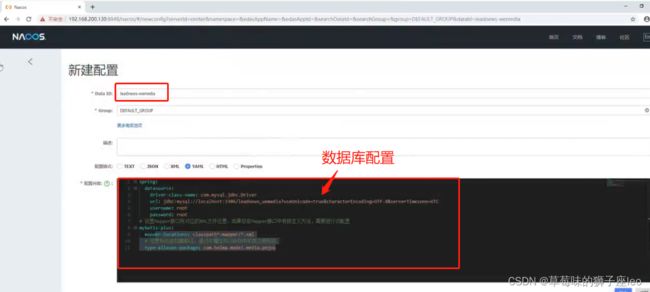
2.3 nacos的配置中心
1. 创建dataid为leadnews-app-gateway的yml配置
spring:
  cloud:
    gateway:
      globalcors:
        add-to-simple-url-handler-mapping: true
        corsConfigurations:
          '[/**]': # 匹配所有请求
            allowedHeaders: "*"
            allowedOrigins: "*" #跨域处理 允许所有的域
            allowedMethods: # 支持的方法
              - GET
              - POST
              - DELETE
              - PUT
              - OPTION
      routes:
      #app网关的微服务的nacos的配置中心添加微服务
        # 用户微服务
        - id: user
          uri: lb://leadnews-user
          predicates:
            - Path=/user/**
          filters:
            - StripPrefix= 1
     #文章微服务
      - id: article
          uri: lb://leadnews-article
          predicates:
            - Path=/article/**
          filters:
            - StripPrefix= 1
3、Nginx
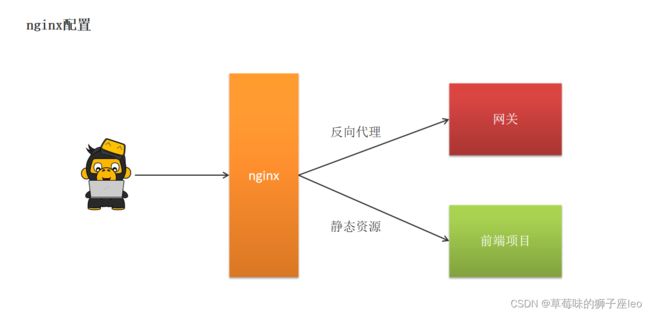
通过nginx来进行配置,功能如下
- 通过nginx的反向代理功能访问后台的网关资源
- 通过nginx的静态服务器功能访问前端静态页面
nginx方式集成前端项目
配置nginx.conf文件
在nginx安装的·conf目录下新建一个文件夹leadnews.conf,并新建heima-leadnews-app.conf文件
**heima-leadnews-app.conf内容:**
upstream  heima-app-gateway{
   #网关
    server localhost:51601;
}

server {
	listen 8801;
	location / {
	# 前端项目的资源位置
		root D:/workspace/app-web/;
		index index.html;
	}

	location ~/app/(.*) {
		proxy_pass http://heima-app-gateway/$1;
		proxy_set_header HOST $host;  # 不改变源请求头的值
		proxy_pass_request_body on;  #开启获取请求体
		proxy_pass_request_headers on;  #开启获取请求头
		proxy_set_header X-Real-IP $remote_addr;   # 记录真实发出请求的客户端IP
		proxy_set_header X-Forwarded-For $proxy_add_x_forwarded_for;  #记录代理信息
	}
}
nginx.conf
#user  nobody;
worker_processes  1;

events {
    worker_connections  1024;
}
http {
    include       mime.types;
    default_type  application/octet-stream;
    sendfile        on;
    keepalive_timeout  65;
	# 引入自定义配置文件
	include leadnews.conf/*.conf;
}
④ :启动nginx
在nginx安装包中使用命令提示符打开,输入命令nginx启动项目
可查看进程,检查nginx是否启动
重新加载配置文件:nginx -s reload
⑤:打开前端项目进行测试 – > http://localhost:8801
3、docker安装MinIO
MinIO兼容亚马逊S3云存储服务接口,非常适合于存储大容量非结构化的数据,例如图片、视频、日志文件、备份数据和容器/虚拟机镜像等,而一个对象文件可以是任意大小,从几kb到最大5T不等
docker run -p 9000:9000 --name minio -d --restart=always -e "MINIO_ACCESS_KEY=minio" -e "MINIO_SECRET_KEY=minio123" -v /home/data:/data -v /home/config:/root/.minio minio/minio server /data


Access Key为minio   Secret_key 为minio123
3.1 将MinIO封装为starter
<dependencies>
    <dependency>
        <groupId>org.springframework.boot</groupId>
        <artifactId>spring-boot-autoconfigure</artifactId>
    </dependency>
    <dependency>
        <groupId>io.minio</groupId>
        <artifactId>minio</artifactId>
        <version>7.1.0</version>
    </dependency>
    <dependency>
        <groupId>org.springframework.boot</groupId>
        <artifactId>spring-boot-starter</artifactId>
    </dependency>
    <dependency>
        <groupId>org.springframework.boot</groupId>
        <artifactId>spring-boot-configuration-processor</artifactId>
        <optional>true</optional>
    </dependency>
    <dependency>
        <groupId>org.springframework.boot</groupId>
        <artifactId>spring-boot-starter-actuator</artifactId>
    </dependency>
</dependencies>
3.2 对外加入自动配置
在resources中新建META-INF/spring.factories
org.springframework.boot.autoconfigure.EnableAutoConfiguration=\
  com.heima.file.service.impl.MinIOFileStorageService
3.3 其他微服务使用
- 导入heima-file-starter的依赖
- 在微服务中添加minio所需要的配置
minio:
  accessKey: minio
  secretKey: minio123
  bucket: leadnews
  endpoint: http://192.168.200.130:9000
  readPath: http://192.168.200.130:9000
- 在对应使用的业务类中注入FileStorageService
@SpringBootTest(classes = MinioApplication.class)
@RunWith(SpringRunner.class)
public class MinioTest {

    @Autowired
    private FileStorageService fileStorageService;

    @Test
    public void testUpdateImgFile() {
        try {
            FileInputStream fileInputStream = new FileInputStream("E:\\tmp\\ak47.jpg");
            String filePath = fileStorageService.uploadImgFile("", "ak47.jpg", fileInputStream);
            System.out.println(filePath);
        } catch (FileNotFoundException e) {
            e.printStackTrace();
        }
    }
}


