JavaScript游戏开发(1)(笔记)
文章目录
- 一、让角色动起来
- 二、背景的视差效果
-
- 2.1 循环背景
- 2.2 视差效果
- 三、敌人的移动模式
-
- 3.1 敌人1
- 3.2 敌人2
- 3.3 敌人3
- 3.4 敌人4
- 四、碰撞动画
-
- 4.1 碰撞检测
- 4.2 碰撞动画
- 附录
素材可以去一位大佬放在github的源码中直接下,见附录。
一、让角色动起来
显示页面
DOCTYPE html>
<html lang="en">
<head>
    <meta charset="UTF-8">
    <meta http-equiv="X-UA-Compatible" content="IE=edge">
    <meta name="viewport" content="width=device-width, initial-scale=1.0">
    <title>shadow_dog_animationtitle>
    <link rel="stylesheet" href="./style.css">
head>
<body>
    <canvas id="canvas1">canvas>
    <script src="./script.js">script>
body>
html>
css
#canvas1 {
    border: 5px solid black;
    position: absolute;
    top: 50%;
    left: 50%;
    transform: translate(-50%,-50%);
    width: 600px;
    height: 600px;
}
js
const canvas = document.getElementById('canvas1');

const ctx = canvas.getContext('2d');


const CANVAS_WIDTH = canvas.width = 600
const CANVAS_HEIGHT = canvas.height = 600


const playerImage = new Image();
playerImage.src = './shadow_dog.png';
// 截取图片的宽高
const spriteWidth = 575;
const spriteHeight = 523;

// 用于计算每一帧截取位置的变动
let frameX = 0;
let frameY = 0;

function animate(){
    // 清除举行区域内内容
    ctx.clearRect(0,0,CANVAS_WIDTH,CANVAS_HEIGHT);
    // 用图片填充内部-通过放缩,达到刚好一只大小
    // 图片开始裁剪的x y  图片裁剪的宽 高  图片放置在从ctx中的 x y 在ctx中使用的宽 高(放缩)
    ctx.drawImage(playerImage,frameX * spriteWidth,frameY * spriteHeight,spriteWidth,spriteHeight,0,0,CANVAS_WIDTH,CANVAS_HEIGHT);

    // 通过内置的动画帧的方式 回调我们的 animate 方法,形成死循环
    requestAnimationFrame(animate);
};

// 执行
animate()
我们通过修改frameX 和frameY来改变截取的图片内容,此时0,0就是第一个图

那么,接下来我们通过循环让其动起来
// 此处是一个简单的帧数计算,一般来说,游戏中通过 x = 下一次重绘时间 - 当前系统时间 ,0<=x 则执行,x > 0 到则睡眠x
// 用于计算游戏帧数
let gameFrame = 0;
// 游戏设置的帧数
const staggerFrames = 5;

function animate(){

    // 清除举行区域内内容
    ctx.clearRect(0,0,CANVAS_WIDTH,CANVAS_HEIGHT);
    // 用图片填充内部-通过放缩,达到刚好一只大小
    // 图片开始裁剪的x y  图片裁剪的宽 高  图片放置在从ctx中的 x y 在ctx中使用的宽 高(放缩)
    ctx.drawImage(playerImage,frameX * spriteWidth,frameY * spriteHeight,spriteWidth,spriteHeight,0,0,CANVAS_WIDTH,CANVAS_HEIGHT);

    if(gameFrame % staggerFrames == 0){
        // 由于第一行只有 7 帧的图片,我们让其小于等于 7
        if(frameX < 6){
            frameX++;
        }
        else{
            frameX = 0;
        }
    }

    gameFrame++;
    // 通过内置的动画帧的方式 回调我们的 animate 方法,形成死循环
    requestAnimationFrame(animate);
};
接下来,我们把每一个行动作都装入
DOCTYPE html>
<html lang="en">
<head>
    <meta charset="UTF-8">
    <meta http-equiv="X-UA-Compatible" content="IE=edge">
    <meta name="viewport" content="width=device-width, initial-scale=1.0">
    <title>shadow_dog_animationtitle>
    <link rel="stylesheet" href="./style.css">
head>
<body>
    <canvas id="canvas1">canvas>
    <div class="controls">
        <label for="animations">choose animation:label>
        <select title="animations" id="animations" name="animations">
            <option value="idle">idleoption>
            <option value="jump">jumpoption>
            <option value="fall">falloption>
            <option value="run">runoption>
            <option value="dizzy">dizzyoption>
            <option value="sit">sitoption>
            <option value="roll">rolloption>
            <option value="bite">biteoption>
            <option value="ko">kooption>
            <option value="getHit">getHitoption>
        select>
    div>
    <script src="./script.js">script>
body>
html>
增加新的修饰
#canvas1 {
    border: 5px solid black;
    position: absolute;
    top: 50%;
    left: 50%;
    transform: translate(-50%,-50%);
    width: 600px;
    height: 600px;
}

.controls{
    position: absolute;
    z-index: 10;
    top: 100px;
    left: 50%;
    transform: translate(-50%);
}

.controls,select,option{
    font-size: 25px;
}
const canvas = document.getElementById('canvas1');

const ctx = canvas.getContext('2d');


const CANVAS_WIDTH = canvas.width = 600
const CANVAS_HEIGHT = canvas.height = 600


const playerImage = new Image();
playerImage.src = './shadow_dog.png';
// 截取图片的宽高
const spriteWidth = 575;
const spriteHeight = 523;


// 用于计算游戏帧数
let gameFrame = 0;

// 游戏设置的帧数
const staggerFrames = 5;


// 存储计算出的动作结果
let spriteAnimations=[]
// 动作状态
const animationStates=[
    {
        name:"idle",
        frames:7
    },
    {
        name:"jump",
        frames:7
    },
    {
        name:"fall",
        frames:7
    },
    {
        name:"run",
        frames:9
    },
    {
        name:"dizzy",
        frames:11
    },
    {
        name:"sit",
        frames:5
    },
    {
        name:"roll",
        frames:7
    },
    {
        name:"bite",
        frames:7
    },
    {
        name:"ko",
        frames:12
    },
    {
        name:"getHit",
        frames:4
    },

]


// 遍历动作状态,计算出结果
animationStates.forEach((state,index)=>{
    let frames={
        // 存储动作帧图片位置
        loc:[],
        // loc中的动作完成所需的帧数
        maxFrame:0
    }
    // 计算每一个动作的行列,使用时直接取出即可
    for(let i = 0;i < state.frames; i++){
        // 计算列
        let positionX = i * spriteWidth;
        // 计算行
        let positionY= index * spriteHeight;
        // 存入数据中
        frames.loc.push({x:positionX, y:positionY})
    }
    // 笔者这里增加了一个最大帧数,用于避免帧数过大的问题。
    frames.maxFrame = frames.loc.length * staggerFrames;
    // map的形式放入
    spriteAnimations[state.name] = frames;
})

let playerState='idle' //角色的状态


// 下拉框事件
const dropdown = document.getElementById('animations')

// 添加事件
dropdown.addEventListener('change',(e)=>{
    playerState=e.target.value
})

function animate(){
    // 清除举行区域内内容
    ctx.clearRect(0,0,CANVAS_WIDTH,CANVAS_HEIGHT);

    // 通过帧数计算当前应该加载哪一列图片,效果与之前的写法相同,只是这样写更简洁
    let position = Math.floor(gameFrame / staggerFrames) % (spriteAnimations[playerState].loc.length);

    // 用于计算每一帧截取位置的变动
    let frameX = spriteAnimations[playerState].loc[position].x;
    let frameY = spriteAnimations[playerState].loc[position].y;


    ctx.drawImage(playerImage,frameX,frameY ,spriteWidth,spriteHeight,0,0,CANVAS_WIDTH,CANVAS_HEIGHT);

    // 进入下一帧
    gameFrame++;
    // 为了防止gameFrame过大,造成CPU压力,此处用最大帧数缩放
    // 当游戏帧数等于最大帧数时,认为已经走完一轮,可以归零
    if(gameFrame >= spriteAnimations[playerState].maxFrame){
        gameFrame = 0;
    }
    // 通过内置的动画帧的方式 回调我们的 animate 方法,形成死循环
    requestAnimationFrame(animate);
};

// 执行
animate()

二、背景的视差效果
2.1 循环背景
我们先创建好主页
<!DOCTYPE html>
<html lang="en">
<head>
    <meta charset="UTF-8">
    <meta http-equiv="X-UA-Compatible" content="IE=edge">
    <meta name="viewport" content="width=device-width, initial-scale=1.0">
    <title>Parallax Backgrounds</title>
    <link rel="stylesheet" href="./style.css">
</head>
<body>
    <canvas id="canvas1"></canvas>
    <script src="./script.js"></script>
</body>
</html>
body{
    background-color: black;
}


#canvas1{
    position: absolute;
    width: 800px;
    height: 700px;
    border: 3px solid white;
    transform: translate(-50%,-50%);
    top:50%;
    left:50%;
}
const canvas = document.getElementById('canvas1');
const ctx = canvas.getContext('2d');
const CANVAS_WIDTH = canvas.width = 800;
const CANVAS_HEIGHT = canvas.height=700;
// 游戏速度
let gameSpeed = 15;

// 载入图像
const backgroundLayer1 = new Image();
backgroundLayer1.src = './layer-1.png'

const backgroundLayer2 = new Image();
backgroundLayer2.src = './layer-2.png'

const backgroundLayer3 = new Image();
backgroundLayer3.src = './layer-3.png'

const backgroundLayer4 = new Image();
backgroundLayer4.src = './layer-4.png'

const backgroundLayer5 = new Image();
backgroundLayer5.src = './layer-5.png'

let x = 0;


function animate(){
    ctx.clearRect(0,0,CANVAS_WIDTH,CANVAS_HEIGHT);
    ctx.drawImage(backgroundLayer4,x,0);

    // 到头从来
    // 像素长度是2400px
    if(x < -2400)
        x = 2400;
    else
        x -= gameSpeed;
    requestAnimationFrame(animate);
}

animate();
先看一看效果,如下

接下来,我们让地图无线延展。做到卷轴类游戏常见的效果。
const canvas = document.getElementById('canvas1');
const ctx = canvas.getContext('2d');
const CANVAS_WIDTH = canvas.width = 800;
const CANVAS_HEIGHT = canvas.height=700;
// 游戏速度
let gameSpeed = 15;

// 载入图像
const backgroundLayer1 = new Image();
backgroundLayer1.src = './layer-1.png'

const backgroundLayer2 = new Image();
backgroundLayer2.src = './layer-2.png'

const backgroundLayer3 = new Image();
backgroundLayer3.src = './layer-3.png'

const backgroundLayer4 = new Image();
backgroundLayer4.src = './layer-4.png'

const backgroundLayer5 = new Image();
backgroundLayer5.src = './layer-5.png'

let x = 0;
let x2 = 2400;

function animate(){
    ctx.clearRect(0,0,CANVAS_WIDTH,CANVAS_HEIGHT);
    ctx.drawImage(backgroundLayer4,x,0);
    ctx.drawImage(backgroundLayer4,x2,0);
    // 可以理解为两张图,一张接在另一张末尾

    // 当第一张x走完了,接在x2后面
    // 第二张x2走完了,接在x后面

    // 此处,笔者修改了代码连接x与x2连接的逻辑
    // 注意:以下的处理方式,移动不可以一次性跨越两张图的长度
    // 也就是始终要保证一张图位置不小于0。

    // 原代码(视频中的代码)也是如此。

    if(x <= -2400){
        x = 2400 + x2; // 接在x2后面
    }
    else if(x2 <= -2400){
        x2 = 2400 + x; // 接在x后面
    }

    // 移动
	x -= gameSpeed;
    x2 -= gameSpeed;
    requestAnimationFrame(animate);
}

animate();
2.2 视差效果
不同图层(背景)移动速度不同,使得游戏立体(远处物体移动较慢,近处物体移动较快)。同时, 它们都是收到角色移动的控制。
为了更便于维护,我们将图层抽象为一个Layer对象。
const canvas = document.getElementById('canvas1');
const ctx = canvas.getContext('2d');
const CANVAS_WIDTH = canvas.width = 800;
const CANVAS_HEIGHT = canvas.height=700;
// 游戏速度
let gameSpeed = 5;

// 载入图像
const backgroundLayer1 = new Image();
backgroundLayer1.src = './layer-1.png'

const backgroundLayer2 = new Image();
backgroundLayer2.src = './layer-2.png'

const backgroundLayer3 = new Image();
backgroundLayer3.src = './layer-3.png'

const backgroundLayer4 = new Image();
backgroundLayer4.src = './layer-4.png'

const backgroundLayer5 = new Image();
backgroundLayer5.src = './layer-5.png'


// 图层对象
class Layer{
    /**
     * @param image 图片信息
     * @param speedModifier 该图层的速度调节器,也即:用于计算,相对全局速度,自己的速度是多少(每一个图层速度不一样)
     */
    constructor(image,speedModifier){
        // 第一张图位置
        this.x = 0;
        this.y = 0;
        // 图片宽高
        this.width = 2400;
        this.height = 700;
        // 第二张图位置
        this.x2 = this.width;
        // 图片
        this.image = image;
        // 图层的速度调节器
        this.speedModifier = speedModifier;
        // 自己的移动速度
        this.speed = gameSpeed * this.speedModifier;
    }

    // 更新图片位置
    update(){
        // 获取新的速度
        this.speed = gameSpeed * this.speedModifier;

        // 此处笔者修改逻辑,个人认为视频可能有错误,导致图片在临界处移动了两次,因此此处修改代码
        if(this.x <= -this.width){
            this.x = this.width + this.x2;
        }
        else if(this.x2 <= -this.width){
            this.x2 = this.width + this.x ;
        }


        // 避免产生小数点
        this.x = Math.floor(this.x - this.speed);
        this.x2 = Math.floor(this.x2 - this.speed);
    }

    draw(){
        ctx.drawImage(this.image,this.x,this.y,this.width,this.height);
        ctx.drawImage(this.image,this.x2,this.y,this.width,this.height);
    }

}

const layer1 = new Layer(backgroundLayer1,0.2);
const layer2 = new Layer(backgroundLayer2,0.4);
const layer3 = new Layer(backgroundLayer3,0.6);
const layer4 = new Layer(backgroundLayer4,0.8);
const layer5 = new Layer(backgroundLayer5,1);

const gameObjects = [layer1,layer2,layer3,layer4,layer5];

function animate(){
    ctx.clearRect(0,0,CANVAS_WIDTH,CANVAS_HEIGHT);


    gameObjects.forEach((item,index)=>{
        item.update();
        item.draw();
    })

    requestAnimationFrame(animate);
}

animate();

我们接下来,完善它。
body{
    background-color: black;
}

#containter{
    position: absolute;
    width: 800px;
    width: 800px;
    transform: translate(-50%,-50%);
    top:50%;
    left:50%;
}

#canvas1{
    position: relative;
    width: 800px;
    height: 700px;
}

#slider{
    width: 100%;
}

p{
    color: white;
}
DOCTYPE html>
<html lang="en">
<head>
    <meta charset="UTF-8">
    <meta http-equiv="X-UA-Compatible" content="IE=edge">
    <meta name="viewport" content="width=device-width, initial-scale=1.0">
    <title>Parallax Backgroundstitle>
    <link rel="stylesheet" href="./style.css">
head>
<body>
    <div id="container">
        <canvas id="canvas1">canvas>
        <p>Game speed: <span id="'showGameSpeed">span>p>
        <input type="range" min="0" max="20" value="5" class="slider" id="slider">
    div>
    <script src="./script.js">script>
body>
html>
body{
    background-color: black;
}

#container{
    position: absolute;
    width: 800px;
    transform: translate(-50%,-50%);
    top:50%;
    left:50%;
}

#canvas1{
    position: relative;
    width: 800px;
    height: 700px;
}

#slider{
    width: 100%;
}

p{
    color: white;
}
最后JS代码也做了修改
- 使用了x1与宽度去计算第二张图的位置
- 使用了等待事件,等待DOM元素加载完毕
- 为滑块添加了改变的事件
const canvas = document.getElementById('canvas1');
const ctx = canvas.getContext('2d');
const CANVAS_WIDTH = canvas.width = 800;
const CANVAS_HEIGHT = canvas.height=700;

// 游戏速度
let gameSpeed = 5;

// 载入图像
const backgroundLayer1 = new Image();
backgroundLayer1.src = './layer-1.png'

const backgroundLayer2 = new Image();
backgroundLayer2.src = './layer-2.png'

const backgroundLayer3 = new Image();
backgroundLayer3.src = './layer-3.png'

const backgroundLayer4 = new Image();
backgroundLayer4.src = './layer-4.png'

const backgroundLayer5 = new Image();
backgroundLayer5.src = './layer-5.png'

// 图层对象
class Layer{
    /**
     * @param image 图片信息
     * @param speedModifier 该图层的速度调节器,也即:用于计算,相对全局速度,自己的速度是多少(每一个图层速度不一样)
     */
    constructor(image,speedModifier){
        // 第一张图位置
        this.x = 0;
        this.y = 0;
        // 图片宽高
        this.width = 2400;
        this.height = 700;
        // 图片
        this.image = image;
        // 图层的速度调节器
        this.speedModifier = speedModifier;
        // 自己的移动速度
        this.speed = gameSpeed * this.speedModifier;
    }

    // 更新图片位置
    update(){
        // 获取新的速度
        this.speed = gameSpeed * this.speedModifier;

        if(this.x <= -this.width){
            this.x = 0;
        }

        // 避免产生小数点
        this.x = Math.floor(this.x - this.speed);
    }

    draw(){
        ctx.drawImage(this.image,this.x,this.y,this.width,this.height);
        ctx.drawImage(this.image,this.x + this.width,this.y,this.width,this.height);
    }

}

const layer1 = new Layer(backgroundLayer1,0.2);
const layer2 = new Layer(backgroundLayer2,0.4);
const layer3 = new Layer(backgroundLayer3,0.6);
const layer4 = new Layer(backgroundLayer4,0.8);
const layer5 = new Layer(backgroundLayer5,1);

const gameObjects = [layer1,layer2,layer3,layer4,layer5];


function animate(){
    ctx.clearRect(0,0,CANVAS_WIDTH,CANVAS_HEIGHT);


    gameObjects.forEach((item,index)=>{
        item.update();
        item.draw();
    })

    requestAnimationFrame(animate);
}

// 等待DOM元素加载完成后,再执行
document.addEventListener('DOMContentLoaded', function() {
    // 获取滑块
    const slider = document.getElementById('slider');
    // 获取dom元素
    const showGameSpeed = document.getElementById('showGameSpeed');

    // 获取当前速度
    slider.value = gameSpeed;


    // 绑定change事件
    slider.addEventListener('change',function(e){
        gameSpeed = e.target.value;
        showGameSpeed.innerHTML = gameSpeed;
    });


    // 向内部插入gameSpeed作为内容
    showGameSpeed.innerHTML = gameSpeed;


    animate();
})

三、敌人的移动模式
html
DOCTYPE html>
<html lang="en">

<head>
    <meta charset="UTF-8">
    <meta http-equiv="X-UA-Compatible" content="IE=edge">
    <meta name="viewport" content="width=device-width, initial-scale=1.0">
    <title>NPC movement animationstitle>
    <link rel="stylesheet" href="./index.css">
head>

<body>
    <canvas id="canvas1">canvas>
    <script src="./script.js">script>
body>

html>
css
#canvas1{
    border: 3px solid black;
    position: absolute;
    top: 50%;
    left: 50%;
    transform: translate(-50%,-50%);
    width: 500;
    height: 1000;
}
js
/** @type {HTMLCanvasElement} */
const canvas = document.getElementById('canvas1');
const ctx = canvas.getContext('2d');
const CANVAS_WIDTH = canvas.width = 500;
const CANVAS_HEIGHT = canvas.height = 1000;
/**敌人总数 */
const numberOfEnemies = 10;
/**存放敌人对象 */
const enemiesArray = [];
class Enemy{
constructor(){
/**敌人刷出的位置*/
this.x = Math.random() * canvas.width;
this.y = Math.random() * canvas.height;
/**敌人宽高 */
this.width = 100;
this.height = 100;
/**速度 -2 ~ 2 */
this.speed = Math.random()*4 - 2;
}
update(){
this.x += this.speed;
this.y += this.speed;
}
draw(){
ctx.strokeRect(this.x,this.y,this.width,this.height);
}
}
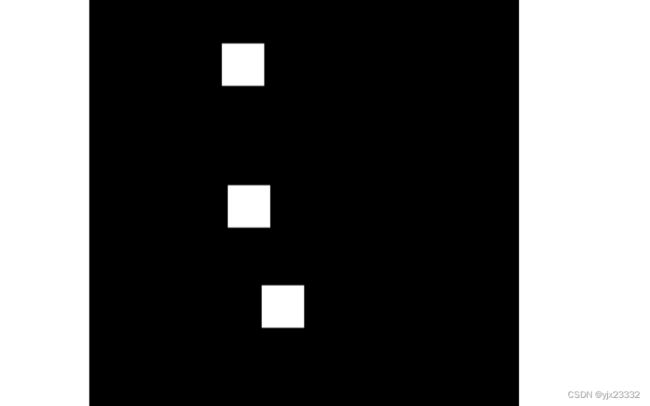
function animate(){
ctx.clearRect(0,0,CANVAS_WIDTH,CANVAS_HEIGHT);
enemiesArray.forEach((item,index)=>{
item.update();
item.draw();
})
requestAnimationFrame(animate);
}
for(let i = 0;i < numberOfEnemies;i++){
enemiesArray.push(new Enemy);
}
animate();

接下来我们将敌人的图片放入,同时为不同的敌人制作动画。
3.1 敌人1
/**  @type {HTMLCanvasElement} */

const canvas = document.getElementById('canvas1');

const ctx = canvas.getContext('2d');

const CANVAS_WIDTH = canvas.width = 500;

const CANVAS_HEIGHT = canvas.height = 1000;

/**敌人总数 */
const numberOfEnemies = 10;

/**存放敌人对象 */
const enemiesArray = [];


/**游戏帧 */
let gameFrame  = 0;

class Enemy{
    constructor(){
        /**敌人图像 */
        this.image = new Image();
        this.image.src = './enemy1.png'
        /**截取图片宽高 */
        this.spriteWidth = 293;
        this.spriteHeight = 155;

        /**敌人宽高,之后可以作为碰撞检测使用*/
        // 此处缩小
        this.width = this.spriteWidth/2.5;
        this.height = this.spriteHeight/2.5;

        /**敌人刷出的位置,此处减去宽高保证其在内部 */
        this.x = Math.random() * (canvas.width - this.width);
        this.y = Math.random() * (canvas.height - this.height);


        /**速度 -2 ~ 2 */
        this.speed = Math.random()*4 - 2;
        /**敌人动作帧数 */
        this.frame = 0;
        /**敌人动作改变频率 */
        this.flapSpeed = Math.floor(Math.random()*3 + 1);

    }
    update(){
        // 随机化,让它看起来像是在飞
        // Math.random() *5 - 2.5 这样写更像是悬停,来回飞
        this.x += Math.random() *5 - 2.5 + this.speed;
        this.y += Math.random() *5 - 2.5 + this.speed;


        // 通过该条件控制敌人动画帧
        if(gameFrame % this.flapSpeed === 0){
            this.frame > 4?this.frame = 0:this.frame++;
        }

    }
    draw(){
        ctx.strokeRect(this.x,this.y,this.width,this.height);
        ctx.drawImage(this.image,this.frame*this.spriteWidth,0,this.spriteWidth,this.spriteHeight,this.x,this.y,this.width,this.height)
    }
}

function animate(){
    ctx.clearRect(0,0,CANVAS_WIDTH,CANVAS_HEIGHT);

    enemiesArray.forEach((item,index)=>{
        item.update();
        item.draw();

    })
    gameFrame++;
    requestAnimationFrame(animate);
}


for(let i = 0;i < numberOfEnemies;i++){
    enemiesArray.push(new Enemy);
}


animate();

3.2 敌人2
同理,我们制作第二个敌人
/**  @type {HTMLCanvasElement} */

const canvas = document.getElementById('canvas1');

const ctx = canvas.getContext('2d');

const CANVAS_WIDTH = canvas.width = 500;

const CANVAS_HEIGHT = canvas.height = 1000;

/**敌人总数 */
const numberOfEnemies = 20;

/**存放敌人对象 */
const enemiesArray = [];


/**游戏帧 */
let gameFrame  = 0;

class Enemy{
    constructor(){
        /**敌人图像 */
        this.image = new Image();
        this.image.src = './enemy2.png'
        /**截取图片宽高 */
        this.spriteWidth = 266;
        this.spriteHeight = 188;
        /**敌人宽高,之后可以作为碰撞检测使用*/

        // 此处缩小
        this.width = this.spriteWidth/2.5;
        this.height = this.spriteHeight/2.5;

        /**敌人刷出的位置,此处减去宽高保证其在内部 */
        this.x = Math.random() * (canvas.width - this.width);
        this.y = Math.random() * (canvas.height - this.height);

        /**速度 1~5 */
        this.speed = Math.random()*4 + 1;
        /**敌人动作帧数 */
        this.frame = 0;
        /**敌人动作改变频率 */
        this.flapSpeed = Math.floor(Math.random()*3 + 1);

        /**正弦波度数,用来实现上下往返飞 */
        this.angle = 0
        /*度数变化速度 */
        this.angleSpeed = Math.random()* 0.2;

    }
    update(){
        this.x -= this.speed;

        // 按照正弦波,上下飞
        this.y += 5 * Math.sin(this.angle);
        this.angle += this.angleSpeed;

        //为了避免angle过大,这里笔者修改
        // 如果大于2*pi,就缩小。
        if(this.angle >= 2*Math.PI){
            this.angle = this.angle - 2*Math.PI;
        }

        // 飞出屏幕,则重新来过,这也保证了最大怪物数目
        if(this.x + this.width < 0){
            this.x =  canvas.width;
        }

        // 通过该条件控制敌人动画帧
        if(gameFrame % this.flapSpeed === 0){
            this.frame > 4?this.frame = 0:this.frame++;
        }

    }
    draw(){
        ctx.strokeRect(this.x,this.y,this.width,this.height);
        ctx.drawImage(this.image,this.frame*this.spriteWidth,0,this.spriteWidth,this.spriteHeight,this.x,this.y,this.width,this.height)
    }
}

function animate(){
    ctx.clearRect(0,0,CANVAS_WIDTH,CANVAS_HEIGHT);

    enemiesArray.forEach((item,index)=>{
        item.update();
        item.draw();

    })
    gameFrame++;
    requestAnimationFrame(animate);
}


for(let i = 0;i < numberOfEnemies;i++){
    enemiesArray.push(new Enemy);
}


animate();

当然,如果想让怪物上下移动更不可预料,我们可以让绘制Y轴的过程更复杂。我们用在下一个敌人上。
3.3 敌人3
笔者这里修改了角度的范围,因此没有用视频中的写法。因此调整的话需要做乘法,而不是除法。
当然,这一块就是自由发挥,通过组合来绘制复杂的怪物移动。
class Enemy{
    constructor(){
        /**敌人图像 */
        this.image = new Image();
        this.image.src = './enemy3.png'
        /**截取图片宽高 */
        this.spriteWidth = 218;
        this.spriteHeight = 177;
        /**敌人宽高,之后可以作为碰撞检测使用*/

        // 此处缩小
        this.width = this.spriteWidth /2;
        this.height = this.spriteHeight /2;

        /**敌人刷出的位置,此处减去宽高保证其在内部 */
        this.x = Math.random() * (canvas.width - this.width);
        this.y = Math.random() * (canvas.height - this.height);

        /**速度 1~5 */
        this.speed = Math.random()*4 + 1;
        /**敌人动作帧数 */
        this.frame = 0;
        /**敌人动作改变频率 */
        this.flapSpeed = Math.floor(Math.random()*3 + 1);

        /**度数,用来实现特殊移动 */
        this.angle = 0;
        /*度数变化速度 */
        this.angleSpeed = Math.random() * 0.01 + 0.01;
        /**复杂化运动 */
        this.curve = Math.random() * 200 + 40;

    }
    update(){
        this.x = this.curve * Math.sin(this.angle + 0.05) + (canvas.width - this.width)/2;

        this.y = this.curve * Math.cos(this.angle + 0.05) + (canvas.height - this.height)/2;

        this.angle += this.angleSpeed;


        if(this.angle >= 2*Math.PI){
            this.angle = this.angle - 2*Math.PI;
        }


        // 通过该条件控制敌人动画帧
        if(gameFrame % this.flapSpeed === 0){
            this.frame > 4?this.frame = 0:this.frame++;
        }

    }
    draw(){
        ctx.strokeRect(this.x,this.y,this.width,this.height);
        ctx.drawImage(this.image,this.frame*this.spriteWidth,0,this.spriteWidth,this.spriteHeight,this.x,this.y,this.width,this.height)
    }
}

3.4 敌人4
class Enemy{
    constructor(){
        /**敌人图像 */
        this.image = new Image();
        this.image.src = './enemy4.png'
        /**截取图片宽高 */
        this.spriteWidth = 213;
        this.spriteHeight = 213;
        /**敌人宽高,之后可以作为碰撞检测使用*/

        // 此处缩小
        this.width = this.spriteWidth /2;
        this.height = this.spriteHeight /2;

        /**敌人刷出的位置,此处减去宽高保证其在内部 */
        this.x = Math.random() * (canvas.width - this.width);
        this.y = Math.random() * (canvas.height - this.height);

        /**速度 1~5 */
        this.speed = Math.random()*4 + 1;
        /**敌人动作帧数 */
        this.frame = 0;
        /**敌人动作改变频率 */
        this.flapSpeed = Math.floor(Math.random()*3 + 1);

        // 改变量
        this.newX = Math.random() * (canvas.width - this.width);
        this.newY = Math.random() * (canvas.height - this.height);
        // 何时改变变化量
        this.interval = Math.floor(Math.random() * 200 + 50);
    }
    update(){
        if(gameFrame % this.interval === 0){
            this.newX = Math.random() * (canvas.width - this.width);
            this.newY = Math.random() * (canvas.height - this.height);
        }
        let dx = this.x - this.newX;
        let dy = this.y - this.newY;

        this.x -= dx/70;
        this.y -= dy/70;

        // 通过该条件控制敌人动画帧
        if(gameFrame % this.flapSpeed === 0){
            this.frame > 7?this.frame = 0:this.frame++;
        }

    }
    draw(){
        ctx.strokeRect(this.x,this.y,this.width,this.height);
        ctx.drawImage(this.image,this.frame*this.spriteWidth,0,this.spriteWidth,this.spriteHeight,this.x,this.y,this.width,this.height)
    }
}

四、碰撞动画
4.1 碰撞检测
- 矩形:
- 检测水平(没有碰撞):
rect1.x > rect2.x + rect2.width || rect1.x + rect1.width < rect2.x - 检测竖直(没有碰撞):
rect1.y > rect2.y + rect2.height || rect1.y + rect1.height < rect2.y - 上述两条语句用 ‘或(||)’ 连接
- 检测水平(没有碰撞):
- 圆形:两个圆心的距离是否小于两个半径和,小于则有碰撞
4.2 碰撞动画
html
DOCTYPE html>
<html lang="en">

<head>
    <meta charset="UTF-8">
    <meta http-equiv="X-UA-Compatible" content="IE=edge">
    <meta name="viewport" content="width=device-width, initial-scale=1.0">
    <title>Playing animations on triggertitle>
    <link rel="stylesheet" href="./index.css">
head>

<body>
    <canvas id="canvas1">canvas>
    <script src="./script.js">script>
body>

html>
css
#canvas1{
    border: 3px solid black;
    position: absolute;
    height: 700px;
    width: 500px;
    background: black;
    top: 50%;
    left: 50%;
    transform: translate(-50%,-50%);
}
先准备动画
const canvas = document.getElementById('canvas1');

const ctx = canvas.getContext('2d');

canvas.width = 500;

canvas.height = 700;


// 测量DOM元素的位置,此处我们获取了边框canvas的坐标
let canvasPosition = canvas.getBoundingClientRect();


window.addEventListener('click',function(e){
    ctx.fillStyle = 'white';
    // 此处用点击坐标 - 绘制坐标,这样就算出了在边框中绘制的坐标(相对坐标)
    // ctx.fillRect(e.x - canvasPosition.left,e.y - canvasPosition.top,50,50);
    // 在那减去25 是因为我们想包裹点击处
    let dx = e.x - canvasPosition.left - 25;
    let dy = e.y - canvasPosition.top - 25;
    ctx.fillRect(dx,dy,50,50);
})
接下来绘制图片
const canvas = document.getElementById('canvas1');

const ctx = canvas.getContext('2d');

canvas.width = 500;

canvas.height = 700;

const explosions = [];

// 测量DOM元素的位置,此处我们获取了边框canvas的坐标
let canvasPosition = canvas.getBoundingClientRect();

// 爆炸效果
class Explosion{
    constructor(x,y){
        this.x = x;
        this.y = y;
        this.spriteWidth = 200;
        this.spriteHeight = 179;
        this.width = this.spriteWidth/2;
        this.height = this.spriteHeight/2;

        this.image = new Image();
        this.image.src = './boom.png';
        this.frame = 0;
    }

    update(){
        this.frame++;
    }

    draw(){
        ctx.drawImage(this.image,this.spriteWidth * this.frame,0,this.spriteWidth,this.spriteHeight,this.x,this.y,this.width,this.height);
    }

}

window.addEventListener('click',function(e){
    let dx = e.x - canvasPosition.left;
    let dy = e.y - canvasPosition.top;
    ctx.fillRect(dx,dy,50,50);
    explosions.push(new Explosion(dx,dy));
})

function animate(){
	ctx.clearRect(0,0,canvas.width,canvas.height)
    for(let i = 0;i < explosions.length; i++){
        explosions[i].update();
        explosions[i].draw();
    }
    requestAnimationFrame(animate);
}

animate();
接下来,我们让每一个类单独给自己计时,来播放动画。
同时,我们让绘制中心位于点击点。
当然要删除无效的对象。
const canvas = document.getElementById('canvas1');

const ctx = canvas.getContext('2d');

canvas.width = 500;

canvas.height = 700;

const explosions = [];

// 测量DOM元素的位置,此处我们获取了边框canvas的坐标
let canvasPosition = canvas.getBoundingClientRect();

// 爆炸效果
class Explosion{
    constructor(x,y){
        this.spriteWidth = 200;
        this.spriteHeight = 179;
        this.width = this.spriteWidth*0.7;
        this.height = this.spriteHeight*0.7;

        this.x = x - this.width/2;
        this.y = y - this.height/2;

        this.image = new Image();
        this.image.src = './boom.png';
        this.frame = 0;

        this.timer = 0;
    }

    update(){
        this.timer++;
        if(this.timer % 10 === 0){
            this.frame++;
        }
    }

    draw(){
        ctx.drawImage(this.image,this.spriteWidth * this.frame,0,this.spriteWidth,this.spriteHeight,this.x,this.y,this.width,this.height);
    }

}

window.addEventListener('click',function(e){
    createAnimation(e);
})

function createAnimation(e){
    let dx = e.x - canvasPosition.left;
    let dy = e.y - canvasPosition.top;
    ctx.fillRect(dx,dy,50,50);
    explosions.push(new Explosion(dx,dy));
}


function animate(){
    ctx.clearRect(0,0,canvas.width,canvas.height)
    for(let i = 0;i < explosions.length; i++){
        explosions[i].update();
        explosions[i].draw();
        if(explosions[i].frame > 5){
            explosions.splice(i,1);
        }
    }
    requestAnimationFrame(animate);
}

animate();
我们还想加入angle来让生成的动画旋转,并让旋转速度不同。
// 爆炸效果
class Explosion{
    constructor(x,y){
        this.spriteWidth = 200;
        this.spriteHeight = 179;
        this.width = this.spriteWidth*0.7;
        this.height = this.spriteHeight*0.7;

        this.x = x;
        this.y = y;

        this.image = new Image();
        this.image.src = './boom.png';
        this.frame = 0;

        this.timer = 0;
        this.angle = Math.random() * 6.2;
    }

    update(){
        this.timer++;
        if(this.timer % 10 === 0){
            this.frame++;
        }
    }

    draw(){
        //  存储当前上下文,避免我们接下来的绘制仅在此处生效,而不会影响整个布局
        // 可以理解为我们复制了当前的所有内容为一个新的图层,我们只会在新的图层上修改,而不会之后的操作通过restore,回到另一个张图层,避免影响到之后操作
        ctx.save();
        // ctx移动到当前位置,即:右移动this.x,下移this.y
        ctx.translate(this.x,this.y);
        // 旋转整个画框 this.angle
        ctx.rotate(this.angle);
        // 绘制
        // 因为我们移动了ctx,也就是画框,到了this.x,this.y。于是此时的this.x,this.y也就是边界,0,0。
        // 因此我们此处用0,0替换。换句话说,因为绘画点就是边界,我们不需要再使用绘制点相对画框的位置。
        ctx.drawImage(this.image,this.spriteWidth * this.frame,0,this.spriteWidth,this.spriteHeight,0 - this.width/2,0 - this.height/2,this.width,this.height);
        // 取出之前保存的上下文,此时ctx回到了原来的位置
        ctx.restore();
    }

}
我们加入音效
下载地址Magic SFX Sample
当然你也可以用其他的。
选一个放在项目下,导入即可。
![]()
constructor(x,y){
        this.spriteWidth = 200;
        this.spriteHeight = 179;
        this.width = this.spriteWidth*0.7;
        this.height = this.spriteHeight*0.7;

        this.x = x;
        this.y = y;

        this.image = new Image();
        this.image.src = './boom.png';
        this.frame = 0;

        this.timer = 0;
        this.angle = Math.random() * 6.2;

        this.sound = new Audio();
        this.sound.src = 'Fire impact 1.wav';
    }

    update(){
        if(this.frame === 0){
            this.sound.play();
        }
        this.timer++;
        if(this.timer % 10 === 0){
            this.frame++;
        }
    }
附录
[1]源-素材地址
[2]源-视频地址
[3]搬运视频地址(JavaScript 游戏开发)
[4]github-视频的素材以及源码