nginx基于源码安装的方式对静态页面、虚拟主机(IP、端口、域名)和日志文件进行配置
一.静态页面
1.更改页面内容
2.更改配置文件
3.测试
二.虚拟主机配置
1.基于IP
(1)在html目录下新建目录存放测试文件
(2)修改nginx.conf文件,在htttp模块中配置两个server模块分别对应两个IP
(3)测试
2.基于端口
(1)创建测试界面
(2)同样在http模块中添加server模块,注意工作目录的变动
(3)测试
3.基于域名
(1)在前面基于IP的基础上添加server_name一行即可
(2)修改/etc/hosts文件
(3)测试
三.nginx错误日志和访问日志配置
1. 在server模块中指定日志类型和日志存放目录即可
2.测试两边后查看
一.静态页面
要关闭apache的httpd
[root@localhost conf]# systemctl status httpd.service
● httpd.service - The Apache HTTP Server
   Loaded: loaded (/usr/lib/systemd/system/httpd.service; disabled; vendor preset: disabled)
   Active: inactive (dead)
     Docs: man:httpd(8)
           man:apachectl(8)
1.更改页面内容
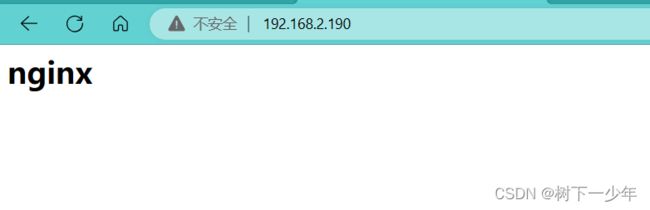
找到自己的nginx安装目录里的html目录,修改index.html
[root@localhost html]# pwd
/usr/local/src/nginx-1.22.0/html
[root@localhost html]# cat index.html
nginx
2.更改配置文件
nginx安装目录里的nginx.conf文件
[root@localhost conf]# pwd
/usr/local/src/nginx-1.22.0/conf
[root@localhost conf]# vim nginx.conf
找到serve内的区块位置,更改工作目录和指定html文件
server {
        listen       80;
        server_name  localhost;

        #charset koi8-r;

        #access_log  logs/host.access.log  main;

        location / {
            root   /usr/local/src/nginx-1.22.0/html;  #你的html文件存放目录
            index  index.html;   #如果前面页面文件是其它名字,这里要更改一致
        }

        #error_page  404              /404.html;

        # redirect server error pages to the static page /50x.html
        #
        error_page   500 502 503 504  /50x.html;
        location = /50x.html {
            root   html;
        }
}
[root@localhost conf]# systemctl restart nginx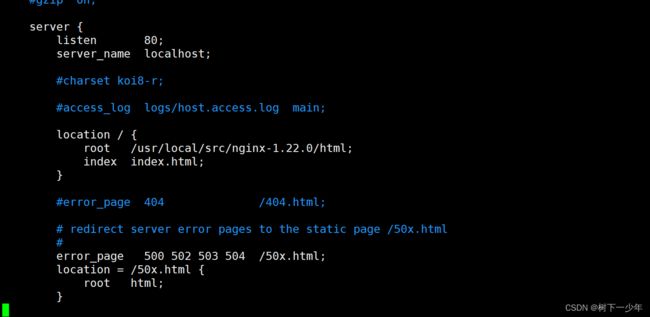
3.测试
二.虚拟主机配置
1.基于IP
(1)在html目录下新建目录存放测试文件
[root@localhost html]# ll
total 8
-rw-r--r-- 1 1001 1001 497 May 24 2022 50x.html
-rw-r--r-- 1 1001 1001 15 Aug 10 10:13 index.html
drwxr-xr-x 2 root root 43 Aug 10 11:53 ip
drwxr-xr-x 2 root root 6 Aug 10 11:51 port
[root@localhost html]# pwd
/usr/local/src/nginx-1.22.0/html
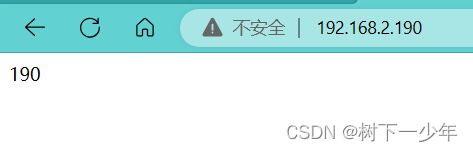
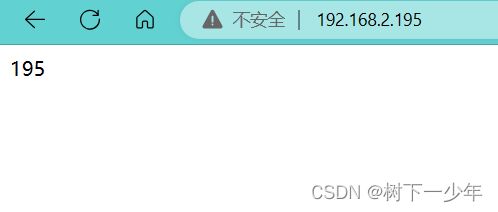
[root@localhost html]# cat ip/index.html ip/index1.html
190
195(2)修改nginx.conf文件,在htttp模块中配置两个server模块分别对应两个IP
server {
                listen 192.168.2.190;
                location / {
                root /usr/local/src/nginx-1.22.0/html/ip;
                index index.html index.htm;
                }
        }
        server {
                listen 192.168.2.195;
                location / {
                root /usr/local/src/nginx-1.22.0/html/ip;
                index index1.html index.htm;
                }
        }
[root@localhost conf]# systemctl restart nginx
(3)测试
2.基于端口
(1)创建测试界面
[root@localhost html]# cat port/index.html port/index1.html
8090
8099
(2)同样在http模块中添加server模块,注意工作目录的变动
server {
                listen 8090;
                location / {
                root /usr/local/src/nginx-1.22.0/html/port;
                index index.html index.htm;
                }
        }
        server {
                listen 8099;
                location / {
                root /usr/local/src/nginx-1.22.0/html/port;
                index index1.html index.htm;
                }
        }
[root@localhost conf]# systemctl restart nginx
(3)测试


3.基于域名
(1)在前面基于IP的基础上添加server_name一行即可
server {
                listen 192.168.2.190;
                server_name www.aabb.com;
                location / {
                root /usr/local/src/nginx-1.22.0/html/ip;
                index index.html index.htm;
                }
        }
        server {
                listen 192.168.2.195;
                server_name www.llss.com;
                location / {
                root /usr/local/src/nginx-1.22.0/html/ip;
                index index1.html index.htm;
                }
        }
[root@localhost conf]# systemctl restart nginx
(2)修改/etc/hosts文件
Linux
[root@localhost conf]# vim /etc/hosts
192.168.2.190 www.aabb.com
192.168.2.195 www.llss.com
windows
通过powershell使用notepad修改hosts文件
Windows PowerShell
版权所有(C) Microsoft Corporation。保留所有权利。

安装最新的 PowerShell,了解新功能和改进!https://aka.ms/PSWindows

PS C:\WINDOWS\system32> cd .\drivers\etc\

PS C:\WINDOWS\system32\drivers\etc> notepad .\hosts
PS C:\WINDOWS\system32\drivers\etc>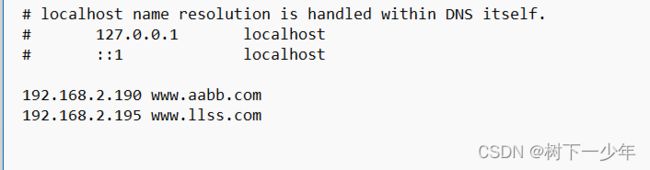
(3)测试


三.nginx错误日志和访问日志配置
1. 在server模块中指定日志类型和日志存放目录即可
2.测试两边后查看
[root@localhost logs]# cat access.log
192.168.2.2 - - [10/Aug/2023:14:06:00 +0800] "GET / HTTP/1.1" 304 0 "-" "Mozilla/5.0 (Windows NT 10.0; Win64; x64) AppleWebKit/537.36 (KHTML, like Gecko) Chrome/115.0.0.0 Safari/537.36 Edg/115.0.1901.200"
192.168.2.2 - - [10/Aug/2023:14:06:00 +0800] "GET /favicon.ico HTTP/1.1" 404 555 "http://192.168.2.190/" "Mozilla/5.0 (Windows NT 10.0; Win64; x64) AppleWebKit/537.36 (KHTML, like Gecko) Chrome/115.0.0.0 Safari/537.36 Edg/115.0.1901.200"
[root@localhost logs]# cat error.log
2023/08/10 14:06:00 [error] 59751#59751: *1 open() "/usr/local/src/nginx-1.22.0/html/ip/favicon.ico" failed (2: No such file or directory), client: 192.168.2.2, server: www.aabb.com, request: "GET /favicon.ico HTTP/1.1", host: "192.168.2.190", referrer: "http://192.168.2.190/"
[root@localhost logs]# pwd
/usr/local/src/nginx-1.22.0/logs