Ubuntu Linux 配置 MySQL 8.0
Ubuntu Linux 配置 MySQL 8.0
今晚给云服务器配MySQL出了不少奇怪的问题 感谢守望时空33大佬的文章 让我解决所有问题 若大家是Debian系统,可直接看大佬的博客
1.下载并上传
现在服务器执行: sudo apt purge mariadb*
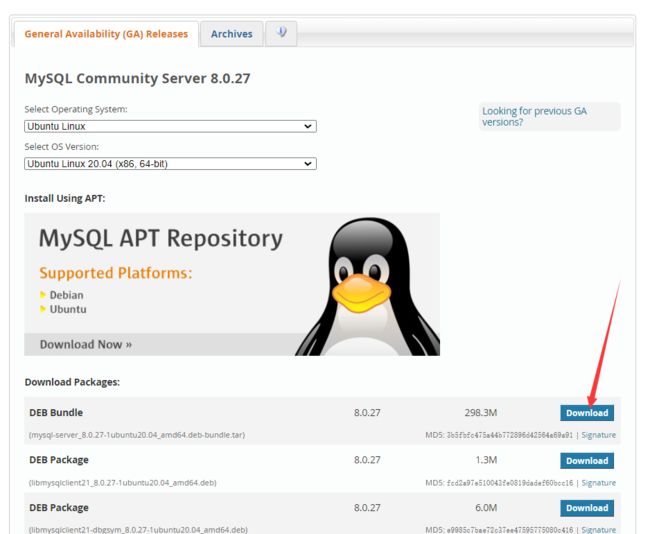
在下载页面选择适合自己的版本
在这里我选择:
将下载好的tar文件解压,将所有deb文件上传到指定路径,并进入该路径,安装所有deb文件
例如:
mkdir /root/MySQL8.0
cd /root/MySQL8.0
-- 上传所有deb文件
sudo dpkg -i *.deb
若安装后出现错误,可执行:
sudo apt update
sudo apt install -f
成功后,会显示一个界面让你设置root密码,即数据库超级管理员root的密码,设置即可:
告知你MySQL 8.0 有新的加密方式,OK即可
然后会让你选择加密方式,有新加密方式和传统加密方式两种。这里需要说明的是如果选择新加密方式可能远程连接数据库时会报错,所以没特殊需要建议选择传统加密方式:
use mysql;
alter user 'root'@'localhost' IDENTIFIED WITH mysql_native_password BY '你的密码';
完成安装
2.修改配置文件
MySQL 8的配置文件在/etc/mysql/my.cnf,没有特殊需要一般不用修改。不过我们一般只需修改服务端的配置即可。服务端配置需要修改/etc/mysql/mysql.conf.d/mysqld.cnf文件,打开这个文件可以看到:
# Copyright (c) 2014, 2021, Oracle and/or its affiliates.
#
# This program is free software; you can redistribute it and/or modify
# it under the terms of the GNU General Public License, version 2.0,
# as published by the Free Software Foundation.
#
# This program is also distributed with certain software (including
# but not limited to OpenSSL) that is licensed under separate terms,
# as designated in a particular file or component or in included license
# documentation.  The authors of MySQL hereby grant you an additional
# permission to link the program and your derivative works with the
# separately licensed software that they have included with MySQL.
#
# This program is distributed in the hope that it will be useful,
# but WITHOUT ANY WARRANTY; without even the implied warranty of
# MERCHANTABILITY or FITNESS FOR A PARTICULAR PURPOSE.  See the
# GNU General Public License, version 2.0, for more details.
#
# You should have received a copy of the GNU General Public License
# along with this program; if not, write to the Free Software
# Foundation, Inc., 51 Franklin St, Fifth Floor, Boston, MA 02110-1301  USA

#
# The MySQL  Server configuration file.
#
# For explanations see
# http://dev.mysql.com/doc/mysql/en/server-system-variables.html

[mysqld]
pid-file        = /var/run/mysqld/mysqld.pid
socket          = /var/run/mysqld/mysqld.sock
datadir         = /var/lib/mysql
log-error       = /var/log/mysql/error.log
上面[mysqld]表示一个配置组,即为服务端配置,这个配置组下面的四行配置依次代表:进程文件位置、socket文件位置、数据库存放文件夹和错误日志文件位置。
通过在下面添加port=自定义端口号可以自定义端口号(默认为3306)
字符集,建议改成utf8mb4 character-set-server=utf8mb4
再修改/etc/mysql/my.cnf这个配置文件,加入[client]配置组(如果没有的话)并设置字符集,添加如下语句:
[client]
default-character-set=utf8mb4
重启MySQL服务 见3
3.启动数据库服务
通过这个目录启动:
service mysql start
停止:
service mysql stop
重启(修改完配置文件重启生效):
service mysql restart
安装完成,MySQL的服务端是默认开机自启动的,我们可以通过下列命令打开/关闭MySQL的开机自启动:
允许开机自启:
systemctl enable mysql
禁用开机自启:
systemctl disable mysql
4.设置外网可以连接(重头戏)
- 连接数据库
mysql -u root -p
- 依次执行
use mysql;
update user set host='%' where user='root';
flush privileges;
其中host原来为localhost,只能由本机访问,通过通配符'%'允许所有IP访问
5.连接测试
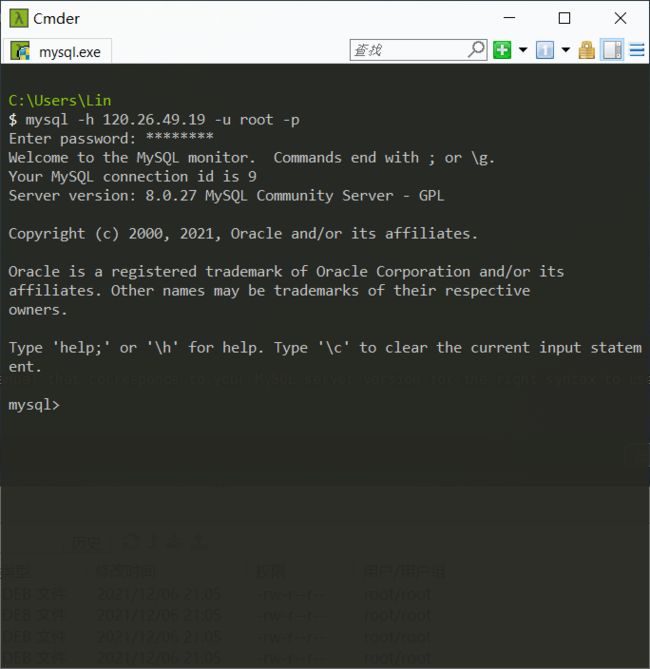
我用本地Windows10进行测试
连接成功!
6.MySQL数据库常规操作
添加用户
create user '用户名'@'可接受连接的主机的ip' identified by '用户密码';
例如:
创建用户a密码为123456,a只能从本机登录(主机字段为localhost):
create user 'a'@'localhost' identified by '123456';
创建用户b密码为123456,b可以从外网任何主机远程登录(主机字段为%):
create user 'b'@'%' identified by '123456';
然后授权用户:
grant 权限 on 授权可操作的数据库.授权可操作的表名 to '被授权用户'@'可操作的主机ip';
其中权限字段有SELECT , INSERT , UPDATE等,若授予所有权限则这里填ALL。
例如给b授予操作所有数据库的所有表的全部权限:
grant ALL on *.* to 'b'@'%';
需要注意的是,用以上命令授权的用户不能给其它用户授权,如果想让该用户可以授权,用如下的命令:
grant 权限 on 授权可操作的数据库.授权可操作的表名 to '用户名'@'可操作主机' with grant option;
例如给b授予操作所有数据库的所有表的全部权限并有授权权限:
grant ALL on *.* to 'b'@'%' with grant option;
修改用户密码
在MySQL8中,使用alter语句修改密码。先登录,然后执行以下语句:
alter user '用户名'@'授权的登录地址' identified by '新密码';
注意登录root或者任何高权限账户可以修改自己以及其他用户密码,而普通账户登录只能修改自己的密码。
其它的增删改查基本操作就不过多赘述


