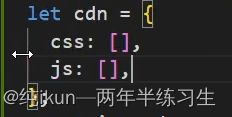
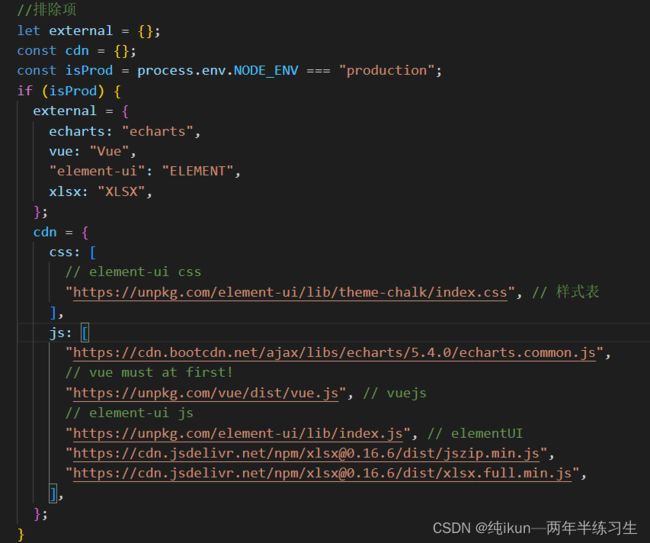
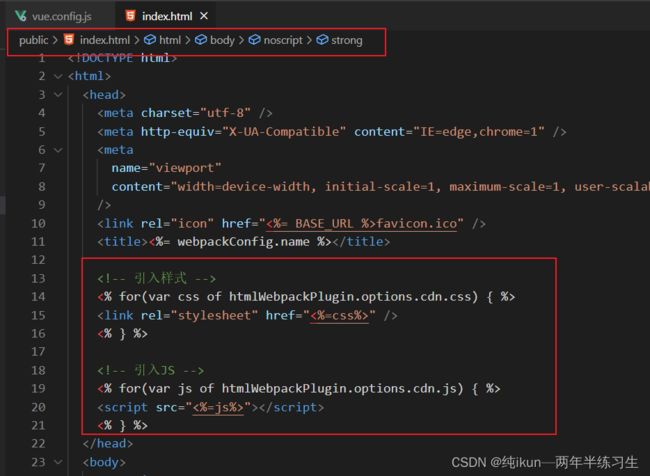
vue2人资
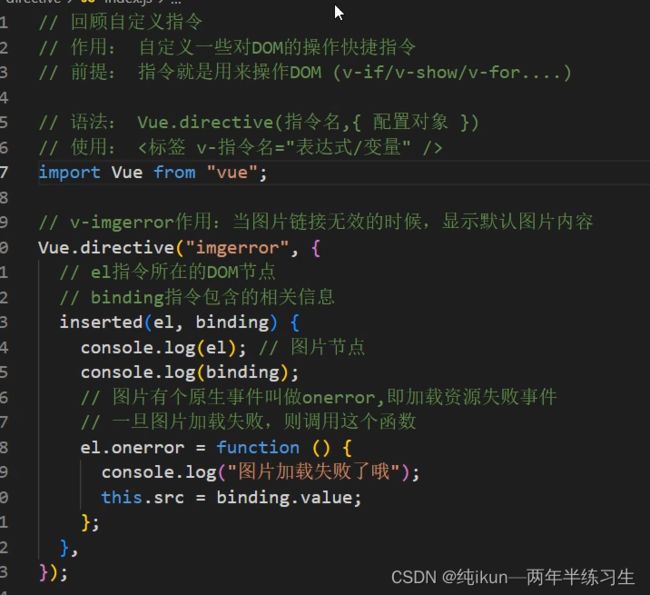
1、图片的加载失败替换
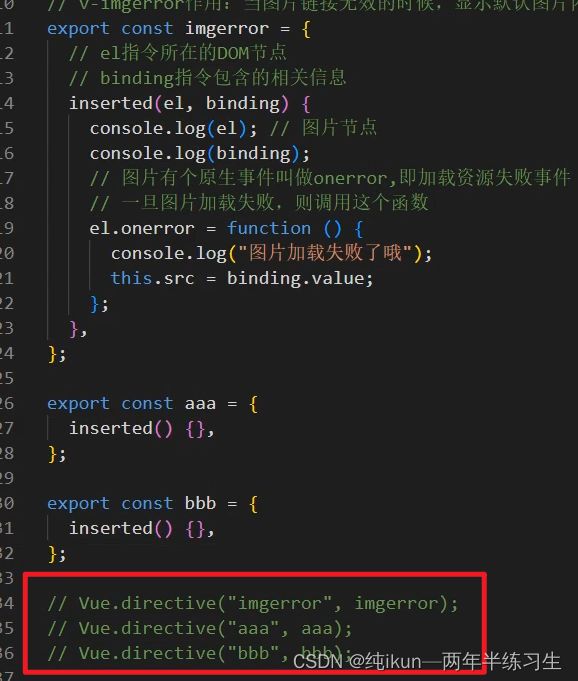
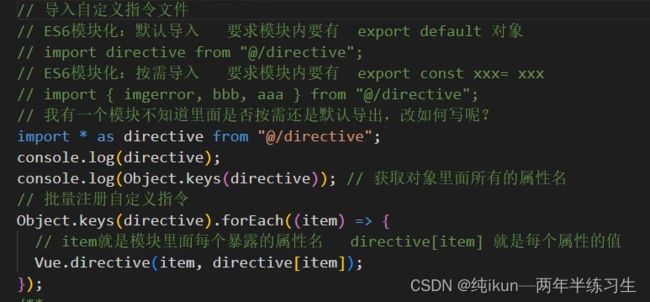
2、不知道是按需还是默认导入
![]()
3、批量注册自定义事件/过滤器
上面这样操作会批量导出我们此时在main.js引入打印

这是键值对的形式
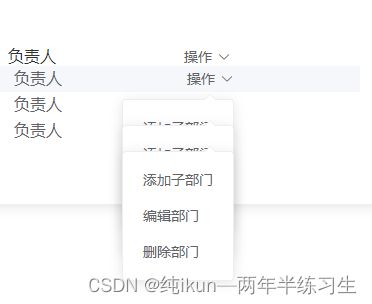
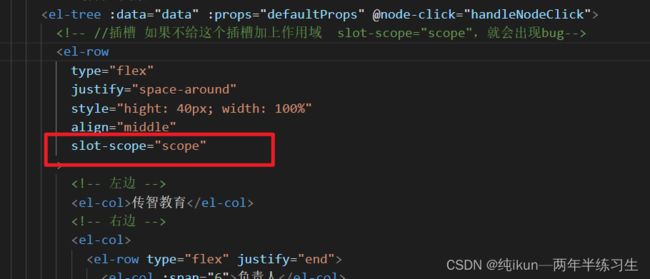
4、element的树形组件的插槽问题bug
5、表单校验调用组件ref实例的validate()这个方法 resetFields()这个也是
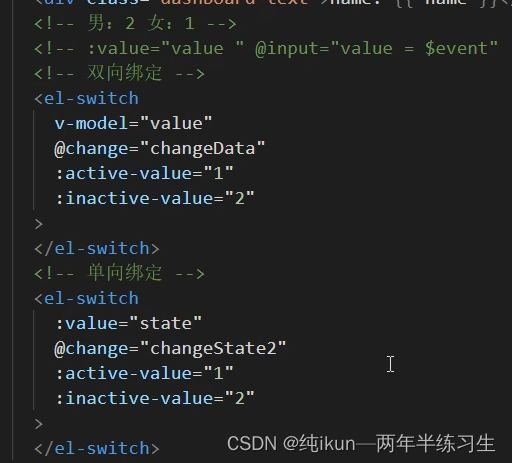
6、饿了么ui的swtich开关问题
!!!需要注意数据类型,不然会有问题
v-model是可以切换的。但是你写的改变事件不能影响到他,比如改变发起请求,哪怕请求失败了,依旧正常切换
:value是单向绑定,用户不可以切换,绑定change事件之后,我们需要手动修改值去让他切换,请求失败就不会切换。
v-model是在表单用吗,:value是在其他的一些地方需要手动控制的时候用
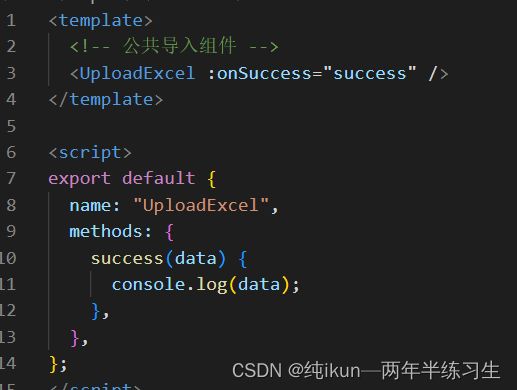
7、excel的element提供的模板
https://gitee.com/panjiachen/vue-element-admin/blob/master/src/components/UploadExcel/index.vue#
安装模板
8、全局插件和过滤器自定义指令的注册
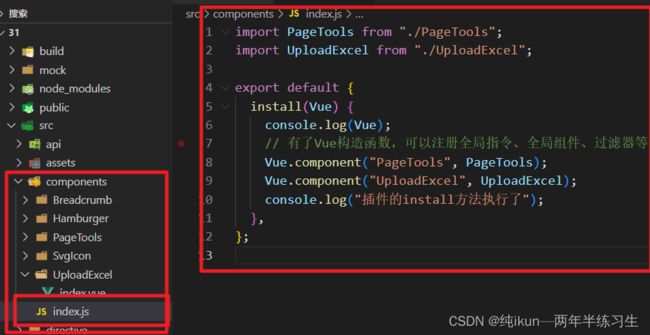
vue提供install可供我们开发新的插件及全局注册组件等
install方法第一个参数是vue的构造器,第二个参数是可选的选项对象
export default {
	install(Vue,option){
		组件
		指令
		混入
		挂载vue原型
	}
}
//全局注册组件
import PageTools from '@/components/PageTools/pageTools.vue'
import update from './update/index.vue'
import ImageUpload from './ImageUpload/ImageUpload.vue'
import ScreenFull from './ScreenFull'
import ThemePicker from './ThemePicker'
import TagsView from './TagsView'
export default {
  install(Vue) {
    Vue.component('PageTools', PageTools)
    Vue.component('update', update)
    Vue.component('ImageUpload', ImageUpload)
    Vue.component('ScreenFull', ScreenFull)
    Vue.component('ThemePicker', ThemePicker)
    Vue.component('TagsView', TagsView)
  }
}

//在main.js中引用  这里的名字可以自己取后面是插件引用文件的位置
import Component from '@/components'
Vue.use(Component)
//全局的过滤器和自定义指令,这是指令 的注册在main.js中
// 导入过滤器
import * as filters from "@/filters";
// 导入自定义指令文件
import * as directive from "@/directive";
// 批量注册自定义指令
Object.keys(directive).forEach((item) => {
  // item就是模块里面每个暴露的属性名   directive[item] 就是每个属性的值
  Vue.directive(item, directive[item]);
});
// 批量注册过滤器
console.log(filters);
Object.keys(filters).forEach((item) => {
  Vue.filter(item, filters[item]);
  // Vue.filter(过滤器名,函数)
});
9、死循环错误
如果这个组件叫uploadExcel 这个name又叫这个,全局组件也叫这个,所以自己调用自己,所以就报错

10、一个前端处理excel日期的代码
formatDate(numb, format) {
      const time = new Date((numb - 1) * 24 * 3600000 + 1);
      time.setYear(time.getFullYear() - 70);
      const year = time.getFullYear() + "";
      const month = time.getMonth() + 1 + "";
      const date = time.getDate() - 1 + "";
      if (format && format.length === 1) {
        return year + format + month + format + date;
      }
      return (
        year +
        (month < 10 ? "0" + month : month) +
        (date < 10 ? "0" + date : date)
      );
    },
    //可以传入值和分割的符号比如 /
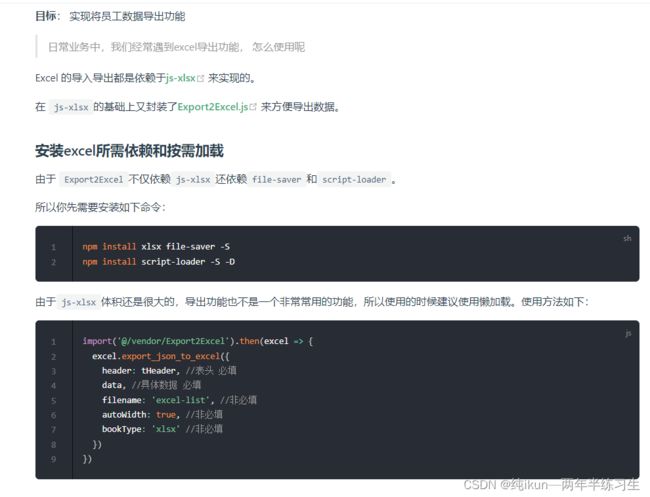
11、前端下载excel使用js-xlsx插件
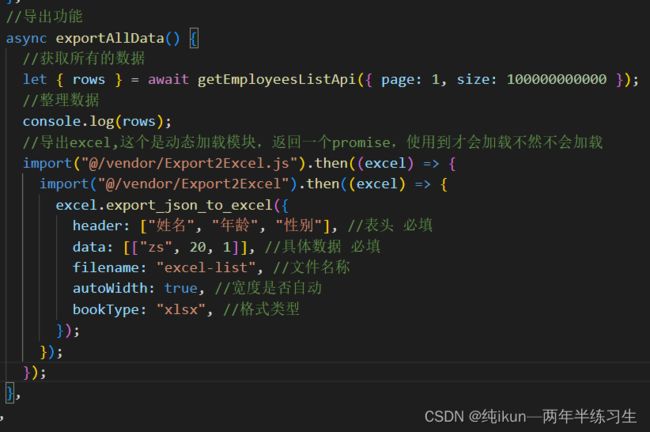
12、动态加载模块
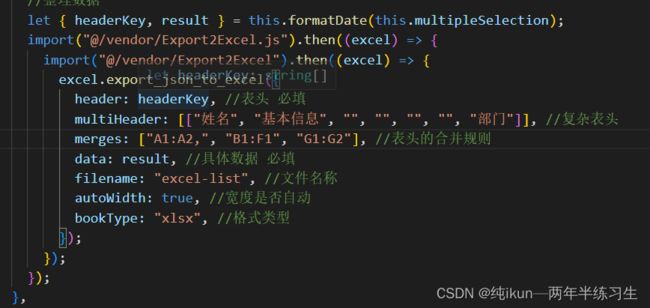
13、复杂excel表头
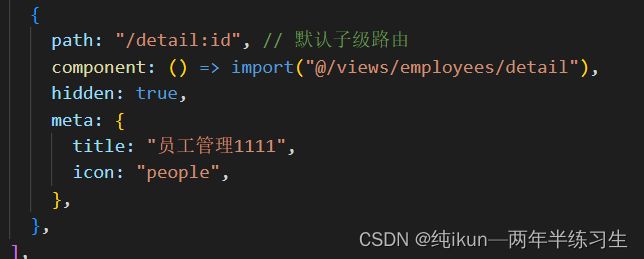
14、隐藏子集路由,添加hidden为true
15、上传图片问题!!!!!
使用$refs获取input的实例,里面有一个files的属性(数组)里面有一个file的对象
size代表是大小最小是字节1024*1024就是一兆

![]()
一般文件类型有这几种
![]()
生成一个图片的预览地址,这个imgFile是这个实例的files[0]


然后就是上传接口
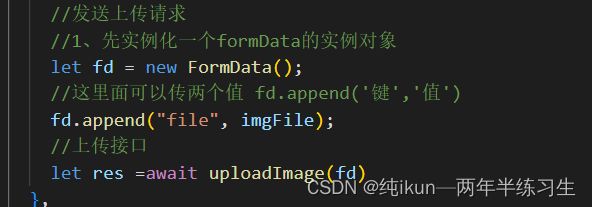
这里需要注意一下这个请求头的问题,axios默认是application/josn
如果这个请求发现数据是formData的实例那就自动变成multipart/form-data

下面是全部的代码
<template>
  <div>
    <h1>传统上传</h1>
    <img style="height: 200px" :src="previewUrl" alt="" />
    <el-button type="primary" @click="$refs.fileRef.click()" icon="el-icon-upload">点击上传</el-button>
    <input type="file" hidden @change="changeFile" ref="fileRef" />
  </div>
</template>

<script>
import { uploadImage } from "@/api/adv";
export default {
  name: "Img",
  data() {
    return {
      previewUrl: "",
    };
  },
  methods: {
    async changeFile() {
      const imgFile = this.$refs.fileRef.files[0];
      if (imgFile.size > 1024 * 1024 * 2) {
        return this.$message.warning("体积不能超过2m");
      }
      //类型的判断
      const typeArr = ["image/png", "image/gif", "image/jpg", "image/jpeg"];
      if (!typeArr.includes(imgFile.type)) {
        return this.$message.warning("文件类型不正确");
      }
      this.previewUrl = URL.createObjectURL(imgFile);
      //发送上传请求
      //1、先实例化一个formData的实例对象
      let fd = new FormData();
      //这里面可以传两个值 fd.append('键','值')
      fd.append("file", imgFile);
      //上传接口
      let res = await uploadImage(fd);
      console.log(res);
    },
  },
};
</script>

<style scoped></style>
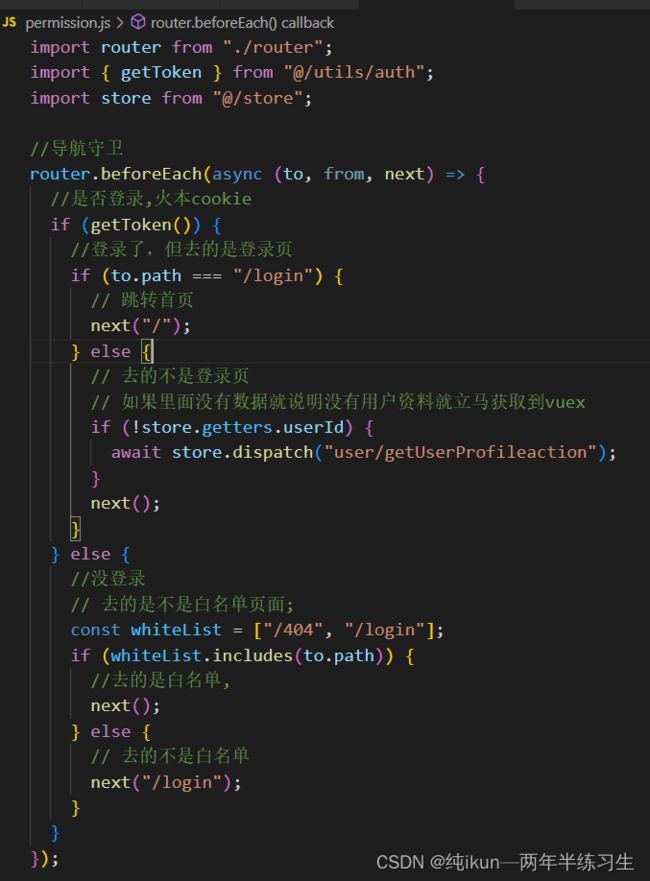
16、导航守卫
17、环境变量是process去读取
18、饿了么ui的上传图片
这个是显示的框框,默认是没有东西的,得在标签里面写内容去触发,但是加了这个有一个漂亮的 样式
![]()
这个是picture的显示

里面还有很多钩子函数可以用,用的时候需要带上引号,因为它里面是一个变量
这个默认是上传了就发送请求
![]()
使用饿了么ui他会自己发送请求,跟我们的请求没有关系,所以我们需要把token给他带上
这个可以显示预览
on-preview 点击文件列表中已上传的文件时的钩子 function(file)
这个是自定义上传,有一个参数是文件信息file
![]()
这个是用来做回显的

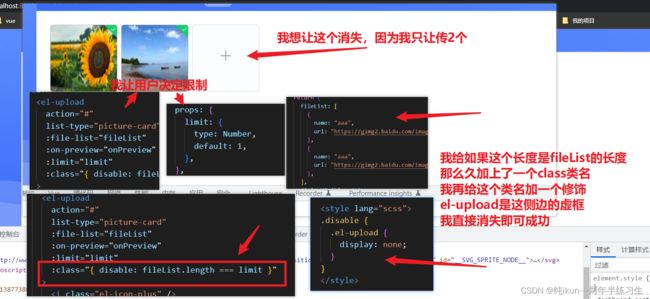
18、cos-js-sdk-v5 --save 下载这个可以帮助我们完成交流上传腾讯等一些功能
19、使用腾讯云
下载cos-js-sdk-v5 --save
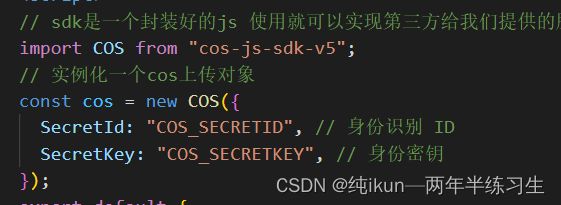
id和身份密钥在腾讯云密钥里面
腾讯云文档地址
https://cloud.tencent.com/document/product/436/64957#.E7.AE.80.E5.8D.95.E4.B8.8A.E4.BC.A0.E5.AF.B9.E8.B1.A1
复制代码
cos.putObject({
    Bucket: 'examplebucket-1250000000', /* 填入您自己的存储桶,必须字段 */
    Region: 'COS_REGION',  /* 存储桶所在地域,例如ap-beijing,必须字段 */
    Key: '1.jpg',  /* 存储在桶里的对象键(例如1.jpg,a/b/test.txt),必须字段 */
    Body: fileObject, /* 必须,上传文件对象,可以是input[type="file"]标签选择本地文件后得到的file对象 */
    onProgress: function(progressData) {
        console.log(JSON.stringify(progressData));
    }
}, function(err, data) {
    console.log(err || data);
});
记得修改函数为箭头函数,不然有问题
 cos.putObject(
        {
          Bucket: "xxxxxxxx" /* 填入您自己的存储桶,必须字段 */,
          Region: "xxxxx" /* 存储桶所在地域,例如ap-beijing,必须字段 */,
          Key: data.file.name /* 存储在桶里的对象键(例如1.jpg,a/b/test.txt),必须字段 */, //建议是文件名
          Body: data.file /* 必须,上传文件对象,可以是input[type="file"]标签选择本地文件后得到的file对象 */,
          onProgress: (progressData) => {
            console.log(JSON.stringify(progressData)); //上传过程中的事件
          },
        },
        (err, data) => {
          console.log(err || data); //有错误输出错误,不然就打印data
        }
      );
20、自定义替换图片加载失败的指令
// v-imgerror作用:当图片链接无效的时候,显示默认图片内容
export const imgerror = {
  // el指令所在的DOM节点
  // binding指令包含的相关信息
  inserted(el, binding) {
    console.log(el); // 图片节点
    console.log(binding);
    el.src = el.src || binding.value;
    // 图片有个原生事件叫做onerror,即加载资源失败事件
    // 一旦图片加载失败,则调用这个函数
    el.onerror = function () {
      this.src = binding.value;
    };
  },
  //这是图片回去的时候也会执行
  componentUpdated(el, binding) {
    el.src = el.src || binding.value;
  },
};
21、二维码
yarn add qrcode 需要用到的包

22、打印功能
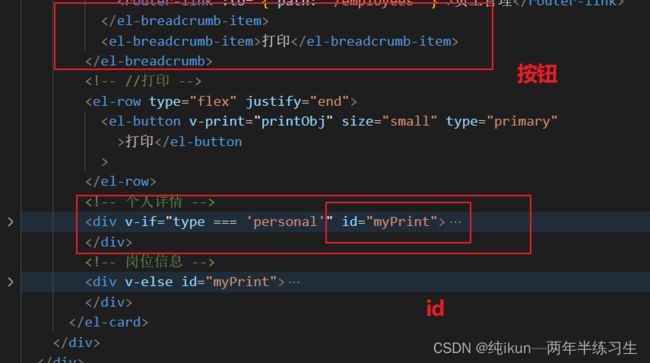
使用插件vue-print-nb 然后全局注册
打印的部分需要加上一个id
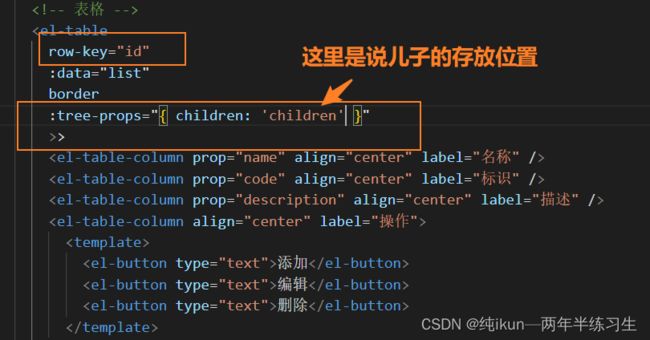
23、饿了么表格的折叠
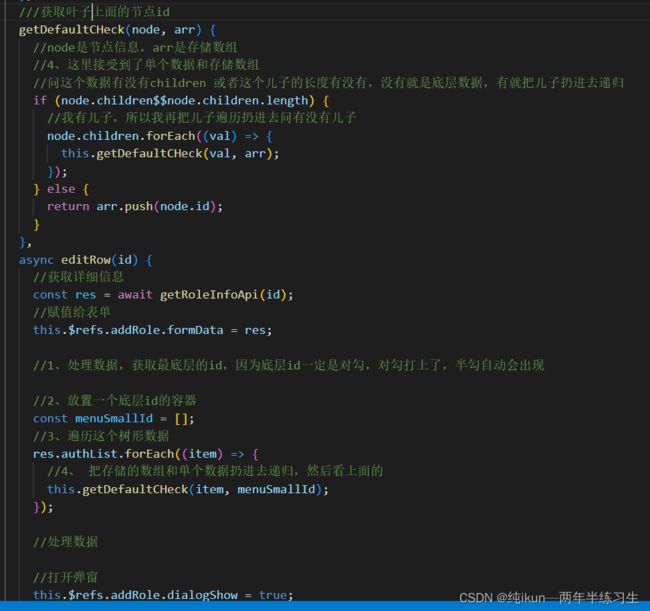
24、树的选择框 半勾全勾和数据的回显
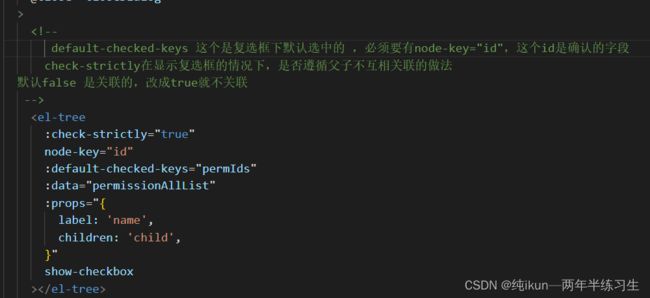


一个是半勾的数据,一个是全勾的数据 需要加上node-key属性属性值是你需要的数据,比如id
这个地方说明了如何处理回显数据,理论就是,树形结构,我最底层的叶子打上对勾,组件会自动把对应的父亲,父亲的父亲…
打上半勾,所以我们只需要给最底层的打上对勾,这样数据就回显出来了
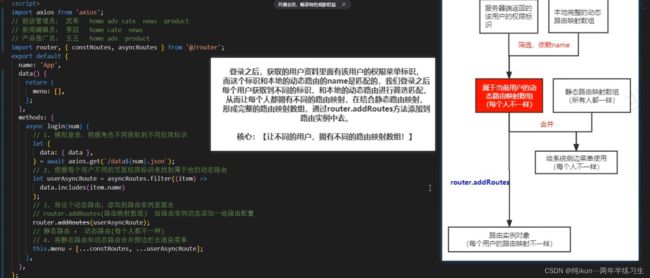
25、路由权限的方式一
路由权限其实就是没有动态路由,靠你登陆之后从后台拿到属于你的动态路由然后使用router.addRoutes()方法添加到路由实例上,这样你就有了路由,这些路由就是你能看见的页面,侧边栏也依靠这个路由的数组去渲染对应的侧边栏
26、路由权限的方式二
这个思路其实就是没有动态路由,登陆之后会返回一个这个角色的路由信息。我们要做的其实就是替换里面的路径
返回的数据其实就是一个完整的路由配置,里面的component这个地方是这个文件名/路径名。
用动态加载去替换掉,然后合并静态路由加载到路由实例上,然后侧边栏也是依靠这个去渲染
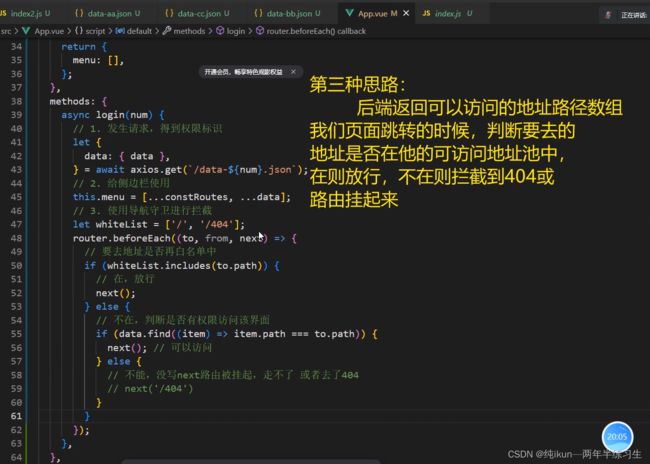
27、路由权限的方式三
28、刷新之后页面依旧在滚动位置
29、权限的注意点需要重新走一次页面404问题
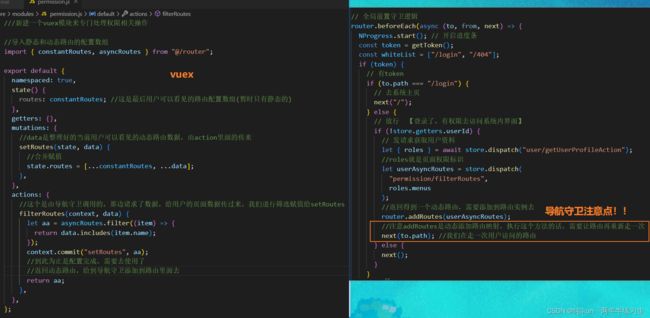
刷新就404的问题,是因为404在静态页面最后,你加了动态,他就在中间了,所以从上往下匹配,404有一个星号,默认是放在最后,但是你动态是后面加的,所以他在中间了,就出错了

我们删掉,在到导航守卫加动态路由的时候,给push进去就可以 了
这句话的意思就是给404加载数据最后面

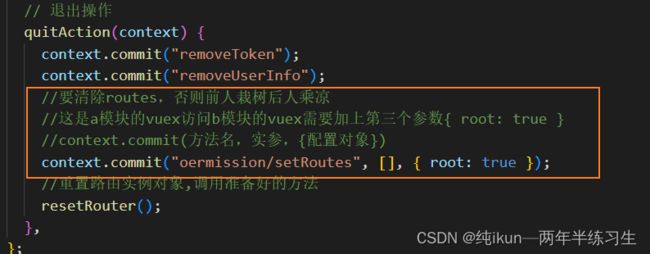
30、权限访问可以越界
退出的时候没有退出,前一个人是超级管理员,你再登一个不是超管的,依然可以访问
31、重置路由实例的方法
![]()
32、不同的vuex模块的互相访问
 //这是a模块的vuex访问b模块的vuex需要加上第三个参数{ root: true }
    //context.commit(方法名,实参,{配置对象})
    context.commit("oermission/setRoutes", [], { root: true });
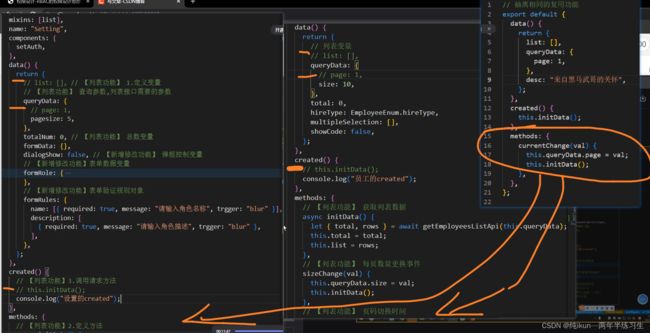
33、局部混入语法
可以抽离相同的代码,这些相同的代码可以抽离出去,然后引用即可

原则:data里面的数据,如果自己有用自己的,自己没有就用抽离的。自己要是改了属性,就合并不然就覆盖
钩子的话都是合并执行的
34、全局混入语法
导入注册 main.js中导入,所有组件的data里面都能看见这个msg

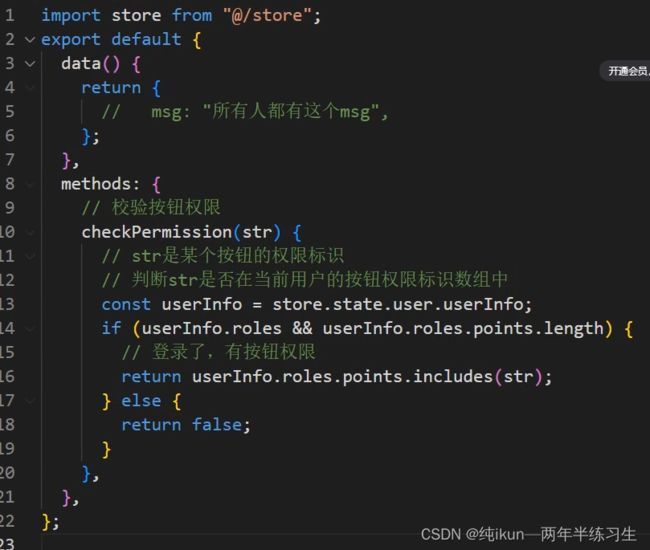
36、按钮权限
一开始我们约定好按钮的名字,比如删除合新增叫del和add ,我们在按钮的地方写上disable=‘checkPermission(del)’
这是删除的,然后到了下面的全局混入组件,判断这个del在不在用户的资料的按钮权限的数组中,在就是有权限为true,不在就是false 直接禁用,需要取反!!这就是原理
37、vue里面echart
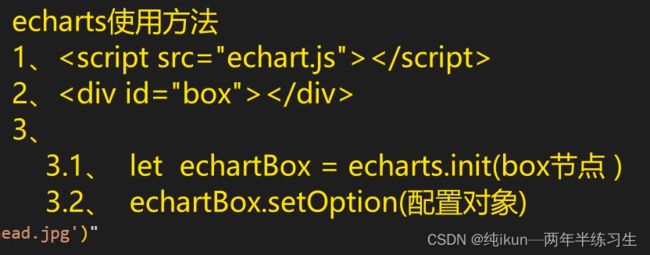
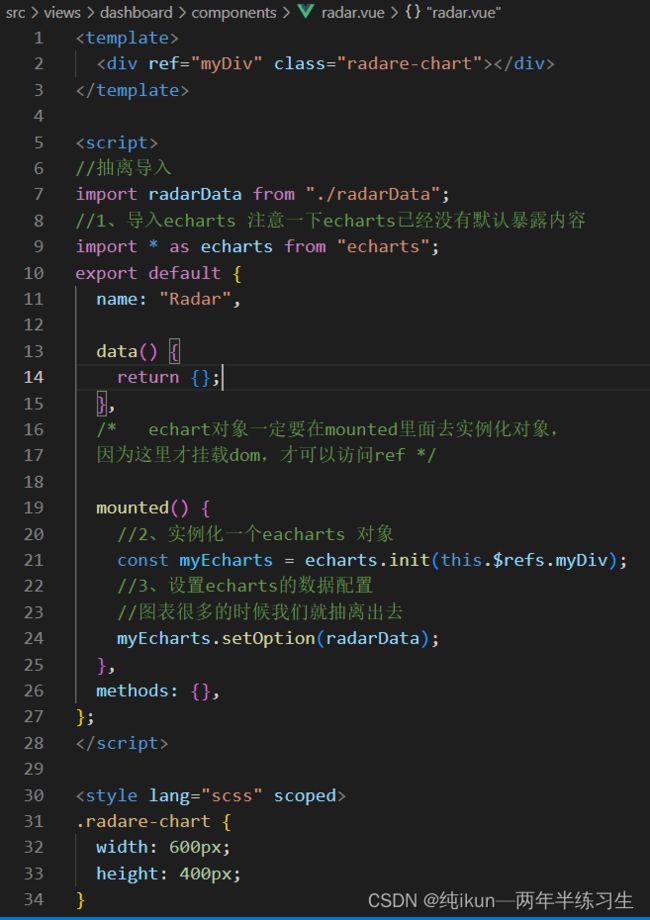
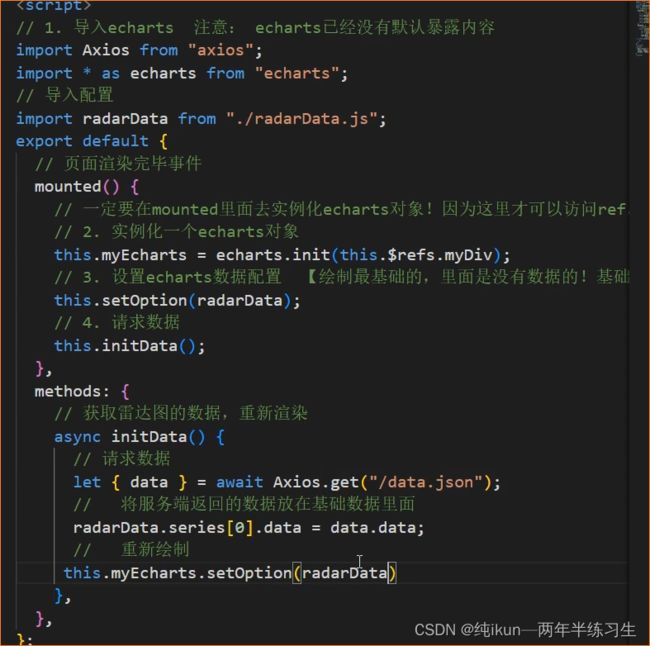
模拟请求数据导入,实例化echarts对象挂载this上会好点
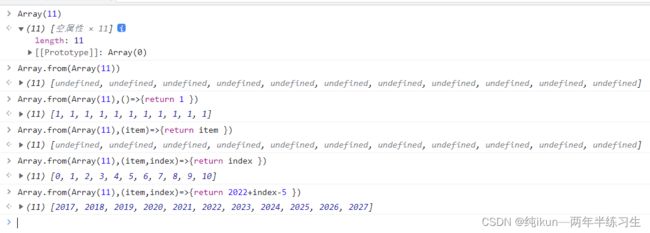
38、数组的快速生成
39、全屏组件
下载安装npm i screenfull 在components新建一个组件放入以下代码 然后全局引用
<template>
  <div>
    <svg-icon :icon-class="isFullscreen?'exit-fullscreen':'fullscreen'" @click="click" />
  </div>
</template>

<script>
import screenfull from 'screenfull'

export default {
  name: 'Screenfull',
  data() {
    return {
      isFullscreen: false
    }
  },
  mounted() {
    this.init()
  },
  beforeDestroy() {
    this.destroy()
  },
  methods: {
    click() {
      if (!screenfull.enabled) {
        this.$message({
          message: 'you browser can not work',
          type: 'warning'
        })
        return false
      }
      screenfull.toggle()
    },
    change() {
      this.isFullscreen = screenfull.isFullscreen
    },
    init() {
      if (screenfull.enabled) {
        screenfull.on('change', this.change)
      }
    },
    destroy() {
      if (screenfull.enabled) {
        screenfull.off('change', this.change)
      }
    }
  }
}
</script>

<style scoped>
.screenfull-svg {
  display: inline-block;
  cursor: pointer;
  fill: #5a5e66;;
  width: 20px;
  height: 20px;
  vertical-align: 10px;
}
</style>
可能会出问题,版本降低一点就行了4.2这样子
40、动态主题
饿了么改ui
<template>
  <el-color-picker
    v-model="theme"
    :predefine="['#409EFF', '#1890ff', '#304156','#212121','#11a983', '#13c2c2', '#6959CD', '#f5222d', ]"
    class="theme-picker"
    popper-class="theme-picker-dropdown"
  />
</template>

<script>
const version = require('element-ui/package.json').version // element-ui version from node_modules
const ORIGINAL_THEME = '#409EFF' // default color

export default {
  data() {
    return {
      chalk: '', // content of theme-chalk css
      theme: ''
    }
  },
  computed: {
    defaultTheme() {
      return this.$store.state.settings.theme
    }
  },
  watch: {
    defaultTheme: {
      handler: function(val, oldVal) {
        this.theme = val
      },
      immediate: true
    },
    async theme(val) {
      const oldVal = this.chalk ? this.theme : ORIGINAL_THEME
      if (typeof val !== 'string') return
      const themeCluster = this.getThemeCluster(val.replace('#', ''))
      const originalCluster = this.getThemeCluster(oldVal.replace('#', ''))
      console.log(themeCluster, originalCluster)

      const $message = this.$message({
        message: '  Compiling the theme',
        customClass: 'theme-message',
        type: 'success',
        duration: 0,
        iconClass: 'el-icon-loading'
      })

      const getHandler = (variable, id) => {
        return () => {
          const originalCluster = this.getThemeCluster(ORIGINAL_THEME.replace('#', ''))
          const newStyle = this.updateStyle(this[variable], originalCluster, themeCluster)

          let styleTag = document.getElementById(id)
          if (!styleTag) {
            styleTag = document.createElement('style')
            styleTag.setAttribute('id', id)
            document.head.appendChild(styleTag)
          }
          styleTag.innerText = newStyle
        }
      }

      if (!this.chalk) {
        const url = `https://unpkg.com/element-ui@${version}/lib/theme-chalk/index.css`
        await this.getCSSString(url, 'chalk')
      }

      const chalkHandler = getHandler('chalk', 'chalk-style')

      chalkHandler()

      const styles = [].slice.call(document.querySelectorAll('style'))
        .filter(style => {
          const text = style.innerText
          return new RegExp(oldVal, 'i').test(text) && !/Chalk Variables/.test(text)
        })
      styles.forEach(style => {
        const { innerText } = style
        if (typeof innerText !== 'string') return
        style.innerText = this.updateStyle(innerText, originalCluster, themeCluster)
      })

      this.$emit('change', val)

      $message.close()
    }
  },

  methods: {
    updateStyle(style, oldCluster, newCluster) {
      let newStyle = style
      oldCluster.forEach((color, index) => {
        newStyle = newStyle.replace(new RegExp(color, 'ig'), newCluster[index])
      })
      return newStyle
    },

    getCSSString(url, variable) {
      return new Promise(resolve => {
        const xhr = new XMLHttpRequest()
        xhr.onreadystatechange = () => {
          if (xhr.readyState === 4 && xhr.status === 200) {
            this[variable] = xhr.responseText.replace(/@font-face{[^}]+}/, '')
            resolve()
          }
        }
        xhr.open('GET', url)
        xhr.send()
      })
    },

    getThemeCluster(theme) {
      const tintColor = (color, tint) => {
        let red = parseInt(color.slice(0, 2), 16)
        let green = parseInt(color.slice(2, 4), 16)
        let blue = parseInt(color.slice(4, 6), 16)

        if (tint === 0) { // when primary color is in its rgb space
          return [red, green, blue].join(',')
        } else {
          red += Math.round(tint * (255 - red))
          green += Math.round(tint * (255 - green))
          blue += Math.round(tint * (255 - blue))

          red = red.toString(16)
          green = green.toString(16)
          blue = blue.toString(16)

          return `#${red}${green}${blue}`
        }
      }

      const shadeColor = (color, shade) => {
        let red = parseInt(color.slice(0, 2), 16)
        let green = parseInt(color.slice(2, 4), 16)
        let blue = parseInt(color.slice(4, 6), 16)

        red = Math.round((1 - shade) * red)
        green = Math.round((1 - shade) * green)
        blue = Math.round((1 - shade) * blue)

        red = red.toString(16)
        green = green.toString(16)
        blue = blue.toString(16)

        return `#${red}${green}${blue}`
      }

      const clusters = [theme]
      for (let i = 0; i <= 9; i++) {
        clusters.push(tintColor(theme, Number((i / 10).toFixed(2))))
      }
      clusters.push(shadeColor(theme, 0.1))
      return clusters
    }
  }
}
</script>

<style>
.theme-message,
.theme-picker-dropdown {
  z-index: 99999 !important;
}

.theme-picker .el-color-picker__trigger {
  height: 26px !important;
  width: 26px !important;
  padding: 2px;
}

.theme-picker-dropdown .el-color-dropdown__link-btn {
  display: none;
}
</style>
注册插件,放置插件即可,原理就是修改elmui的颜色
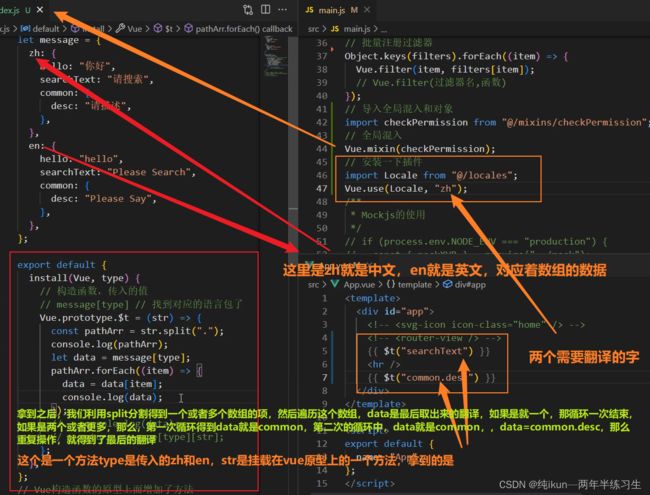
41、语言包的原理
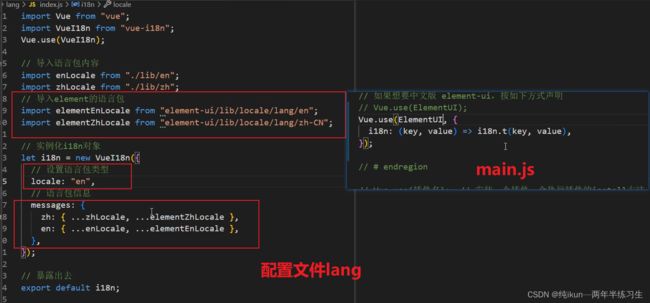
42、语言包插件
yarn add [email protected]
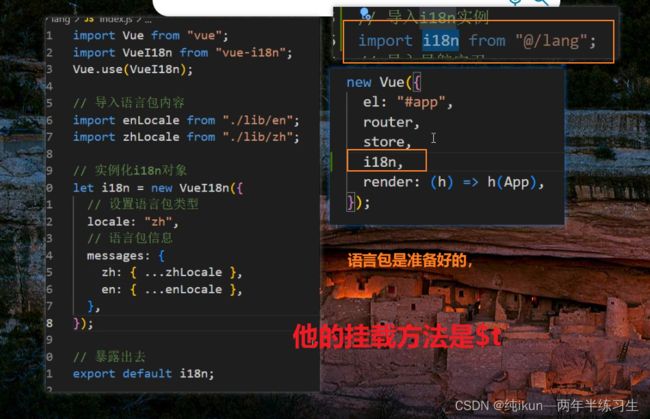
饿了么和i18n结合
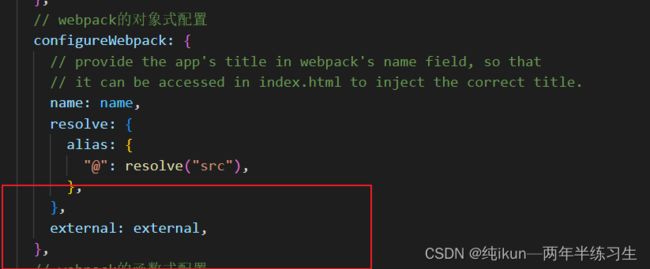
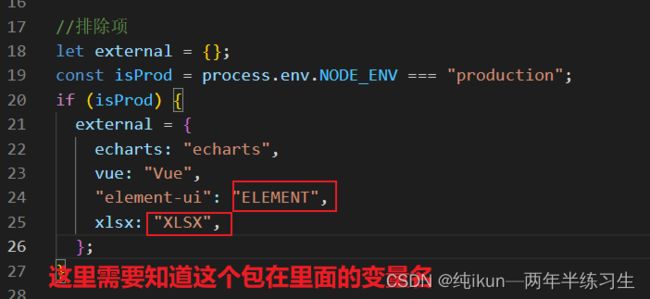
43、项目分析
cmd运行vue ui
或者是 npm run preview – --report没配置不能用,建议第一种
