Asp .NetCore 支付宝网页授权登录
人这一生不必太较真,苦了自己怨了别人,爱情无需刻意去把握,越是想抓牢自己的爱情,反而容易失去自我。
文档
- 官方文档 算是比较清晰明了的文档啦
环境
- .Net Core 6.0
工具
- Visual Studio 2022
- 支付宝开放平台开发助手
流程
以观看的角度我喜欢把代码放在前面界面的操作放在后边
新建项目
我这里是这样新建的,当然也可以使用Visual Studio中的可视化新建。
dotnet new webapi --name AlipayWebsiteAuthorizedLogin
打开程序包管理器控制台 Ctrl + `
执行安装命令依赖包
Install-Package AlipaySDKNet.Standard
新增登录接口
在Controllers文件夹下新建UserController.cs
using Aop.Api;
using Aop.Api.Request;
using Aop.Api.Response;
using Microsoft.AspNetCore.Mvc;

// For more information on enabling Web API for empty projects, visit https://go.microsoft.com/fwlink/?LinkID=397860

namespace AlipayWebsiteAuthorizedLogin.Controllers
{
    [Route("api/[controller]")]
    [ApiController]
    public class UserController : ControllerBase
    {

        const string app_id = "应用id";
        const string merchant_private_key = "应用私钥";
        const string alipay_public_key = "公钥";

        [HttpPost(nameof(Login))]
        public ActionResult<LoginResult> Login([FromBody] LoginParameters parameters)
        {
            IAopClient client = new DefaultAopClient("https://openapi.alipay.com/gateway.do", app_id, merchant_private_key, "json", "1.0", "RSA2", alipay_public_key, "UTF-8", false);
            // 获取AccessToken
            AlipaySystemOauthTokenRequest oauthTokenRequest = new AlipaySystemOauthTokenRequest();
            oauthTokenRequest.GrantType = "authorization_code";
            oauthTokenRequest.Code = parameters.Code;
            AlipaySystemOauthTokenResponse oauthTokenResponse = client.Execute(oauthTokenRequest);
            if (oauthTokenResponse.IsError)
            {
                Console.WriteLine("获取AccessToken失败!", oauthTokenResponse.Msg);
                // 我这里就不处理一些异常啦
                throw new Exception(oauthTokenResponse.Msg);
            }
            return new LoginResult
            {
                AccessToken = oauthTokenResponse.AccessToken,
                UserId = oauthTokenResponse.UserId
            };
        }
    }

    public class LoginParameters
    {
        public string Code { get; set; }
    }

    public class LoginResult
    {
        public string UserId { get; set; }
        public string AccessToken { get; set; }
    }
}
使用UseStaticFiles配置静态目录
在Program.cs增加app.UseStaticFiles();
var builder = WebApplication.CreateBuilder(args);

// Add services to the container.

builder.Services.AddControllers();

var app = builder.Build();

app.UseStaticFiles();

app.UseAuthorization();

app.MapControllers();

app.Run();
新建页面
新增wwwroot文件夹并在下面新建index.html
DOCTYPE html>
<html>

<head>
    <meta charset="utf-8" />
    <title>支付宝授权登录title>
head>

<body>
    <p>授权登陆中...p>
    <script type="module">
        let pDom = document.getElementsByTagName('p')[0];

        let url = location.href;
        let auth_code = url.match(/.*auth_code=(.*?)&/)?.[1];
        let app_id = url.match(/.*app_id=(.*?)&/)?.[1];
        if (!auth_code) location.href = `https://openauth.alipay.com/oauth2/publicAppAuthorize.htm?app_id=[应用id]&scope=auth_user&redirect_uri=http%3A%2F%2Fa.frp.linyisonger.cn%2Findex.html&state=init`
        let r = new XMLHttpRequest();
        r.open("post", `${location.origin}/api/user/login`);
        r.setRequestHeader("Content-Type", "application/json")
        r.onloadend = () => {
            // 重新进入页面
            if (r.status == 500) location.href = '/index.html'
            else if(r.status == 200) pDom.textContent = `登录成功! \n ${r.responseText}`
        }
        r.send(JSON.stringify({
            code: auth_code
        }))
    script>

body>

html>
新建应用
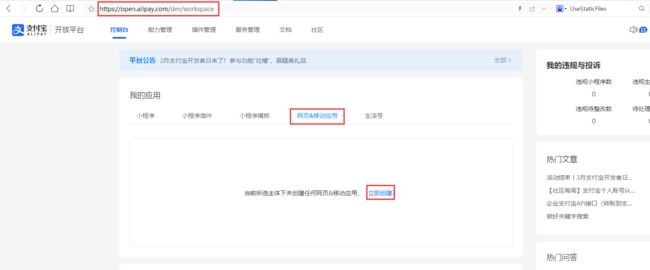
进入支付宝开放平台进入控制台
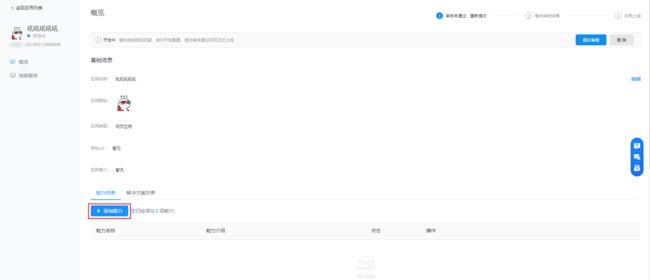
创建好之后给应用增加能力
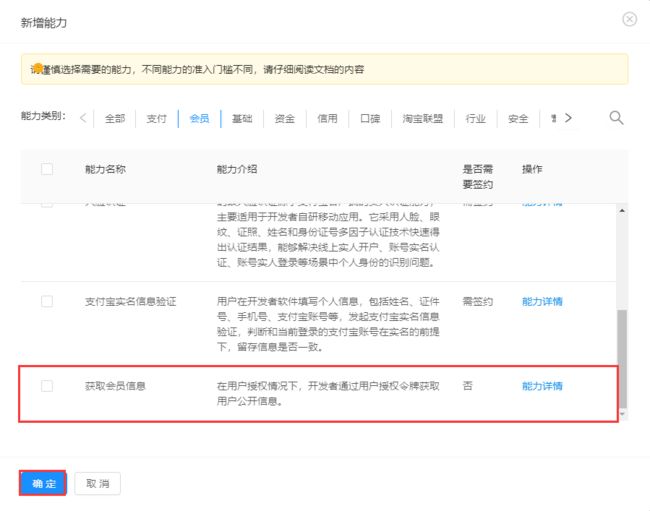
选择对应的能力✔确定
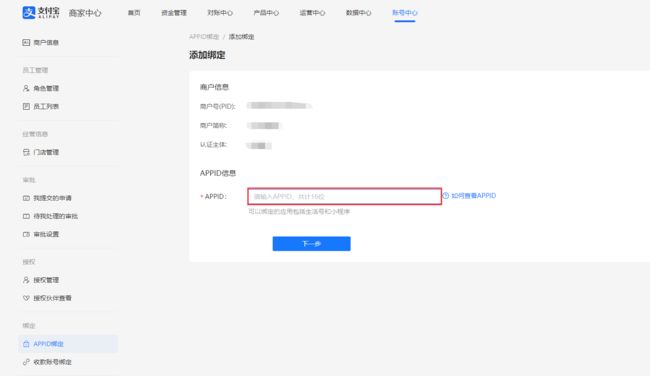
根据引导需要关联商家,点击进入商家中心
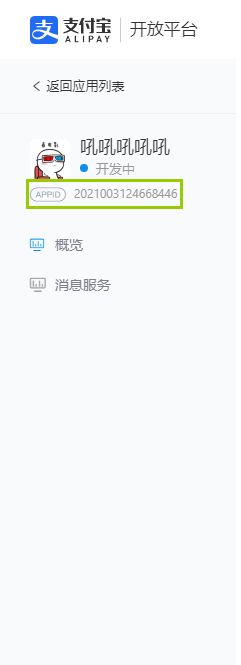
进入APPID绑定页面,进行绑定。
注: appid在这里~
同样也要复制给页面和接口应用id字段
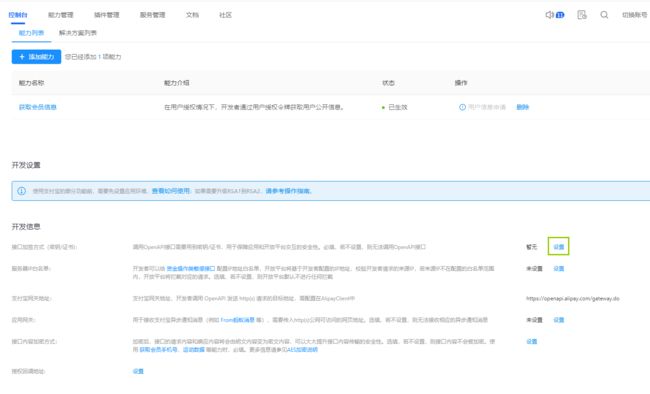
生效之后设置密钥
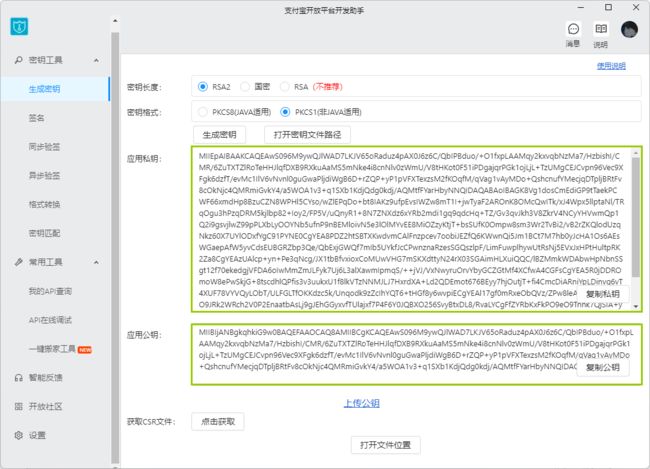
需要下载支付宝开放平台开发助手
复制应用私钥给接口配置merchant_private_key字段赋值
复制应用公钥填写到应用配置中去如下图
保存设置后
会产生一个支付宝公钥
复制给接口配置alipay_public_key字段赋值
设置授权回调地址
我这里是有反向代理的
通过frp将本地的服务代理到http://a.frp.linyisonger.cn上面
可以参考文章配置自己的反向代理服务
https://blog.csdn.net/linyisonger/article/details/123567529
哦豁~
