ubuntu下的vscode的安装、配置(C++,python,java)
目录
- 1. 安装
- 2.配置C++(CMake版)
-
- 2.1 准备工作
- 2.2 写launch.json文件调试
- 2.3 自动化编译写tasks.json
- 3.配置Python
-
- 3.1 安装插件,预备源代码
- 3.2 调试写launch.json文件
- 4.配置Java
1. 安装
两种安装方法
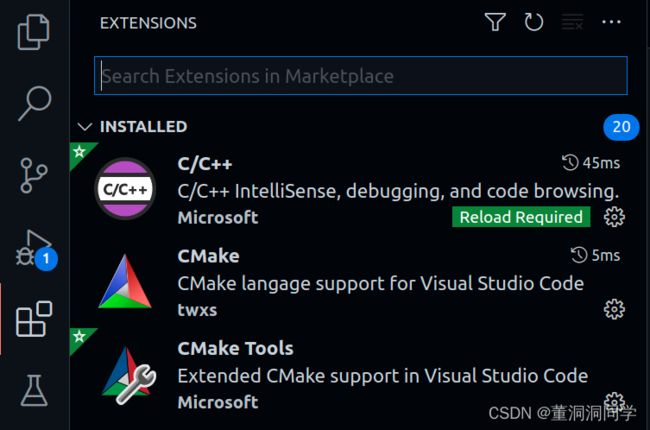
https://www.cnblogs.com/lwp-king666/p/10513382.html,为什么推荐这两种方法呢?因为后续卸载升级方便。有一次我安装VsCode用了冷门的命令,结果时间一长都忘记了,只能暴力卸载误删了很多东西。此外,基础插件有C++,CMake,CMake Tools(选装IORun,多个按钮后续运行程序方便点),左侧点击Extentions(四个方格子),搜索插件名,点击绿色按钮install就行。

2.配置C++(CMake版)
2.1 准备工作
首先展示我的demo代码
//这是helloworld.cpp文件
#include //这是CMakeLists.txt文件
cmake_minimum_required(VERSION 3.0)
project(HELLOWORLD)
//如果要debug一定要写,不写不能debug
SET(CMAKE_BUILD_TYPE "Debug")
add_executable(helloworld_cmake helloworld.cpp)
其实就三个东西,一个build空文件夹,CMakeLists.txt,helloworld.cpp。然后在build里cmake ..再make(打开vscode的终端Ctrl +` ,cd build),最终生成可执行文件。工程文件结构简单。

2.2 写launch.json文件调试
Run and Debug,点左边调试按钮(三角形加昆虫的标志),点击create a launch.json file,选择C++(GDB/LLDB),选择g+±生成和调试活动文件。然后编写launch.json文件,就三处地方值得改(中文注释处)。最后加上你的断电,按F5debug
{
    // Use IntelliSense to learn about possible attributes.
    // Hover to view descriptions of existing attributes.
    // For more information, visit: https://go.microsoft.com/fwlink/?linkid=830387
    "version": "0.2.0",
    "configurations": [
        {
            "name": "g++ - Build and debug active file",
            "type": "cppdbg",
            "request": "launch",
            //修改调试程序的绝对路径
            //"program": "${fileDirname}/${fileBasenameNoExtension}",
            "program": "${workspaceFolder}/build/my_cmake_exe",
            //int main(int argc, char **argv)里的argv
            "args": [],
            "stopAtEntry": false,
            //工程路径名
           // "cwd": "${fileDirname}",
           "cwd": "${workspaceFolder}",
            "environment": [],
            "externalConsole": false,
            "MIMode": "gdb",
            "setupCommands": [
                {
                    "description": "Enable pretty-printing for gdb",
                    "text": "-enable-pretty-printing",
                    "ignoreFailures": true
                }
            ],
            //等会讲解,先注释
           // "preLaunchTask": "C/C++: g++ build active file",
            //"miDebuggerPath": "/usr/bin/gdb"
        }
    ]
}
2.3 自动化编译写tasks.json
刚刚写launch.json文件是为了debug,现在写tasks.json文件想自动化编译,运行,调试代码。在2.1节为了生成可执行文件,我是手动在终端中cmake,make,也就是手动编译。现在想实现,按下F5自动编译,运行,调试代码。这样做的好处是写大型项目时,稍微修改程序就可以自动编译代码(因为c++是静态编译,修改就要人工重新编译,而python随时修改随时运行出结果)
在顶部选择terminal选项,点击configure default build task,点击create tasks.json file from template。删除原来的模板,使用我的模板
,更详细的参数解释看官网说明书https://code.visualstudio.com/Docs/editor/tasks。
最后我们把build里的所有文件删除,也就是删除了C++的可执行文件,一般是不能运行了,因为没有编译生成可执行文件。但是我们现在写好了tasks.json和launch.json文件以后,直接F5就可以运行出结果了。
{
    // See https://go.microsoft.com/fwlink/?LinkId=733558
    // for the documentation about the tasks.json format
    "version": "2.0.0",
    "options": {
    	//第一件事情cd到build文件夹下
        "cwd": "${workspaceFolder}/build"
    },
    "tasks": [
        {
        //第二件事情在build文件夹下cmake ..
            "type": "shell",
            "label": "cmake",//任务名
            "command": "cmake",//任务执行命令
            "args": [
                ".."
            ]//执行命令的参数
        },

        {
        //第三件事情make
            "label": "make",
            "group": {
                "kind": "build",
                "isDefault": true
            },
            "command": "make",
            "args": [

            ]
        },

        {
        //任务执行的计划表,上面已经说明任务内容,执行顺序需要一个计划表
            "label": "Build",
            "dependsOrder": "sequence",//按列出的顺序执行任务依赖项
            "dependsOn":[
                "cmake",
                "make"
            ]//先执行Label为cmake的任务,然后执行label为make的任务
        }
    ]
}
这个做完以后launc.json文件需要修改一下
{
    // Use IntelliSense to learn about possible attributes.
    // Hover to view descriptions of existing attributes.
    // For more information, visit: https://go.microsoft.com/fwlink/?linkid=830387
    "version": "0.2.0",
    "configurations": [
        {
            "name": "g++ - Build and debug active file",
            "type": "cppdbg",
            "request": "launch",
            //修改调试程序的绝对路径
            //"program": "${fileDirname}/${fileBasenameNoExtension}",
            "program": "${workspaceFolder}/build/my_cmake_exe",
            "args": [],
            "stopAtEntry": false,
            //工程路径名
           // "cwd": "${fileDirname}",
           "cwd": "${workspaceFolder}",
            "environment": [],
            "externalConsole": false,
            "MIMode": "gdb",
            "setupCommands": [
                {
                    "description": "Enable pretty-printing for gdb",
                    "text": "-enable-pretty-printing",
                    "ignoreFailures": true
                }
            ],
            //等会讲解,先注释
           // "preLaunchTask": "C/C++: g++ build active file",
           //请看参数名就能理解参数作用,后面的build就是我们tasks.json中任务执行计划表的任务名
           "preLaunchTask": "Build",
            //"miDebuggerPath": "/usr/bin/gdb"
        }
    ]
}
3.配置Python
思路跟C++差不多
3.1 安装插件,预备源代码
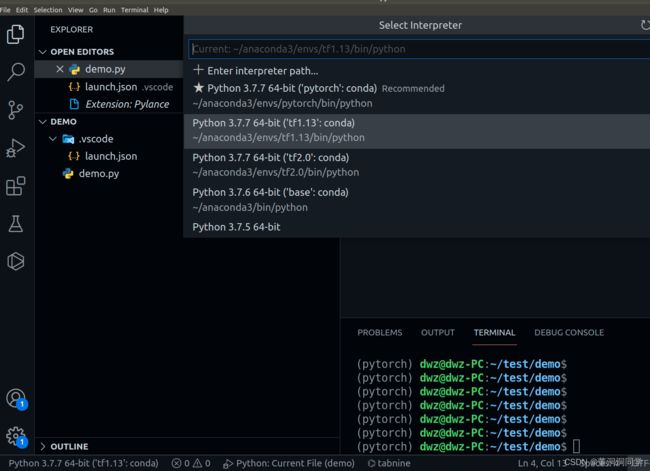
点击左侧Extensions,搜索框内输入python,点击安装。安装完以后想切换编译器,点击左侧底部状态栏中的编译器,就能切换编译器。
 我的demo.py文件十分简单。
import random
a = random.randint(0, 100)
b = random.randint(0, 100)
print(a * b)
3.2 调试写launch.json文件
python的没有C++的复杂,这是软件默认的配置文件就能用。
{
    // Use IntelliSense to learn about possible attributes.
    // Hover to view descriptions of existing attributes.
    // For more information, visit: https://go.microsoft.com/fwlink/?linkid=830387
    "version": "0.2.0",
    "configurations": [
        {
            "name": "Python: Current File",
            "type": "python",
            "request": "launch",
            "program": "${file}",
            "console": "integratedTerminal"
        }
    ]
}
4.配置Java
java的思路和C++、python都差不多,这里不多描述。上官方连接。https://code.visualstudio.com/docs/java/java-debugging