Windows上VS2017单步调试FFmpeg源码的方法
之前在https://blog.csdn.net/fengbingchun/article/details/90114411 介绍过如何在Windows7/10上通过MinGW方式编译FFmpeg 4.1.3源码生成库的步骤,那时只能生成最终的库,却不能产生vs工程,无法进行单步调试。GitHub上有个项目ShiftMediaProject/FFmpeg提供了vs工程,下面对编译过程进行说明:
1. 从https://github.com/ShiftMediaProject/FFmpeg clone到E:\GitCode\FFmpeg_VS2013\ShiftMediaProject目录下,最新commit id为3371d97d5951e882b3a57c323b3e1f21cfabe900,提交日期为2019.12.14;
2. 按照SMP/readme.txt的说明,要求vs版本需为2013及以上,初始打算使用vs2013,不过提示需要下载最新的Service Pack,因此改为使用vs2017;
3. 下载依赖项,执行FFmpeg/SMP/project_get_dependencies.bat,执行结果如下,可能需要等待较长时间,而且可能需要执行多次,直到所有的依赖项全部clone下来,个别项目(如我多次尝试下载gnulib始终失败)可能会需要自己手动clone:git clone https://gitlab.com/libidn/gnulib-mirror.git ,然后将其拷贝到ShiftMediaProject/gnutls/gnulib目录下;
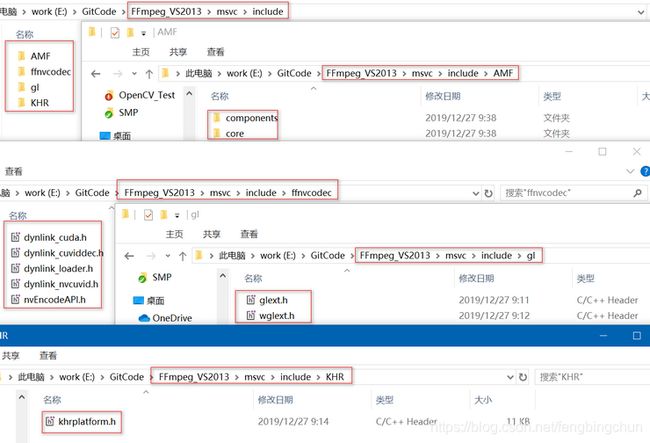
4. 按照SMP/readme.txt中的说明,下载额外依赖文件,手动创建新目录E:\GitCode\FFmpeg_VS2013\msvc,下载完后的内容如下:
(1). 从https://www.khronos.org/registry/OpenGL/index_gl.php 下载glext.h和wglext.h,将其保存到新创建的目录msvc/include/gl下;
(2). 从https://www.khronos.org/registry/OpenGL/index_gl.php 下载khrplatform.h,将其保存到新创建的目录msvc/include/KHR下;
(3). 从https://github.com/FFmpeg/nv-codec-headers 下载include/ffnvcodec,将ffnvcodec整个目录拷贝到目录msvc/include下;
(4). 从https://github.com/GPUOpen-LibrariesAndSDKs/AMF 下载amf/public/include,将include下的内容保存到新创建的目录msvc/include/AMF下;
5. 有些项目有汇编代码需要ASM编译,如libavutil需要NASM,依赖项libvpx需要YASM:
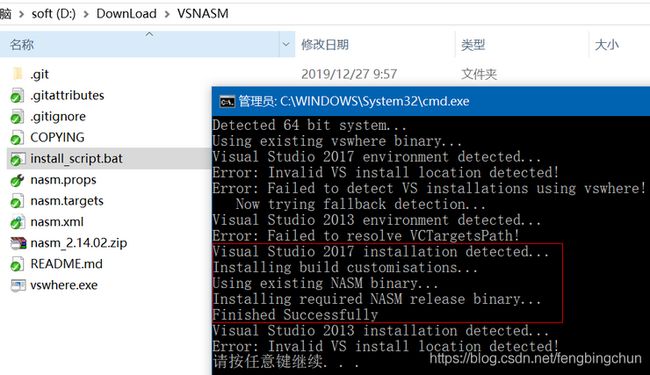
(1). 从https://github.com/ShiftMediaProject/VSNASM 下载VSNASM,以管理员身份运行install_script.bat,可多执行几次,如下图所示:vs2017安装成功,vs2013安装失败,因为使用vs2017编译先不管vs2013;如果install_script.bat不能成功安装,可参照VSNASM下的README.md进行安装:
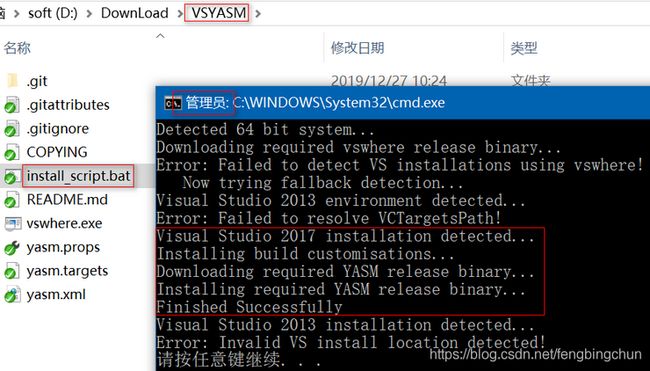
(2). 从https://github.com/ShiftMediaProject/VSYASM 下载VSYASM,以管理员身份运行install_script.bat,可多执行几次,如下图所示 :vs2017安装成功,vs2013安装失败,因为使用vs2017编译先不管vs2013;如果install_script.bat不能成功安装,可参照VSYASM下的README.md进行安装:
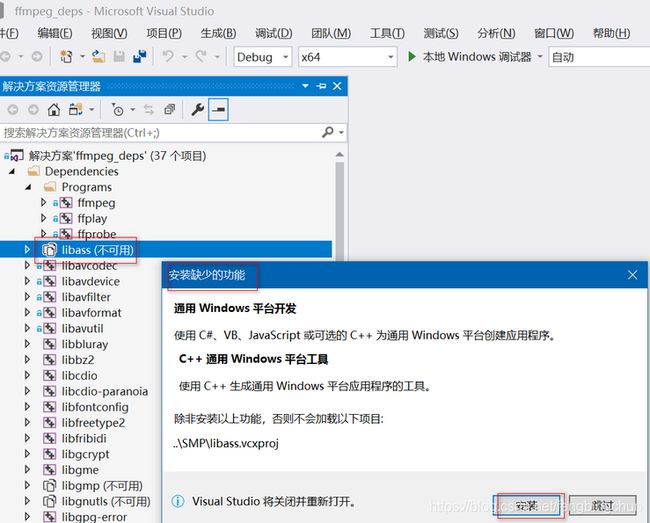
6. 使用vs2017打开FFmpeg/SMP/ffmpeg_deps.sln,发现有些项目不可用,如libass,如下图所示,点击安装并关闭ffmpeg_deps.sln:
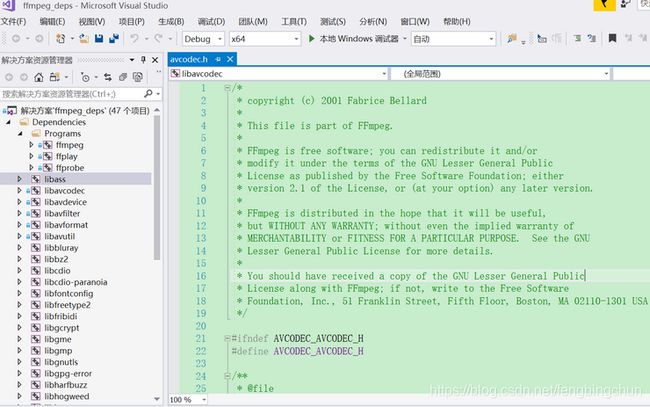
7. 再次打开ffmpeg_deps.sln,47个项目均加载成功,如下图所示:
8. 可选择编译静态库/动态库,Debug/Release,x86/x64,这里选择x64 静态库 Debug,选中解决方案”ffmpeg_deps”,点击重新生成解决方案,第一次可能会产生一些error,可再次点击生成解决方案,执行结果如下图所示:
(1). 在E:\GitCode\FFmpeg_VS2013\msvc\bin\x64目录下会存放可执行文件,包括:ffmpegd.exe、ffplayd.exe、ffprobed.exe;
(2). 在E:\GitCode\FFmpeg_VS2013\msvc\lib\x64目录下会存放所有的静态库文件包括ffmpeg自身的和依赖项的;
(3). 在E:\GitCode\FFmpeg_VS2013\msvc\include目录下会存放所需要的头文件;
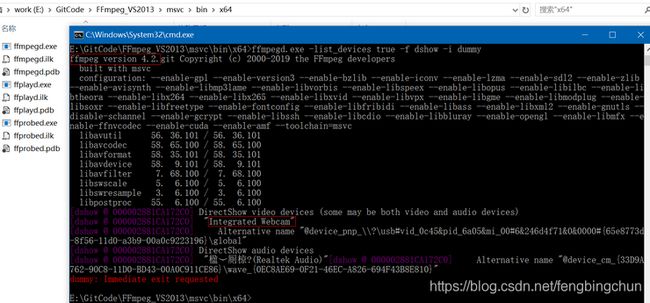
(4). 验证ffmpegd.exe的正确性:获取视频设备名,执行如下命令,执行结果如下图所示:显示ffmpeg版本为4.2,检测到的视频设备名为” Integrated Webcam”
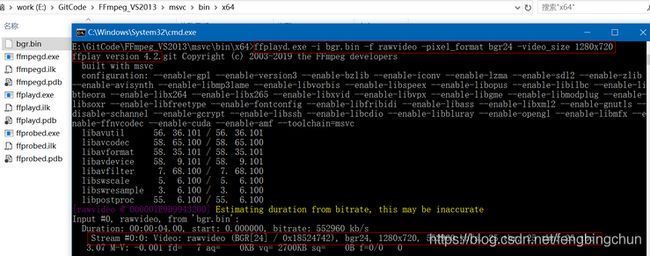
ffmpegd.exe -list_devices true -f dshow -i dummy(5). 验证ffplayed.exe的正确性:播放一个编码格式为rawvideo,像素格式为bgr24,帧大小为1280*720的文件,执行如下命令,执行结果如下图所示:可正常播放
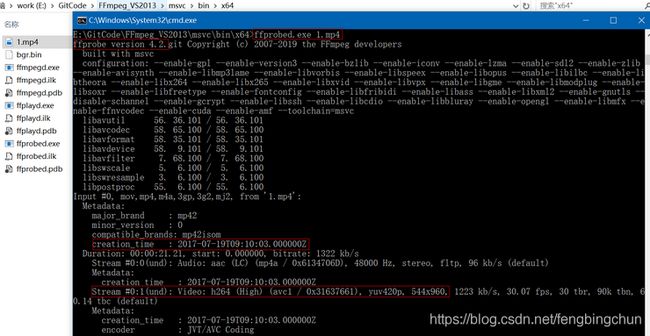
ffplayd.exe -i bgr.bin -f rawvideo -pixel_format bgr -video_size 1280x720(6). 验证ffprobed.exe的正确性:查看1.mp4视频文件信息,执行如下命令,执行结果如下图所示:可正常显示视频文件信息
ffprobed.exe 1.mp49. 新建一个test项目,测试代码test.cpp如下,执行结果如下:可正常打开视频设备并显示
#include
#include
#include
#include
#include
#include

#ifdef __cplusplus
extern "C" {
#endif

#include
#include
#include
#include
#include
#include

#ifdef __cplusplus
}
#endif

#include

int main()
{
	avdevice_register_all();

	AVCodecID id = AV_CODEC_ID_MJPEG;
	AVCodec* encoder_id = avcodec_find_encoder(id);
	AVCodec* decoder_id = avcodec_find_decoder(id);
	if (!encoder_id || !decoder_id) {
		fprintf(stderr, "codec not found: %d\n", id);
		return -1;
	}

	AVFormatContext* format_context = avformat_alloc_context();
	format_context->video_codec_id = id; // 指定编解码格式

	AVInputFormat* input_format = av_find_input_format("dshow");
	AVDictionary* dict = nullptr;
	//if (av_dict_set(&dict, "vcodec"/*"input_format"*/, "mjpeg", 0) < 0) fprintf(stderr, "fail to av_dict_set: line: %d\n", __LINE__); // 通过av_dict_set设置编解码格式好像不起作用
	if (av_dict_set(&dict, "video_size", "960x540", 0) < 0) fprintf(stderr, "fail to av_dict_set: line: %d\n", __LINE__);
	//if (av_dict_set(&dict, "r", "25", 0) < 0) fprintf(stderr, "fail to av_dict_set: line: %d\n", __LINE__); // 通过av_dict_set设置帧率好像不起作用
	int ret = avformat_open_input(&format_context, "video=Integrated Webcam", input_format, &dict);
	if (ret != 0) {
		fprintf(stderr, "fail to avformat_open_input: %d\n", ret);
		return -1;
	}

	ret = avformat_find_stream_info(format_context, nullptr);
	if (ret < 0) {
		fprintf(stderr, "fail to get stream information: %d\n", ret);
		return -1;
	}

	int video_stream_index = -1;
	for (unsigned int i = 0; i < format_context->nb_streams; ++i) {
		const AVStream* stream = format_context->streams[i];
		if (stream->codecpar->codec_type == AVMEDIA_TYPE_VIDEO) {
			video_stream_index = i;
			fprintf(stdout, "type of the encoded data: %d, dimensions of the video frame in pixels: width: %d, height: %d, pixel format: %d\n",
				stream->codecpar->codec_id, stream->codecpar->width, stream->codecpar->height, stream->codecpar->format);
		}
	}

	if (video_stream_index == -1) {
		fprintf(stderr, "no video stream\n");
		return -1;
	}

	fprintf(stdout, "frame rate: %f\n", av_q2d(format_context->streams[video_stream_index]->r_frame_rate));

	AVCodecParameters* codecpar = format_context->streams[video_stream_index]->codecpar;
	const AVCodec* codec = avcodec_find_decoder(codecpar->codec_id);
	if (!codec) {
		fprintf(stderr, "fail to avcodec_find_decoder\n");
		return -1;
	}

	if (codecpar->codec_id != id) {
		fprintf(stderr, "this test code only support mjpeg encode: %d\n", codecpar->codec_id);
		return -1;
	}

	AVCodecContext* codec_context = avcodec_alloc_context3(codec);
	if (!codec_context) {
		fprintf(stderr, "fail to avcodec_alloc_context3\n");
		return -1;
	}

	codec_context->pix_fmt = AVPixelFormat(codecpar->format);
	codec_context->height = codecpar->height;
	codec_context->width = codecpar->width;
	codec_context->thread_count = 16;
	ret = avcodec_open2(codec_context, codec, nullptr);
	if (ret != 0) {
		fprintf(stderr, "fail to avcodec_open2: %d\n", ret);
		return -1;
	}

	AVPixelFormat dst_pixel_format = AV_PIX_FMT_BGR24;
	AVFrame* frame = av_frame_alloc();
	AVPacket* packet = (AVPacket*)av_malloc(sizeof(AVPacket));
	SwsContext* sws_context = sws_getContext(codec_context->width, codec_context->height, codec_context->pix_fmt, codec_context->width, codec_context->height, dst_pixel_format, 0, nullptr, nullptr, nullptr);
	if (!frame || !packet || !sws_context) {
		fprintf(stderr, "fail to alloc\n");
		return -1;
	}

	uint8_t *bgr_data[4];
	int bgr_linesize[4];
	av_image_alloc(bgr_data, bgr_linesize, codec_context->width, codec_context->height, dst_pixel_format, 1);
	cv::Mat mat(codec_context->height, codec_context->width, CV_8UC3);
	const char* winname = "dshow mjpeg video";
	cv::namedWindow(winname);

	while (1) {
		ret = av_read_frame(format_context, packet);
		if (ret >= 0 && packet->stream_index == video_stream_index && packet->size > 0) {
			ret = avcodec_send_packet(codec_context, packet);
			if (ret < 0) {
				fprintf(stderr, "##### fail to avcodec_send_packet: %d\n", ret);
				av_packet_unref(packet);
				continue;
			}

			ret = avcodec_receive_frame(codec_context, frame);
			if (ret < 0) {
				fprintf(stderr, "##### fail to avcodec_receive_frame: %d\n", ret);
				av_packet_unref(packet);
				continue;
			}

			sws_scale(sws_context, frame->data, frame->linesize, 0, codec_context->height, bgr_data, bgr_linesize);
			mat.data = bgr_data[0];
			cv::imshow(winname, mat);
		}
		else if (ret < 0 || packet->size <= 0) {
			fprintf(stderr, "##### fail to av_read_frame: %d, packet size: %d\n", ret, packet->size);
			continue;
		}

		av_packet_unref(packet);

		int key = cv::waitKey(30);
		if (key == 27) break;
	}

	cv::destroyWindow(winname);
	sws_freeContext(sws_context);
	av_frame_free(&frame);
	av_freep(packet);
	av_freep(&bgr_data[0]);
	avformat_close_input(&format_context);
	av_dict_free(&dict);

	fprintf(stdout, "test finish\n");
	return 0;
}
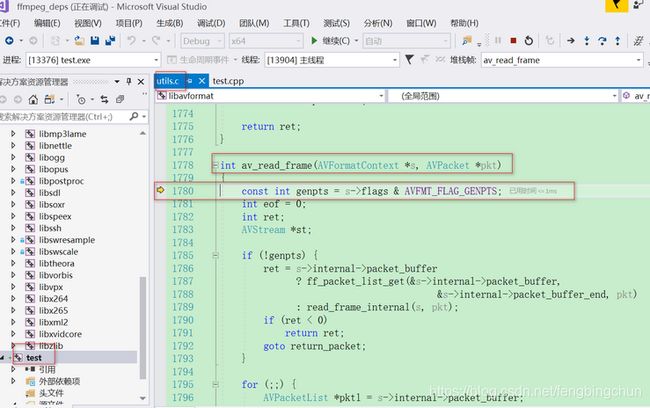
在av_read_frame处设置断点,单步调试,可进入av_read_frame函数内部,如下图所示:
GitHub:https://github.com//fengbingchun/OpenCV_Test

