Matplotlib | 高阶绘图案例【1】
文章目录
- ️ 1. 绘制图布,设置坐标范围
- ️ 2. 绘制圆角矩形
- ️ 3. 添加水滴
- ️ 4. 添加时间线
- ️ 5. 添加文本、配色
- ️ 6. 可视化项目源码+数据
大家好,我是 【Python当打之年(点击跳转)】
本期是 Matplotlib高阶绘图案例系列 的第一期,核心是楔形图 , Matplotlib系列和Pyecharts系列都会不间断更新,希望对大家有所帮助,如有疑问或者需要改进的地方可以联系小编。
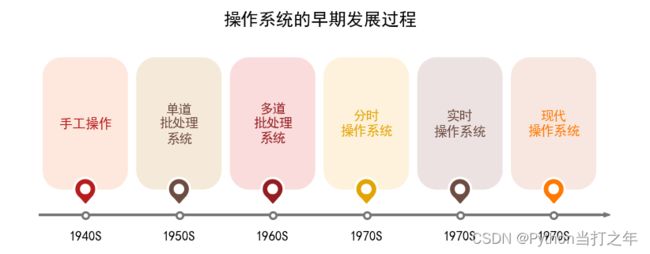
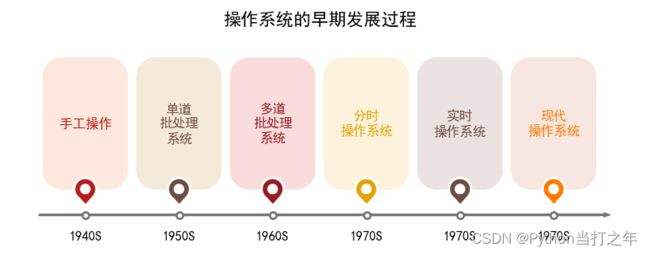
先看看效果:
️ 1. 绘制图布,设置坐标范围
fig, ax = plt.subplots(1, 1,figsize=(4,4))
ax.set_xlim(0,26)
ax.set_ylim(0,26)
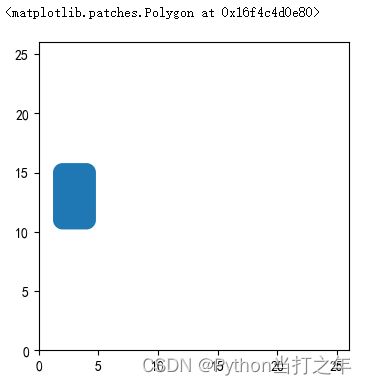
️ 2. 绘制圆角矩形
可以看到图上是有6个相同部分组成的,所以只要画出一个,其他复制就可以了:
fig, ax = plt.subplots(1, 1,figsize=(8,8),dpi=100)
ax.set_xlim(0,26)
ax.set_ylim(0,26)
# 圆心/半径
center_x,center_y,r = 2,15,0.8
# 宽/高/数量
wide,high,num = 2,4,500
pgon = plt.Polygon(get_cir_rect(center_x,center_y,r,wide,high,num))
ax.add_patch(pgon)
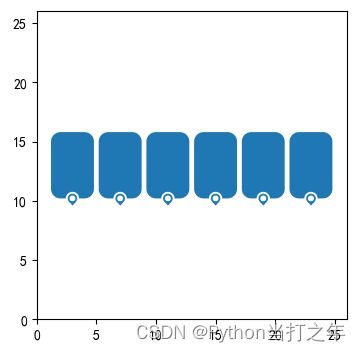
循环绘制其余的几个矩形:
for idx,value in enumerate(range(2,24,4)):
    pgon = plt.Polygon(get_cir_rect(value,center_y,r,wide,high,num))
    ax.add_patch(pgon)
️ 3. 添加水滴
wed = Wedge((value+wide/2,center_y-r-high),0.5,0,360,color='w',width=0.5)
wed1 = Wedge((value+wide/2,center_y-r-high),0.4,0,360,width=0.15)
pgon1 = plt.Polygon(([value+wide/2-0.3,center_y-r-high-0.25],[value+wide/2+0.32,center_y-r-high-0.25],[value+wide/2+0.01,center_y-r-high-0.6]))
ax.add_patch(wed)
ax.add_patch(pgon1)
ax.add_patch(wed1)
️ 4. 添加时间线
line = Rectangle((1,ys[0]),24,0.06,color='#757575')
ax.add_patch(line)
ax.plot(xs,ys,marker='o', markerfacecolor='white',color='#757575',markeredgewidth=2,markeredgecolor='#757575')
ax.arrow(xs[-1],ys[0],2,0,width=0.06,head_starts_at_zero=True,color='#757575')
️ 5. 添加文本、配色
colors = ['#FEE8DD','#F5E9D9','#FADCDD','#FEF2DD','#ECE2E2','#F8E6E0']
colors_t = ['#B71C1C','#6D4C41','#931D21','#E1A400','#6D4C41','#FF7900']
texts = ['手工操作','单道\n批处理\n系统','多道\n批处理\n系统','分时\n操作系统','实时\n操作系统','现代\n操作系统']
years = ['1940S','1950S','1960S','1970S','1970S','1970S']

ax.text(value+wide/2,center_y-high/2,texts[idx],verticalalignment='center',horizontalalignment='center',fontsize=12,color=colors_t[idx], fontweight='bold')
ax.text(value+wide/2,center_y-high/2-5,years[idx],horizontalalignment='center',fontsize=12, fontweight='bold')
ax.text(13,17.2,'操作系统的早期发展过程',horizontalalignment='center',fontsize=16, fontweight='bold')
️ 6. 可视化项目源码+数据
点击跳转:【全部可视化项目源码+数据】
以上就是本期为大家整理的全部内容了,赶快练习起来吧,原创不易,喜欢的朋友可以点赞、收藏也可以分享(注明出处)让更多人知道。
