Electron登录注册桌面应用源码+安装文件的打包方法
1. 效果展示:
2. 前言:
在当下流量几乎被瓜分的背景下,如果说Web应用是从别人那里抢流量,那桌面应用和手机应用就是留住抢来的流量。Web应用暴露在搜索引擎下,所以可以通过网络营销链接方便快速的引流web产品上。
但是桌面和手机应用是封闭式的,这样就又可以从自己Web产品上导流,通过独到好处的功能增加用户粘性。那么自己的一套简单的互联网生态圈就可以定型了,后期再开放商户端口进行商业化运营。所以有了Web和App或小程序外,桌面应用也很有必要。
3. Electron介绍:
Electron是一个能让你使用传统前端技术(Nodejs, Javascript, HTML, CSS)开发一个跨平台桌面应用的框架。这里所说的桌面应用指的是在Windows、OSX及Linux系统上运行的程序。
4. 环境要求:
(1). Node.js
(2). Cnpm
(3). Electron
(4). Visual Studio
(5). electron-packager 打包工具
5. 编码:
Electron的环境搭建网上也有很多,一下仅以开发案例说明网络请求,主进程,渲染进程,窗口交互,应用的调试与打包等等。
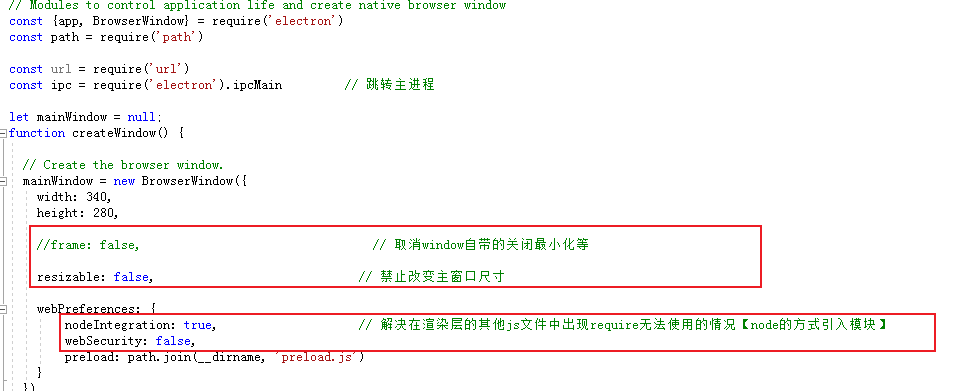
(1). 创建窗口
const {app, BrowserWindow} = require('electron')
const path = require('path')

const url = require('url')
const ipc = require('electron').ipcMain         	// 跳转主进程

let mainWindow = null;								// 主窗口
function createWindow() {

  // 创建主窗口
  mainWindow = new BrowserWindow({
    width: 340,										// 窗口宽度
    height: 280,									// 窗口高度

    //frame: false,                                 // 取消window自带的关闭最小化等

    resizable: false,                             	// 禁止改变主窗口尺寸

    webPreferences: {
        nodeIntegration: true,                    	// 解决在渲染层的其他js文件中出现require无法使用的情况【node的方式引入模块】
        webSecurity: false,
        preload: path.join(__dirname, 'preload.js')
    }
  })

	// 加载本地页面到应用中
    mainWindow.loadFile('index.html')

    mainWindow.setMenu(null);                      // 关闭菜单栏

    //mainWindow.webContents.openDevTools();       // 开启调试

}
(2). 跳转窗口1——创建新窗口
// 渲染进程部分
const ipc = require('electron').ipcRenderer             // 用于跳转的

// 1.点击按钮打开新窗口
document.getElementById('target').onclick = function () {
    ipc.send('add');
}

// 渲染进程部分


// 主进程部分
const ipc = require('electron').ipcMain         // 跳转主进程

let newwin;
ipc.on('add', () => {

    mainWindow.hide(); // 隐藏原窗口

    newwin = new BrowserWindow({
        width: 450,
        height: 400,
        resizable: false,
        parent: mainWindow, 						  // win是主窗口[原窗口]
        webPreferences: {
            nodeIntegration: true,                    // 解决在渲染层的其他js文件中出现require无法使用的情况【node的方式引入模块】
            webSecurity: false						  // 跨域
        }
    })
    newwin.setMenu(null);							  // 取消原菜单
    newwin.loadURL(path.join('file:', __dirname, './page/index.html')); //new.html是新开窗口的渲染进程

    //newwin.webContents.openDevTools();

    newwin.on('closed', () => { newwin = null })

})
// 主进程部分
(3). 跳转窗口2——替换本窗口页面
/* 渲染进程部分 */
const ipc = require('electron').ipcRenderer // 用于跳转的
// 点击按钮替换主进程页面URL
document.getElementById('target').onclick = function () {
ipc.send('load-page', 'file://' + __dirname + './page/index.html');
}
/* 渲染进程部分 */
/* 主进程部分 */
const ipc = require('electron').ipcMain // 跳转主进程
// 不开新窗口/替换页面url
ipc.on('load-page', (event, arg) => {
mainWindow.loadURL(arg);
});
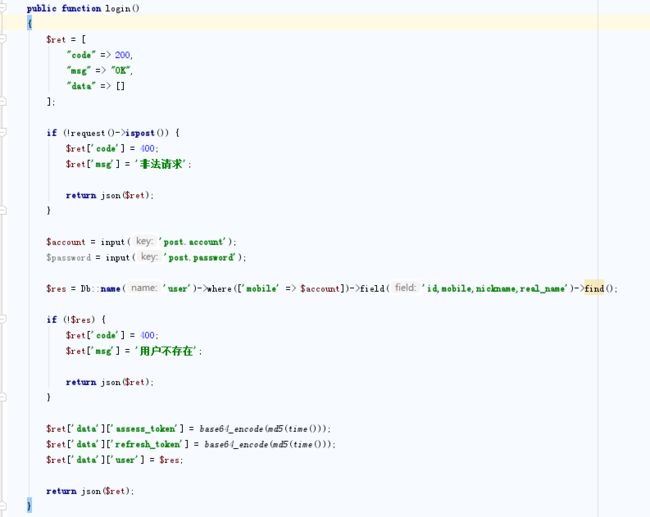
/* 主进程部分 */(4). 网络请求——GET,POST
/* get请求 */
function login_get(account, password) {
let url = 'http://www.mytp5.com/index/user/login?account=' + account + '&password='+password;
let request = net.request(url);
request.on('response', (response) => {
console.log(response.statusCode);
console.log(response.headers);
response.on('data', (chunk) => {
console.log(JSON.parse(chunk.toString()));
})
response.on('end', () => {
console.log('end');
})
})
request.end();
}
/* get请求 */
/* post请求 */
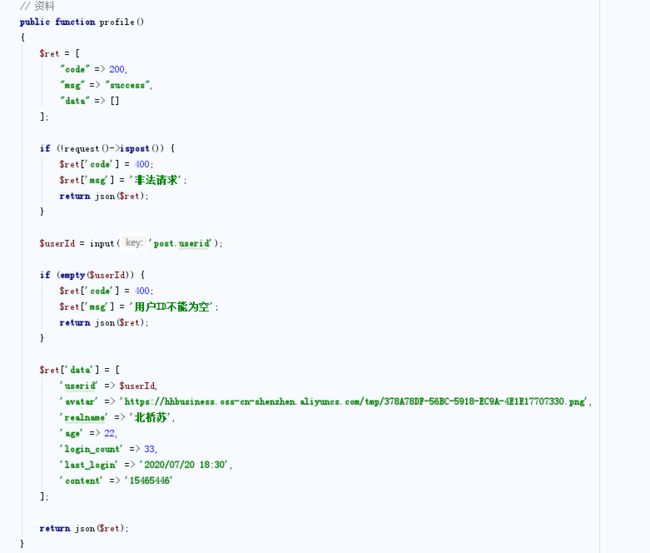
function profile_post(userid) {
let request = net.request({
method: 'POST', // 请求方式
protocol: 'http:', // 协议http / https
hostname: 'www.mytp5.com', // 请求的域名
port: 80, // 端口
path: '/index/user/profile' // 请求的地址
})
request.on('response', (response) => {
response.on('data', (chunk) => {
let res = JSON.parse(chunk.toString());
let appendString = ''; // 追加数据
if (res.code == 200) {
appendString = '头像: 
' +
' 姓名: ' + res.data.realname + '
' +
'年龄: ' + res.data.age + '
' +
'登录次数:' + res.data.login_count + '
' +
'最近登录:' + res.data.last_login + '
' +
'座右铭:' + res.data.content + '
';
} else {
appendString = '' + res.msg + '
';
}
// 这里执行时还遇到过页面追加中文乱码,解决方法js文件和html文件确定全部保存为utf8
document.getElementById('profile_content').innerHTML = appendString;
console.log(appendString);
})
response.on('end', () => {
//console.log('end');
})
})
// 请求参
let data = { userid: 11 };
// 搜索可以直接搜“node.js 的request-promise模块”找答案
request.write(require('querystring').stringify(data));
request.end();
}
/* post请求 */
(5). electron中使用jquery解决方法。
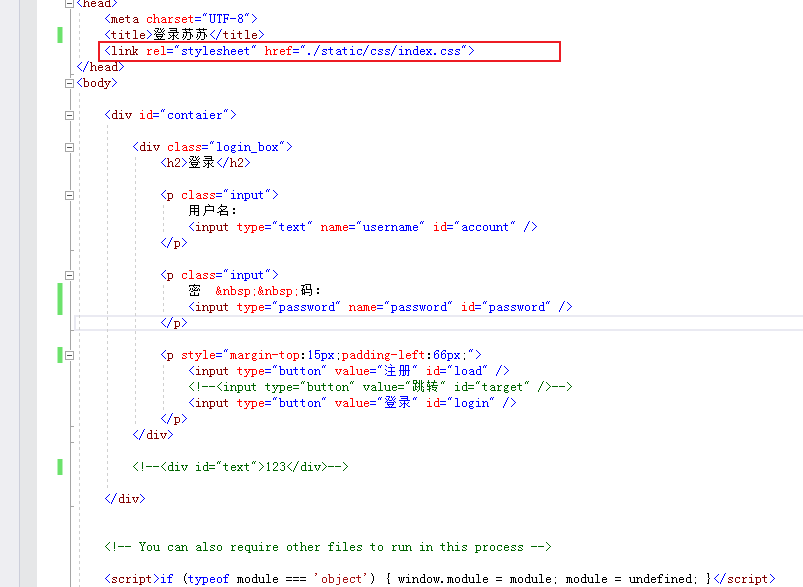
(6). electron中使用css或禁止调整窗口和关闭默认菜单。
(7). 后台接口部分,随便测试写的。
6. 文件打包
electron的打包会生成一个绿色软件安装目录,代码其实是完全暴露在软件的一个资源文件中。加密混淆网上也有其他解决方案,还一个是需要将绿色包打成exe安装包就需要使用Inno Setup Compiler的工具了。
(1).安装electron打包工具electron-packager
npm install electron-packager -g
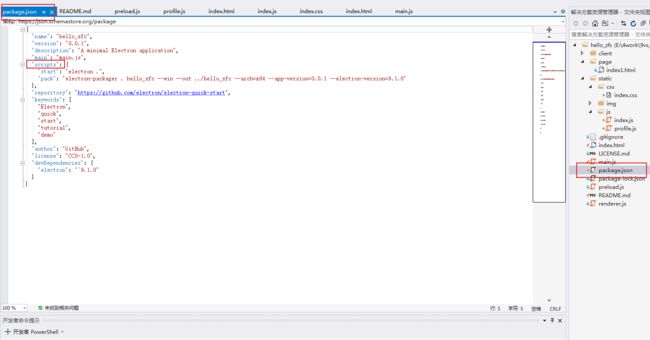
(2).配置打包命令
"scripts": {
"start": "electron .",
"pack": "electron-packager . myClient --win --out ../myClient --arch=x64 --app-version=0.0.1 --electron-version=2.0.0"
}
命令结构如下(根据实际情况修改):
“.”:需要打包的应用目录(即当前目录),
“myClient”:应用名称,
“--win”:打包平台(以Windows为例),
“--out ../myClient”:输出目录,
“--arch=64”:64位,
“--app-version=0.0.1”:应用版本,
“--electron-version=2.0.0”:electron版本
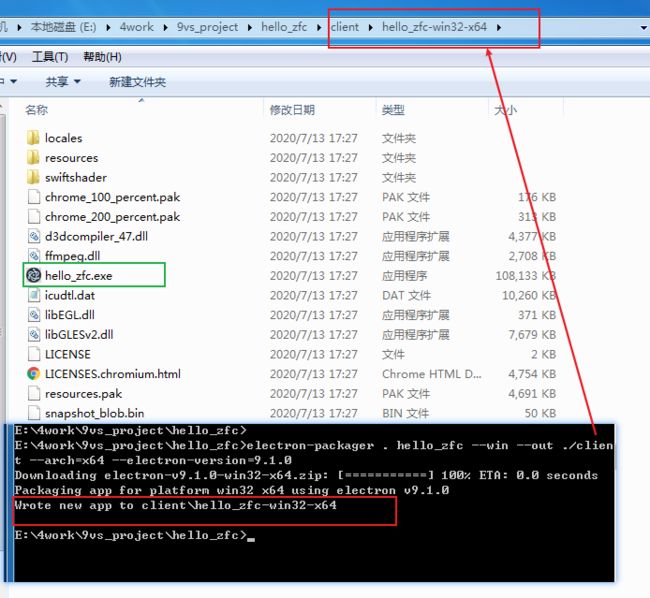
执行打包命令:
npm run pack
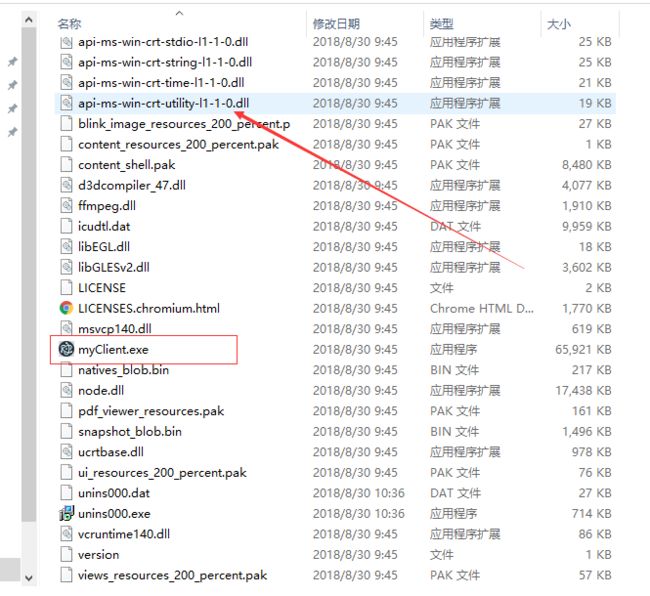
打包完成后,找到输出目录,打开打包完成后的文件夹,
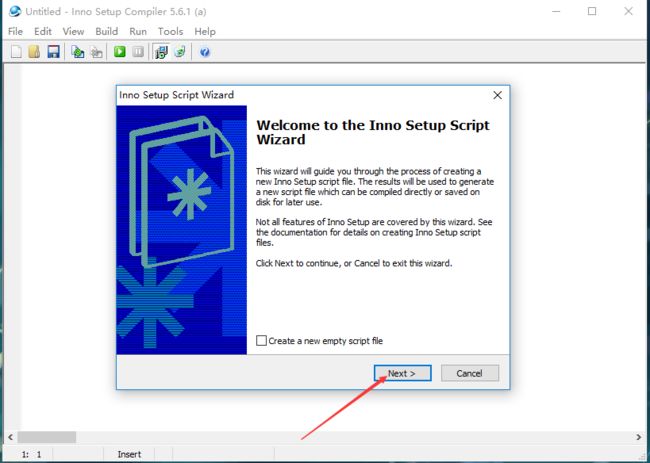
(3). 下载安装Inno Setup
安装完成以后打开Inno Setup客户端
a. file->new,新建脚本
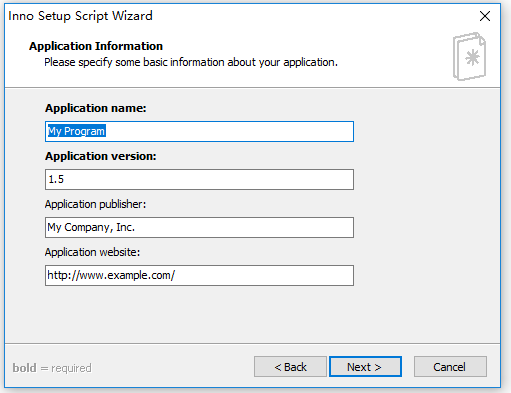
b.填写应用程序信息,黑体为必填项
Application name: 应用名称;
Application version:应用版本;
Application publisher:发行单位(可选);
Application websiter:应用程序网址(可选);
c.完善应用文件信息
Application destination base folder:应用程序目标基本文件夹,可默认也可自定义;
Application folder name:应用文件夹名称;
Allow user to change the application folder:勾选,允许用户自定义安装位置;
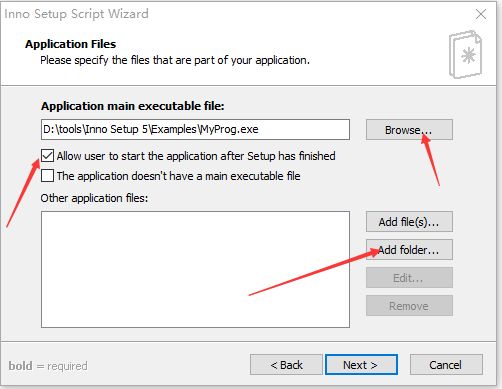
d.指定属于应用程序的文件
Application main executable file:应用程序主执行文件,即第8步中打包生成的.exe文件;
Allow user to start the application after Setup has finished:允许用户在安装完成后启动应用程序;
Add folders:添加应用程序文件,选择第8步中打包出的文件根目录即可,要把所有.dll文件及其他配置文件都包含进去;
点击添加之后可以看到:
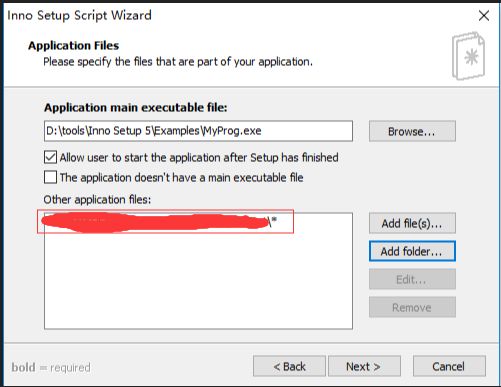
文件目录以自己的实际情况为准。
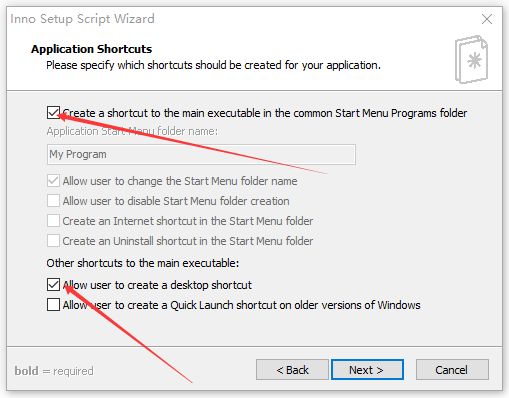
e.指定应用程序的快捷方式,勾选默认的两项即可,即“创建主执行程序的快捷方式到公共开始菜单程序文件夹”、“允许用户创建桌面快捷方式”
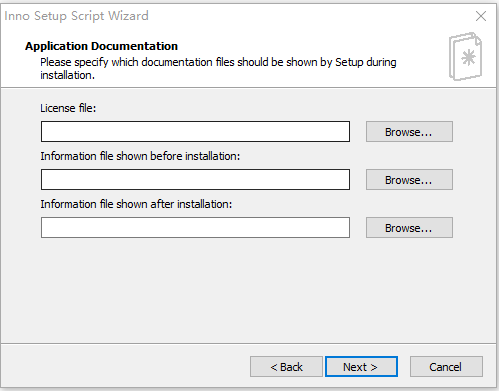
f.指定安装期间要显示的文档文件
License file:许可文件;
Information file shown before installation:安装之前显示信息文件;
Information file shown after installation:安装之后显示信息文件;
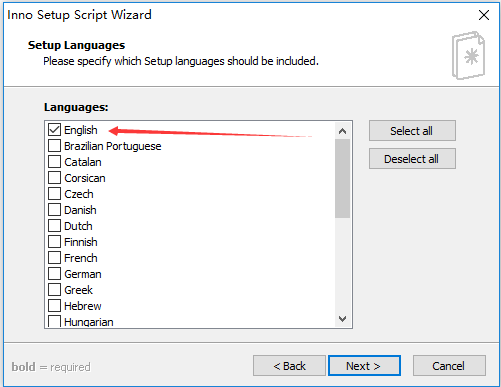
g.指定应包括的安装语言(汉化版的有简体中文选项),选择之后点击下一步
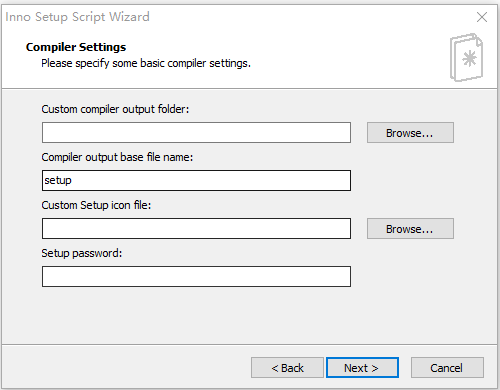
h.指定基本编译设置
Custom compiler output folder:自定义编译器输出文件夹,即最终编译出的安装包要放哪个位置;
Compiler output base file name:编辑器输出基本文件名,即安装包名称;
Custom Setup icon file:自定义安装程序图标文件;
Setup password:安装密码;
i.点击下一步
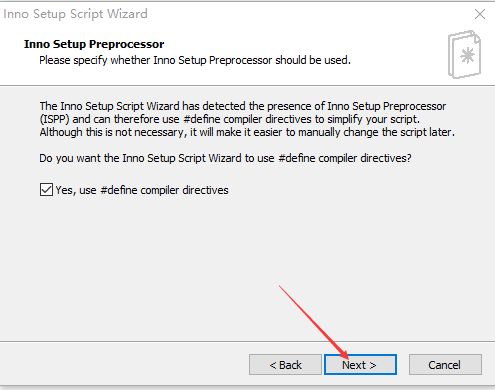
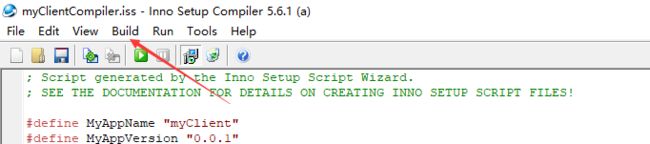
剩下的就是一路确定了,会询问你在编译之前要不要保存你的脚本(上面的配置步骤,最终会生成一个编译脚本文件),点击保存,先不要编译,打开脚本文件,新增配置项,修改注册表,设置开机自启动:

[Registry]
Root: HKLM; Subkey: "SOFTWARE\Microsoft\Windows\CurrentVersion\Run"; ValueType: string; ValueName: "testrun"; ValueData: "{app}\{#MyAppExeName}"
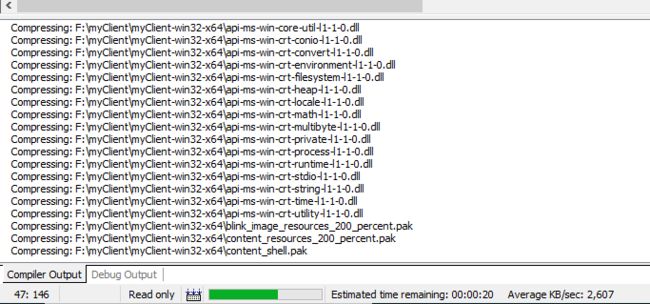
然后,执行编译文件:build->compile
关注以下公众号回复 “桌面应用”获取实例代码