零基础小白速通北邮操作系统课程设计(一)Linux内核编程输出HelloWorld
笔者学习Linux内核编程主要是为了对付北邮操作系统课设,但是由于完全不熟悉Linux系统,因此记录一些从0开始面向Linux Kernel Programing的一些知识点。
课程任务:开发一个内核模块或组件,完成如下功能:
- 读取
∼/targets文件。格式如下,
pid: 100, 234
prog: program, another program
file: a filename; another filename
- 记录
pid或prog进程访问了哪些文件和 IP 地址,记录file文件被哪些进程所访问。记录内容至少包括进程 pid 和程序名、日期时间、访问模式。 - 当进程或文件数量不大于 5 个,展示它们的关系,例如,进程之间的父子关系,某个文件被哪些进程并发访问。
- 支持记录最多 20 个进程,给出进程分别为 5,10,20 个情况下的模块性能,包括 CPU 和内存使用情况。
下期链接:(二)命令行输入模块变量&分模块编写
第一周 熟悉Linux Kernel Programming
一、在Linux中创建C文件
由于C++文件再Linux内核中过大,因此内核编程需要编写C文件。以下给出笔者在Linux中创建Hello.c文件时的步骤。
- 创建一个目录用来存放
Hello.c文件,该目录的地址为Desktop/lkp/test
mkdir -p lkp/test
- 进入子目录
cd lkp/test
- 通过vim编辑器创建
Hello.c文件(C++文件则.cpp结尾)。
vim Hello.c
- 在vim编辑器中,按
i进入编辑状态,输入如下代码后esc退出编辑状态,(在终端中复制为shift+ctrl+c,粘贴为shift+ctrl+v,其他同理)按x保存,输入:wq返回。
#include - 编译C文件
gcc Hello.c -o Hello。,如果编译成功,则跳转至步骤8。 - 编译过程中如果没有安装gcc的话,按照系统提示输入以下命令。如果编译成功,则跳转至步骤8。
sudo apt install gcc
- 在安装过程中如果出现如下报错
E: Failed to fetch http://security.ubuntu.com/ubuntu/pool/main/l/linux/linux-libc-dev_5.15.0-56.62_amd64.deb
则需要更换ubuntu软件镜像源。在Home中左侧任务栏找到并点击Other Locations,进入目录etc/apt并打开终端。
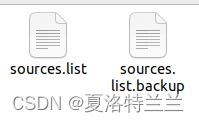
(1)备份source.list, 为防止运行错误需要修改文件名。
sudo cp sources.list sources.list.backup
(2)编辑source.list。
sudo vim sources.list
(3)在文件末尾添加如下内容
# 默认注释了源码镜像以提高 apt update 速度,如有需要可自行取消注释
deb https://mirrors.tuna.tsinghua.edu.cn/ubuntu/ xenial main restricted universe multiverse
# deb-src https://mirrors.tuna.tsinghua.edu.cn/ubuntu/ xenial main restricted universe multiverse
deb https://mirrors.tuna.tsinghua.edu.cn/ubuntu/ xenial-updates main restricted universe multiverse
# deb-src https://mirrors.tuna.tsinghua.edu.cn/ubuntu/ xenial-updates main restricted universe multiverse
deb https://mirrors.tuna.tsinghua.edu.cn/ubuntu/ xenial-backports main restricted universe multiverse
# deb-src https://mirrors.tuna.tsinghua.edu.cn/ubuntu/ xenial-backports main restricted universe multiverse
deb https://mirrors.tuna.tsinghua.edu.cn/ubuntu/ xenial-security main restricted universe multiverse
# deb-src https://mirrors.tuna.tsinghua.edu.cn/ubuntu/ xenial-security main restricted universe multiverse
(4)更新apt-get以安装gcc。
sudo apt-get update
(5)回到步骤5进行编译。
————————————————
版权声明:这一部分借鉴CSDN博主「无知亦乐」的原创文章,原文链接:https://blog.csdn.net/xiaoyujiale/article/details/125495607
- 在终端中输入
./Hello运行步骤5生成的可执行文件。
二、Linux 内核中的HelloWorld
关于Linux内核编程可以参照The Linux Kernel Module Programming Guide中的教程,以下部分也借鉴了其中的方法。
1、下载头文件
通过如下代码来更新apt-get并获取要下载的头文件版本。
sudo apt-get update
apt-cache search linux-headers-`uname -r`
以笔者的结果为例,如下。
linux-headers-5.15.0-56-generic - Linux kernel headers for version 5.15.0 on 64 bit x86 SMP
将下面代码中kmod 中的版本替换为你的虚拟机对应的版本即可。
sudo apt-get install kmod linux-headers-5.15.0-56-generic
2、创建c语言代码并
和上述过程一样,先创建一个~/develop/kernelhello-1文件夹
mkdir -p ~/develop/kernel/hello-1
cd ~/develop/kernel/hello-1
跳转到对应位置后输入vim hello-1.c创建C语言文件并开始编写,将如下代码粘贴。
/*
* hello-1.c - The simplest kernel module.
*/
#include 3、创建Makefile文件
终端输入vim Makefile创建Makefile文件并编辑,粘贴以下代码。
obj-m += hello-1.o
PWD := $(CURDIR)

all:
	make -C /lib/modules/$(shell uname -r)/build M=$(PWD) modules
clean:
	make -C /lib/modules/$(shell uname -r)/build M=$(PWD) clean
退出编辑后在终端输入make生成以下文件
Skipping BTF generation for /home/away/develop/kernel/hello-1/hello-2.ko due to unavailability of vmlinux
4、编译C语言代码
此时hello-1模块已经成功建立好了。使用命令行
sudo insmod hello-1.ko
sudo rmmod hello-1.ko
分别将模块加载和卸载到内核中,执行
sudo dmesg
可以查看输出如下。
[ 2193.659823] Hello world 1.
[ 2258.472297] Goodbye world 1.

