(笔记五)利用opencv进行图像几何转换
参考网站:https://docs.opencv.org/4.1.1/da/d6e/tutorial_py_geometric_transformations.html
(1)读取原始图像和标记图像
import cv2 as cv
import numpy as np
from matplotlib import pyplot as plt

path = r"D:\data\flower.jpg"
img = cv.imread(path)
img = cv.cvtColor(img, cv.COLOR_BGR2RGB)

# 拷贝图像
img1 = np.copy(img)
img1[100:105, 100:105, :] = [255, 0, 0]  # main point is (103, 103)
img1[100:105, 150:155, :] = [255, 0, 0]  # main point is (103, 153)
img1[150:155, 100:105, :] = [255, 0, 0]  # main point is (153, 103)
img1[150:155, 150:155, :] = [255, 0, 0]  # main point is (153, 153)
plt.figure(12)
plt.subplot(211), plt.imshow(img), plt.title('ori img'), plt.axis('off')
plt.subplot(212), plt.imshow(img1), plt.title('changed 4-points ori img'), plt.axis('off')
# plt.show()
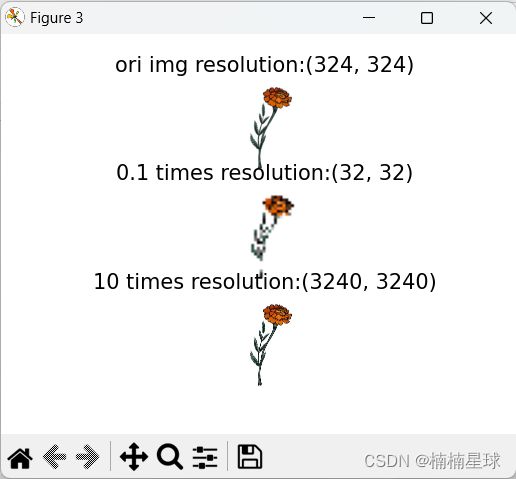
(2)改变图像分辨率
# 改变分辨率
img2 = np.copy(img)
# dsize = None,fx是x相对于原来的x要改变的比例,同理y
img3 = cv.resize(img2, None, fx=0.1, fy=0.1, interpolation=cv.INTER_CUBIC)
img4 = cv.resize(img2, None, fx=10, fy=10, interpolation=cv.INTER_CUBIC)
plt.figure(3)
plt.subplot(311), plt.imshow(img), plt.title('ori img resolution:' + str(img.shape[0:2])), plt.axis('off')
plt.subplot(312), plt.imshow(img3), plt.title('0.1 times resolution:' + str(img3.shape[0:2])), plt.axis('off')
plt.subplot(313), plt.imshow(img4), plt.title('10 times resolution:' + str(img4.shape[0:2])), plt.axis('off')
# plt.show()
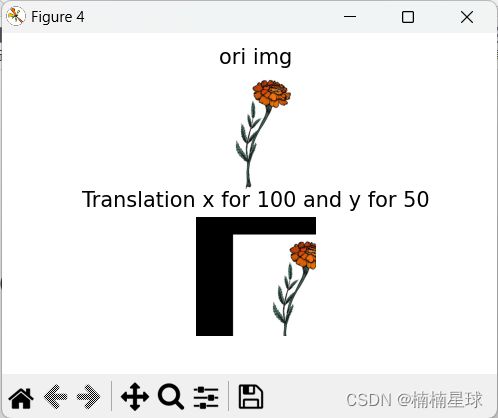
(3)平移图像
核心函数:cv.warpAffine(img, M, (col, row))
# 图像平移
img5 = np.copy(img)
row, col, sp = img5.shape
M1 = np.float32([[1, 0, 100], [0, 1, 50]])  # x平移100,y平移50
print('图像平移:')
print('图像平移所计算的转换矩阵为:', M1)
img6 = cv.warpAffine(img5, M1, (col, row))  # warpAffine函数利用转移矩阵平移
plt.figure(4)
plt.subplot(211), plt.imshow(img), plt.title('ori img'), plt.axis('off')
plt.subplot(212), plt.imshow(img6), plt.title('Translation x for 100 and y for 50'), plt.axis('off')
# plt.show()
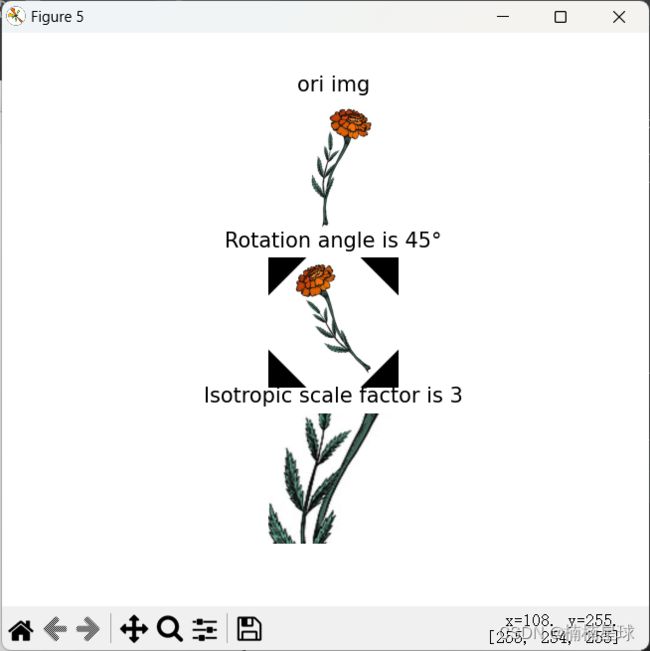
(4)图像旋转
核心函数:M=cv.getRotationMatrix2D(((旋转中心坐标(x,y)), 旋转角度, 相向尺度因子)
cv.warpAffine(img, M, (col, row))
# 图像旋转
img7 = np.copy(img)
# 图像中心,图像旋转角度,图像同向比例因子
M2 = cv.getRotationMatrix2D(((col - 1) / 2, (row - 1) / 2), 45, 1)
M3 = cv.getRotationMatrix2D(((col - 1) / 2, (row - 1) / 2), 0, 3)
print('图像旋转:')
print('旋转一的转换矩阵:', M2)
print('旋转二的转换矩阵:', M3)
img8 = cv.warpAffine(img7, M2, (col, row))
img9 = cv.warpAffine(img7, M3, (col, row))
plt.figure(5)
plt.subplot(311), plt.imshow(img), plt.title('ori img'), plt.axis('off')
plt.subplot(312), plt.imshow(img8), plt.title('Rotation angle is 45°'), plt.axis('off')
plt.subplot(313), plt.imshow(img9), plt.title('Isotropic scale factor is 3'), plt.axis('off')
# plt.show()
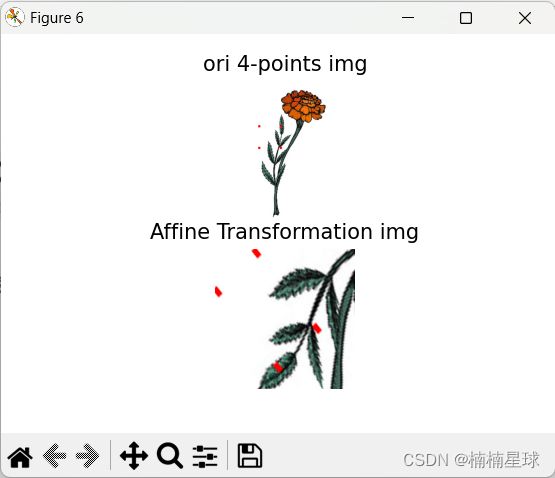
(5)图像仿射变换
核心函数:M=cv.getAffineTransform(原图三个点坐标, 转换图三个点坐标)
cv.warpAffine(img, M, (col, row))
# 仿射变换
img10 = np.copy(img1)
points_one = np.float32([[103, 103], [103, 153], [153, 103]])  # 原始图像三个点坐标
points_two = np.float32([[10, 100], [100, 10], [150, 275]])  # 仿射变换目标图像的三个点坐标
M4 = cv.getAffineTransform(points_one, points_two)
print('仿射变换:')
print('仿射变换的转换矩阵:', M4)
img11 = cv.warpAffine(img10, M4, (col, row))
plt.figure(6)
plt.subplot(211), plt.imshow(img1), plt.title('ori 4-points img'), plt.axis('off')
plt.subplot(212), plt.imshow(img11), plt.title('Affine Transformation img'), plt.axis('off')
# plt.show()
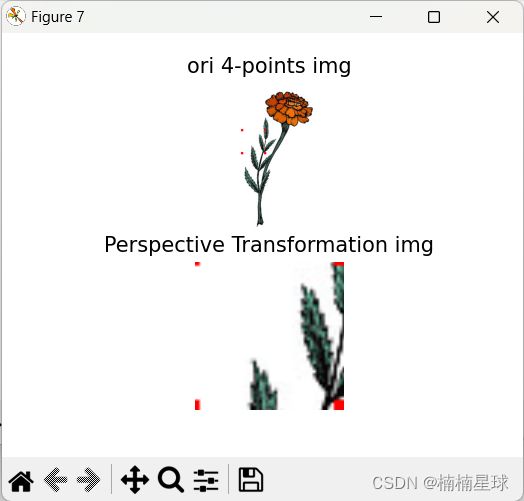
(6)图像透射变换
核心函数:M=cv.getPerspectiveTransform(原图四个点坐标,转换图像四个点坐标 )
cv.warpPerspective(img, M, (转换图长宽))
# 透射变换
img12 = np.copy(img1)
points_one_one = np.float32([[103, 103], [103, 153], [153, 103], [153, 153]])  # 原始图像四个点坐标
points_two_two = np.float32([[0, 0], [0, 300], [300, 0], [300, 300]])  # 透射变换目标图像的四个点坐标
M5 = cv.getPerspectiveTransform(points_one_one, points_two_two)
print('透射变换:')
print('透射变换的转换矩阵:', M5)
# img12为要转换的图像,M5为透射变换的转换矩阵,dsize为目标图像大小
img13 = cv.warpPerspective(img12, M5, (300, 300))
plt.figure(7)
plt.subplot(211), plt.imshow(img1), plt.title('ori 4-points img'), plt.axis('off')
plt.subplot(212), plt.imshow(img13), plt.title('Perspective Transformation img'), plt.axis('off')
plt.show()

