Element表格自动滚动
一. 基础用法
1.表格自动滚动

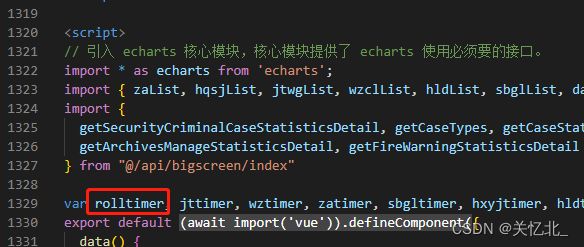
在页面上的表格(非弹框内)实现自动滚动 首先要给表格绑定上 ref
如果要添加鼠标滑进暂停 滑出继续滚动的话 则需要绑定 id
这里绑定 ref 之后写事件, rolltimer 记得声明 是因为页面销毁时清除的
autoRoll(stop) {
  if (stop) {
    clearInterval(rolltimer)
    return
  }
  // 这里的 tab 是上方 table 表格绑定的ref值
  const table = this.$refs.tab
  const divData = table.bodyWrapper
  rolltimer = setInterval(() => {
    // + 4 是每秒向下滑动 4个像素  这块可以自己更改
    divData.scrollTop += 4
    // 下方判断是滑动到底部就会自己回到最上方重新开始滑动  改动像素的话 一定要满足进入这个判断  否则滚动到底部就停了
    if (divData.clientHeight + divData.scrollTop == divData.scrollHeight) {
      divData.scrollTop = 0
    }
  }, 100)
},
运行的话 就在 mounted 中调用这个函数就行了,不能在 created 里,因为那个时候 dom 还没渲染完成
mounted(){
  this.autoRoll()
}
添加滑动进入暂停 滑出继续滚动
mounted(){
    this.autoRoll()
    // 此处 boxed 是 el-table 绑定的 id
    let box = document.getElementById("boxed")
    // 鼠标滑进暂停
    box.addEventListener("mouseenter", (e) => {
        // 此处函数里传什么值都会暂停
        this.autoRoll("stop")
    })
    // 鼠标滑出滚动
    box.addEventListener('mouseleave', (e) => {
        this.autoRoll()
    })
}
记得销毁
destroyed() {
    this.autoRoll('stop')
},
2. div 里自动滚动
也是一样 要绑定 ref 做滑进暂停滑出继续滚动就要绑定 id
        {{ textTitle }}


                    {{ item }}

结构:这里的 inBox 是上方图片右上角那一块滚动的区域 textTitle 是标题 就是此处的 2023年2学期周计划第12周
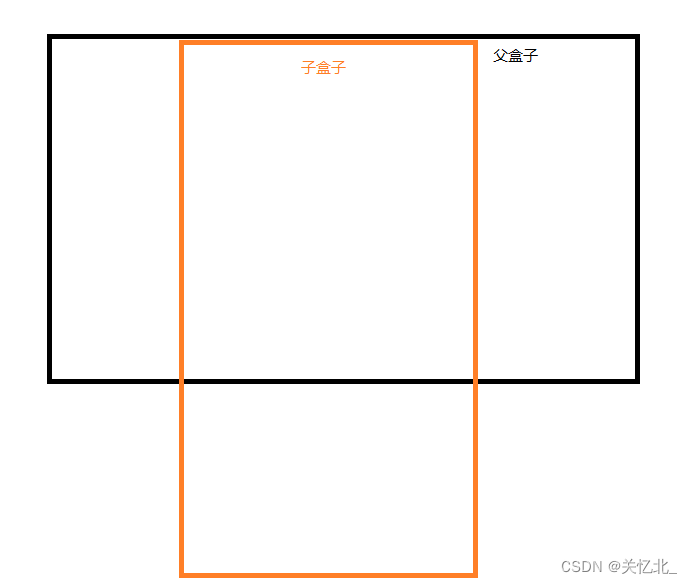
滑动的前提就是父盒子有高 然后又设置了 overflow-y:hidden 并且子盒子的高要大于父盒子的高 才能实现滑动
所以我们在父盒子上绑定第一个 ref 如上方代码所示 就是 ref="rightd" id="rightBox"
下方子盒子绑定第二个 ref 如上方代码所示 就是 ref="rightscorll"
还是老样子 先声明定时器 在写函数

auto(stop) {
    if (stop) {
        clearInterval(roll)
        return
    }
    const table = this.$refs.rightscorll
    const daay = this.$refs.rightd
    const divData = table
    roll = setInterval(() => {
        daay.scrollTop += 2
        if (daay.clientHeight + daay.scrollTop >= divData.scrollHeight + 1) {
            daay.scrollTop = 0
        }
    }, 100)
},
后续调用也是在 mounted 里
mounted() {
    this.auto()
}
添加滑进停止滚动滑出继续滚动
let rightBox = document.getElementById("rightBox")
rightBox.addEventListener("mouseover", (e) => {
    this.auto("stop")
})
rightBox.addEventListener('mouseout', (e) => {
    this.auto()
})
记得销毁
destroyed() {
    this.auto('stop')
},
二. 进阶用法
上方说的就是简单用法 如果是弹框中表格自动滚动前提是不加上鼠标滑进停止滚动 滑出继续滚动的情况 也是够用的 加上的话就又不一样了
就是会出现第一次打开弹框一切都很正常 但是关闭弹框再打开 表格滚动速度就会加快 再次会更快 而且停不下来的情况 这里我做出了改进
最上方那一块其他地方没变 就在触发 滑进滑出的监听事件哪里做了的更改
在data当中声明
swindleIndex: 0,
autonum: 1,
watch: {
'swindle': function () {
if (this.swindle) {
setTimeout(() => {
if (this.swindleIndex == 0) {
this.autoRoll()
let box = document.getElementById("boxed")
box.addEventListener("mouseenter", (e) => {
if ((this.autonum + 1) % 2 == 0) {
this.autoRoll("stop")
this.autonum++
}
})
box.addEventListener('mouseleave', (e) => {
if (this.autonum % 2 == 0) {
this.autoRoll()
this.autonum++
}
})
this.swindleIndex++
}
}, 300)
}
},
}监听弹框显示时 判断弹框是显示还是关闭
swindleIndex 是判断只要弹框第一次进入给 表格增加滑进滑出事件 否则的话每次打开弹框都会增加一个这样的事件就会乱掉 具体了解一下 dom2级 下方里面相当与做了一个类似防抖的东西
就是我必须触发完鼠标滑进暂停滚动事件之后 再触发滑出继续滚动事件
打完 收工 研究下一门技术