Axios源码解读
为何要阅读源码?用尤大的话:提升自己的行业竞争力。本文以Axios为例,带你一下学习源码。之所以选择Axios,因为它是一款非常流行的处理http请求的库,前端几乎人人在用,复杂度适中且有很好的注释解释。
姿势很重要
正式开始前,先普及一下源码阅读的正确姿势:
- 去
Githubfork一个你想学习的项目(如果你不知道Github,那你不用往下看了) - 在fork的项目下建一个学习分支
- 熟悉、理解项目结构
- 开始阅读(最好遵循一定的顺序)
- 在源代码里添加你自己的理解或标记
- 提交学习记录到学习分支
再有,就是要有一个平常的心态,没有人天生就是代码高手;同时要有正确的学习理念,那就是:
- 你是学习人家的设计思想,而不是全盘吸收,这玩意真不值得你全部背下来
- 对于那些非常巧妙的点,一定要重点关注,确保理解和吸收。
- 做一些练习巩固你的理解
好,你准备好了吗?进入正题!
先别慌,瞄一眼很重要
先看他的package.json文件,了解两个关键信息:
- 入口文件是
index.js - 打包命令是
npm run build
打开terminal键入命令npm install、npm run build
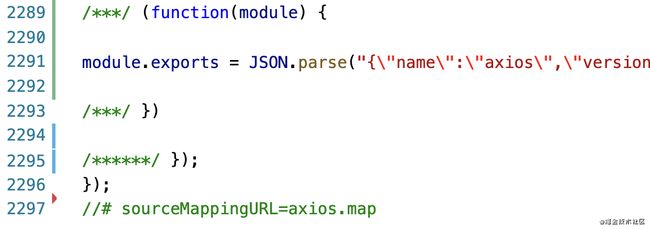
然后进入dist目录查看axios.js文件:

这是最后一行的行号–2297,其实我想说非压缩的版本只有2000多行,所以确实不复杂,我没骗你的!
其次再瞄一眼目录结构:
lib目录是存放源码的,像其他目录如 examples、sandbox、test等是起辅助作用的,dist是编译包的存放目录,所以我们主要关注的部分将是lib目录。
ok,瞄完了!
所以我们知道了应该从入口index.js开始,源码都在lib目录,不懂可以看注释文档或README.md
从入口文件开始
入口文件内容很直接:module.exports = require('./lib/axios');,所以间接入口是lib目录下的axios.js
内容也很简单:
- 创建一个Axios的实例
- 往上面挂几个方法或属性
- 返回该实例
'use strict';
//引入省略。。。

/**
 * Create an instance of Axios
 *
 * @param {Object} defaultConfig The default config for the instance
 * @return {Axios} A new instance of Axios
 */

// 创建Axios的一个实例的工厂函数
function createInstance(defaultConfig) {
  //省略了
}

// 执行示例创建
// Create the default instance to be exported
var axios = createInstance(defaults);

// 暴露自己的爹
axios.Axios = Axios;

// 把创建自己的工厂函数也暴露出去
axios.create = function create(instanceConfig) {
  return createInstance(mergeConfig(axios.defaults, instanceConfig));
};

// 挂载几个有用的方法
// 省略。。。
axios.xxx = yyyy;

// 最后导出,o了
module.exports = axios;

// Allow use of default import syntax in TypeScript
module.exports.default = axios;
现在,你明白了Axios实例是通过createInstance()创建的,可以通过axios.create()间接调用它,并且该库的作者非常贴心,默认为你创建好并导出了,你直接 require('axios')就可以使用了。
这样阅读是不是有点走马观花?我觉得一点也不,这里不值得我们下狠功夫!
请求是如何发起的?
我们知道,可以通过调用axios.get|post发起请求,然后处理返回的promise对象即可对响应的数据做处理。那么,这一切的背后原理是怎样的?
首先这些方法在哪里定义?Axios原型对象:
// lib/core/Axios.js
// 遍历方法数组给原型对象添加方法
utils.forEach(['delete', 'get', 'head', 'options'], function forEachMethodNoData(method) {
  /*eslint func-names:0*/
  Axios.prototype[method] = function(url, config) {
    return this.request(mergeConfig(config || {}, {
      method: method,
      url: url,
      data: (config || {}).data
    }));
  };
});

// 遍历方法数组给原型对象添加方法
utils.forEach(['post', 'put', 'patch'], function forEachMethodWithData(method) {
  /*eslint func-names:0*/
  Axios.prototype[method] = function(url, data, config) {
    return this.request(mergeConfig(config || {}, {
      method: method,
      url: url,
      data: data
    }));
  };
});
接着我们看到会返回this.request函数的调用返回值,它当然是一个promise对象:
/**
 * Dispatch a request
 *
 * @param {Object} config The config specific for this request (merged with this.defaults)
 */
Axios.prototype.request = function request(config) {

  // 省略了无数行,这里他们不重要

  try {
    //创建请求的promsie对象
    promise = dispatchRequest(newConfig);
  } catch (error) {
    return Promise.reject(error);
  }

  // 省略了无数行,这里他们不重要

  //返回一个promise对象
  return promise;
};
所以我们断定dispatchRequest这哥们是个关键角色:
/**
 * Dispatch a request to the server using the configured adapter.
 *
 * @param {object} config The config that is to be used for the request
 * @returns {Promise} The Promise to be fulfilled
 */
module.exports = function dispatchRequest(config) {

  // 省略了无数行

  // 获取adapter
  var adapter = config.adapter || defaults.adapter;

  return adapter(config).then(function onAdapterResolution(response) {

    // 转换相应数据的,这里不重要,省略

    return response;
  }, function onAdapterRejection(reason) {

    // 转换相应数据的,这里不重要,省略

    return Promise.reject(reason);
  });
}
可以基本断定直接负责请求的就是这个adapter,由于axios是一个可以运行在web和node里的http client,所以这里的adapter也分web和node两种,分别对应的文件是adapters/xhr.js和adapters/http.js:
 // lib/defaults.js

 if (typeof XMLHttpRequest !== 'undefined') {
    // For browsers use XHR adapter
    adapter = require('./adapters/xhr');
  } else if (typeof process !== 'undefined' && Object.prototype.toString.call(process) === '[object process]') {
    // For node use HTTP adapter
    adapter = require('./adapters/http');
  }
所以我们的目光又来到了xhr.js:
function xhrAdapter(config) {
  return new Promise(function dispatchXhrRequest(resolve, reject) {
    var request = new XMLHttpRequest();

    function onloadend() {
      if (!request) {
        return;
      }
      // 省略。。。

      //将resolve和reject托管给settle函数处理
      settle(resolve, reject, response);

      // Clean up request
      request = null;
    }

    if ('onloadend' in request) {
      // Use onloadend if available
      request.onloadend = onloadend;
    } else {
      // Listen for ready state to emulate onloadend
      request.onreadystatechange = function handleLoad() {
        if (!request || request.readyState !== 4) {
          return;
        }
        // 省略了一部分处理边界的代码
        setTimeout(onloadend);
      };
    }
    request.onabort = function(){
      // 省略
    }
    request.onerror = function(){
      // 省略
    }
    request.onerror = function(){
      // 省略
    }
  })

}
可以看到在xhr的onload事件处理函数里,promise的resolve和reject函数会被传递给settle函数,由它来决定resolve、reject的调用。这俩函数如果不被调用,任你怎么axios.get(...).then()都不会得到预期的效果。
相信settle.js应该没几行代码了:
module.exports = function settle(resolve, reject, response) {
 // 对响应做校验,通过则调用resolve 否则reject
  if (!response.status || !validateStatus || validateStatus(response.status)) {
    resolve(response);
  } else {
    reject(createError(
      'Request failed with status code ' + response.status,
      response.config,
      null,
      response.request,
      response
    ));
  }
};
好了,流程看完了,再来梳理一遍http请求的执行栈(流程),以get方法为例:
这个部分精彩地方不多,但流程的设计很重要,你只需要知道请求是怎么发出来的,又怎么如何把promise给resolve的就行了。
数据转换与请求拦截
相信大家对数据转换应该不陌生,Axios给出了这么一段代码示例:
{
  transformRequest: [function (data, headers) {
    // Do whatever you want to transform the data
    return data;
  }],

  // `transformResponse` allows changes to the response data to be made before
  // it is passed to then/catch
  transformResponse: [function (data) {
    // Do whatever you want to transform the data
    return data;
  }],
}
一个用来转换请求发送前的数据或请求头,一个用来转换收到的响应数据。
接下来我们分析一下背后的原理和执行顺序!
还记得dispatchRequest()吗?就是那个关键的哥们,这是我们前面省略的代码:
module.exports = function dispatchRequest(config) {
  // 省略。。。
  // 处理请求发送前的数据
  config.data = transformData.call(
    config,
    config.data,
    config.headers,
    config.transformRequest
  );
  // 省略。。。

  // 这里的adapter 只有被resolve后才会运行then
  return adapter(config).then(function onAdapterResolution(response) {
    throwIfCancellationRequested(config);

    // 处理响应后的数据
    response.data = transformData.call(
      config,
      response.data,
      response.headers,
      config.transformResponse
    );
  })
可以看到它调用transformData(),几乎可以断定它就是遍历、调用config里的转换函数数组,果不其然:
module.exports = function transformData(data, headers, fns) {
  var context = this || defaults;
  /*eslint no-param-reassign:0*/
  utils.forEach(fns, function transform(fn) {
    data = fn.call(context, data, headers);
  });
  return data;
};
两种数据转换:一个是在XHRsend之前,一个是在promise resolve后。
还有一个类似的概念叫请求拦截,有两个:一个请求拦截,另一个响应拦截,这家伙藏在Axios.prototype.request里:
//省略。。。
this.interceptors.response.forEach(function pushResponseInterceptors(interceptor) {
    responseInterceptorChain.push(interceptor.fulfilled, interceptor.rejected);
});
//省略。。。
其实啊,这个概念很简单:就是在每个Axios示例维护了两个数组:分别存放请求拦截和响应拦截的函数,每次request()时从上面两个数组里收集两个拦截链:requestInterceptorChain、responseInterceptorChain:
  // 请求拦截
  while (requestInterceptorChain.length) {
    var onFulfilled = requestInterceptorChain.shift();
    var onRejected = requestInterceptorChain.shift();
    try {
      newConfig = onFulfilled(newConfig);
    } catch (error) {
      onRejected(error);
      break;
    }
  }

  try {
    //开始请求
    promise = dispatchRequest(newConfig);
  } catch (error) {
    return Promise.reject(error);
  }
  // 响应拦截
  while (responseInterceptorChain.length) {
    // 这段代码蛮精致的
    promise = promise.then(responseInterceptorChain.shift(), responseInterceptorChain.shift());
  }
流程应该很清楚了,接下来我想问问个问题:
请求、响应数据转换与请求、响应拦截的执行顺序是?
没错,你答对了:
因为数据转换是在dispatchRequest里负责的。
如何取消请求?
再来谈谈请求的取消,主代码在cancel/CancelToken.js里:
function CancelToken(executor) {
  // 省略。。。
  var resolvePromise;
  this.promise = new Promise(function promiseExecutor(resolve) {
    resolvePromise = resolve;
  });

  var token = this;
  executor(function cancel(message) {
    if (token.reason) {
      // Cancellation has already been requested
      return;
    }

    token.reason = new Cancel(message);
    resolvePromise(token.reason);
  });
}
上诉代码其实就是内部声明一个promise挂到实例的promise属性,将内部的cancel函数传到外部供调用,结果就是resolve 内部的promise
为了方便作者还提供了一个工厂函数:
CancelToken.source = function source() {
  var cancel;
  var token = new CancelToken(function executor(c) {
    cancel = c;
  });
  return {
    token: token,
    cancel: cancel
  };
};
官方也提供了很多使用例子:
const CancelToken = axios.CancelToken;
let cancel;

axios.get('/user/12345', {
  cancelToken: new CancelToken(function executor(c) {
    // 这里保存函数c的引用。这家伙就是用来resolve cancel.promsie的
    cancel = c;
  })
});

// cancel the request
cancel();
注意,这里的取消有两种情况:
- canceltoken在请求发出前就已经被resolve了(调用了
cancel()),请求会报错,不会发起请求:
function dispatchRequest(config) {
  //判断cancleToken 如果已经取消则 throw error,后面的代码不会执行
  throwIfCancellationRequested(config);

  //省略。。

  //发起请求
  var adapter = config.adapter || defaults.adapter;

  return adapter(config).then(function onAdapterResolution(response) {
    // 省略。。
  })
}
- 请求发出后,响应到达客户端之前取消了。这个请求会达到
.catch里
//xhr.js
module.exports = function xhrAdapter(config) {
    if (config.cancelToken) {
      config.cancelToken.promise.then(function onCanceled(cancel) {
        // 省略。。。

        //reject the promise
        reject(cancel);
      });
    }
}
最后
读者朋友,如果你看到了这里,那么恭喜你,你肯定是理解了Axios了,如果不理解你是不会读到这里的。
当然,如果本文对你有所帮助,感谢动手点个赞;
还有,如果你看了本文萌生了看axios或其他源码的冲动,请一定留言让我知道,我们是同道中人,让我们共同进步


