关于colmap+nerf对数据集进行预处理的使用总结
前言
零零碎碎的东西太多,有必要统一记录一下,因为是回忆步骤,所以可能有不准确的地方
Colmap的使用
1. 下载
下载链接:colmap,下载之后直接解压就能使用,点击COLMAP.bat。

2. colmap
这里到处都是很详细的操作步骤,可以自行搜索,顺序是:
File→New project:选择一个路径存放数据库,生成database.db
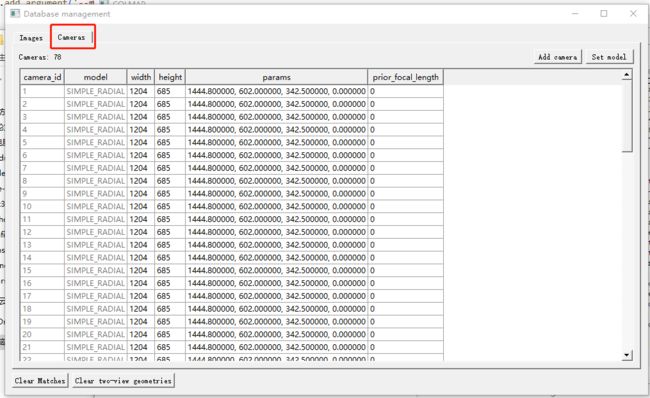
Processing→Feature extraction:提取图像特征。提取特征后,可以选择要不要修改相机内参,如果你的相机内参已知,可以使用如下链接修改相机内参,此处记录方法名为blender_camera2colmap.py,修改之后选择Processing→Database management→camera看到内参修改成功。

Processing→Feature matching:匹配图像特征
Reconstraction→Start reconstruction(这里不要选Auto):稀疏重建
重建后 File→Export model得到文件,参考链接,此处我与他的命名方式保持一致,获得的目录如下:
+── E:\test\scene78-3
│   +── images			#用于重建的图像
│   +── sparse
	|	+── 0
		|	+── cameras.bin
		|	+── images.bin
		|	+── points3Ds.bin
		|	+── project.ini
│   +── dataset.db
此处用于nerf预处理的colmap已经结束,但是如果想用于稠密重建或者其他问题的还需额外的步骤,以下放出我的一些应用:
应用1 稠密重建
经历完上述步骤后:
Reconstraction→Dense reconstruction
- 选择路径
- 去畸变

- 立体匹配
- 融合,融合后可以获得fused.ply,应该是点云可视化文件
- Poisson后获得mesh文件meshed-poisson.ply
- 最后一个Delaunay应该是几何模型?反正不太好看meshed-delaunay.ply
从左到右依次是fusion, poission, delaunay


此处再列一下最终获得的目录,可能不完全准确,但大概是这样
+── images # 对应重建图片数据集
│   +── image1.jpg
│   +── image2.jpg
│   +── ...
+── sparse # 稀疏重建结果
│   +── 0
│   │   +── cameras.bin
│   │   +── images.bin
│   │   +── points3D.bin
│   │   +── 对应的.txt  #如果保存了的话
│   +── ...
+── dense # 稠密重建结果
│   +── 0
│   │   +── images # 去畸变图像
│   │   +── sparse
│   │   +── stereo
│   │   +── fused.ply # 稠密点云
│   │   +── meshed-poisson.ply
│   │   +── meshed-delaunay.ply
│   +── ...
+── database.db # 图像提取的特征相关信息
+── project.ini # 项目信息文件
应用2:获得外参文件和深度图
外参文件: File→txt,这时就可以获取一些参数文件,这一步在稠密重建前就可以用
使用的时候要注意两点:这里的外参是w2c,坐标轴的转换
cameras.txt 内参
images.txt 外参(轨迹数据)
Points3D.txt
每幅图像对应的外参有两行,但是我只需要用到第一行的七元组,所以使用如下代码提取外参,文件名storetxt2othertxt.py
# 从一个.txt文件读取并保存到另一个.txt文件中
import os
import numpy as np

path1 = 'E:/test/dense_pc/images.txt'
path2 = 'E:/test/dense_pc/output_file.txt'

# 读取相机外参文件
with open(path1, 'r') as f_in, open(path2, 'w') as f_out:
    for num,line in enumerate(f_in):
        if num<4:
            f_out.write(line)
        else:
            if num%2!=0:
                continue
            else:
                f_out.write(line)
深度图: 在稠密重建后(stereo)获得深度图,这时在stereo文件夹下有两种深度图(我也不知道哪种好),任选一种放在目标文件夹F:/code1/nice-slam-master/Datasets/dist3.6-2/depth_colmap下的代码。
import shutil
import os
import re
from ntpath import join


def sorted_alphanum(file_list_ordered):
    convert = lambda text: int(text) if text.isdigit() else text
    alphanum_key = lambda key: [convert(c) for c in re.split('([0-9]+)', key)]
    return sorted(file_list_ordered, key=alphanum_key)

def get_file_list(path, extension=None,a=None):
    if extension is None:
        file_list = [path + f for f in os.listdir(path) if os.path.isfile(join(path, f))]
    else:
        file_list = [
            path + f
            for f in os.listdir(path)
            if os.path.isfile(os.path.join(path, f)) and os.path.splitext(f)[1] == extension and a in os.path.splitext(f)[0]
        ]

    file_list = sorted_alphanum(file_list)
    return file_list


depth_image_path = get_file_list(os.path.join('E:/test/dense_pc_78/stereo/depth_maps/'),
                                     extension=".bin",a='geometric')  # geometric  photometric

print(depth_image_path)

for i in range(len(depth_image_path)):
    c = '%s'%(depth_image_path[i][38:])

    shutil.copyfile(depth_image_path[i],
                    'F:/code1/nice-slam-master/Datasets/dist3.6-2/depth_colmap/%s'%c)
应用3:验证colmap的外参到底是什么,有多准确
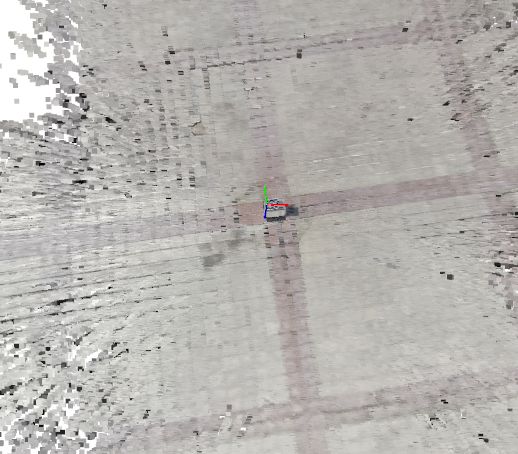
很庆幸无意间发现colmap生成的外参是w2c,此处本来也想用来验证自己的深度图有多大误差,使用show_cube_with_extrinsic.py文件选择几张位姿差距较大的图像,重建场景,用到open3d包
使用LLFF处理为NeRF能用的格式
依旧参考链接 下载LLFF代码并配置环境,这里不要听他的使用python3.8,因为没有tensorflow1.*版本,我使用的python3.6。接着把你刚刚生成的文件copy到llff文件夹下(图方便),激活环境后就运行如下命令,其中cube就是scene78-3,下面包含了images和sparse等。
python imgs2poses.py cube
获得如下结果:

于是就能在该路径下看到:poses_bounds.npy文件,把它移动到nerf目录下并修改nerf配置文件,还是参考那个链接。


