SpringBoot 整合 ActiveMQ、RabbitMQ(direct、topic模式)、RocketMQ详解代码示例
- SpringBoot 整合 ActiveMQ、RabbitMQ(direct、topic模式)、RocketMQ详解代码示例
概念:
-
消息分为:
1、同步消息
2、异步消息 -
处理消息的角色分为:
1、消息发送方
2、消息接收方 -
企业级应用中广泛使用的三种异步消息传递技术:
1、JMS(Java Message Service):一种规范,类似于JDBC规范,提供了与消息服务相关的API接口。
2、AMQP(advanced message queuing protocol):一种协议(高级消息队列协议,也是消息代理规范),规范了网络交换的数据格式,兼容JMS。用于不同语言开发的系统之间参照此协议来通信。优点是:具有跨平台性,服务器供应商,生产者,消费者可以使用不同的语言来实现。
3、MQTT(Message Queueing Telemetry Transport):消息队列遥测传输,专为小设备设计,是物联网(IOT)生态系统中主要成分之一。
- JMS介绍:
-
JMS消息模型:
1、peer-to-peer:点对点模型,消息发送到一个队列中,队列保存消息。队列的消息只能被一个消费者消费或超时。
2、publish-subscribe:发布订阅模型,消息可以被多个消费者消费,生产者和消费者完全独立,不需要感知对方的存在。 -
JMS消息种类:
1、TextMessage
2、MapMessage
3、ByteMessage(常用)
4、StreamMessage
5、ObjectMessage
6、Message(只有消息头和属性) -
实现JMS规范的消息中间件:
1、ActiveMQ
2、Redis
3、HornetMQ
4、RabbitMQ
5、RocketMQ(没有完全遵守JMS规范)
- AMQP 介绍:
-
AMQP消息模型:
1、direct exchange(常用)
2、fanout exchange
3、topic exchange
4、headers exchange
5、system exchange -
AMQP消息种类:
byte[]:字节数组,统一了格式。解决了跨平台的问题。 -
实现AMQP协议的消息中间件:
1、RabbitMQ
2、StormMQ
3、RocketMQ
SpringBoot 整合 ActiveMQ:
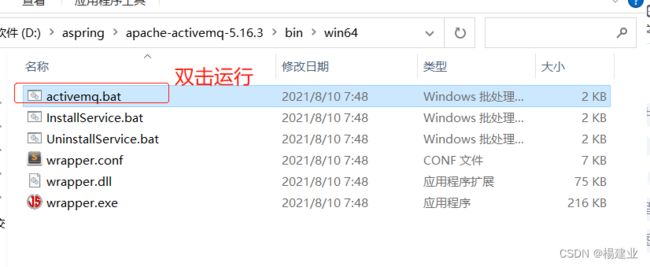
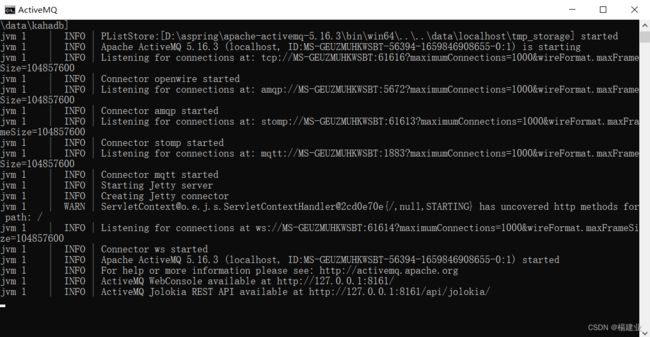
- 下载安装ActiveMQ:
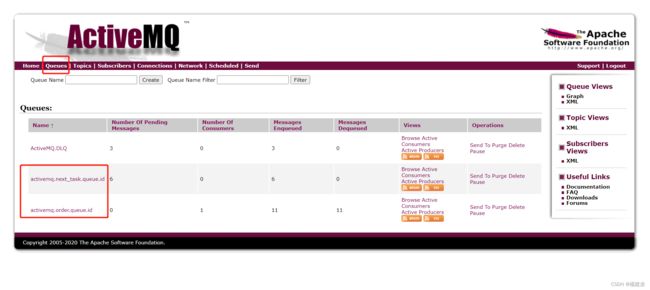
- 访问 ActiveMQ 控制台:
- 引入相关依赖:
<dependency>
  <groupId>org.springframework.bootgroupId>
    <artifactId>spring-boot-starter-webartifactId>
dependency>
<dependency>
    <groupId>org.springframework.bootgroupId>
    <artifactId>spring-boot-starter-activemqartifactId>
dependency>
<dependency>
    <groupId>org.projectlombokgroupId>
    <artifactId>lombokartifactId>
    <optional>trueoptional>
dependency>
<dependency>
    <groupId>org.springframework.bootgroupId>
    <artifactId>spring-boot-starter-testartifactId>
    <scope>testscope>
dependency>
- 配置yml:
spring:
  activemq:
    # activemq 服务的连接地址
    broker-url: tcp://localhost:61616
  jms:
    # 此属性设置为 true 时,使用的是JMS消息模型中的发布订阅消息模型
    pub-sub-domain: true
- 模拟业务场景:用户下订单,发送短信提醒用户。
- 业务层订单业务代码示例(往消息中间件中存放消息):
// OrderService.java
public interface OrderService {

    void order(String id);

}
// OrderServiceImpl.java
import com.example.springboot.service.MessageService;
import com.example.springboot.service.OrderService;
import org.springframework.beans.factory.annotation.Autowired;
import org.springframework.stereotype.Service;

@Service
public class OrderServiceImpl implements OrderService {

    @Autowired
    private MessageService ms;

    @Override
    public void order(String id) {
        // 此处简单展示:省略中间过程各种服务的调用,处理各种业务i=
        System.out.println("订单处理开始...");

        // 发送短信消息
        ms.sendMessage(id);

        System.out.println("订单处理结束...");
        System.out.println("------------------------");

    }
}
- 业务层短信业务代码示例(从中间件中读取消息):
// MessageService.java
public interface MessageService {

    void sendMessage(String id);

    String receiveMessage();

}
// MessageServiceActiveMQImpl.java
import com.example.springboot.service.MessageService;
import org.springframework.beans.factory.annotation.Autowired;
import org.springframework.jms.core.JmsMessagingTemplate;
import org.springframework.jms.core.JmsTemplate;
import org.springframework.stereotype.Service;

@Service
public class MessageServiceActiveMQImpl implements MessageService {

    @Autowired
    private JmsMessagingTemplate messagingTemplate;

    @Override
    public void sendMessage(String id) {
        System.out.println("待发送的短信已进入消息队列,id:" + id);
        messagingTemplate.convertAndSend("activemq.order.queue.id", id);
    }

    @Override
    public String receiveMessage() {
        String id = messagingTemplate.receiveAndConvert("activemq.order.queue.id", String.class);
        System.out.println("已完成短信发送业务,id:" + id);
        return id;
    }
}
- 监听器(当消息队列中有消息时,自动消费消息):
import org.springframework.jms.annotation.JmsListener;
import org.springframework.messaging.handler.annotation.SendTo;
import org.springframework.stereotype.Component;

@Component
public class MessageListener {

    // 自动执行中间件中的消息消费,当监听到中间件中有消息时,自动消费
    // 参数 id 的类型为放到消息中的消息类型
    @JmsListener(destination = "activemq.order.queue.id")
    // @SendTo 注解将 ”activemq.order.queue.id“ 这个队列中的消息处理完后,
    // 将receive方法的返回值放到物流(logistics)队列中,以此来实现消息的自动流转。
    // 然后可以再定义物流队列的监听器,看实际需求
    @SendTo("activemq.logistics.queue.id")
    public String receive(String id){
        System.out.println("已完成短信发送业务,id:" + id);
        return id;
    }

}
- 通过 Postman 测试向消息队列中发送消息:
订单处理开始...
待发送的短信已进入消息队列,id:1
已完成短信发送业务,id:1
订单处理结束...
------------------------
订单处理开始...
待发送的短信已进入消息队列,id:2
已完成短信发送业务,id:2
订单处理结束...
------------------------
订单处理开始...
待发送的短信已进入消息队列,id:3
已完成短信发送业务,id:3
订单处理结束...
------------------------
- 通过 ActiveMQ 的控制台可以查看消息队列中消息的消费情况
SpringBoot 整合 RabbitMQ(direct模式):
- 安装RabbitMQ
-
RabbitMQ 基于 Erlang 语言编写,需要安装 Erlang。
下载地址:
链接 -
RabbitMQ下载地址:
https://github.com/rabbitmq/rabbitmq-server/releases/download/v3.10.7/rabbitmq-server-3.10.7.exe -
两个安装完后重启电脑。
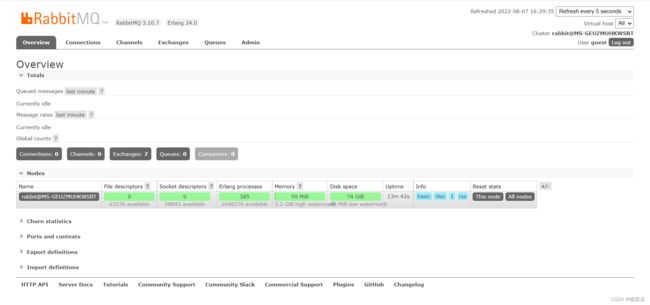
- 启动RabbitMQ
- 代码示例:
- 工程目录结构如下:
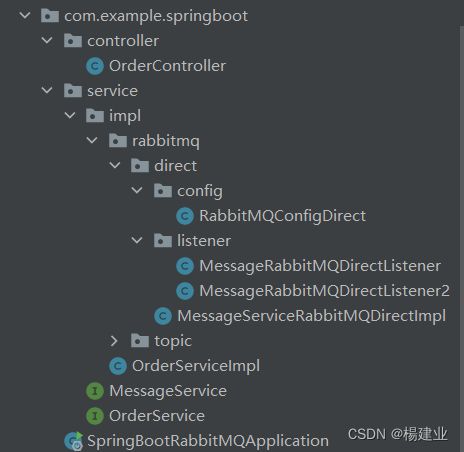
- 其中业务层 OrderService.java、OrderServiceImpl.java、MessageService.java、OrderController.java 参照 整合 ActiveMQ 章节,代码未改变。
- 配置类:
// RabbitMQConfigDirect.java
import org.springframework.amqp.core.Binding;
import org.springframework.amqp.core.BindingBuilder;
import org.springframework.amqp.core.DirectExchange;
import org.springframework.amqp.core.Queue;
import org.springframework.context.annotation.Bean;
import org.springframework.context.annotation.Configuration;

@Configuration
public class RabbitMQConfigDirect {

    @Bean
    // 定义队列
    public Queue directQueue(){
        // 第二个参数:消息队列是否持久化
        // 第三个参数:当前消息队列是否当前连接专用
        // 第四个参数:当生产者消费者都不再使用此队列,是否删除此队列
        return new Queue("direct_queue", true, false, false);
    }

    @Bean
    // 定义交换机,一个交换机可以绑定多个队列
    public DirectExchange directExchange(){
        return new DirectExchange("direct_exchange");
    }

    @Bean
    // 定义路由器
    public Binding directBinding(){
        return BindingBuilder.bind(directQueue()).to(directExchange()).with("direct");

    }

}
- 业务层 MessageService 的实现类:
// MessageServiceRabbitMQDirectImpl.java
import com.example.springboot.service.MessageService;
import org.springframework.amqp.core.AmqpTemplate;
import org.springframework.beans.factory.annotation.Autowired;
import org.springframework.stereotype.Service;

@Service
public class MessageServiceRabbitMQDirectImpl implements MessageService {

    @Autowired
    private AmqpTemplate amqpTemplate;

    @Override
    public void sendMessage(String id) {
        amqpTemplate.convertAndSend("direct_exchange", "direct", id);
        System.out.println("(Rabbitmq direct)待发送的短信已进入消息队列,id:" + id);
    }

    @Override
    public String receiveMessage() {
        return null;
    }
}
- 监听器:
// MessageRabbitMQDirectListener.java
import org.springframework.amqp.rabbit.annotation.RabbitListener;
import org.springframework.context.annotation.Configuration;

@Configuration
public class MessageRabbitMQDirectListener {

    @RabbitListener(queues = "direct_queue")
    public void receive(String id){
        System.out.println("(Rabbitmq direct)已完成短信发送业务,id:" + id);
    }

}
// MessageRabbitMQDirectListener2.java
import org.springframework.amqp.rabbit.annotation.RabbitListener;
import org.springframework.context.annotation.Configuration;

@Configuration
public class MessageRabbitMQDirectListener2 {

    @RabbitListener(queues = "direct_queue")
    public void receive(String id){
        System.out.println("(Rabbitmq direct 2)已完成短信发送业务,id:" + id);
    }

}
- 监听同一队列的监听器在消费消息时,会轮询消费,通过 Postman 发送1、2、3、4、5共5个请求测试如下:
- IDEA 控制台输出如下:
订单处理开始...
(Rabbitmq direct)待发送的短信已进入消息队列,id:1
订单处理结束...
------------------------
(Rabbitmq direct)已完成短信发送业务,id:1


订单处理开始...
(Rabbitmq direct)待发送的短信已进入消息队列,id:2
订单处理结束...
------------------------
(Rabbitmq direct 2)已完成短信发送业务,id:2


订单处理开始...
(Rabbitmq direct)待发送的短信已进入消息队列,id:3
订单处理结束...
------------------------
(Rabbitmq direct)已完成短信发送业务,id:3


订单处理开始...
(Rabbitmq direct)待发送的短信已进入消息队列,id:4
订单处理结束...
------------------------
(Rabbitmq direct 2)已完成短信发送业务,id:4


订单处理开始...
(Rabbitmq direct)待发送的短信已进入消息队列,id:5
订单处理结束...
------------------------
(Rabbitmq direct)已完成短信发送业务,id:5
SpringBoot 整合 RabbitMQ(topic模式):
- 代码示例:
- 工程目录结构如下:

- 在测试topic模式时,应将direct模式中的配置类及接口实现类的注解去掉,否则冲突。
- 其中业务层 OrderService.java、OrderServiceImpl.java、MessageService.java、OrderController.java 参照 整合 ActiveMQ 章节,代码未改变。
- 配置类:
// RabbitMQConfigTopic.java
import org.springframework.amqp.core.Binding;
import org.springframework.amqp.core.BindingBuilder;
import org.springframework.amqp.core.TopicExchange;
import org.springframework.amqp.core.Queue;
import org.springframework.context.annotation.Bean;
import org.springframework.context.annotation.Configuration;

@Configuration
public class RabbitMQConfigTopic {

    @Bean
    // 定义队列
    public Queue topicQueue(){
        // 第二个参数:消息队列是否持久化
        // 第三个参数:当前消息队列是否当前连接专用
        // 第四个参数:当生产者消费者都不再使用此队列,是否删除此队列
        return new Queue("topic_queue", true, false, false);
    }

    @Bean
    // 定义队列
    public Queue topicQueue2(){
        // 第二个参数:消息队列是否持久化
        // 第三个参数:当前消息队列是否当前连接专用
        // 第四个参数:当生产者消费者都不再使用此队列,是否删除此队列
        return new Queue("topic_queue2", true, false, false);
    }

    @Bean
    // 定义交换机,一个交换机可以绑定多个队列
    public TopicExchange topicExchange(){
        return new TopicExchange("topic_exchange");
    }

    @Bean
    // 定义路由器,路由器可以定义规则
    // * 用来代表一个单词,且该单词是必须出现的
    public Binding TopicBinding(){
        return BindingBuilder.bind(topicQueue()).to(topicExchange()).with("topic.*.id");

    }

    @Bean
    // 定义路由器,路由器可以定义规则
    // # 用来表示任意数量的单词,可以为0个单词
    public Binding TopicBinding2(){
        return BindingBuilder.bind(topicQueue2()).to(topicExchange()).with("topic.#");

    }

}
- 业务层 MessageService 的实现类:
// MessageServiceRabbitMQTopicImpl.java
import com.example.springboot.service.MessageService;
import org.springframework.amqp.core.AmqpTemplate;
import org.springframework.beans.factory.annotation.Autowired;
import org.springframework.stereotype.Service;

@Service
public class MessageServiceRabbitMQTopicImpl implements MessageService {

    @Autowired
    private AmqpTemplate amqpTemplate;

    @Override
    public void sendMessage(String id) {
		// 第一个参数是交换机
        // 第二个参数是routingKey,如果其可以匹配上配置类中绑定着topic_exchange交换机的n个路由器的话,
        // 那么这个消息就会被分发到n和队列中,被消费n次
        // 第三个参数是,发送到消息队列的消息对象
        amqpTemplate.convertAndSend("topic_exchange", "topic.order.id", id);
        System.out.println("(Rabbitmq topic)待发送的短信已进入消息队列,id:" + id);
    }

    @Override
    public String receiveMessage() {
        return null;
    }
}
- 监听器
// MessageRabbitMQTopicListener.java
import org.springframework.amqp.rabbit.annotation.RabbitListener;
import org.springframework.context.annotation.Configuration;

@Configuration
public class MessageRabbitMQTopicListener {

    @RabbitListener(queues = "topic_queue")
    public void receive(String id){
        System.out.println("(Rabbitmq topic)已完成短信发送业务,id:" + id);
    }

    @RabbitListener(queues = "topic_queue2")
    public void receive2(String id){
        System.out.println("(Rabbitmq topic 2)已完成短信发送业务,id:" + id);
    }

}
- 通过 Postman 测试:
订单处理开始...
(Rabbitmq topic)待发送的短信已进入消息队列,id:1
订单处理结束...
------------------------
(Rabbitmq topic 2)已完成短信发送业务,id:1
(Rabbitmq topic)已完成短信发送业务,id:1
- 注意:amqpTemplate.convertAndSend(“topic_exchange”, “topic.order.id”, id)
1、第一个参数是交换机
2、第二个参数是routingKey,如果其可以匹配上配置类中绑定着topic_exchange交换机的n个路由器的话,那么这个消息就会被分发到n和队列中,被消费n次
3、第三个参数是,发送到消息队列的消息对象
SpringBoot 整合 RocketMQ
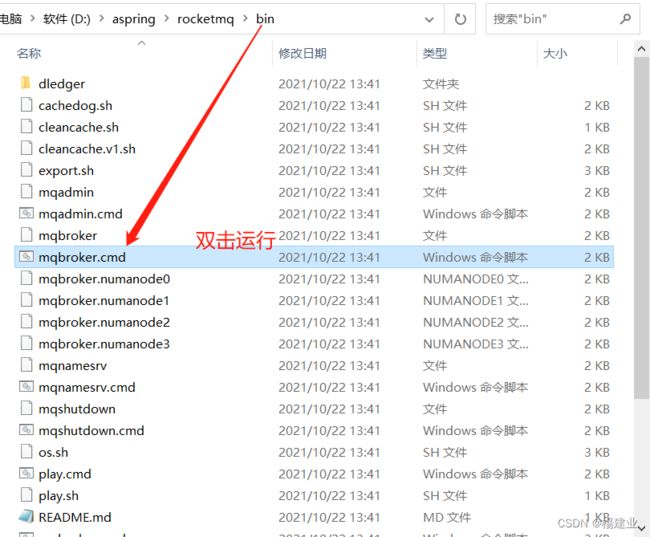
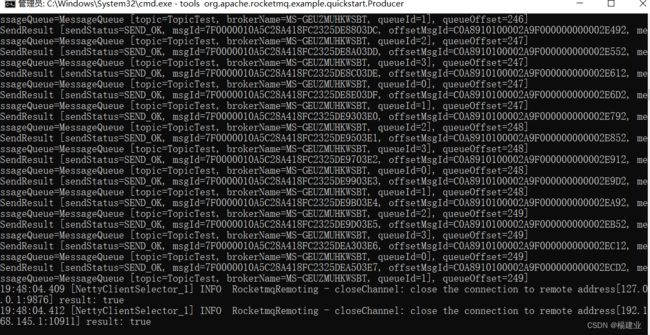
- 安装 RocketMQ
- 启动命名服务器
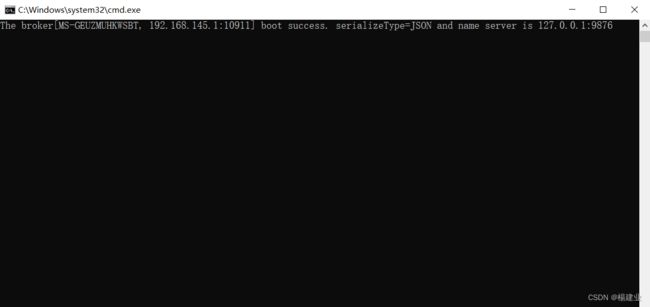
- 启动业务(消息队列)服务器 Broker
- 代码示例:
- 工程目录结构:
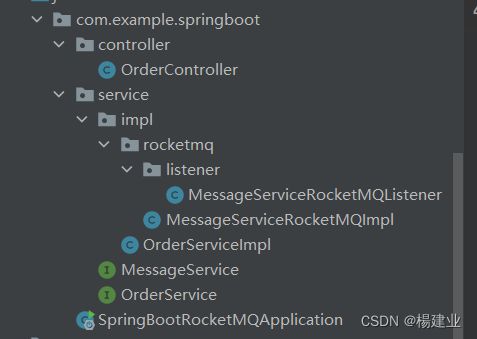
- 其中业务层 OrderService.java、OrderServiceImpl.java、MessageService.java、OrderController.java 参照 整合 ActiveMQ 章节,代码未改变。
- 引入相关依赖:
<dependency>
    <groupId>org.springframework.bootgroupId>
    <artifactId>spring-boot-starter-webartifactId>
dependency>
<dependency>
    <groupId>org.springframework.bootgroupId>
    <artifactId>spring-boot-starter-amqpartifactId>
dependency>
<dependency>
    <groupId>org.apache.rocketmqgroupId>
    <artifactId>rocketmq-spring-boot-starterartifactId>
    <version>2.2.1version>
dependency>
<dependency>
    <groupId>org.projectlombokgroupId>
    <artifactId>lombokartifactId>
    <optional>trueoptional>
dependency>
<dependency>
    <groupId>org.springframework.bootgroupId>
    <artifactId>spring-boot-starter-testartifactId>
    <scope>testscope>
dependency>
- 配置yml
rocketmq:
  name-server: localhost:9876
  producer:
    group: group_rocketmq
- 业务层 MessageService 的实现类:
// MessageServiceRocketMQImpl.java
import com.example.springboot.service.MessageService;
import org.apache.rocketmq.client.producer.SendCallback;
import org.apache.rocketmq.client.producer.SendResult;
import org.apache.rocketmq.spring.core.RocketMQTemplate;
import org.springframework.beans.factory.annotation.Autowired;
import org.springframework.stereotype.Service;

@Service
public class MessageServiceRocketMQImpl implements MessageService {

    @Autowired
    private RocketMQTemplate rocketMQTemplate;

    @Override
    public void sendMessage(String id) {
        // convertAndSend是同步方法,在实际生产过程中不建议使用
        // rocketMQTemplate.convertAndSend("rocketmq_order_queue_id", id);

        // 实际生产过程中使用异步方法:
        SendCallback callback = new SendCallback() {
            @Override
            public void onSuccess(SendResult sendResult) {
                System.out.println("通过异步消息方式,消息发送成功");
            }

            @Override
            public void onException(Throwable throwable) {
                System.out.println("通过异步消息方式,消息发送失败");
            }
        };
        rocketMQTemplate.asyncSend("rocketmq_order_queue_id", id, callback);

        System.out.println("(Rocketmq)待发送的短信已进入消息队列,id:" + id);
    }

    @Override
    public String receiveMessage() {
        return null;
    }
}
- 监听器
// MessageServiceRocketMQListener.java
import org.apache.rocketmq.spring.annotation.RocketMQMessageListener;
import org.apache.rocketmq.spring.core.RocketMQListener;
import org.springframework.stereotype.Component;

@Component
@RocketMQMessageListener(topic = "rocketmq_order_queue_id", consumerGroup = "group_rocketmq")
public class MessageServiceRocketMQListener implements RocketMQListener<String> {
    @Override
    public void onMessage(String message) {
        System.out.println("(Rocketmq)已完成短信发送业务,id:" + message);
    }
}
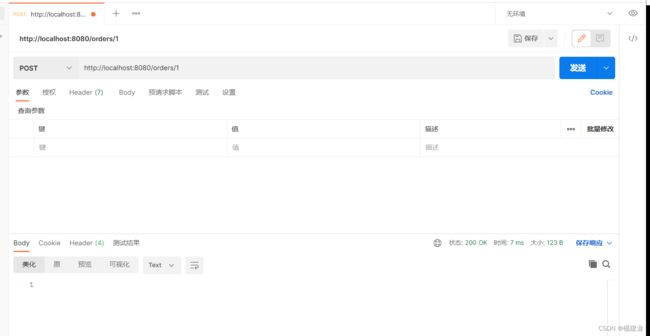
- 通过 Postman 测试如下:
订单处理开始...
(Rocketmq)待发送的短信已进入消息队列,id:1
订单处理结束...
------------------------
通过异步消息方式,消息发送成功
(Rocketmq)已完成短信发送业务,id:1
