Springboot 实践(15)spring config 配置与运用—自动刷新
目前,网络上讲解spring config的自动刷新,都是通过git服务站的webhook功能执行“actuator/bus-refresh”服务实现的自动刷新。我们的前文讲解的配置中心,配置中心仓库使用的时本地地址,如下图所示:
那么,配置中心仓库中的文件被修改后,是如何实现触发“actuator/bus-refresh”服务呢,下面我们详细讲解如何实现。
我们利用三个工程文件,讲解本地化配置中心,是如何实现配置文件更新后,使用该配置文件参数的工程是如何刷新的,三个工程功能分工详细如下:
- Springboot-config-server工程,实现配置中心服务器功能,使用http://localhost:8020/mango-config-client.yml方式查询配置中心yml文件
- Springboot-config-client工程,实现配置中心客户端功能,调用配置中心的yml文件中参数;通过http://localhost:1881/swagger-ui.html访问yml文件配置参数
- Springboot-config-YMLManager工程,实现配置中心客户端功能,实现配置中心文件的管理,包括查询和修改连个功能。
一、Springboot-config-server工程与Springboot-config-client工程改造
Springboot-config-server工程与Springboot-config-client工程,在《Springboot 实践(14)spring config 配置与运用--手动刷新》中已经讲解,本文只讲究修改内容,详细如下;
1、pom.xml问价改造
两个工程中,添加RabbitMQ与运行依赖jar包
2、yml文件改造
两个工程中,添加RabbitMQ与运行配置参数
spring:
rabbitmq:
host: 127.0.0.1
port: 5672
username: guest
password: guest
二、新建Springboot-config-YMLManager工程
1、利用MyEclipse2019新建web project工程,命名为Springboot-config-YMLManager,工程目录建设如下图所示。
2、pom.xml
使用jar包如下:
3、bootstrap.yml
server:
port: 2881
servlet:
#context-path: /auth
session:
cookie:
name: SESSION_SSO
timeout: 180000 #注意时间单位是秒;特别注意的地方:如果设置小于60秒的话,则会默认取60*60*10秒!
spring:
application:
name: Springboot-config-YMLManager
cloud:
consul:
host: 127.0.0.1
port: 8500
#discovery:
#serviceName: ${spring.application.name}
discovery:
# 配置服务注册到Consul上
register: true
# 配置服务健康检测地址 供Consul 调用
health-check-path: /actuator/health
#consul 健康检测频率
health-check-interval: 15s
# 配置注册到consul 服务的id
instance-id: ${spring.application.name}
enabled: true
service-name: ${spring.application.name}
#告诉consul我注册的时候你给我按ip注册我地址(对应no such host问题)。
prefer-ip-address: true
ip-address: 127.0.0.1
#ip-address: 172.16.52.14
config:
fail-fast: true
discovery:
enabled: true # 开启服务发现
service-id: Springboot-config-server # 配置中心服务名称
name: auth-server # 对应{application}部分
profile: dev # 对应{profile}部分
rabbitmq:
host: 127.0.0.1
port: 5672
username: guest
password: guest
thymeleaf:
#缓冲的配置
cache: false
check-template: true
check-template-location: true
#开启MVC thymeleaf 视图解析
enabled: true
encoding: utf-8
mode: HTML5
prefix: classpath:/templates/
suffix: .html
# actuator的配置
management:
endpoints:
web:
exposure:
include: "*"
endpoint:
health:
show-details: always
4、功能实现简介
后台java代码主要实现功能如下:
☆ 配置中心文件列表读取controller
☆ 配置中心文件内容读取controller
☆ 配置文件修改后,将修改后内容写入配置文件
☆ 配置文件修改后,执行“actuator/bus-refresh”服务(访问“actuator/bus-refresh”节点,触发了一个事件,该事件传播到了其它的节点,其它节点获取事件后,也进行了刷新的效果)
备注:由于配置中心采用本地华配置,所以该工程后台使用了本地路径,不属实,需要部署到配置仓库服务器。
5、页面实现简介
三、测试
1、启动RabbitMQ
2、启动Consul
3、启动Springboot-config-server
4、启动Springboot-config-client
5、启动Springboot-config-YMLManager项目
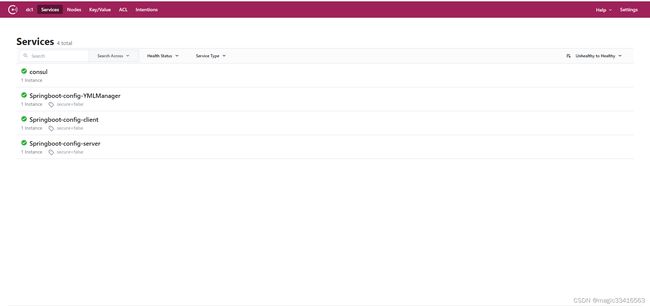
项目启动后,服务注册软件consul页面如下:
6、通过Springboot-config-YMLManager项目查看修改后参数
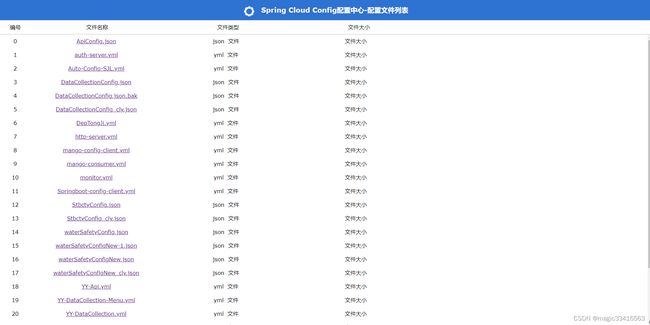
☆ 在浏览器中输入http://localhost:2881/mainfunction,进入配置文件列表,如下图所示
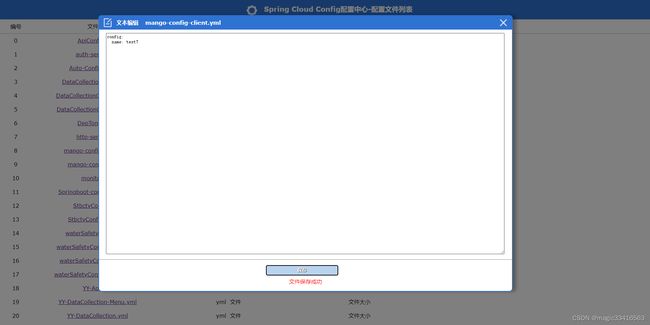
☆ 选择“mango-config-client.yml”,进入编辑页面,如下图所示:
☆ 将name: test6,改成name:test7,点击保存,如下所示
☆ 在配置中心服务器端测试文件修改,即在浏览器中输入“http://localhost:8020/mango-config-client.yml”,显示如下:
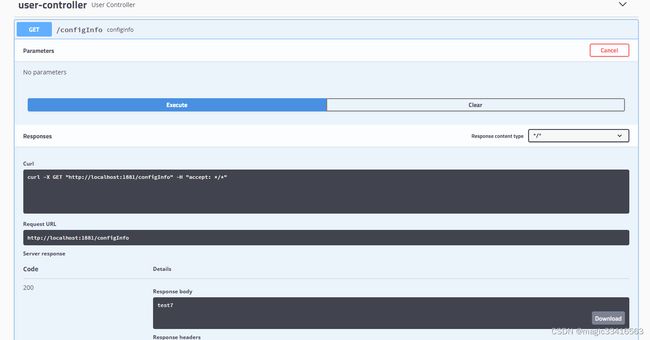
☆ 在配置中心客户端测试参数修改,即在浏览器中输入http://localhost:1881/swagger-ui.html,进入swagger-ui界面,选择“/configInfo”,显示如下:
服务端和客户端参数都应景自动跟新为test7,项目设计功能都已经实现。
本文讲解到此结束,下文我们一起学习一下nacos配置中心,相信学友们会有新的感悟。


