Ubuntu 22.04LTS + 深度学习环境安装全流程
一、 CUDA Toolkit 安装
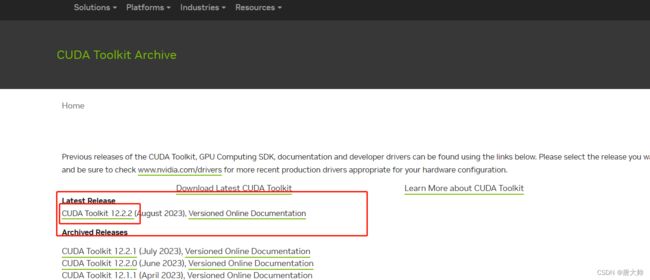
1. 选择需要安装的版本(下载地址)
2. 选择自己的系统版本获取下载地址和安装指令

3. 运行安装指令进行安装
wget https://developer.download.nvidia.com/compute/cuda/12.2.2/local_installers/cuda_12.2.2_535.104.05_linux.run
sudo sh cuda_12.2.2_535.104.05_linux.run
选择安装选项:

cuda安装包是自带显卡驱动的,所以这一步按空格或者Enter键去掉安装显卡驱动的选项,然后选择install

安装正常:

配置环境变量:
vim ~/.bashrc

# 添加一行
export PATH=/usr/local/cuda-12.2/bin${PATH:+:${PATH}}
export LD_LIBRARY_PATH=/usr/local/cuda-12.2/lib64${LD_LIBRARY_PATH:+:${LD_LIBRARY_PATH}}

# 保存并加载环境变量
source ~/.bashrc
验证安装是否成功:
root@service2:~# nvcc -V
nvcc: NVIDIA (R) Cuda compiler driver
Copyright (c) 2005-2023 NVIDIA Corporation
Built on Tue_Aug_15_22:02:13_PDT_2023
Cuda compilation tools, release 12.2, V12.2.140
Build cuda_12.2.r12.2/compiler.33191640_0
4. 可能出现测错误
gcc未安装或版本不对:
报错 :
	cat /var/log/cuda-installer.log

	[INFO]: Driver not installed.
	[INFO]: Checking compiler version...
	[INFO]: gcc location: G
	[ERROR]: Missing gcc. gcc is required to continue.
解决方法 :
	# 确保 GCC 已经安装:
	gcc --version

	# 如果输出显示 GCC 版本信息,则说明已经安装。

	# 如果没有安装,请执行以下命令安装 GCC:
	sudo apt update
	sudo apt install gcc
驱动不兼容
报错:
cat /var/log/nvidia-installer.log
ERROR: The Nouveau kernel driver is currently in use by your system.  This driver is incompatible with the NVIDIA driver, and must be disabled before proceeding.  Please consult the NVIDIA driver README and your Linux distribution's documentation for details on how to correctly disable the Nouveau kernel driver.
-> For some distributions, Nouveau can be disabled by adding a file in the modprobe configuration directory.  Would you like nvidia-installer to attempt to create this modprobe file for you? (Answer: Yes)
-> One or more modprobe configuration files to disable Nouveau have been written.  For some distributions, this may be sufficient to disable Nouveau; other distributions may require modification of the initial ramdisk.  Please reboot your system and attempt NVIDIA driver installation again.  Note if you later wish to re-enable Nouveau, you will need to delete these files: /usr/lib/modprobe.d/nvidia-installer-disable-nouveau.conf, /etc/modprobe.d/nvidia-installer-disable-nouveau.conf
ERROR: Installation has failed.  Please see the file '/var/log/nvidia-installer.log' for details.  You may find suggestions on fixing installation problems in the README available on the Linux driver download page at www.nvidia.com.
解决方式
echo "blacklist nouveau" >> /lib/modprobe.d/dist-blacklist.conf
echo "options nouveau modeset=0" >> /lib/modprobe.d/dist-blacklist.conf

mv /boot/initramfs-$(uname -r).img /boot/initramfs-$(uname -r).img.bak
dracut /boot/initramfs-$(uname -r).img $(uname -r)
systemctl set-default multi-user.target
reboot
二、安装 cuDNN
访问官网,获取下载地址(需要开发者账号)

下载并安装
wget https://developer.nvidia.com/downloads/compute/cudnn/secure/8.9.4/local_installers/12.x/cudnn-local-repo-ubuntu2204-8.9.4.25_1.0-1_amd64.deb/
apt install cudnn-local-repo-ubuntu2204-8.9.3.28_1.0-1_amd64.deb
三、安装Mincanda
mkdir -p ~/miniconda3
wget https://repo.anaconda.com/miniconda/Miniconda3-latest-Linux-x86_64.sh -O ~/miniconda3/miniconda.sh
bash ~/miniconda3/miniconda.sh -b -u -p ~/miniconda3
rm -rf ~/miniconda3/miniconda.sh
运行系统环境变量初始化命令:
~/miniconda3/bin/conda init bash
~/miniconda3/bin/conda init zsh
更换清华源镜像
各系统都可以通过修改用户目录下的 .condarc 文件来使用 TUNA 镜像源
conda config --set show_channel_urls yes
vim ~/.condarc
编辑入如下内容:
channels:
  - defaults
show_channel_urls: true
default_channels:
  - https://mirrors.tuna.tsinghua.edu.cn/anaconda/pkgs/main
  - https://mirrors.tuna.tsinghua.edu.cn/anaconda/pkgs/r
  - https://mirrors.tuna.tsinghua.edu.cn/anaconda/pkgs/msys2
custom_channels:
  conda-forge: https://mirrors.tuna.tsinghua.edu.cn/anaconda/cloud
  msys2: https://mirrors.tuna.tsinghua.edu.cn/anaconda/cloud
  bioconda: https://mirrors.tuna.tsinghua.edu.cn/anaconda/cloud
  menpo: https://mirrors.tuna.tsinghua.edu.cn/anaconda/cloud
  pytorch: https://mirrors.tuna.tsinghua.edu.cn/anaconda/cloud
  pytorch-lts: https://mirrors.tuna.tsinghua.edu.cn/anaconda/cloud
  simpleitk: https://mirrors.tuna.tsinghua.edu.cn/anaconda/cloud
  deepmodeling: https://mirrors.tuna.tsinghua.edu.cn/anaconda/cloud/
运行 conda clean -i 清除索引缓存,保证用的是镜像站提供的索引。
四、安装PyTorch
选择系统版本获取下载命令

直接安装最新版即可
conda install pytorch torchvision torchaudio pytorch-cuda=11.8 -c pytorch -c nvidia

# 出现如下内容表示成功
Preparing transaction: done
Verifying transaction: done
Executing transaction: done
验证安装是否成功:
执行 python
# 验证torch安装
import torch
print(torch.__version__)

#验证cuda安装
print(torch.cuda.is_available())