QGIS3.18.3(自带QT5)+VS2019二次开发环境搭建及测试
QGIS3.18.3(自带QT5)+VS2019二次开发环境搭建及测试
- 前言
- 一、环境搭建前的准备
- 二、开始搭建项目,设置环境
- 三、测试
- 注意
前言
按网上的qt+qgis+vs的编译流程总是出现不同的问题,实验很久也没完全成功,看网上除了自己编译之外,还可以采用官网已经编译好的QGIS版本+VS搭建QGIS二次开发环境,本文主要记载自己成功搭建QGIS二次开发环境并且测试的流程
提示:以下是本篇文章正文内容,下面案例可供参考
一、环境搭建前的准备
1.本文所搭建的二次开发环境各软件版本为QGIS3.18.3(自带QT5)+VS2019-----release x64
2.VS2019中安装VS 2017编译器
-
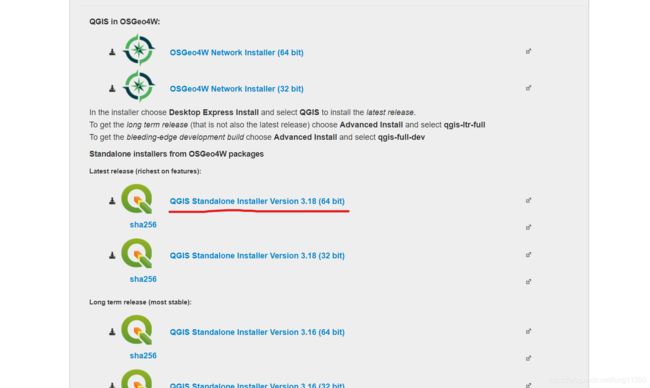
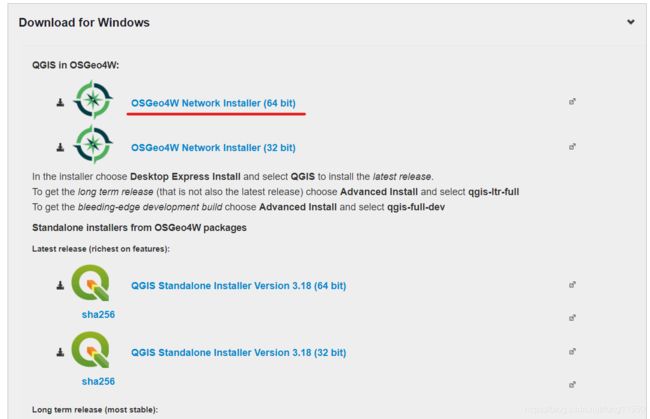
双击osgeo4w-setup-x86_64.exe
-
Andvance Install
-
Install from Intenet
-
选择安装路径D:\OSGeo4W64
-
选择安装包路径D:\OSGeo4W64\Temp
-
Direct Connection
-
随便选择一个站点
-
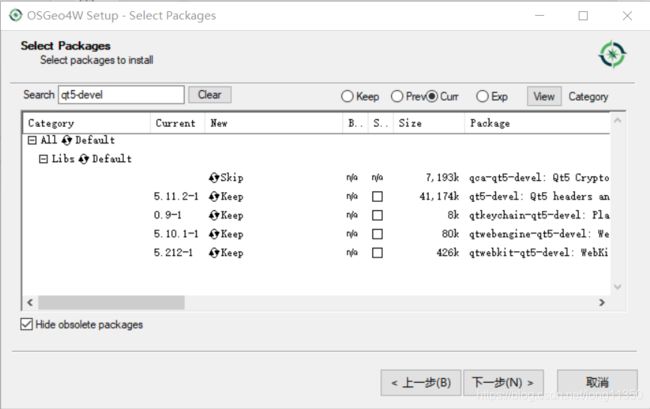
在"Search"框中输入"qt5-devel"(表示搜索qt5二次开发的依赖库),点击一下对应的"Skip"(如果已经安装则是Keep状态),即可下载相应版本的二次开发依赖库,如下图:
-
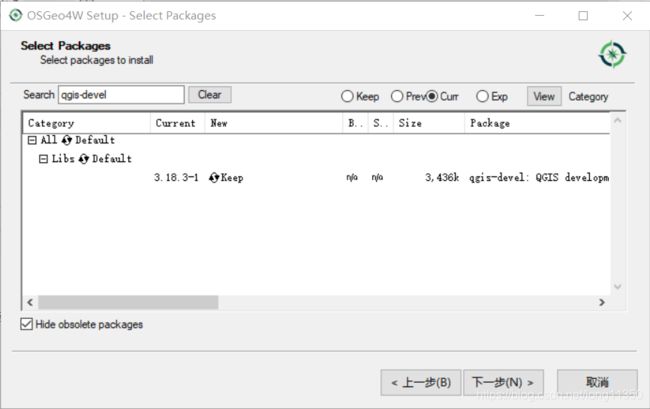
再在"Search"框中输入"qgis-devel"(表示搜索qgis二次开发的依赖库),点击对应的"Skip",即可下载相应版本的二次开发依赖库,如下图:
-
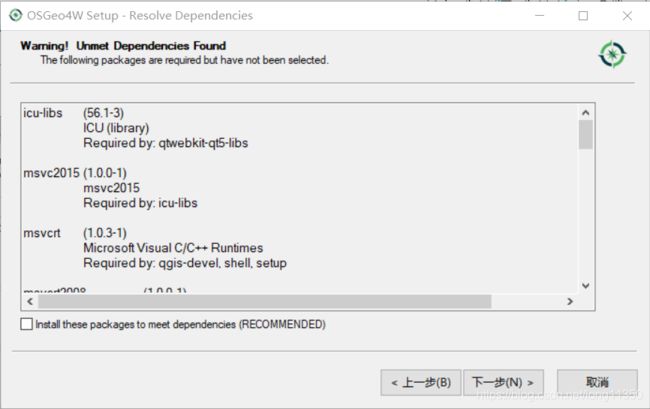
下一步、弹出对话框中点击确定、完成
-
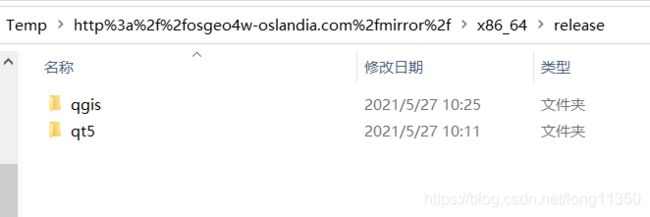
每个找出五个文件夹下的压缩文件,分别解压,会得到五个apps文件夹,分别将五个文件夹复制到D:\QGIS-3.18.3(即你的QGIS安装文件夹)
二、开始搭建项目,设置环境
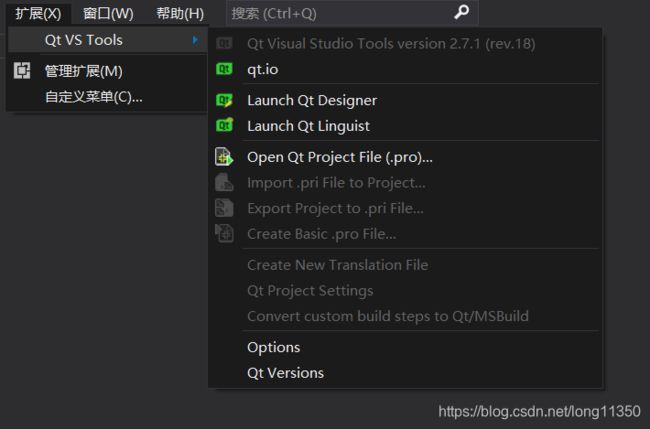
1.打开VS,下载QT VS Tools插件
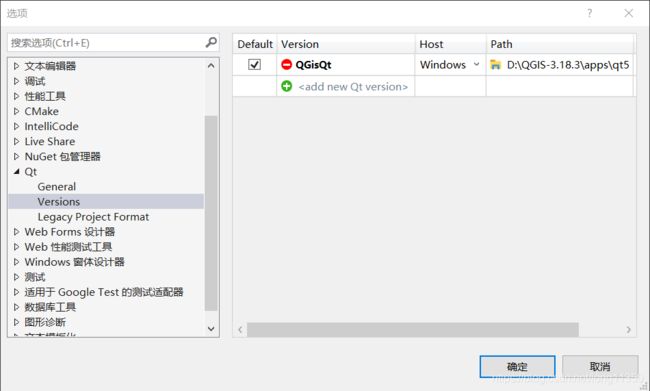
2.QT VS Tools插件中设置QT版本
3.用户环境变量配置(设置完后重启电脑)
“Path”:添加"$(QGis安装路径)\bin"
“QTDIR”:设置为"$(QGis)安装路径\apps\Qt5"
4.打开VS,新建Qt Widgets Application项目,命名为gisTest2–next–next–finish
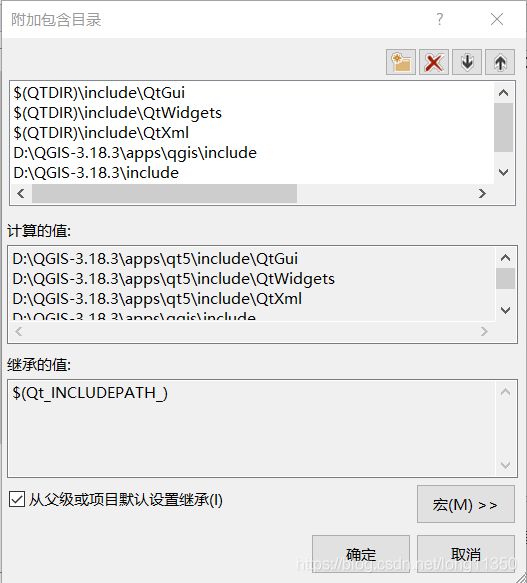
5.gisTest2项目右键属性,C/C++ 点击常规,附加包含目录设置,如下图:
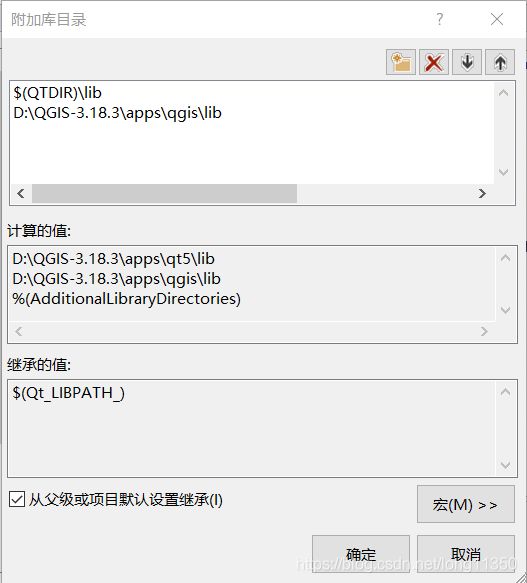
6.gisTest2项目右键属性,链接器中,点击常规,附加库目录设置,如下图:
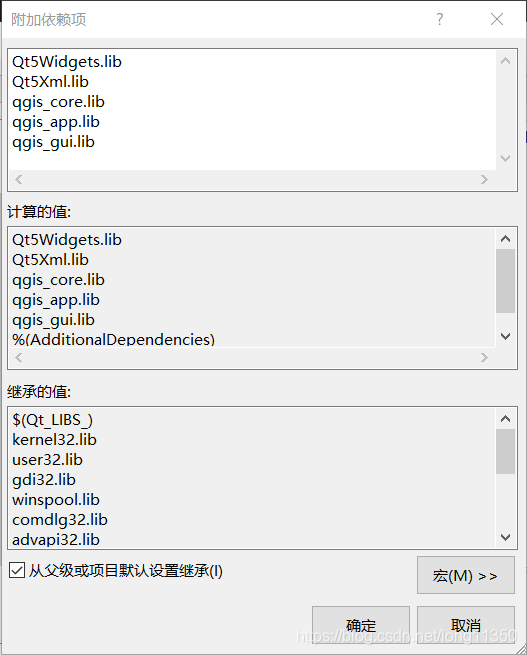
7.gisTest2项目右键属性,链接器中,点击输入,附加依赖项设置,如下图:
8.将下列目录中的dll文件复制到gisTest2项目.exe文件同级目录中(D:\QGIS_workspace\gisTest2\x64\Release)
D:\QGIS-3.18.3\apps\qt5\bin
D:\QGIS-3.18.3\apps\qgis\bin
D:\QGIS-3.18.3\bin
9.将D:\QGIS-3.18.3\apps\qt5\plugins\中的platforms文件夹复制到D:\QGIS_workspace\gisTest2\x64\Release\路径下,如图: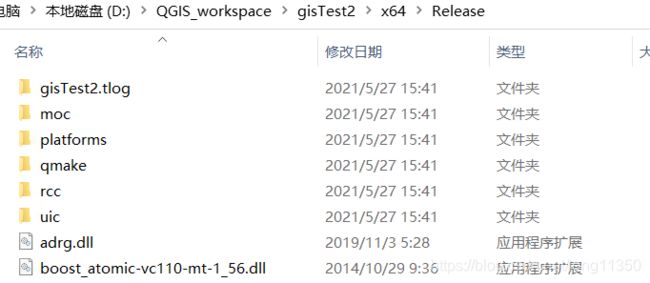
三、测试
1.将如下代码取代gisTest2项目的main.cpp中的内容:
#include "gisTest2.h"
#include 2.将如下代码取代gisTest2项目的gisTest2.cpp中的内容:
#include "gisTest2.h"
#include 3.将如下代码取代gisTest2项目的gisTest2.h中的内容:
#include 注意
1.VS中一切操作都基于release
2.测试实现的功能是打开一个shp文件并显示
3.经测试发现QT版本为5.11.2
4.可能测试时会遇到error C2065: “M_PI”: 未声明的标识符,解决方法如下https://blog.csdn.net/liu_feng_zi_/article/details/84816763
