Unity2022新手入门教程(P4-P100)
本笔记根据B站同名Unity教程同步记录,课程资料见此链接。
博主已购买,支持正版资源,尊重每个人的劳动成果。
本教程适合毫不知情的小白 内容非常简单 建议先看目录再决定要不要学习
目录
- 2.1 安装Unity
-
- 下载Unity Hub
- 注册许可证
- 安装Unity编辑器
- 2.2 新建项目
- 2.3 窗口布局
-
- 层级窗口/游戏管理器
- 场景窗口/3D视图窗口
- 检查器窗口
- 项目窗口
- 控制台窗口
- 重返初始布局
- 字体调整
- 3.1 场景
- 3.2 游戏物体
- 3.3 3D视图
-
- 导航器gizmo
- 栅格Grid
- 天空盒Skybox
- 视图相关操作
- 3.4 世界坐标系
- 3.5 视野中心
- 3.6 透视与正交
- 4.1 3D原生物体
- 4.2 物体的移动
-
- Move Tool 移动工具
- 4.3 物体的旋转与缩放
-
- Rotate Tool 旋转工具
- Scale Tool 缩放工具
- 4.4 多选复制对齐
-
- 多选
- 复制
- 聚焦
- 激活 Active
- 对齐
- 4.5 AF扩展插件(作者自定义插件)
- 5.1 网格
- 5.2 材质
- 5.3 纹理
- 5.4 外部模型
- 5.5 更多细节
- 5.6 FBX的使用1:导入模型
- 5.7 FBX的使用2:材质替换
-
- 重映射
- 使用外部材质
- 5.8 FBX的使用3:分解重组
- 6.1 资源文件
- 6.2 场景文件
- 6.3 资源包
- 6.4 资源商店
- 6.5 项目资源的导入
- 7.1 轴心
- 7.2 父子关系
-
- 相对坐标
- 7.3 空物体
- 7.4 global与local
- 7.5 pivot(轴心)与center(中心)
- 8.1 组件
- 8.2 添加和删除组件
- 8.3 AudioSource组件
- 8.4 Transform组件
- 8.5 摄像机
- 9.1 脚本
-
- Unity_VS编译环境设置
- unity运行我的第一个脚本
- 9.2 当前物体
- 9.3 物体的坐标
- 9.4 播放模式
- 10.1 帧更新
- 10.2 移动物体
- 11.1 物体的运动
- 11.2 相对运动
- 11.3 运动的方向
- 11.4 物体的坐标
- 12.1 物体的旋转
- 12.2 相对旋转
- 12.3 自转与公转
- 12.4 官方文档
- 13.1 脚本的运行
- 13.2 消息函数
- 13.3 脚本的执行顺序
- 13.4 主控脚本
- 14.1 脚本的参数
- 14.2 参数的赋值
- 14.3 值类型
- 14.4 引用类型
- 14.5 运行时调试
- 15.1 鼠标输入
- 15.2 几个细节
- 15.3 屏幕坐标
- 15.4 键盘输入
- 16.1 组件的调用
- 16.2 组件的参数
- 16.3 引用别的组件
- 16.4 引用脚本组件
- 16.5 消息调用
- 16.6 练习 简单飞控
- 17.1 获取物体
- 17.2 父子物体
-
- 访问父级节点
- 方法1:子节点的遍历访问
- 方法2:子节点的索引访问
- 方法3:子节点的名称访问
- 17.3 物体的操作
- 17.4 练习 俄罗斯方块
- 18.1 资源的使用
- 18.2 资源数组
- 18.3 练习 三色球
- 19.1 定时调用
- 19.2 定时与线程
- 19.3 几点细节
- 19.4 练习 红绿灯
- 19.5 练习 加速减速
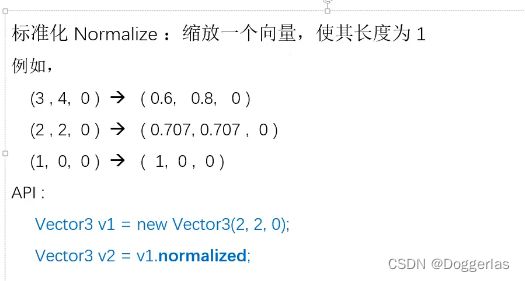
- 20.1 向量
- 20.2 向量运算
- 20.3 向量测距
- 20.4 向量的使用
- 21.1 预制体
- 21.2 预制体的创建
- 21.3 预制体的实例
- 21.4 预制体的编辑
-
- 单独编辑 编辑原始预制体以此影响实例
- 原位编辑 直接编辑实例
- 覆盖编辑 编辑实例 同时覆盖掉原始预制体
- 21.5 多级节点
- 22.1 动态创建实例
- 22.2 实例的初始化
- 22.3 实例的销毁
- 22.4 练习 火控参数
- 22.5 练习 按键控制
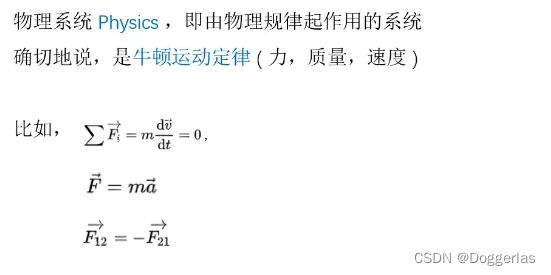
- 23.1 物理系统
- 23.2 物理碰撞
- 23.3 反弹与摩擦
- 24.1 运动学刚体
- 24.2 碰撞检测
- 24.3 碰撞体的编辑
- 24.4 练习 击毁目标
- 后记
2.1 安装Unity
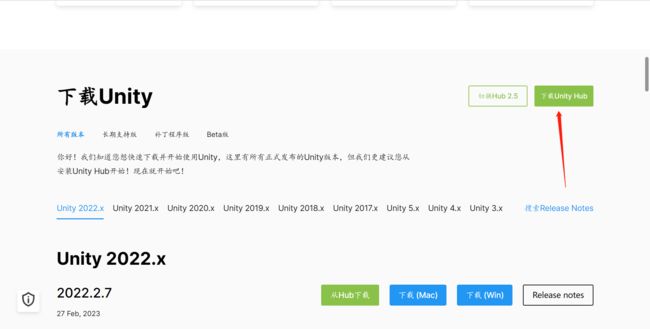
下载Unity Hub
unity下载地址:
https://unity.cn/
点击下载Unity

下载Unity Hub(需要注册一个账号,博主是用邮箱注册的。)
注册许可证
下载并安装Unity Hub完成后,打开它,登录刚才的账号。注册许可证。
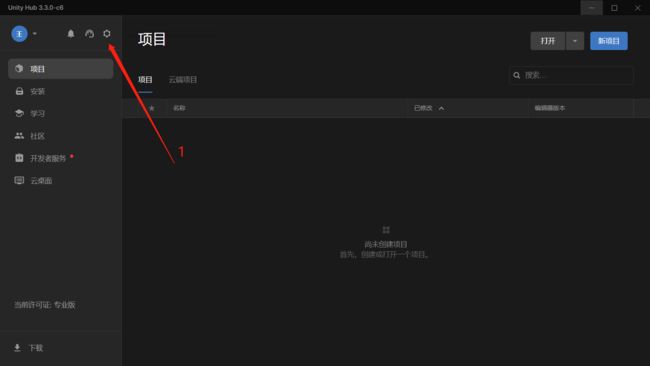

默认情况下是没有许可证的。可以点击“添加-获取免费的个人版许可证”
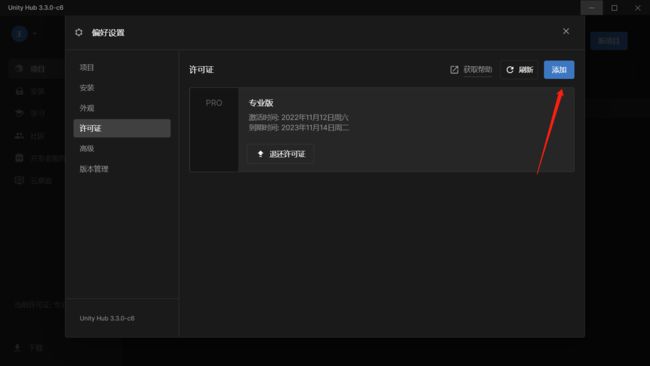
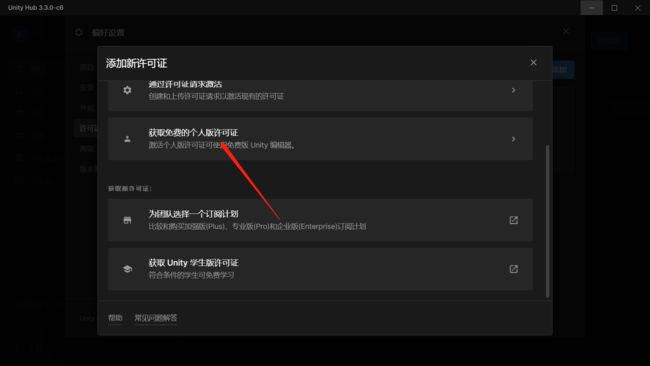
当然也可以和博主一样,申请学生资格。需要审核学籍,具体方法自查。其实个人版可以一直申请,对于普通开发人员已经足够。

安装Unity编辑器
点击“安装编辑器”,建议安装lts版本。我安的是2020.3.41f1c1LTS
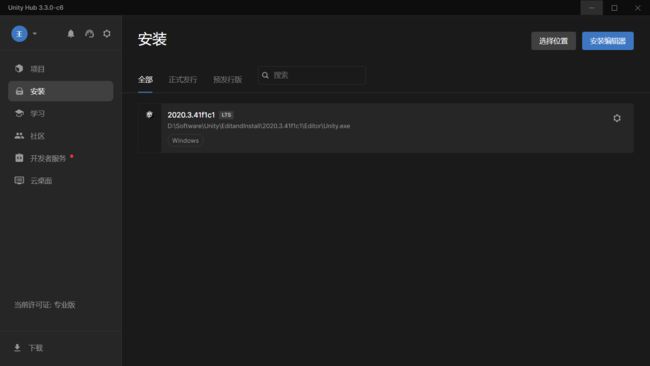
安装完成后,桌面上会同时存在Unity Hub(启动器)和编辑器2020.3.41f1c1LTS。
每次都是从Unity Hub进入编辑器。
2.2 新建项目
点击“项目-新项目”

模板选择3D,记得更改项目名字和存储位置

更改完后,点击右下角“创建项目”,等待几分钟。
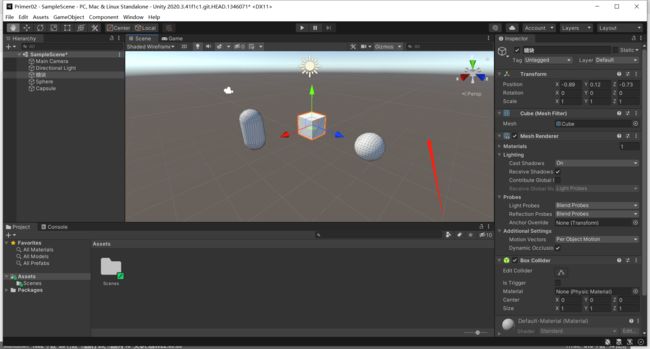
创建完成如下

2.3 窗口布局
点击“GameObject-3D Object-Cube”往界面先添加一个正方体。

层级窗口/游戏管理器
列出游戏中的所有物体

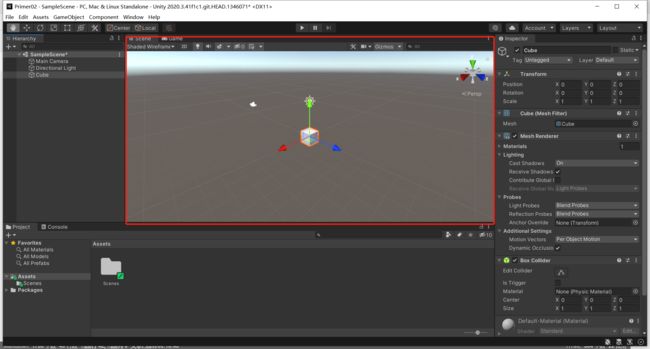
场景窗口/3D视图窗口
在scene进行设计,在game窗口观察。
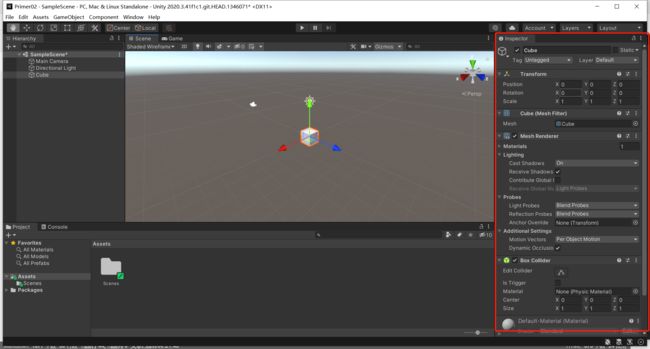
检查器窗口
显示当前选中物体的一些属性
项目窗口
模型音乐脚本存放地

控制台窗口
代码输出的调试信息

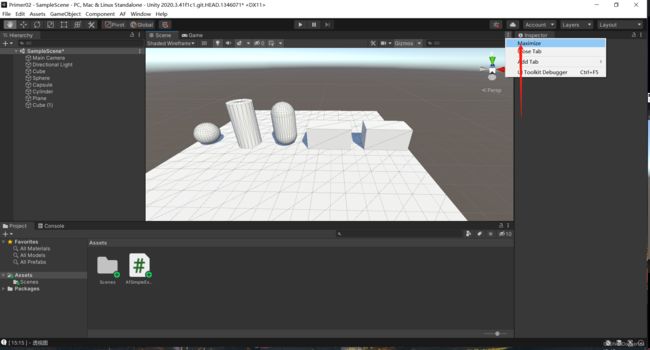
重返初始布局
布局可以考拖动重新布置,返回初始设置点击“Windows-layout-default”返回初始布局。
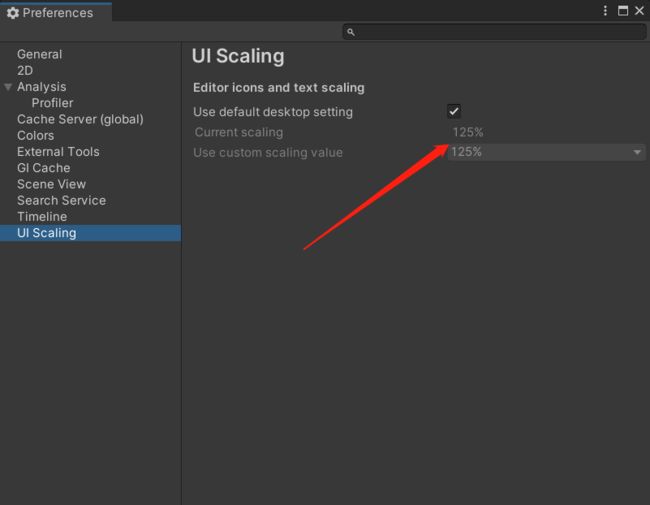
字体调整
“Edit-Preferences-UI Scaling”缩放字体为125%。重启后会生效。
目录
- 2.1 安装Unity
-
- 下载Unity Hub
- 注册许可证
- 安装Unity编辑器
- 2.2 新建项目
- 2.3 窗口布局
-
- 层级窗口/游戏管理器
- 场景窗口/3D视图窗口
- 检查器窗口
- 项目窗口
- 控制台窗口
- 重返初始布局
- 字体调整
- 3.1 场景
- 3.2 游戏物体
- 3.3 3D视图
-
- 导航器gizmo
- 栅格Grid
- 天空盒Skybox
- 视图相关操作
- 3.4 世界坐标系
- 3.5 视野中心
- 3.6 透视与正交
- 4.1 3D原生物体
- 4.2 物体的移动
-
- Move Tool 移动工具
- 4.3 物体的旋转与缩放
-
- Rotate Tool 旋转工具
- Scale Tool 缩放工具
- 4.4 多选复制对齐
-
- 多选
- 复制
- 聚焦
- 激活 Active
- 对齐
- 4.5 AF扩展插件(作者自定义插件)
- 5.1 网格
- 5.2 材质
- 5.3 纹理
- 5.4 外部模型
- 5.5 更多细节
- 5.6 FBX的使用1:导入模型
- 5.7 FBX的使用2:材质替换
-
- 重映射
- 使用外部材质
- 5.8 FBX的使用3:分解重组
- 6.1 资源文件
- 6.2 场景文件
- 6.3 资源包
- 6.4 资源商店
- 6.5 项目资源的导入
- 7.1 轴心
- 7.2 父子关系
-
- 相对坐标
- 7.3 空物体
- 7.4 global与local
- 7.5 pivot(轴心)与center(中心)
- 8.1 组件
- 8.2 添加和删除组件
- 8.3 AudioSource组件
- 8.4 Transform组件
- 8.5 摄像机
- 9.1 脚本
-
- Unity_VS编译环境设置
- unity运行我的第一个脚本
- 9.2 当前物体
- 9.3 物体的坐标
- 9.4 播放模式
- 10.1 帧更新
- 10.2 移动物体
- 11.1 物体的运动
- 11.2 相对运动
- 11.3 运动的方向
- 11.4 物体的坐标
- 12.1 物体的旋转
- 12.2 相对旋转
- 12.3 自转与公转
- 12.4 官方文档
- 13.1 脚本的运行
- 13.2 消息函数
- 13.3 脚本的执行顺序
- 13.4 主控脚本
- 14.1 脚本的参数
- 14.2 参数的赋值
- 14.3 值类型
- 14.4 引用类型
- 14.5 运行时调试
- 15.1 鼠标输入
- 15.2 几个细节
- 15.3 屏幕坐标
- 15.4 键盘输入
- 16.1 组件的调用
- 16.2 组件的参数
- 16.3 引用别的组件
- 16.4 引用脚本组件
- 16.5 消息调用
- 16.6 练习 简单飞控
- 17.1 获取物体
- 17.2 父子物体
-
- 访问父级节点
- 方法1:子节点的遍历访问
- 方法2:子节点的索引访问
- 方法3:子节点的名称访问
- 17.3 物体的操作
- 17.4 练习 俄罗斯方块
- 18.1 资源的使用
- 18.2 资源数组
- 18.3 练习 三色球
- 19.1 定时调用
- 19.2 定时与线程
- 19.3 几点细节
- 19.4 练习 红绿灯
- 19.5 练习 加速减速
- 20.1 向量
- 20.2 向量运算
- 20.3 向量测距
- 20.4 向量的使用
- 21.1 预制体
- 21.2 预制体的创建
- 21.3 预制体的实例
- 21.4 预制体的编辑
-
- 单独编辑 编辑原始预制体以此影响实例
- 原位编辑 直接编辑实例
- 覆盖编辑 编辑实例 同时覆盖掉原始预制体
- 21.5 多级节点
- 22.1 动态创建实例
- 22.2 实例的初始化
- 22.3 实例的销毁
- 22.4 练习 火控参数
- 22.5 练习 按键控制
- 23.1 物理系统
- 23.2 物理碰撞
- 23.3 反弹与摩擦
- 24.1 运动学刚体
- 24.2 碰撞检测
- 24.3 碰撞体的编辑
- 24.4 练习 击毁目标
- 后记
3.1 场景
Project-Assets-Scenes-SampleScene.unity文件,对应的即为当前场景

层级目录的SampleScene,则是直接显示出场景里现在有什么(目前只有主摄像机(拍摄场景的东西)和平行光(照明用))

3.2 游戏物体

可以往场景中添加立方体球体圆柱体(通过gameobject或者在层级窗口右键添加)


使用滚轮放大缩小立方体,用左键选中

重命名复制或者删除等操作

移动物体,按坐标轴或者原点进行拖拽

3.3 3D视图
介绍下三种常见的视觉辅助效果
导航器gizmo
场景方向的指示器,相当于指南针。y代表天地方向,xz代表水平面(y代表上下,xz代表东西南北)。

导航器的指针可以点击,分别代表从该角度看到的场景视图。
栅格Grid
代表高度为0的xz水平面
这个选项可以隐藏栅格

此外,还可以调整栅格的透明度

天空盒Skybox
打开或关闭天空盒

视图相关操作
Alt+鼠标左键:旋转视图
滚轮/alt+鼠标右键:缩放视图
平移视图:鼠标中键
3.4 世界坐标系
unity采用的是左手坐标系
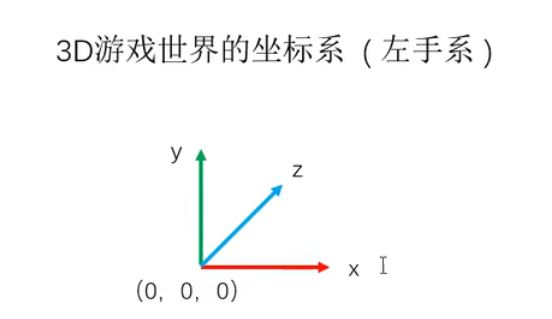
有了世界坐标系 物体位置的定义即为xyz坐标

3.5 视野中心
视野中心位于3D视图中心点位置,场景旋转就是围绕它进行的。
很多时候我们往往需要围绕某一物体旋转进行观察,所以需要先把视野中心置于物体中心。选中物体,然后按F,再用alt+左键进行旋转。此时的旋转就是围绕指定物体了。
每次新添加的物体,都是默认产生在视野中心位置。
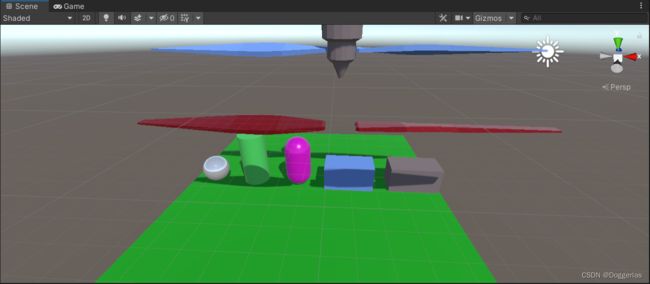
3.6 透视与正交
透视视图:近大远小:同样大小的正方体,因为离的比较远所以看起来小了很多

正交视图:等距视图:物体大小与距离无关
将默认的透视视图改为正交视图即可


正交视图常用于物体的布局,对齐操作
改为正交视图后再点击导航器轴进行对齐

透视畸变:透视视图下物体位于相机边缘时容易产生视觉畸变(视觉边缘的球体会看起来像是椭圆)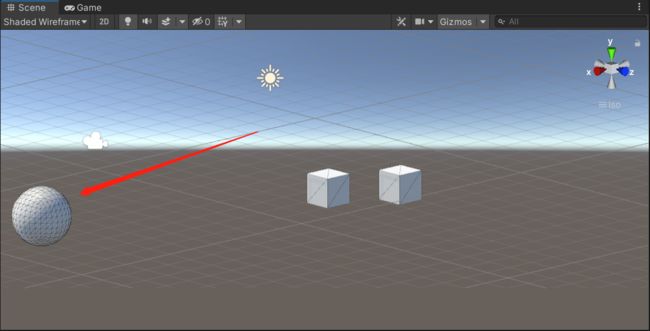
产生这种现象的原因是视场角大小,广角摄像机初始设定视场角为60°,可以从这个选项更改。视场角调小一点畸变的效果会适当降低。(一般改为30-40之间)

4.1 3D原生物体
Unity 下自带的几种基本模型:
- Cube ,立方体 :长宽高各一个单位
- Sphere ,球体 :直径是一个单位
- Capsule ,胶囊体 :底面直径是一个单位,高度是2个单位
- Cylinder ,圆柱体 :底面直径是一个单位,高度是2个单位
- Plane ,平面:长宽各10个单位

Unity 尺寸单位 ,约定为 1 米
原生模型仅用于练习,真正的模型应在建模软件中制作
CG建模软件:3Dmax / Maya / Blender / Cinema4D / ZBrush
4.2 物体的移动
物体的移动、旋转、缩放

其中,
- Move Tool ,移动工具
- Rotate Tool ,旋转工具
- Scale Tool ,缩放工具
Move Tool 移动工具
三轴代表移动方向。Inspector窗口positon:xyz代表中心坐标。可以在 Inspector 里精确指定位置,或者 Reset 重置(将物体的坐标中心重置到000)

沿坐标轴移动:拖动坐标轴
在坐标平面内移动:拖动中心点旁边两个坐标轴围成的面
 当物体位置重叠时,最好在 Hierarchy 窗口选中物体,即使物体被遮住,也是可以操作的。
4.3 物体的旋转与缩放
Rotate Tool 旋转工具
三环代表旋转角度。Inspector窗口rotation:xyz分别代表与xyz轴的夹角。可以在 Inspector 里精确指定旋转角度,或者 Reset 重置(将物体的旋转角度重置为000)
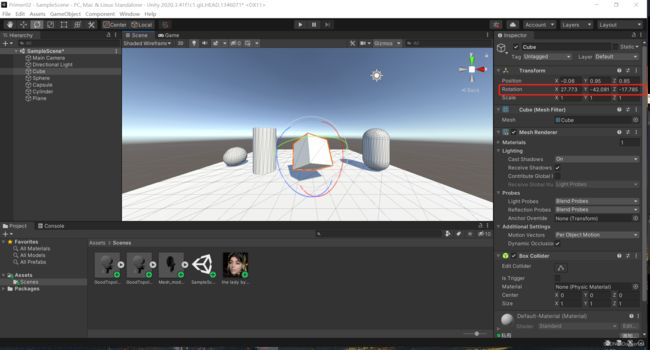
1. 逆时针为正,顺时针为负
2. 按住 CTRL 键时,会出现刻度值,每次旋转的角度增量为 15 度。这个旋转增量可在“Edit-Grid and snap settings-Rotate”里进行修改
Scale Tool 缩放工具
三轴代表缩放方向。Inspector窗口scale:xyz沿xyz轴的缩放尺寸。可以在 Inspector 里精确指定缩放大小,或者 Reset 重置(将物体的缩放尺寸重置到000)

其实在Inspector里三个xyz都可以直接使用鼠标进行拖动,不用每次都去选工具。

三种操作:
1. 可以用快捷键 W 、E 、R 切换三种操作
2. 操作模式,保持默认就可以
Pivot 轴心 / Center 中心点
Global 世界坐标系 / Local 局部坐标系 ![]()
4.4 多选复制对齐
多选
按SHIFT或CTRL键点选
或在3D视图中鼠标框选(建议还是在层级管理器里精确选择)
复制
选中物体,CTRL+D复制物体
或右键Duplicate 
聚焦
选中物体,按F键 ,置于视图中心
或者在层级管理器里双击物体节点

激活 Active
选中物体,在检查器中激活/禁用物体(就是不想显示但是又不想删掉,先把物体隐藏起来)

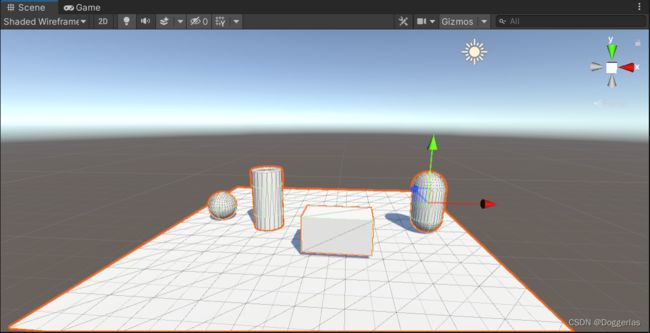
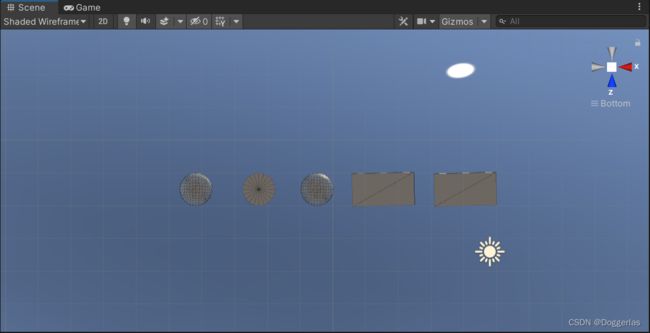
对齐
对初学者,直接目视对齐即可
进入正交顶视图 / 正交右视图 / 正交后视图 ,方便观察


4.5 AF扩展插件(作者自定义插件)
AF 扩展插件 :AfSimpleExtension.cs
相关功能:
- 获取物体的尺寸
- 置于视图中心,G键
- 切换到 正交顶视图,1键
使用方法:直接拖拽到这里,unity会调用vs2017自动编译。没有安装过vs2017的可以先参考这个:
vs2017安装教程

编译完成后,这里会出现插件:
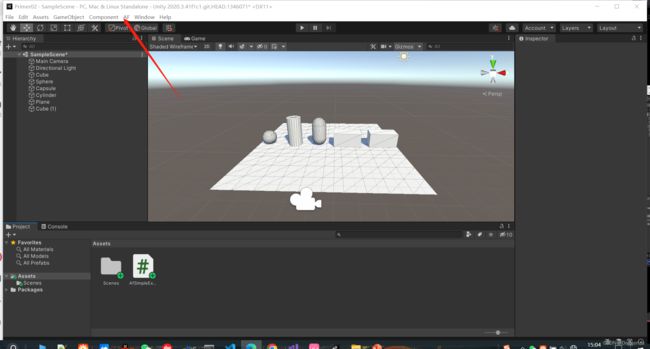
这样就可以直接点击使用插件功能。

比如测距,先选中两个物体,再点击物体测距,就会在调试框显示距离:

比如尺寸,先选中1个物体,再点击物体尺寸,就会在调试框显示尺寸:

其他功能类似,使用起来很简单。
5.1 网格
网格Mesh:存储模型的形状数据
- 模型的形状,由若干个小面围合而来
- 模型是中空的
- Mesh中包含了面,顶点坐标,面的法向等数据
如何看物体的网格?直接切换为wireframe(线框)模式
- shaded:着色模式,显示物体材质
- wireframe:线框模式,显示物体的网格结构
- shaded wireframe:显示材质及网格结构
显然,任何物体都是由三角面构成的,面数越多,物体表面越精细,GPU负担越重


该窗口全屏显示

5.2 材质
定义物体的表面细节,包括:颜色,金属/非金属,光滑/粗糙,透明/半透明/不透明,凹陷/凸起等。
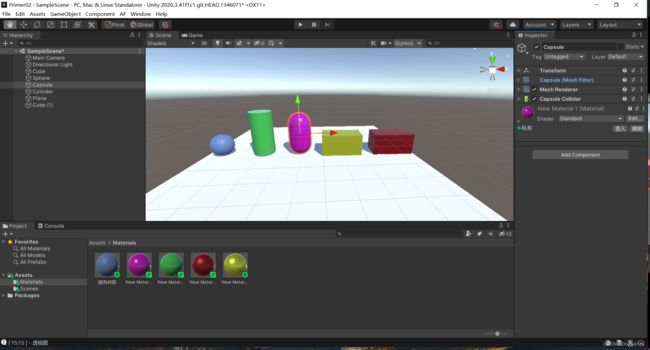
给物体添加材质:
创建文件夹Materials:
在文件夹添加材质资源

改名为“蓝色材质”

选择颜色

接下来只要把这个材质拖动到物体上即可


所以我们可以创建各种材质,然后放到物体上


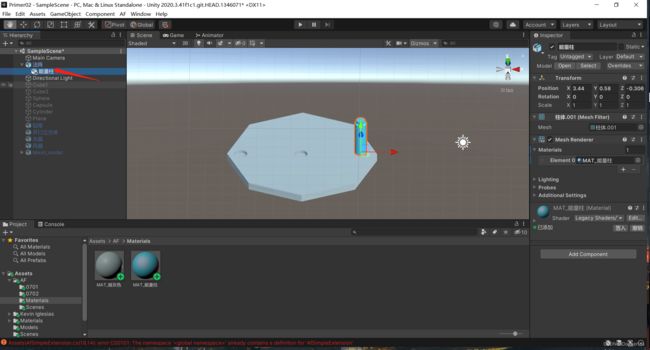
查看物体的属性页
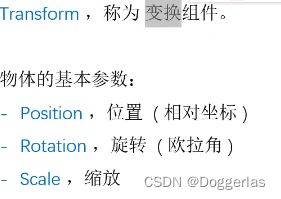
- Transform:空间属性
- Mesh Filter:指定模型本身的数据,形状有多少面,每个面的顶点坐标等。
- Mesh Renderer:将物体显示出来。里面包含了材质属性
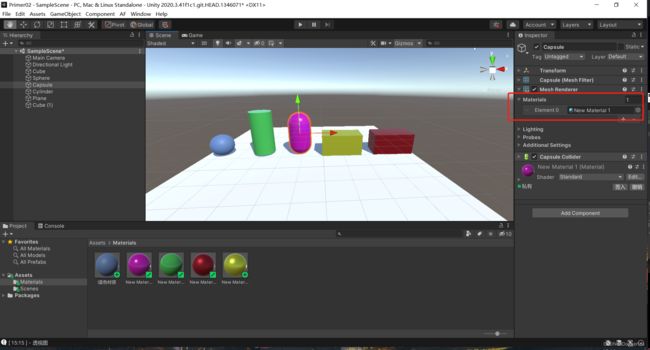
材质资源也可以直接拖动到inspector此处。
5.3 纹理
纹理texture,也称贴图,用一张图定义物体的表面颜色。
与上节相似,新建文件夹Textures,把图片拖过来
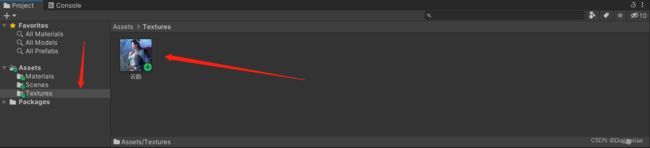
打开5.2材质的Inspector页面,把图片拖到这里

现在材质就有了纹理

不需要纹理的时候,直接backspace回退就可以


想恢复默认材质,需要点这个点,选择default-Material即可


5.4 外部模型
unity的标准模型格式:fbx
创建新的目录:Models,将模型文件fbx与贴图文件psd拖进来

其中fbx中的qb是网格文件,另一个是它的材质
直接拖到层级窗口

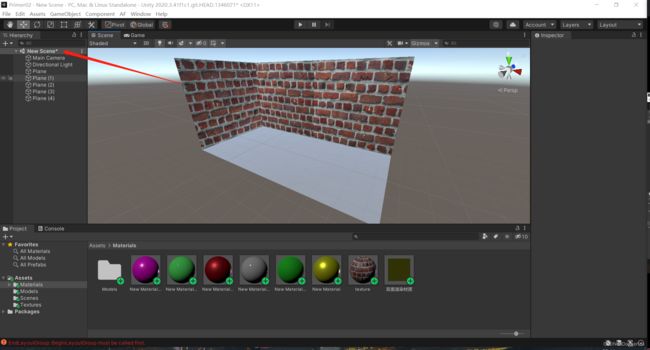
5.5 更多细节
在unity中
- 平面是没有厚度的
- 正面可见,背面透明。或者说,平面的背面不会被渲染。
这是一个开口立方体,一个面被删掉了。在一个视角很正常,换一个视角就会发现透明了

但是实际上,会有需要渲染双面的情景(比如你的物体只有一个曲面),我查了两篇帖子,一个是自己写的双面渲染shader(因为不会导入到unity所以失败了),一个是双面显示材质,后者成功了。
以我的单面网格文件为例:
正面正常使用默认材质

反面就没被渲染

用以下材质可渲染出双面金属色泽的效果
反面:
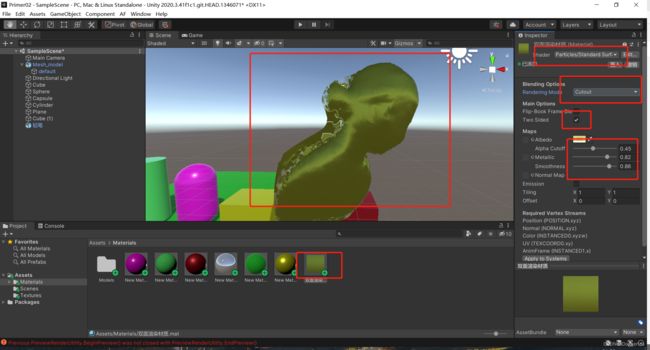
正面:

甚至对开口立方体用了这个材质也可以双面渲染,非常滴好用:

5.6 FBX的使用1:导入模型
在一个FBX模型文件中,一般包含:
- Mesh网格:定义物体的形状
- Material材质:定义表面的光学特性
- Texture贴图:定义表面的像素颜色
FPX第一种使用方式:直接拖拽导入模型(见5.4)
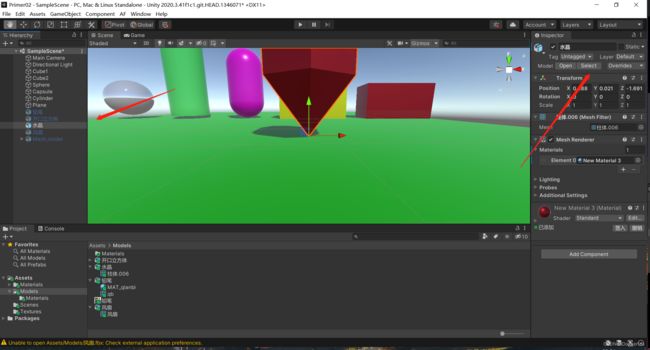
在层级管理器选中水晶,再点Inspector的select可以直接跳转到水晶的fpx文件。

有的模型需要贴图,贴图文件路径是约定好的,与fbx相同目录,或者是统计Textures目录。
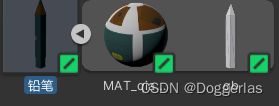
有的模型定义了多个材质,如风扇定义了两个材质:

5.7 FBX的使用2:材质替换
FPX第二种使用方式:材质替换
如何更改风扇颜色?需要改材质中的颜色。
但是导入的fbx是只读文件,不能修改

以下提供两种修改fbx文件材质的方法。
重映射
就是在Materials菜单下引入新的材质,覆盖掉Model菜单下的材质。(作者资料中水晶的fbx文件不包含Material,所以unity没有重映射选项,所以我使用风扇进行演示)
层级窗口选中风扇,Inspector选中select。在inspector最上面的四个选项中选中Materials。以下是未更改的材质,都是none。

更改这两个材质

更改完点击apply,目标材质重定向到模型文件

观察到材质变化。
使用外部材质
使用外部材质是另一种更换fbx文件材质的方法,如下:
选中风扇
改成Use external Materials,点击Apply

在同级目录下生成Materials文件夹,里面是风扇的材质。


直接在这里更改材质,也可以体现在原模型上(叶片由蓝变黄)

5.8 FBX的使用3:分解重组
FPX第三种使用方式:分解重组
风扇的一种Mesh和两种材质都可以分开使用。比如导入Mesh给一个新的材质,或是用它的材质给其他物体上材质。
6.1 资源文件
Assets目录下的文件,称为资源:
常见类型:
- 模型文件Model(.fbx)
- 图片文件Texture(.jpg .png psd tif)
- 音频文件AudioClip(mp3,wav,aiff)
- 脚本文件Script(.cs)
- 材质文件.mat
- 场景文件.unity
目录式管理,与windows类似
几个操作:
- 在文件夹窗口查看Show in Explorer
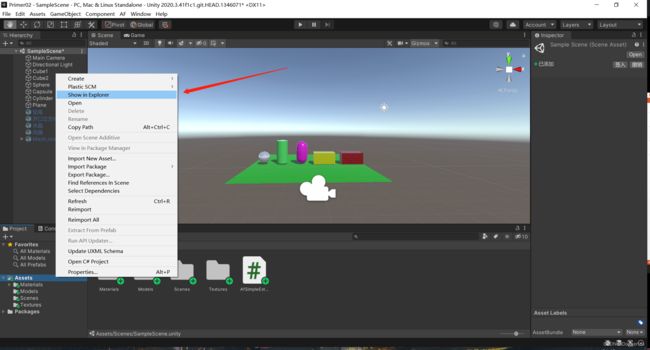
- 添加删除目录
- 添加资源文件,文件会被拷贝到项目中 (直接拖拽)
- 复制资源CTRL+D

- 缩略图比例调节,列表模式

unity所有文件夹和文件都会有对应的meta文件,专门用来记录资源的一些信息。

6.2 场景文件
记录场景中的节点数据
包含:
- 场景全局设置
- 节点
- 节点下组件
- 每个组件的参数值


一个场景代表一个关卡,可以创建多个场景
几个操作:
-
添加场景
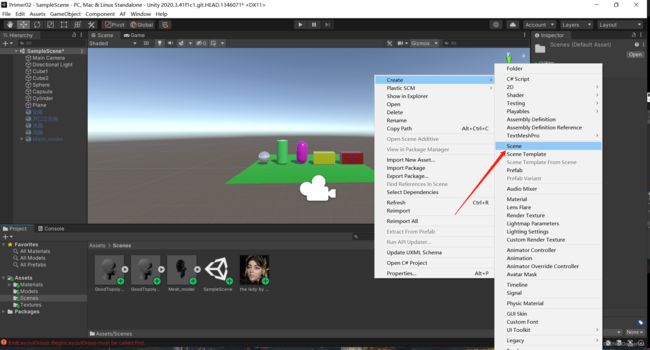
-
打开场景

-
编辑场景,保存CTRL+S(未保存会有*)
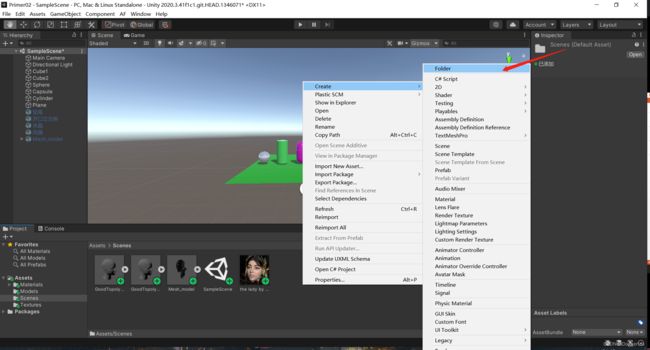
6.3 资源包
对Assets下的资源打包并导出
- 选择一个资源文件或者一个目录
- 右键Export Package
- 生成*.unitypackage资源包


导入资源包
直接拖拽到Assets窗口

6.4 资源商店

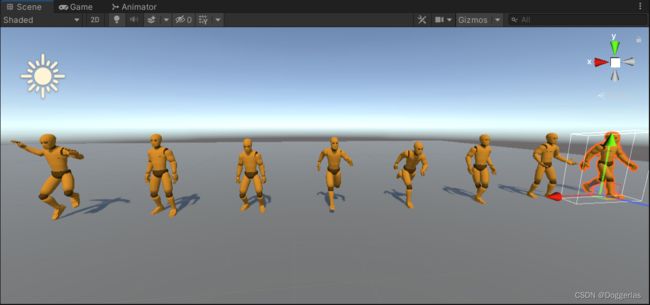
unity资源商店
白嫖一个小人运动的文件,感觉以后会用得上,先码住了
6.5 项目资源的导入

7.1 轴心

轴心就是物体移动旋转缩放所依赖的中心点

在建模软件中,轴心不一定是物体的几何中心,可以定义在任意位置,甚至是物体外部。unity里无法修改物体的轴心。

7.2 父子关系

能量柱依赖于法阵,将法阵拖动到能量柱底下,形成父子节点。
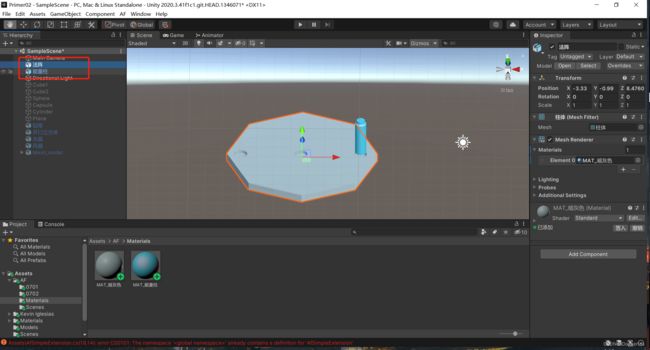
此时能量柱已经是法阵的子节点了,现在拖动法阵,能量柱会随之一起移动;删除法阵,能量柱也会随之一起删除。
相对坐标

圆球所在位置是(0,0,0),将能量柱坐标reset成(0,0,0)并没有与圆球重叠。这是因为子物体的坐标是相对于父节点的相对坐标,子物体的(0,0,0)其实是在父节点的中心点。移动或旋转父物体,子物体的坐标始终不变

7.3 空物体
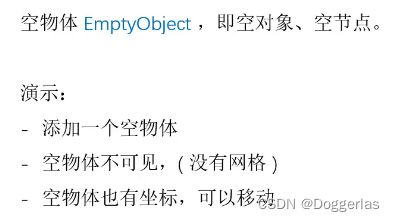

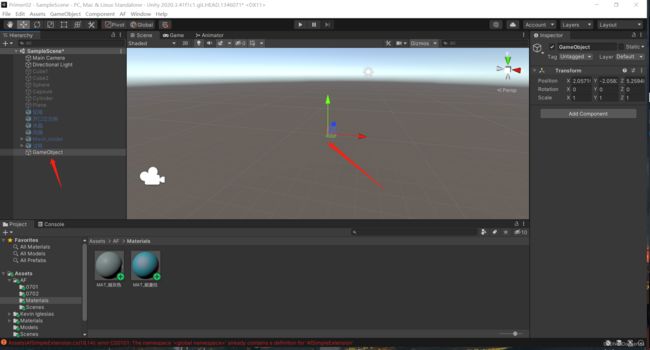

导入0701的炮塔和武器站台,他们是一体的,但是让谁做父物体?
可以设置一个空节点"自动武器站",让他们都成为他的子物体。这样就可以通过空节点控制两个子物体。

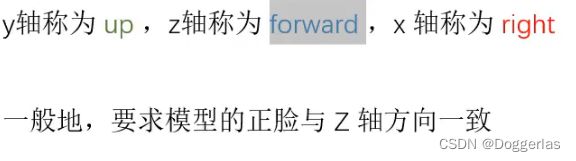
7.4 global与local


换模式时会使坐标系朝向发生变化。global时小车的坐标系和世界坐标系一致,local时和自身坐标系一致。
global:与gizmos的朝向一致

local:与gizmos的朝向在y方向产生一个15度夹角

7.5 pivot(轴心)与center(中心)


pivot 轴心:建模师规定的,位于小车最下方

center几何中心:计算得出,位于小车中间

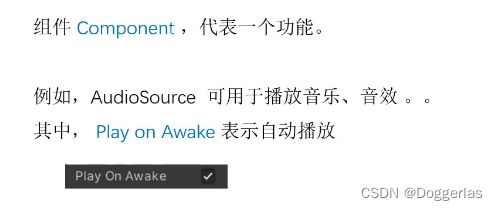
8.1 组件
给不同的物体赋予各类功能


light 光照功能

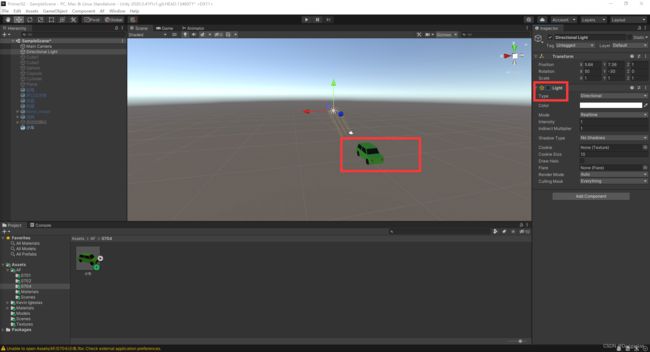
Mesh fliter 网格加载器
Mesh Renderer 网格渲染器 呈现网格


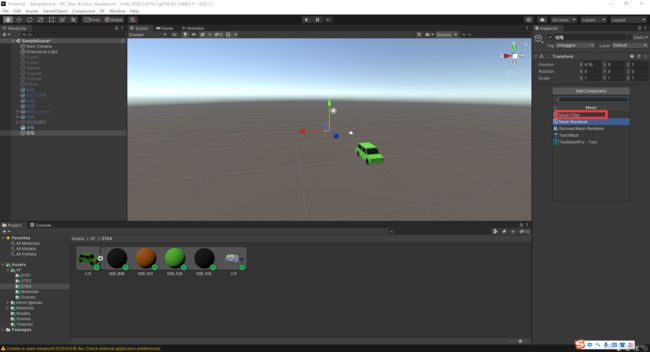
8.2 添加和删除组件
删除
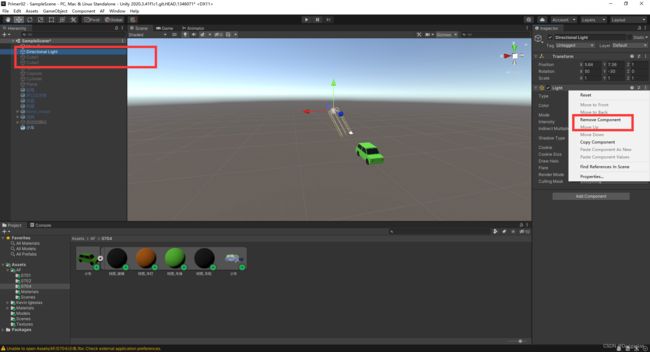

添加


添加


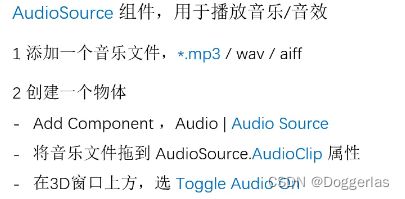
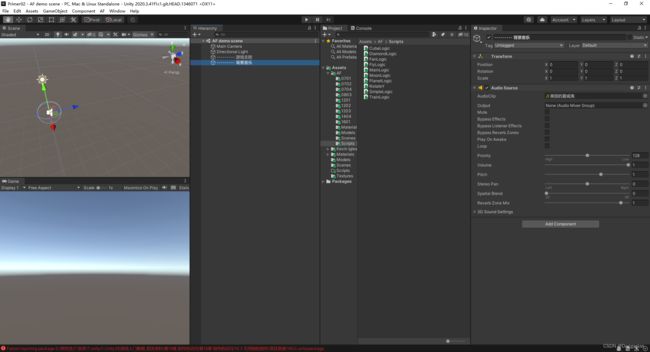
8.3 AudioSource组件


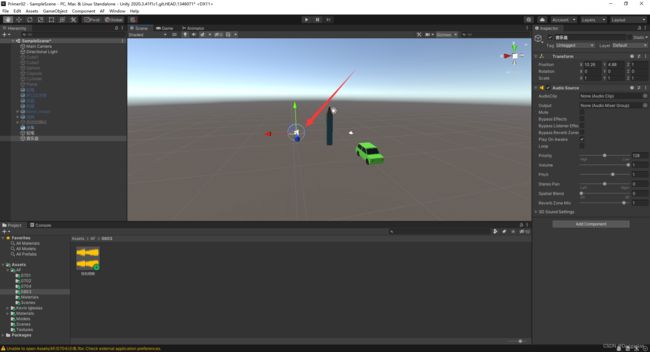


8.4 Transform组件

8.5 摄像机


9.1 脚本
Unity_VS编译环境设置
1 安装
在安装 Unity 时,一定要勾选 VS 选项,如下图,

即使你的电脑上已经安装了VS,也应勾选这一项。
如果没装 可以重装vs 安装完成后需要安装.net 否则会出现引用不兼容问题
比如这个unity编辑器适配版本就是vs2019


2 在Unity的 Preferences 调转中,关联VS编辑器
打开 Unity ,Edit | Preferences ,在 External Tools 里,选择 VS 作为脚本编辑器。

默认已经选择了VS 。如未设置,则自行设置一下。
3 在General 设置中,检查以下设置。

默认应为 Recompile After Finished Playing 。如未设置,则自行设置一下。
unity运行我的第一个脚本
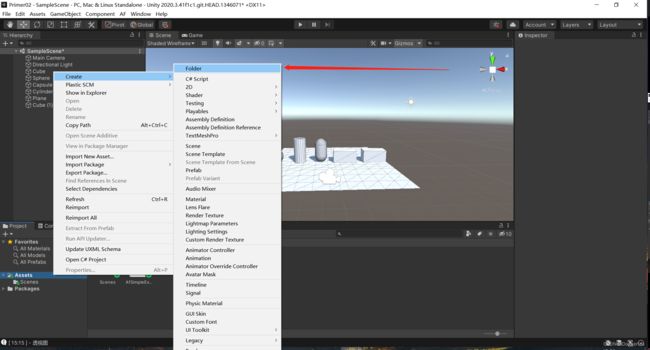
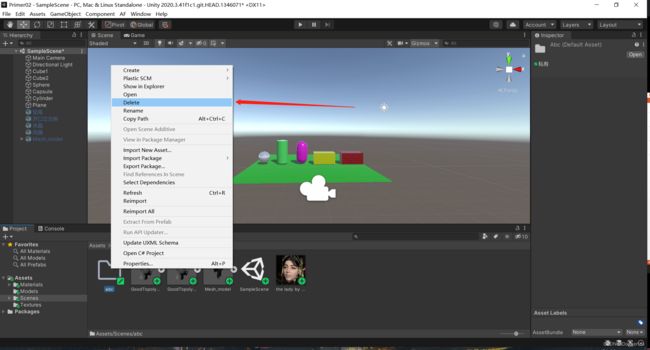
1 添加一个脚本
- 右键,Create | C# Script
- 文件名必须规范,不能使用中文及标点符号。文件名即为类名 。如SimpleLogic
2 双击在 VS 中打开脚本,检查类名与文件名是否一致
3 在 VS 中编辑代码
添加一行打印输出,
void Start()
{
Debug.Log(“** 我的第一个脚本”);
}
其中,Debug 是 Unity API 中的一个工具类
4 CTRL + S ,保存代码 ,并闭 VS
5 编译
编译过程是自动的。保存脚本,回到Unity时会自动重新编译。
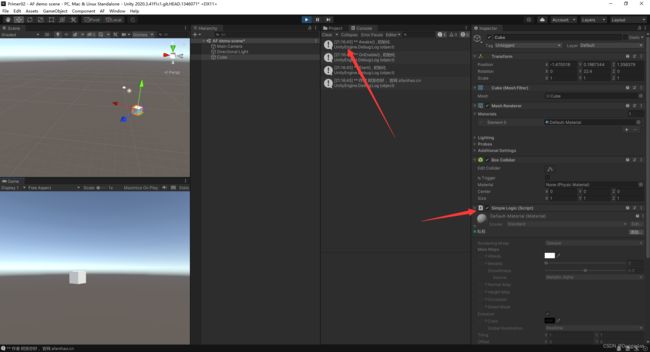
6 (给自动武器站)挂载脚本
两种办法:
-
点 Add Component ,选 Scripts | Simple Logic

-
或者,直接将脚本拖到 Inspector 窗口的最下方
-

7 运行游戏
-
点 Play 按钮,运行游戏
-

-
在 Console 窗口中,观察输出。
-

若 Console 窗口未显示,则 Window | General | Console 调出此窗口。
- 停止游戏

9.2 当前物体
将脚本SimpleLogic92挂载到cube1上 获取cube1信息

SimpleLogic92.cs
using System.Collections;
using System.Collections.Generic;
using UnityEngine;

public class SimpleLogic92 : MonoBehaviour
{
    // Start is called before the first frame update
    void Start()
    {
        Debug.Log("** 开始测试..");

        GameObject obj = this.gameObject;//选中当前挂载脚本的物体
        string name = obj.name;//获取物体名称
        Debug.Log("** 物体名字:" + this.gameObject.name);

        Transform tr = this.gameObject.transform;//获取物体的transform组件
        Vector3 pos = this.gameObject.transform.position;//获取世界坐标
        Debug.Log("** 物体的位置 :" +  pos.ToString("F3"));//保留三位小数
    }


    // Update is called once per frame
    void Update()
    {

    }
}
输出位置信息


9.3 物体的坐标

本地坐标就是相对于父物体的坐标
构建cube2与cube1的父子关系(黄) 脚本输出世界坐标(红) 但是指示器输出相对于父物体的坐标(绿)(指示器输出的坐标含义参考7.2节)

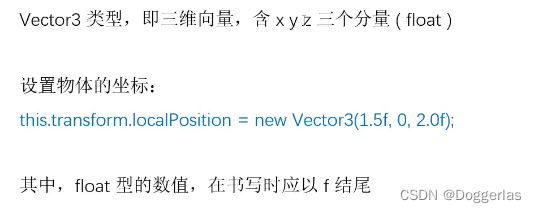
脚本改成Vector3 pos = this.gameObject.transform.localPosition;//获取本地坐标后
脚本输出本地坐标(红) 和指示器输出相对于父物体的坐标(绿)一致


人为指定坐标位置:
using System.Collections;
using System.Collections.Generic;
using UnityEngine;

public class SimpleLogic92 : MonoBehaviour
{
    // Start is called before the first frame update
    void Start()
    {
        Debug.Log("** 开始测试..");

        GameObject obj = this.gameObject;//选中当前挂载脚本的物体
        string name = obj.name;//获取物体名称
        Debug.Log("** 物体名字:" + this.gameObject.name);

        Transform tr = this.gameObject.transform;//获取物体的transform组件
        this.transform.localPosition = new Vector3(1.5f, 2.5f, 0);//人为指定新的坐标
        Vector3 pos = this.transform.localPosition;//简写 获取本地坐标
        Debug.Log("** 物体的位置 :" + pos.ToString("F3"));//保留三位小数

    }


    // Update is called once per frame
    void Update()
    {

    }
}

9.4 播放模式

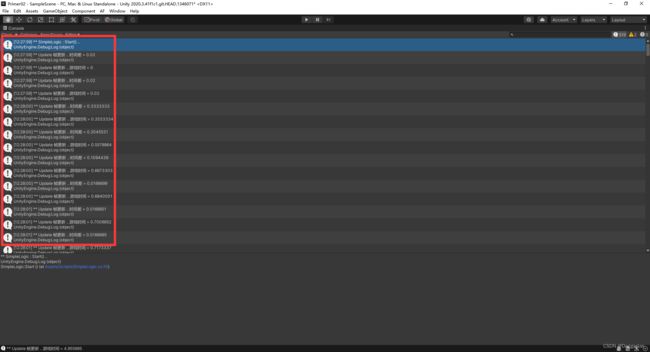
10.1 帧更新
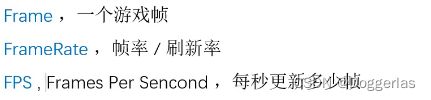


update的内容每帧都会调用
这次在小车上新增component 挂载脚本
using System.Collections;
using System.Collections.Generic;
using UnityEngine;

public class SimpleLogic : MonoBehaviour
{
    // Start is called before the first frame update
    void Start()
    {
        Debug.Log("** SimpleLogic : Start() ..");

        Application.targetFrameRate = 60; // 16.7 ms

    }


    // Update is called once per frame
    void Update()
    {
        Debug.Log("** Update 帧更新 .. 时间差 = " + Time.deltaTime);
        Debug.Log("** Update 帧更新 .. 游戏时间 = " + Time.time);
    }
}

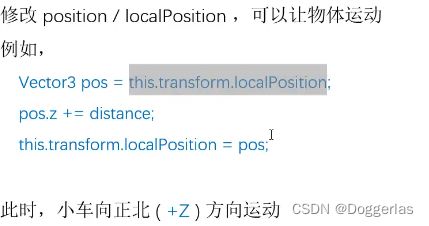
10.2 移动物体

把跑道平面在z方向延长十倍 让小车进行平移
using System.Collections;
using System.Collections.Generic;
using UnityEngine;

public class SimpleLogic : MonoBehaviour
{
    // Start is called before the first frame update
    void Start()
    {
        Debug.Log("** SimpleLogic : Start() ..");

        // 设一下近似帧率,让电脑不要太卡
        Application.targetFrameRate = 60;
    }


    // Update is called once per frame
    void Update()
    {
        Debug.Log("** Update 帧更新 .. 时间差 = " + Time.deltaTime);

        //
        float speed = 3; // 设定速度为 3米/秒
        float distance = speed * Time.deltaTime; // 算出本次更新移动的距离

        Vector3 pos = this.transform.localPosition;
        pos.z += distance; // 0.02f;
        this.transform.localPosition = pos; // 将物体移动到新的位置
    }
}


11.1 物体的运动

using System.Collections;
using System.Collections.Generic;
using UnityEngine;

public class SimpleLogic : MonoBehaviour
{
    // Start is called before the first frame update
    void Start()
    {

    }

    // Update is called once per frame
    void Update()
    {
        float speed = 1;
        float distance = speed * Time.deltaTime;

        Vector3 pos = this.transform.localPosition;
        pos.z += distance; // 0.005f;
        this.transform.localPosition = pos;


    }
}


using System.Collections;
using System.Collections.Generic;
using UnityEngine;

public class SimpleLogic : MonoBehaviour
{
    // Start is called before the first frame update
    void Start()
    {

    }

    // Update is called once per frame
    void Update()
    {
        float speed = 1;
        float distance = speed * Time.deltaTime;
        this.transform.Translate(distance, 0, distance);//两个方向增量式移动 等价于两个速度矢量和
    }
}

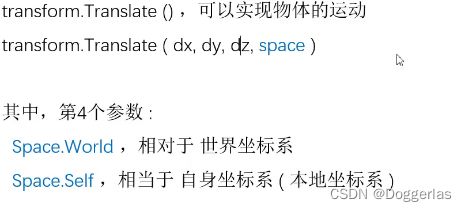
11.2 相对运动
using System.Collections;
using System.Collections.Generic;
using UnityEngine;

public class SimpleLogic : MonoBehaviour
{
    // Start is called before the first frame update
    void Start()
    {

    }

    // Update is called once per frame
    void Update()
    {
        float speed = 1;
        float distance = speed * Time.deltaTime;
        this.transform.Translate(0, 0, distance,Space.World);//沿着世界坐标系的Z方向(前向)移动
    }
}
箭头为移动方向

using System.Collections;
using System.Collections.Generic;
using UnityEngine;

public class SimpleLogic : MonoBehaviour
{
    // Start is called before the first frame update
    void Start()
    {

    }

    // Update is called once per frame
    void Update()
    {
        float speed = 1;
        float distance = speed * Time.deltaTime;
        this.transform.Translate(0, 0, distance,Space.Self);//沿着自身坐标系的Z方向(前向)移动
    }
}
箭头为移动方向

11.3 运动的方向


using System.Collections;
using System.Collections.Generic;
using UnityEngine;

public class SimpleLogic : MonoBehaviour
{
    // Start is called before the first frame update
    void Start()
    {
        GameObject flag = GameObject.Find("红旗");//获取物体目标

        this.transform.LookAt(flag.transform);//转向目标

    }

    // Update is called once per frame
    void Update()
    {
        //给定移动速度 让小车向着红旗前进
        float speed = 1;
        float distance = speed * Time.deltaTime;

        this.transform.Translate(0, 0, distance, Space.Self);


    }
}

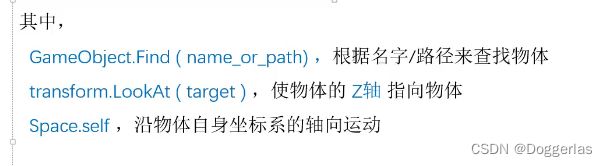
![]()
红旗如果在空中,使用lookat方法 小火车会原地起飞

11.4 物体的坐标

using System.Collections;
using System.Collections.Generic;
using UnityEngine;
public class SimpleLogic : MonoBehaviour
{
GameObject flag; // 目标物体
// Start is called before the first frame update
void Start()
{
// 近似60FPS运行,不需要太快,不然CPU卡
Application.targetFrameRate = 60;
// 调转方向,使Z轴指向目标
this.flag = GameObject.Find("红旗");
this.transform.LookAt(flag.transform);
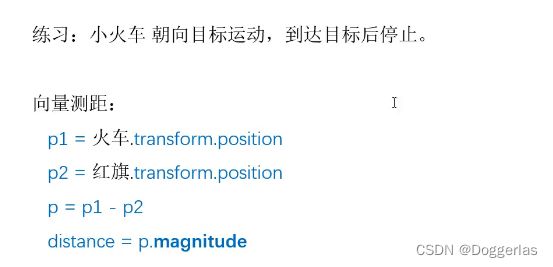
//两个物体之间距离测量
Vector3 p1 = this.transform.position;
Vector3 p2 = flag.transform.position;
Vector3 p = p2 - p1;
float distance = p.magnitude;//向量转变为距离 即求向量长度
Debug.Log("** 两个物体之间的初始距离是: " + distance);
}
// Update is called once per frame
void Update()
{
//实时测量距离
Vector3 p1 = this.transform.position;
Vector3 p2 = flag.transform.position;
Vector3 p = p2 - p1;
float distance = p.magnitude;
Debug.Log("** 两个物体之间的实时距离是: " + distance);
if ( distance > 0.3f )//距离足够小 认为是已经达到目标点
{
float speed = 2;
float move = speed * Time.deltaTime;
this.transform.Translate(0, 0, move, Space.Self);
}
}
}
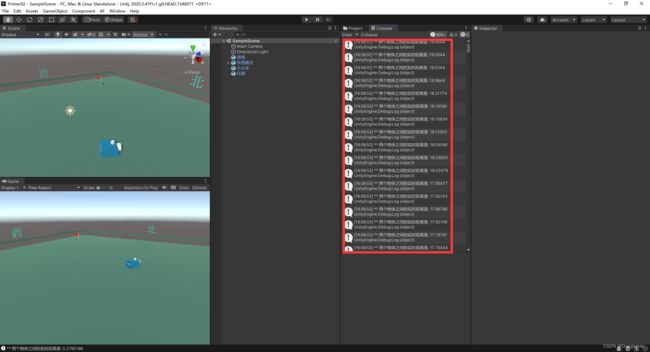

可以 但是效率很差
选中小火车 再Edit | Lock view to selected 可以体验第一人称开火车的感觉

12.1 物体的旋转


打开场景 AF demo sence
风扇模型挂载脚本位于AF | scripts
using System.Collections;
using System.Collections.Generic;
using UnityEngine;
public class SimpleLogic : MonoBehaviour
{
// Start is called before the first frame update
void Start()
{
Application.targetFrameRate = 60;
// Quaternion 是四元组,不便使用
// transform.rotation =
// 欧拉角,官方推荐使用
// transform.localEulerAngles = new Vector3(0, 45, 0);//y轴旋转一次45度
}
// Update is called once per frame
void Update()
{
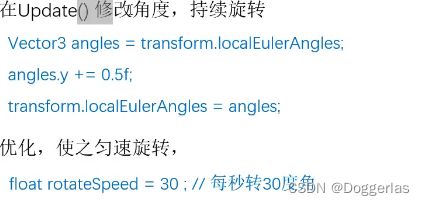
float rotateSpeed = 60; // 角速度,每秒转动60度角
Vector3 angles = this.transform.localEulerAngles;
angles.y += rotateSpeed * Time.deltaTime; //0.5f;
this.transform.localEulerAngles = angles;
}
}

开始旋转


12.2 相对旋转

using System.Collections;
using System.Collections.Generic;
using UnityEngine;

public class SimpleLogic : MonoBehaviour
{
    // Start is called before the first frame update
    void Start()
    {
        Application.targetFrameRate = 60;


        // Quaternion 是四元组,不便使用
        // transform.rotation =

        // 欧拉角,官方推荐使用
        // transform.localEulerAngles = new Vector3(0, 45, 0);
    }

    // Update is called once per frame
    void Update()
    {
        float rotateSpeed = 60; // 角速度,每秒转动60度角

        //Vector3 angles = this.transform.localEulerAngles;
        //angles.y += rotateSpeed * Time.deltaTime; //0.5f;
        //this.transform.localEulerAngles = angles;

        this.transform.Rotate(0, rotateSpeed * Time.deltaTime, 0, Space.Self);
    }
}
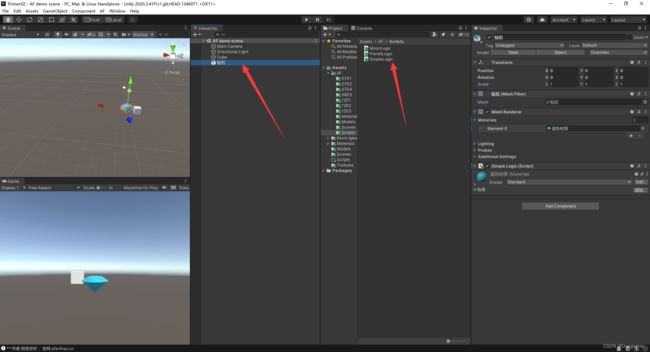
星球旋转例子
给地球模型挂载脚本 Planetlogic
using System.Collections;
using System.Collections.Generic;
using UnityEngine;

/** 地球运动的脚本
 *
 */
public class PlanetLogic : MonoBehaviour
{
    // Start is called before the first frame update
    void Start()
    {

    }

    // Update is called once per frame
    void Update()
    {
        float rotateSpeed = 60; // 角速度,每秒转动60度角

        this.transform.Rotate(0, rotateSpeed * Time.deltaTime, 0, Space.Self);
    }
}

旋转

12.3 自转与公转

注意卫星的父物体不是地球 是与地球中心重合的空物体a1 这样做可以避免对地球进行操作(放缩 移动)时影响卫星
卫星脚本MoonLogic.cs
using System.Collections;
using System.Collections.Generic;
using UnityEngine;

/** 此脚本挂在卫星上
 *
 */
public class MoonLogic : MonoBehaviour
{
    // Start is called before the first frame update
    void Start()
    {

    }

    // Update is called once per frame
    void Update()
    {
        float rotateSpeed = 60;

        // 找到父物体
        Transform parent = this.transform.parent;

        // 控制父物体旋转
        parent.Rotate(0, rotateSpeed* Time.deltaTime, 0, Space.Self);
    }
}
地球脚本PlanetLogic.cs
using System.Collections;
using System.Collections.Generic;
using UnityEngine;

/** 地球运动的脚本
 *
 */
public class PlanetLogic : MonoBehaviour
{
    // Start is called before the first frame update
    void Start()
    {

    }

    // Update is called once per frame
    void Update()
    {
        float rotateSpeed = 10; // 角速度,每秒转动60度角

        this.transform.Rotate(0, rotateSpeed * Time.deltaTime, 0, Space.Self);
    }
}


12.4 官方文档

官方文档
13.1 脚本的运行

在以下物体上挂载SimpleLogic脚本实现自旋
using System.Collections;
using System.Collections.Generic;
using UnityEngine;

public class SimpleLogic : MonoBehaviour
{
    // Start is called before the first frame update
    void Start()
    {
        Debug.Log("** 作者 阿发你好 ,官网 afanihao.cn ");

        Application.targetFrameRate = 60;

    }

    // Update is called once per frame
    void Update()
    {
        float rotateSpeed = 60;

        this.transform.Rotate(0, rotateSpeed * Time.deltaTime, 0, Space.Self);
    }
}

自旋

unity对场景的理解


同一个脚本可以多次使用,挂载到不同的节点物体下
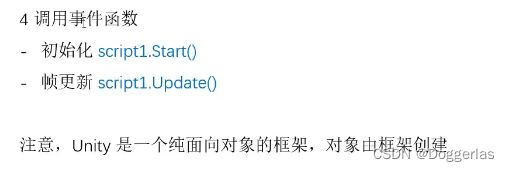
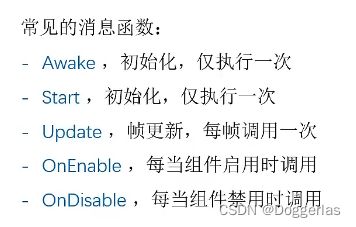
13.2 消息函数

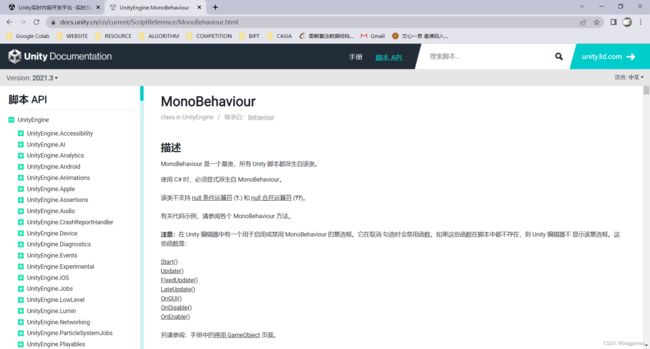
全部的消息函数在下面

目前仅需了解以下五个:
using System.Collections;
using System.Collections.Generic;
using UnityEngine;

public class SimpleLogic : MonoBehaviour
{
    private void Awake()
    {
        Debug.Log("** Awake() , 初始化");//第一阶段初始化 即使被禁用(就是取消Simple Logic前面的√)也会调用
    }

    // Start is called before the first frame update
    void Start()
    {
        Debug.Log("** Start() , 初始化");

        Debug.Log("** 作者 阿发你好 ,官网 afanihao.cn ");//第二阶段初始化 被禁用就不会调用

        Application.targetFrameRate = 60;

    }

    // Update is called once per frame
    void Update()
    {
        float rotateSpeed = 60;

        this.transform.Rotate(0, rotateSpeed * Time.deltaTime, 0, Space.Self);
    }

    private void OnEnable()
    {
        Debug.Log("** OnEnable() , 初始化");//组件被启用时调用
    }

    private void OnDisable()
    {
        Debug.Log("** OnDisable() , 初始化");//组件被禁用时调用
    }

}
脚本不被禁用时执行结果
脚本被禁用时执行结果

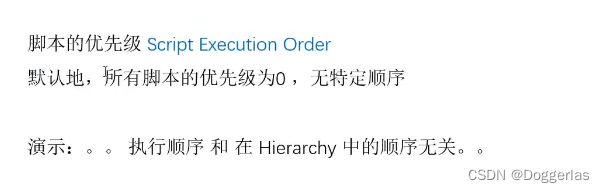
13.3 脚本的执行顺序
SimpleLogic脚本
using System.Collections;
using System.Collections.Generic;
using UnityEngine;

public class SimpleLogic : MonoBehaviour
{
    private void Awake()
    {
        Debug.Log(this.gameObject.name + "** Awake() , 初始化");
    }

    // Start is called before the first frame update
    void Start()
    {
        Debug.Log(this.gameObject.name + "** Start() , 初始化");

        Debug.Log("** 作者 阿发你好 ,官网 afanihao.cn ");

        Application.targetFrameRate = 60;

    }

    // Update is called once per frame
    void Update()
    {
        float rotateSpeed = 60;

        this.transform.Rotate(0, rotateSpeed * Time.deltaTime, 0, Space.Self);
    }


}

DiamondLogic脚本
using System.Collections;
using System.Collections.Generic;
using UnityEngine;

public class DiamondLogic : MonoBehaviour
{
    private void Awake()
    {
        Debug.Log(this.gameObject.name + "** Awake() , 初始化");
    }

    // Start is called before the first frame update
    void Start()
    {
        Debug.Log(this.gameObject.name + "** Start() , 初始化");

    }

    // Update is called once per frame
    void Update()
    {
        float rotateSpeed = -60;

        this.transform.Rotate(0, rotateSpeed * Time.deltaTime, 0, Space.Self);
    }
}

执行结果


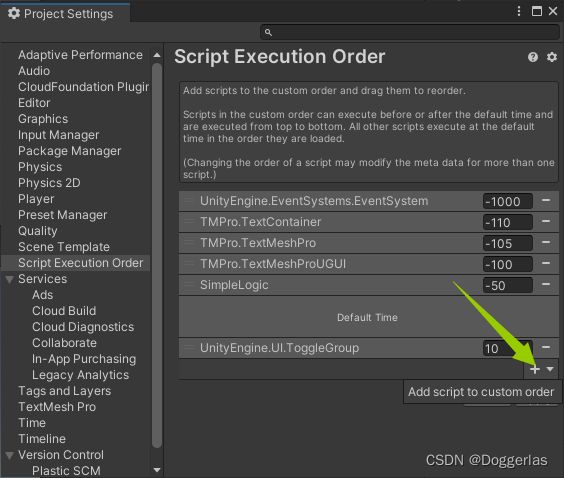


这样就会比SimpleLogic更优先执行DiamondLogic脚本

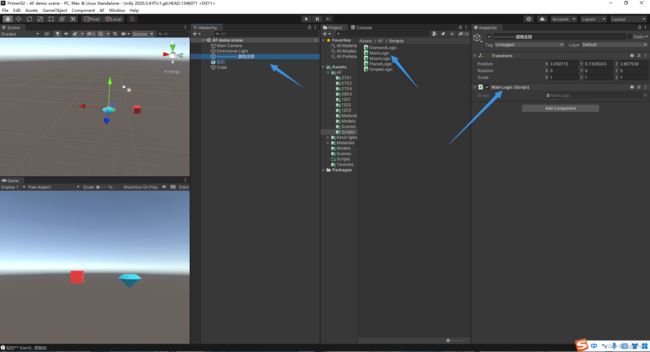
13.4 主控脚本
用来存储一些全局性的信息

MainLogic脚本(比如用来存放游戏的帧率)
using System.Collections;
using System.Collections.Generic;
using UnityEngine;

public class MainLogic : MonoBehaviour
{
    private void Awake()
    {
        Application.targetFrameRate = 60;

    }

    // Start is called before the first frame update
    void Start()
    {

    }

    // Update is called once per frame
    void Update()
    {

    }
}
一般地 可以将主控脚本的优先级调高一点
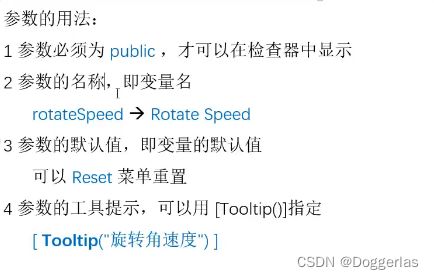
14.1 脚本的参数

给风扇模型挂载脚本RotateY,其功能是让物体绕着Y轴自转。
脚本参数为Rotate Speed鼠标悬停于此会显示“这个是Y轴向的角速度”字样。可直接在inspector中对该值进行修改。从而改变风扇转速,而不需要每次都修改脚本重新编译。
RotateY脚本
using System.Collections;
using System.Collections.Generic;
using UnityEngine;

// 让物体绕着Y轴自转

public class RotateY : MonoBehaviour
{
    [ Tooltip("这个是Y轴向的角速度") ]
    public float rotateSpeed = 30f;

    // Start is called before the first frame update
    void Start()
    {

    }

    // Update is called once per frame
    void Update()
    {
        // float speed = 30f;

        this.transform.Rotate(0, rotateSpeed * Time.deltaTime, 0, Space.Self);
    }
}

14.2 参数的赋值
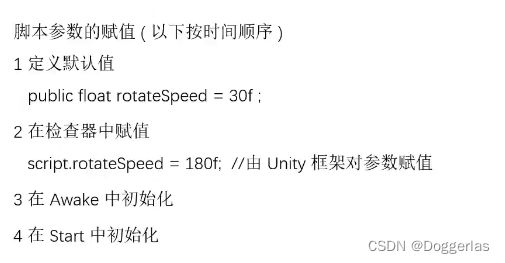
所以如果在inspector窗口不改值 最终参数值取决于start里对它的赋值

可见最后rotateSpeed为120 由start决定
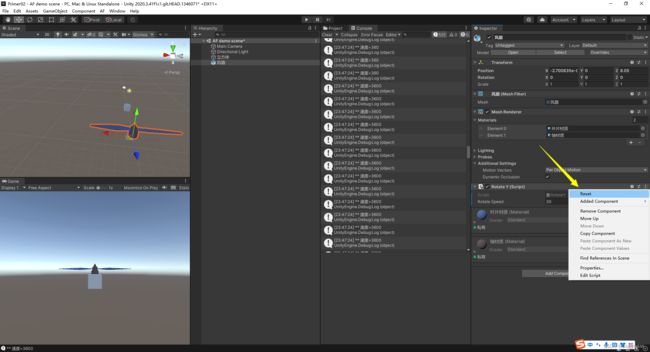
如果在inspector窗口改值 最终参数值以此值为准

支持reset返回默认值
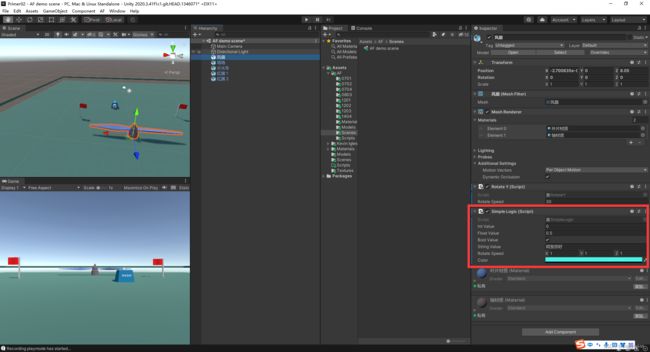
14.3 值类型


SimpleLogic脚本加入各式值参数示例
using System.Collections;
using System.Collections.Generic;
using UnityEngine;

public class SimpleLogic : MonoBehaviour
{
    public int intValue ;//整型值类型

    public float floatValue = 0.5f;//浮点型值类型


    public bool boolValue = true;//布尔型值类型


    public string stringValue = "阿发你好";//字符串值类型


    public Vector3 rotateSpeed = new Vector3(1,1,1);//结构体值类型

    public Color color;//引用类型


    // Start is called before the first frame update
    void Start()
    {

    }

    // Update is called once per frame
    void Update()
    {

    }
}


14.4 引用类型


所以火车向哪个红旗行驶 需要在检查器内提前赋值 直接把节点拖过来就好

这样就说明红旗1是终点
注意:若 targe 未赋值,在控制台里会报告异常 UnassignedReferenceException
TrainLogic脚本 需要挂载到小车上:
using System.Collections;
using System.Collections.Generic;
using UnityEngine;

/** 控制小火车,朝着目标运动
 *
 */

public class TrainLogic : MonoBehaviour
{
    public GameObject target; // 目标物体

    // Start is called before the first frame update
    void Start()
    {
        // 近似60FPS运行,不需要太快,不然CPU卡
        Application.targetFrameRate = 60;

        // 注意,target 必须在检查器里赋值 !!!
        // 若 targe 未赋值,在控制台里会报告异常 UnassignedReferenceException
        this.transform.LookAt(target.transform);

    }

    // Update is called once per frame
    void Update()
    {
        Vector3 p1 = this.transform.position;
        Vector3 p2 = target.transform.position;
        Vector3 p = p2 - p1;
        float distance = p.magnitude;

        if( distance > 0.3f )
        {
            float speed = 2;
            float move = speed * Time.deltaTime;
            this.transform.Translate(0, 0, move, Space.Self);
        }
    }
}
14.5 运行时调试

Inspector值可以实时显示或者交互输入,调试了一组很好的参数时,可以暂停游戏模式先拷贝值,再在编辑模式中粘贴值

15.1 鼠标输入


新建一个风扇模型 挂载以下的FanLogic脚本
可实现鼠标按下 风扇转动 松开停止
using System.Collections;
using System.Collections.Generic;
using UnityEngine;

public class FanLogic : MonoBehaviour
{
    float m_speed = 0;

    // Start is called before the first frame update
    void Start()
    {

    }

    // Update is called once per frame
    void Update()
    {
        if ( Input.GetMouseButtonDown( 0 ))
        {
            Debug.Log("** 鼠标按下");
            m_speed = 180;//鼠标按下给个转速
        }
        if (Input.GetMouseButtonUp(0))
        {
            Debug.Log("** 鼠标抬起");
            m_speed = 0;//鼠标抬起 运动终止
        }

        //float speed = 180;
        this.transform.Rotate(0, m_speed * Time.deltaTime, 0, Space.Self);
    }
}


15.2 几个细节

用以下检测鼠标状态的脚本 也能实现上一节的逻辑
using System.Collections;
using System.Collections.Generic;
using UnityEngine;

public class FanLogic : MonoBehaviour
{
    float m_speed = 0;

    // Start is called before the first frame update
    void Start()
    {

    }

    // Update is called once per frame
    void Update()
    {


        /// 鼠标状态探测 //
        if (Input.GetMouseButton(0))
        {
            Debug.Log("** 鼠标按下ing, 正被按下");
            m_speed = 180;
        }
        else
        {
            m_speed = 0;
        }

        this.transform.Rotate(0, m_speed * Time.deltaTime, 0, Space.Self);
    }
}

可以看到输出了很多打印信息 这是因为状态监测能在鼠标弹起前这段时间内一直输出鼠标状态 而上一节的鼠标事件只记录一次鼠标被触发的状态改变
事件能实现更为复杂的逻辑 所以常用
在场景中新建cube物体 并挂载以下脚本
using System.Collections;
using System.Collections.Generic;
using UnityEngine;

public class CubeLogic : MonoBehaviour
{
    // Start is called before the first frame update
    void Start()
    {

    }

    // Update is called once per frame
    void Update()
    {
        if (Input.GetMouseButtonDown(0))
        {
            Debug.Log("** 鼠标按下, " + this.name );
        }
    }
}
并把风扇脚本也更改了
using System.Collections;
using System.Collections.Generic;
using UnityEngine;

public class FanLogic : MonoBehaviour
{
    float m_speed = 0;

    // Start is called before the first frame update
    void Start()
    {

    }

    // Update is called once per frame
    void Update()
    {
        if (Input.GetMouseButtonDown(0))
        {
            Debug.Log("** 鼠标按下, " + this.name);
            m_speed = 180;
        }

        this.transform.Rotate(0, m_speed * Time.deltaTime, 0, Space.Self);
    }
}
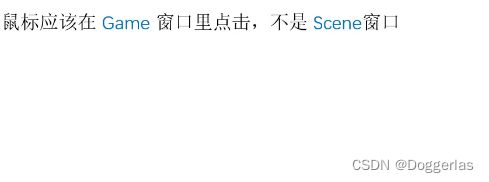
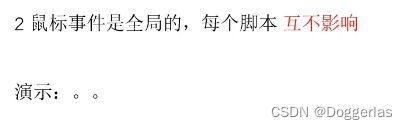
按下鼠标时 可以看到两个物体都捕捉了鼠标事件 所以说
鼠标事件是一个全局信号

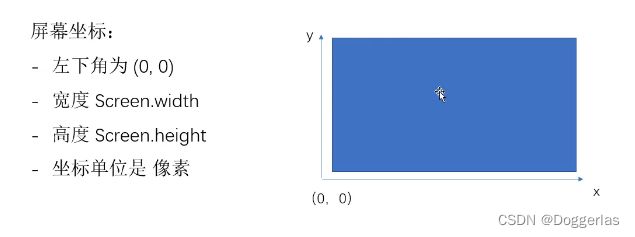
15.3 屏幕坐标

获取鼠标位置
using System.Collections;
using System.Collections.Generic;
using UnityEngine;
public class CubeLogic : MonoBehaviour
{
// Start is called before the first frame update
void Start()
{
}

// Update is called once per frame
void Update()
{

    if(Input.GetMouseButtonDown( 0 ))
    {
        // 鼠标点下的位置,此位置是屏幕坐标
        Vector3 mousePos = Input.mousePosition;
        Debug.Log("* 鼠标位置 " + mousePos);
    }


}
}


根据屏幕大小及物体的屏幕坐标之间的关系 判断运动物体是否超出屏幕边界
using System.Collections;
using System.Collections.Generic;
using UnityEngine;

public class CubeLogic : MonoBehaviour
{
    // Start is called before the first frame update
    void Start()
    {
        //获取游戏窗口屏幕(摄像机屏幕)尺寸
        int width = Screen.width;
        int height = Screen.height;
        Debug.Log("* 屏幕尺寸 : " + width + ", " + height);

        //物体的世界坐标转换为屏幕(摄像机屏幕)坐标
        Vector3 pos = this.transform.position;
        Vector3 screenPos = Camera.main.WorldToScreenPoint(pos);
        Debug.Log("** 物体初始的屏幕坐标: " + screenPos);
    }

    // Update is called once per frame
    void Update()
    {
        // 取得物体在屏幕上显示的位置 ,即屏幕坐标
        Vector3 pos = this.transform.position;
        Vector3 screenPos = Camera.main.WorldToScreenPoint(pos);
        Debug.Log("** 此时刻物体的屏幕坐标: " + screenPos);

        // 判断物体是否已经出了屏幕边界
        if ( screenPos.x <0 || screenPos.x > Screen.width)
        {
            Debug.Log("** 物体已出屏幕边界");
        }

        // 物体运动
        float speed = 4;
        transform.Translate(speed * Time.deltaTime, 0, 0, Space.World);


    }
}


15.4 键盘输入


使用以下脚本 用wsadhl实现对飞行器前后左右上下的控制
using System.Collections;
using System.Collections.Generic;
using UnityEngine;

public class FlyLogic : MonoBehaviour
{
    // Start is called before the first frame update
    void Start()
    {

    }

    // Update is called once per frame
    void Update()
    {
        float xSpeed = 0;
        float ySpeed = 0;
        float zSpeed = 0;

        if ( Input.GetKey ( KeyCode.W ))
        {
            //Debug.Log("* 按键 w 被按下 ");
            zSpeed = 1;
        }
        if (Input.GetKey(KeyCode.S))
        {
            //Debug.Log("* 按键 s 被按下 ");
            zSpeed = -1;
        }
        if (Input.GetKey(KeyCode.A))
        {
            //Debug.Log("* 按键 a 被按下 ");
            xSpeed = 1;
        }
        if (Input.GetKey(KeyCode.D))
        {
            //Debug.Log("* 按键 d 被按下 ");
            xSpeed = -1;
        }
        if (Input.GetKey(KeyCode.H))
        {
            //Debug.Log("* 按键 h 被按下 ");
            ySpeed = 1;
        }
        if (Input.GetKey(KeyCode.L))
        {
            //Debug.Log("* 按键 l 被按下 ");
            ySpeed = -1;
        }

        this.transform.Translate(xSpeed * Time.deltaTime, ySpeed * Time.deltaTime, zSpeed * Time.deltaTime, Space.Self);
    }
}

16.1 组件的调用
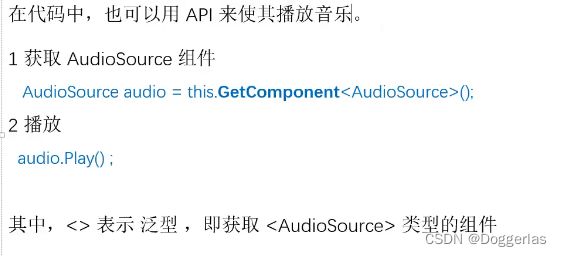
用以下脚本实现鼠标点击的时候就播放 再点一次停止播放:
using System.Collections;
using System.Collections.Generic;
using UnityEngine;
public class CubeLogic : MonoBehaviour
{
// Start is called before the first frame update
void Start()
{
}

// Update is called once per frame
void Update()
{

    if(Input.GetMouseButtonDown( 0 ))
    {
        //鼠标点击的时候就播放 再点一次停止播放
        PlayMusic();
    }

}

void PlayMusic()
{
    // 获取组件
    AudioSource audio = this.GetComponent();

    if( audio.isPlaying )
    {
        Debug.Log("* 停止播放");
        audio.Stop();
    }
    else
    {
        Debug.Log("* 开始播放音乐 ..");
        audio.Play();
    }

}
}

16.2 组件的参数

用以下脚本实现对mute参数的访问
using System.Collections;
using System.Collections.Generic;
using UnityEngine;

public class CubeLogic : MonoBehaviour
{
    // Start is called before the first frame update
    void Start()
    {

    }

    // Update is called once per frame
    void Update()
    {

        if(Input.GetMouseButtonDown( 0 ))
        {
            PlayMusic();
        }

    }

    void PlayMusic()
    {
        // 获取组件
        AudioSource audio = this.GetComponent<AudioSource>();
        audio.mute = true;//实现对mute参数的访问


    }

}
当游戏运行时 可见mute属性被自动勾选
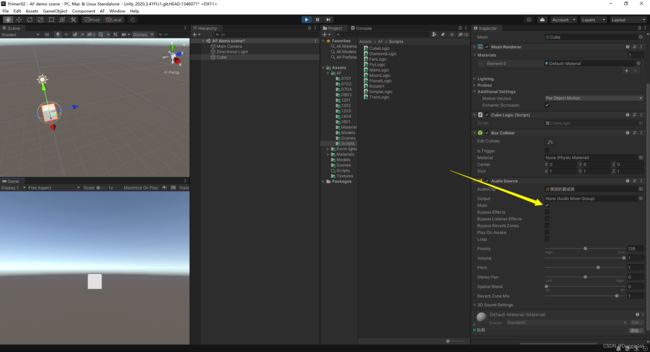
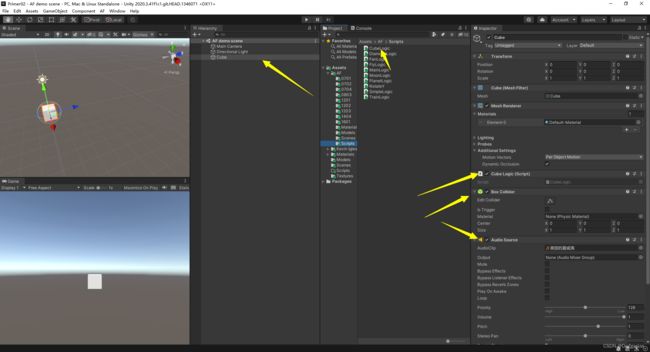
16.3 引用别的组件
某一物体的挂载脚本中调用别的物体的组件

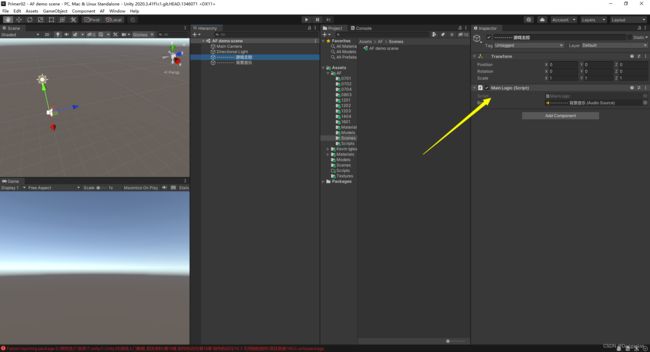
在游戏主控下挂载mainlogic脚本 在背景音乐中添加一个AudioSource组件
using System.Collections;
using System.Collections.Generic;
using UnityEngine;

public class MainLogic : MonoBehaviour
{

    // 在检查器里给一个引用
    public GameObject bgm;

    // Start is called before the first frame update
    void Start()
    {

        //访问引用的音频的属性
        AudioSource audio = bgm.GetComponent<AudioSource>();
        audio.Play();

    }

    // Update is called once per frame
    void Update()
    {
        // 访问另一个节点下的 AudioSource 组件
    }
}
把背景音乐这个组件拖拽到主控下即可

using System.Collections;
using System.Collections.Generic;
using UnityEngine;
public class MainLogic : MonoBehaviour
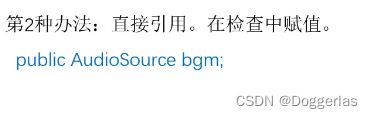
{
// 在检查器里对其赋值,引用目标组件
public AudioSource bgm;
// Start is called before the first frame update
void Start()
{
// 直接访问这个组件
bgm.Play();
}
// Update is called once per frame
void Update()
{
// 访问另一个节点下的 AudioSource 组件
}
}
当然运行也需要拖动才行


16.4 引用脚本组件

用主控结点的脚本mainlogic访问另一个风扇节点的脚本属性rotateSpeed并赋值
第一种方式:API获取
MainLogic脚本
using System.Collections;
using System.Collections.Generic;
using UnityEngine;

public class MainLogic : MonoBehaviour
{
    // 目标组件,直接在检查里引用
    public GameObject fanNode;

    // Start is called before the first frame update
    void Start()
    {


    }

    // Update is called once per frame
    void Update()
    {
        if(Input.GetMouseButtonDown(0))
        {
            DoWork();
        }
    }

    void DoWork()
    {
        FanLogic fan = fanNode.GetComponent<FanLogic>();
        fan.rotateSpeed = 180;
    }
}
FanLogic脚本
using System.Collections;
using System.Collections.Generic;
using UnityEngine;

public class FanLogic : MonoBehaviour
{
    public float rotateSpeed;

    // Start is called before the first frame update
    void Start()
    {

    }

    // Update is called once per frame
    void Update()
    {
        this.transform.Rotate(0, rotateSpeed * Time.deltaTime, 0, Space.Self);
    }
}
然后在mainlogic脚本属性中选择对fanlogic脚本的引用

运行即可
第二种方式:直接引用
MainLogic脚本
using System.Collections;
using System.Collections.Generic;
using UnityEngine;

public class MainLogic : MonoBehaviour
{
    // 目标组件,直接在检查里引用
    public FanLogic fan;

    // Start is called before the first frame update
    void Start()
    {


    }

    // Update is called once per frame
    void Update()
    {
        if(Input.GetMouseButtonDown(0))
        {
            DoWork();
        }
    }

    void DoWork()
    {
        fan.rotateSpeed = 180;//访问FanLogic脚本的属性rotateSpeed并赋值
    }
}
FanLogic脚本不变
并且也需要拖拽

以上两种方式运行后都可发现风扇旋转参数变为180


16.5 消息调用
还是希望以主控脚本给定旋转量实现操纵这个风扇旋转
主控脚本MainLogic
using System.Collections;
using System.Collections.Generic;
using UnityEngine;
public class MainLogic : MonoBehaviour
{
public GameObject fanNode;
// Start is called before the first frame update
void Start()
{
}
// Update is called once per frame
void Update()
{
if(Input.GetMouseButtonDown(0))
{
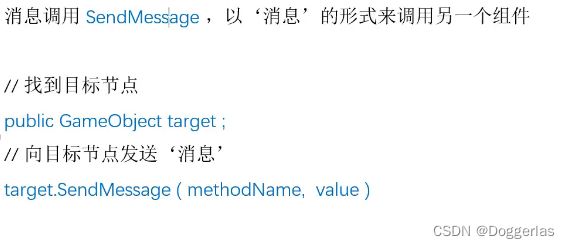
Debug.Log("** 发送一个消息 ,DoRoate ");
// 向目标节点发送一个‘消息’
// 消息名,即为目标函数名,注意函数名不要写错了
fanNode.SendMessage("DoRoate");
}
}
}
风扇脚本FanLogic
using System.Collections;
using System.Collections.Generic;
using UnityEngine;

public class FanLogic : MonoBehaviour
{
    public float rotateSpeed;

    // Start is called before the first frame update
    void Start()
    {

    }

    // Update is called once per frame
    void Update()
    {
        this.transform.Rotate(0, rotateSpeed * Time.deltaTime, 0, Space.Self);
    }

    public void DoRoate()
    {
        Debug.Log("** 执行 ,DoRoate() ");
        rotateSpeed = 180;
    }
}
还是需要关联脚本

执行结果:


16.6 练习 简单飞控

w起飞 s降落
主控

using System.Collections;
using System.Collections.Generic;
using UnityEngine;
//主控脚本
public class MainLogic : MonoBehaviour
{
    public RotateLogic rotateLogic;

    public FlyLogic flyLogic;

    // Start is called before the first frame update
    void Start()
    {
        Application.targetFrameRate = 60;

        rotateLogic.DoRotate();//旋翼开始旋转
    }

    // Update is called once per frame
    void Update()
    {
        // w 键,起飞, s 键 ,降落
        if(Input.GetKeyDown(KeyCode.W))
        {
            flyLogic.Fly();
        }

        if (Input.GetKeyDown(KeyCode.S))
        {
            flyLogic.Land();
        }

    }


}
无人机

using System.Collections;
using System.Collections.Generic;
using UnityEngine;
//无人机脚本
public class FlyLogic : MonoBehaviour
{
    float m_speed = 0;

    // Start is called before the first frame update
    void Start()
    {
    }

    // Update is called once per frame
    void Update()
    {
        float height = this.transform.position.y;
        float dy = m_speed * Time.deltaTime;
        //限定飞行范围
        if( dy > 0 && height < 4 )
        {
            this.transform.Translate(0, dy, 0, Space.Self);
        }
        if ( dy < 0 && height > 0)
        {
            this.transform.Translate(0, dy, 0, Space.Self);
        }
    }

    public void Fly()
    {
        m_speed = 1;
    }
    public void Land()
    {
        m_speed = -1;
    }
}
旋翼

using System.Collections;
using System.Collections.Generic;
using UnityEngine;
//旋翼脚本
public class RotateLogic : MonoBehaviour
{
    float m_rotateSpeed;

    // Start is called before the first frame update
    void Start()
    {

    }

    // Update is called once per frame
    void Update()
    {
        this.transform.Rotate(0, m_rotateSpeed * Time.deltaTime, 0, Space.Self);
    }

    public void DoRotate()//旋翼旋转
    {
        m_rotateSpeed = 360*3;
    }
    public void DoStop()//旋翼停止
    {
        m_rotateSpeed = 0;
    }
}

17.1 获取物体
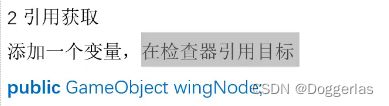

比如查找旋翼的主控脚本
using System.Collections;
using System.Collections.Generic;
using UnityEngine;
public class MainLogic : MonoBehaviour
{
public GameObject wingNode;
// Start is called before the first frame update
void Start()
{
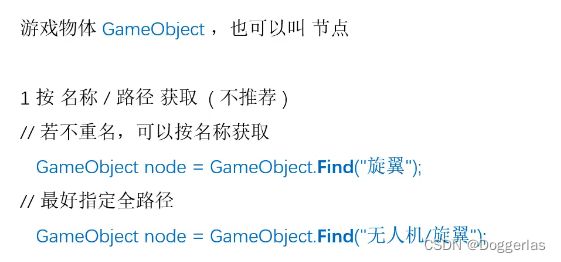
Application.targetFrameRate = 60;
//GameObject node = GameObject.Find("无人机/旋翼");//通过节点路径名称获取物体
RotateLogic rotateLogic = wingNode.GetComponent<RotateLogic>();//引用获取 需要在检查器里引用目标对象(拖拽)
rotateLogic.DoRotate();
}
// Update is called once per frame
void Update()
{
}
}
旋翼脚本
using System.Collections;
using System.Collections.Generic;
using UnityEngine;

public class RotateLogic : MonoBehaviour
{
    float m_rotateSpeed;

    // Start is called before the first frame update
    void Start()
    {

    }

    // Update is called once per frame
    void Update()
    {
        this.transform.Rotate(0, m_rotateSpeed * Time.deltaTime, 0, Space.Self);
    }

    public void DoRotate()
    {
        m_rotateSpeed = 360*3;
    }
    public void DoStop()
    {
        m_rotateSpeed = 0;
    }
}
17.2 父子物体

在cube下挂载脚本SimpleLogic 对cube父子节点进行访问

访问父级节点
using System.Collections;
using System.Collections.Generic;
using UnityEngine;

public class SimpleLogic : MonoBehaviour
{
    // Start is called before the first frame update
    void Start()
    {
        Transform parent = this.transform.parent;//父级节点的transform组件

        GameObject parentNode = this.transform.parent.gameObject;//通过父级节点的transform组件得到父级节点

        Debug.Log("* 父级 : " + parent.name);


    }

    // Update is called once per frame
    void Update()
    {

    }
}

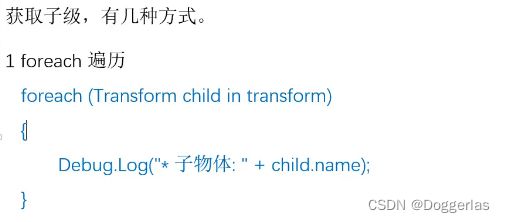
方法1:子节点的遍历访问
using System.Collections;
using System.Collections.Generic;
using UnityEngine;

public class SimpleLogic : MonoBehaviour
{
    // Start is called before the first frame update
    void Start()
    {
        foreach (Transform child in transform)
        {

            Debug.Log("* 子物体: " + child.name); // child
        }
    }

    // Update is called once per frame
    void Update()
    {

    }
}

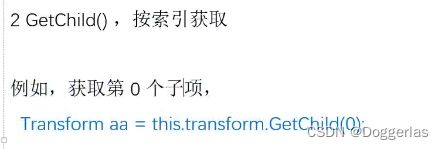
方法2:子节点的索引访问
using System.Collections;
using System.Collections.Generic;
using UnityEngine;

public class SimpleLogic : MonoBehaviour
{
    // Start is called before the first frame update
    void Start()
    {

        Transform child = this.transform.GetChild(0);
        Debug.Log("* 子物体: " + child.name); // child

    }

    // Update is called once per frame
    void Update()
    {

    }
}

方法3:子节点的名称访问

using System.Collections;
using System.Collections.Generic;
using UnityEngine;

public class SimpleLogic : MonoBehaviour
{
    // Start is called before the first frame update
    void Start()
    {

        Transform child = this.transform.Find("bb/cc");
        if (child != null)
        {
            Debug.Log("* 找到子物体: " + child.name); // child
        }
        else
        {
            Debug.Log("Not Found"); // child
        }

    }

    // Update is called once per frame
    void Update()
    {

    }
}

顶级节点的父物体为空(null)
17.3 物体的操作

初始情况 cube父节点是111

点击鼠标 cube会移动到222节点下边 也就是把222作为父节点
using System.Collections;
using System.Collections.Generic;
using UnityEngine;

public class SimpleLogic : MonoBehaviour
{
    // Start is called before the first frame update
    void Start()
    {

    }

    // Update is called once per frame
    void Update()
    {
        if(Input.GetMouseButtonDown(0))
        {
            Test();
        }
    }

    private void Test()
    {
        Transform a222 = this.transform.Find("/222");
        this.transform.SetParent( null );
    }
}


鼠标点击一下即可实现隐藏/可见节点aa
using System.Collections;
using System.Collections.Generic;
using UnityEngine;

public class SimpleLogic : MonoBehaviour
{
    // Start is called before the first frame update
    void Start()
    {

    }

    // Update is called once per frame
    void Update()
    {
        if(Input.GetMouseButtonDown(0))
        {
            Test();
        }
    }

    private void Test()
    {
        //隐藏/可见节点
        Transform child = this.transform.Find("aa");
        if(child.gameObject.activeSelf)//判断节点是否可见
        {
            child.gameObject.SetActive(false);//隐藏
        }
        else
        {
            child.gameObject.SetActive( true);//可见
        }
    }
}


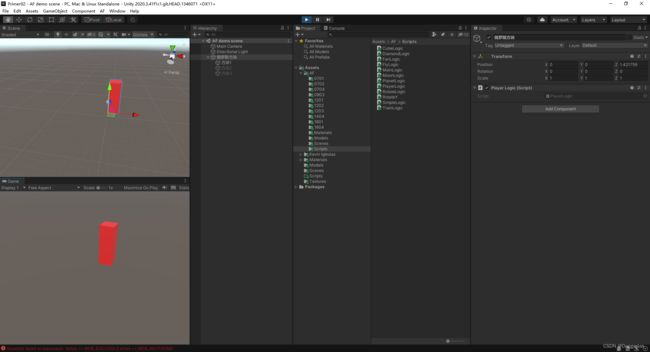
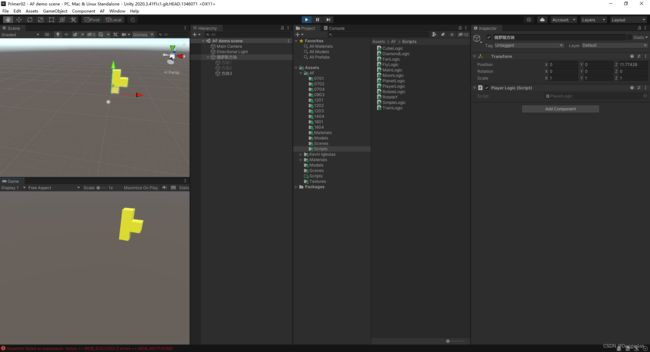
17.4 练习 俄罗斯方块

在父级节点上挂载脚本PlayerLogic

using System.Collections;
using System.Collections.Generic;
using UnityEngine;

public class PlayerLogic : MonoBehaviour
{
    int m_index = 0; // 表示显示的是哪一个形状的索引

    // Start is called before the first frame update
    void Start()
    {

    }

    // Update is called once per frame
    void Update()
    {
        //点击空格切换显示的形状
        if(Input.GetKeyDown(KeyCode.Space))
        {
            ChangeShape();
        }

        // 父物体(俄罗斯方块空节点)向前运动  三个子物体同时移动
        float speed = 1;
        this.transform.Translate(0, 0, speed * Time.deltaTime, Space.Self);
    }

    private void ChangeShape()
    {
        // 先把原来的形状,隐藏
        Transform child = this.transform.GetChild(m_index);
        child.gameObject.SetActive(false);
        //三次一周期 循环改变形状
        m_index += 1;
        int count = this.transform.childCount;//获取子物体的个数
        if (m_index >= count)
            m_index = 0;

        // 显示新的形状
        child = this.transform.GetChild(m_index);
        child.gameObject.SetActive(true);

    }
}

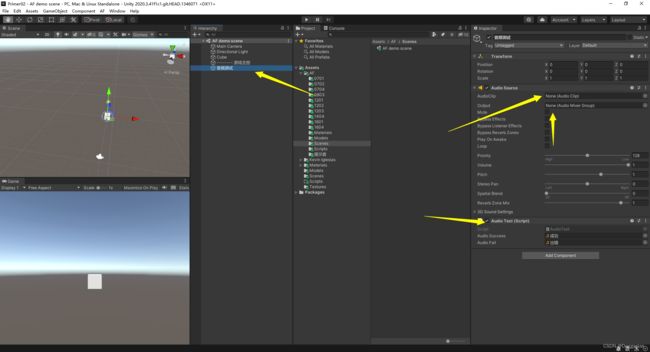
18.1 资源的使用

在音频测试节点下增加一个Audio Source Component但是不指定AudioClip 用脚本实现这一功能
using System.Collections;
using System.Collections.Generic;
using UnityEngine;

public class AudioTest : MonoBehaviour
{
    public AudioClip audioSuccess;

    public AudioClip audioFail;

    // Start is called before the first frame update
    void Start()
    {

    }

    // Update is called once per frame
    void Update()
    {
        if(Input.GetKeyDown(KeyCode.A))
        {
            AudioSource audioSource = GetComponent<AudioSource>();

            audioSource.PlayOneShot(audioSuccess);
        }

        if (Input.GetKeyDown(KeyCode.D))
        {
            AudioSource audioSource = GetComponent<AudioSource>();

            audioSource.PlayOneShot(audioFail);
        }

    }
}
直接引用两个音频文件

单击键盘AD键实现音效播放
18.2 资源数组

在音乐盒上挂载脚本MusicBox

using System.Collections;
using System.Collections.Generic;
using UnityEngine;
public class MusicBox : MonoBehaviour
{
public AudioClip[] songs;//数组类型属性
// Start is called before the first frame update
void Start()
{
if (songs == null || songs.Length == 0)
{
Debug.Log("* 请在检查器里指定资源");
}
}
// Update is called once per frame
void Update()
{
if(Input.GetMouseButtonDown(0))
{
NextSong();
}
}
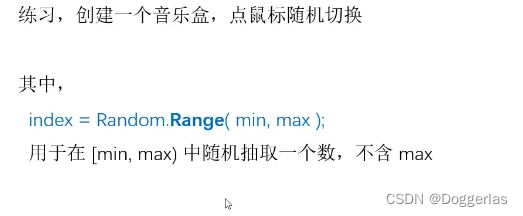
private void NextSong()
{
// 随机播放 (大家也可以改成顺序播放)
// 在 [min, max) 间随机抽取一个值。不包含max 。
int index = Random.Range(0, songs.Length);
AudioClip clip = this.songs[index];
// 播放选中的歌曲
AudioSource ac = GetComponent<AudioSource>();
ac.clip = clip;
ac.Play();
Debug.Log("* 播放第 " + index + ", 名字: " + clip.name);
}
}
歌曲需要引用传递

运行,每点击一次鼠标 就会随机播放一首

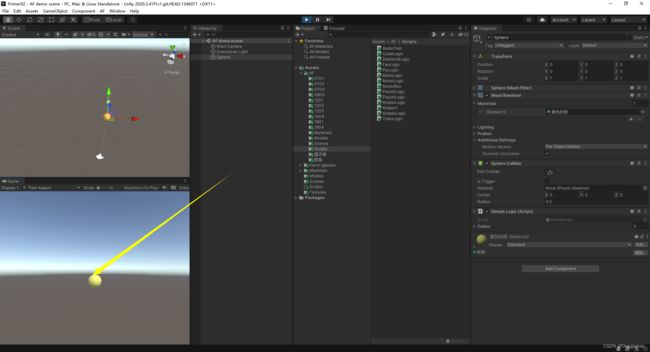
18.3 练习 三色球
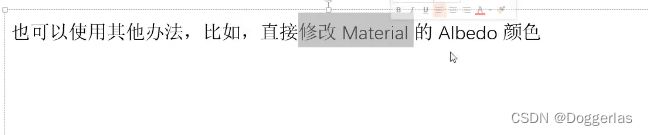
点击鼠标 更换小球颜色(材质)


using System.Collections;
using System.Collections.Generic;
using UnityEngine;

public class SimpleLogic : MonoBehaviour
{
    public Material[] colors;//颜色数组

    //
    int m_index = 0;

    // Start is called before the first frame update
    void Start()
    {

    }

    // Update is called once per frame
    void Update()
    {
        if(Input.GetMouseButtonDown(0))
        {
            ChangeColor();
        }
    }

    private void ChangeColor()
    {
        m_index += 1;
        if (m_index >= this.colors.Length)
            m_index = 0;

        //
        Material selected = this.colors[m_index];

        //
        MeshRenderer rd = GetComponent<MeshRenderer>();
        rd.material = selected;//更改Mesh renderer组件的material 属性 即可实现颜色变换

    }
}
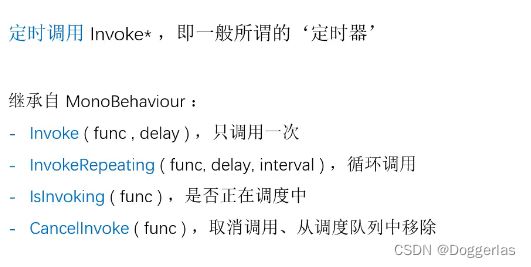
19.1 定时调用
在一秒之后让小球移动
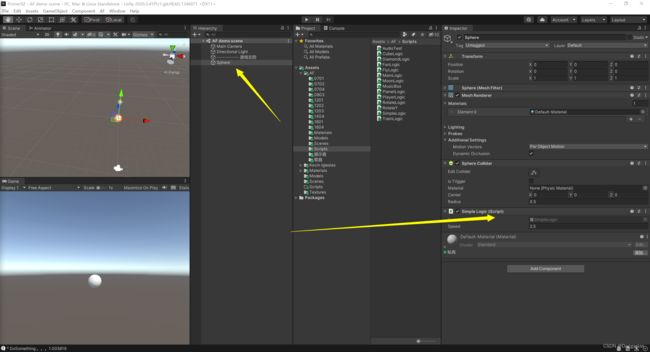
using System.Collections;
using System.Collections.Generic;
using UnityEngine;
public class SimpleLogic : MonoBehaviour
{
public float speed = 2.5f;
// Start is called before the first frame update
void Start()
{
Debug.Log("* Start 。。。" + Time.time);
// 在1秒之后,只调用一次
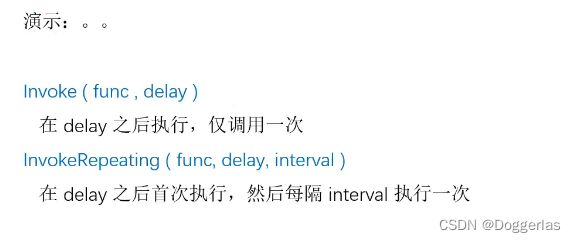
this.Invoke("DoSomething", 1);
}
// Update is called once per frame
void Update()
{
this.transform.Translate(0, speed * Time.deltaTime, 0, Space.Self);
}
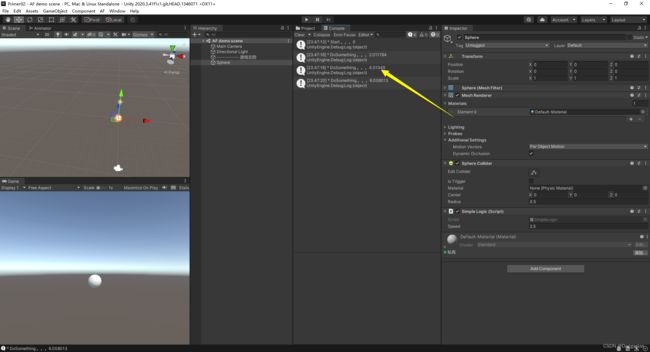
private void DoSomething()
{
Debug.Log("* DoSomething 。。。" + Time.time);
this.speed = 0 - speed;
}
}

每隔两秒执行一次 每次执行两秒
using System.Collections;
using System.Collections.Generic;
using UnityEngine;

public class SimpleLogic : MonoBehaviour
{
    public float speed = 2.5f;

    // Start is called before the first frame update
    void Start()
    {
        Debug.Log("* Start 。。。" + Time.time);

        // 循环反复执行
        this.InvokeRepeating("DoSomething", 2, 2); // 反射机制
    }

    // Update is called once per frame
    void Update()
    {
        this.transform.Translate(0, speed * Time.deltaTime, 0, Space.Self);

    }

    private void DoSomething()
    {
        Debug.Log("* DoSomething 。。。" + Time.time);

        this.speed = 0 - speed;//速度取反 表示反向运动
    }

}

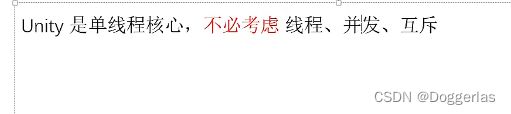
19.2 定时与线程


其实unity程序是单线程完成的 所有函数均在一个线程中调用 可用以下程序测试
using System.Collections;
using System.Collections.Generic;
using UnityEngine;
using System.Threading;

public class SimpleLogic : MonoBehaviour
{
    public float speed = 2.5f;

    // Start is called before the first frame update
    void Start()
    {
        Debug.Log("* Start , 线程ID=" + Thread.CurrentThread.ManagedThreadId);

        // 循环反复执行
        this.InvokeRepeating("DoSomething", 1, 1); // 反射机制
    }

    // Update is called once per frame
    void Update()
    {
        Debug.Log("* Update , 线程ID=" + Thread.CurrentThread.ManagedThreadId);

        this.transform.Translate(0, speed * Time.deltaTime, 0, Space.Self);

    }

    private void DoSomething()
    {
        Debug.Log("* DoSomething 。。。。。。。。。。。 线程ID=" + Thread.CurrentThread.ManagedThreadId);


        this.speed = 0 - speed;
    }

}


19.3 几点细节


Cubelogic脚本:一次重复调用 每隔一秒cube在y方向长度+1
using System.Collections;
using System.Collections.Generic;
using UnityEngine;

public class CubeLogic : MonoBehaviour
{
    // Start is called before the first frame update
    void Start()
    {

    }

    // Update is called once per frame
    void Update()
    {
        // 点鼠标左键后,开始定时器
        if(Input.GetMouseButtonDown(0))
        {
            InvokeRepeating("Expand", 1, 1);

        }
    }

    private void Expand()
    {
        Debug.Log("* 变长 。。" + Time.time);

        Vector3 scale = this.transform.localScale;
        scale.y += 1;
        this.transform.localScale = scale;
    }
}

Cubelogic脚本:两次重复调用 每隔一秒cube在y方向长度+1 但是是两个调度 相当于+2
using System.Collections;
using System.Collections.Generic;
using UnityEngine;

public class CubeLogic : MonoBehaviour
{
    // Start is called before the first frame update
    void Start()
    {

    }

    // Update is called once per frame
    void Update()
    {
        // 点鼠标左键后,开始定时器
        if(Input.GetMouseButtonDown(0))
        {
            InvokeRepeating("Expand", 1, 1);
            InvokeRepeating("Expand", 1, 1);
        }
    }

    private void Expand()
    {
        Debug.Log("* 变长 。。" + Time.time);

        Vector3 scale = this.transform.localScale;
        scale.y += 1;
        this.transform.localScale = scale;
    }
}

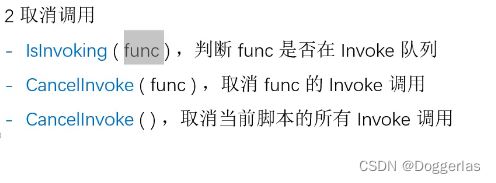
Cubelogic脚本:调度检测 若无调度则点击启动调度 再点击关闭调度
using System.Collections;
using System.Collections.Generic;
using UnityEngine;

public class CubeLogic : MonoBehaviour
{
    // Start is called before the first frame update
    void Start()
    {

    }

    // Update is called once per frame
    void Update()
    {
        // 点鼠标左键后,开始定时器
        if(Input.GetMouseButtonDown(0))
        {
            // 自己根据实际需要,实现自己的逻辑

            // IsInvoking 判断是否已经在调度队列中
            // CancelInvoke 从调度队列中移除
            // InvokeRepeating 添加一个新的调度到队列中
            if ( IsInvoking("Expand"))
            {
                CancelInvoke("Expand");
            }
            else
            {
                InvokeRepeating("Expand", 1, 1);
            }
        }
    }

    private void Expand()
    {
        Debug.Log("* 变长 。。" + Time.time);

        Vector3 scale = this.transform.localScale;
        scale.y += 1;
        this.transform.localScale = scale;
    }
}


19.4 练习 红绿灯

注意这个场景变更又是SimpleScene了 而不是AF demo Scene 作者又是大意了 还好我早就不用SimpleScene了 上一次也是置换SimpleScene 所以把之前例子的SimpleScene全转到My Scene中了

点击后自动变颜色:红 -> 绿,间隔4秒钟,绿 -> 黄,间隔4秒钟,黄 -> 红,间隔1秒钟
灯的脚本LightLogic:
using System.Collections;
using System.Collections.Generic;
using UnityEngine;

public class LightLogic : MonoBehaviour
{
    [Tooltip("红、绿、黄按顺序指定")]
    public Material[] colors;

    int m_index = 0; // 红灯开始

    // Start is called before the first frame update
    void Start()
    {
        ChangeColor();
    }

    // Update is called once per frame
    void Update()
    {
    }

    void ChangeColor()
    {
        // 当前材质
        Material color = this.colors[m_index];
        MeshRenderer renderer = GetComponent<MeshRenderer>();
        renderer.material = color;
        Debug.Log("* Change -> " + m_index + ", time=" + Time.time);

        if (m_index == 0)
        {
            // 红 -> 绿,间隔4秒钟
            Invoke("ChangeColor", 4);//调用自身也是可以的
        }
        else if (m_index == 1)
        {
            // 绿 -> 黄,间隔4秒钟
            Invoke("ChangeColor", 4);
        }
        else if (m_index == 2)
        {
            // 黄 -> 红,间隔1秒钟
            Invoke("ChangeColor", 1);
        }

        // 切换
        m_index++;
        if (m_index >= 3) m_index = 0;
    }
}
设置数组引用传参:

最终结果
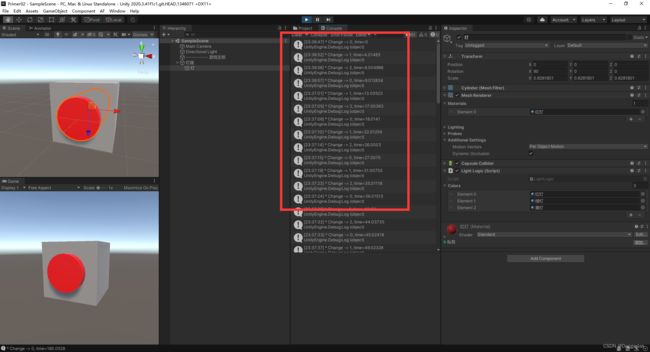

19.5 练习 加速减速

点击风扇启动 到达最大转速时再次点击 风扇逐渐减速到停止
using System.Collections;
using System.Collections.Generic;
using UnityEngine;

public class FanLogic : MonoBehaviour
{
    // 最大转速
    public float maxRotateSpeed = 720;

    float m_speed = 0; // 当前转速
    bool m_speedUp = false; // true 加速 , false 减速

    // Start is called before the first frame update
    void Start()
    {
        InvokeRepeating("AdjustSpeed", 0.1f, 0.1f);
    }

    // Update is called once per frame
    void Update()
    {
        // 点一下,加速。再点一下,减速。
        if(Input.GetMouseButtonDown(0))
        {
            m_speedUp = !m_speedUp;
        }

        // 旋转
        if(m_speed > 0)
        {
            this.transform.Rotate(0, m_speed * Time.deltaTime, 0, Space.Self);
        }
    }

    // 速度调整
    private void AdjustSpeed()
    {
        if(m_speedUp)
        {
            if (m_speed < maxRotateSpeed)
                m_speed += 10;
        }
        else
        {
            m_speed -= 10;
            if (m_speed < 0)
                m_speed = 0;
        }
    }

}
20.1 向量


向量测试
using System.Collections;
using System.Collections.Generic;
using UnityEngine;

public class SimpleLogic : MonoBehaviour
{
    // Start is called before the first frame update
    void Start()
    {
        // Vector3 v1 = Vector3.zero;
        Vector3 v1 = Vector3.right; // (1, 0 , 0)

        Debug.Log("* 结果=" + v1.ToString("f3"));
    }

    // Update is called once per frame
    void Update()
    {

    }
}

20.2 向量运算


向量乘法运算示例

using System.Collections;
using System.Collections.Generic;
using UnityEngine;

public class SimpleLogic : MonoBehaviour
{
    public Vector3 speed ;

    // Start is called before the first frame update
    void Start()
    {

        Vector3 a = new Vector3(1, 3, 0);

        Vector3 b = a * 2;


        Debug.Log("* 结果=" + b);
    }

    // Update is called once per frame
    void Update()
    {

    }
}
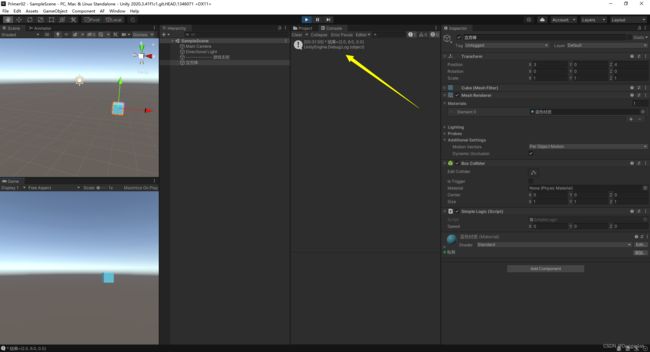
20.3 向量测距
 .
.

测量火车与红旗之间的距离:

using System.Collections;
using System.Collections.Generic;
using UnityEngine;
public class TrainLogic : MonoBehaviour
{
// Start is called before the first frame update
void Start()
{
// 取得目标 , 也可以用 this.transform.Find("/红旗")
GameObject target = GameObject.Find("红旗");
// 两个物体的坐标点
Vector3 p1 = this.transform.position;
Vector3 p2 = target.transform.position;
// 求距离
//Vector3 direction = p2 - p1; // 方向向量
//float distance = direction.magnitude; // 距离
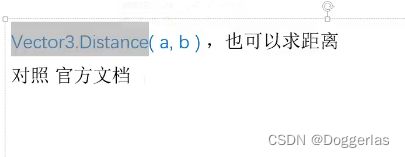
// 直接用 Vector3.Distance() 也可以求距离
float distance = Vector3.Distance(p2, p1);
Debug.Log("* 距离=" + distance);
}
// Update is called once per frame
void Update()
{
}
}

20.4 向量的使用
using System.Collections;
using System.Collections.Generic;
using UnityEngine;
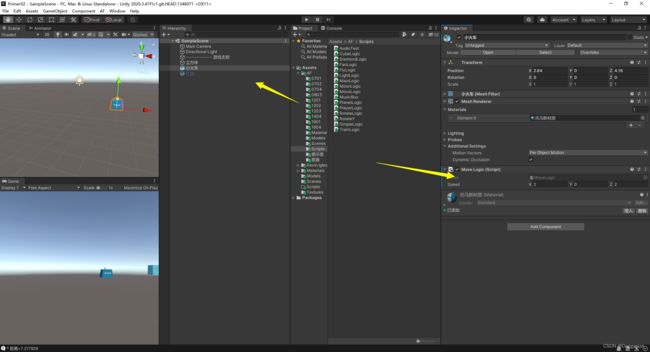
public class MoveLogic : MonoBehaviour
{
// public float speed = 2;
public Vector3 speed;
// Start is called before the first frame update
void Start()
{
}
// Update is called once per frame
void Update()
{
Vector3 delta = speed * Time.deltaTime;
this.transform.Translate(delta, Space.Self);//注意这种Translate重载的写法
}
}

21.1 预制体


21.2 预制体的创建

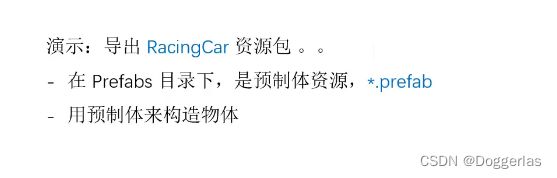
在scene中制作好目标节点 直接拖拽节点到prefabs中即可自动生成预制体 预制体制作完后 可以删掉之前的节点
prefab就是保存节点信息的文件
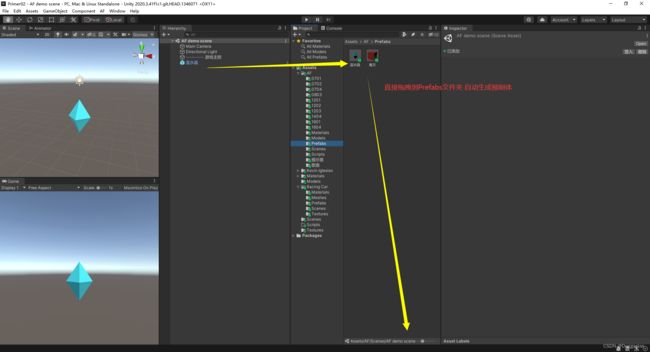
预制体是场景节点的存储信息,场景节点依赖于其他Assets资源文件(材质 脚本 或者mat网格) 所以预制体在导出的时候 需要勾选“Include Dependences”

21.3 预制体的实例
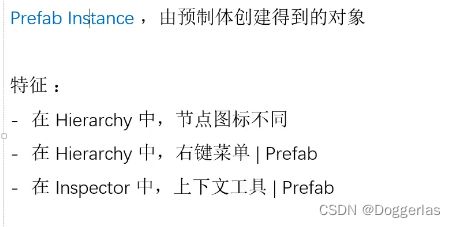
层级窗口中 预制体实例图标和文字都是亮蓝色

预制体实例有自己单独的菜单

预制体实例的检查器有几个奇怪的选项:Open Select Override
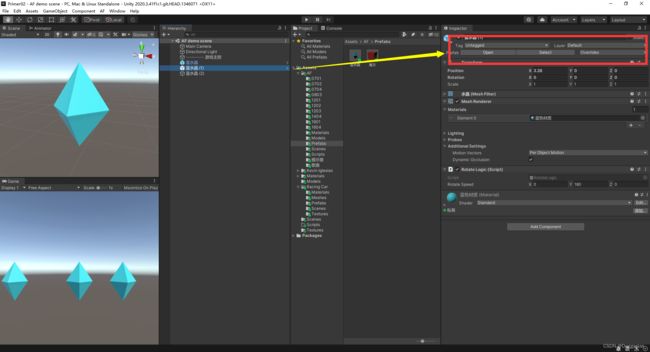
Select(反向定位) :会指出创建当前场景中预制体实例的原始预制体


这个选项会让场景预制体实例切断与创建它的预制体之间的关联 令实例变成单独的物体

21.4 预制体的编辑
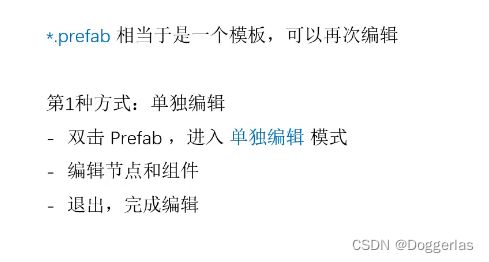
单独编辑 编辑原始预制体以此影响实例
双击预制体即可编辑,编辑完成后 按这两个位置退出 此时场景中的预制体实例也会发生变化

原位编辑 直接编辑实例
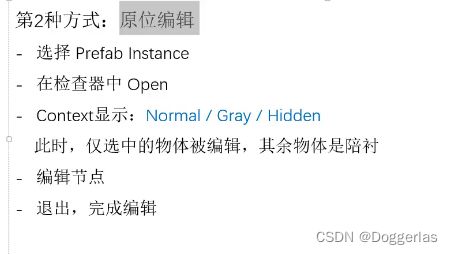
对选中的预制体实例 点击这两个位置进入编辑模式

normal gray hidden分别代表正常场景视图 灰色场景视图 排除掉其他无用的预制体 仅编辑选中的预制体
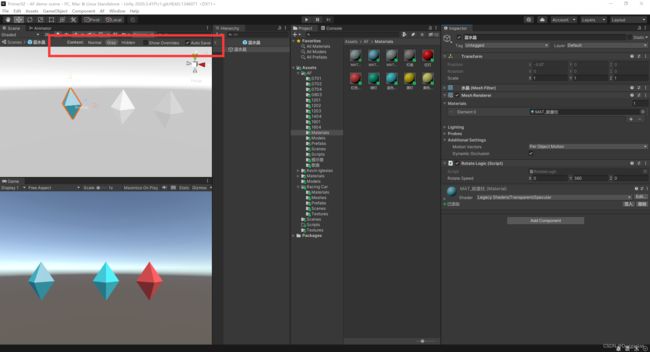
点这两个位置退出

覆盖编辑 编辑实例 同时覆盖掉原始预制体

在层级窗口编辑完预制体实例后 点击override 可以修改创建它的预制体 此时根据原始预制体创造的实例都会发生变化

21.5 多级节点


22.1 动态创建实例

虽然拖拽创建实例很简单 但是实际游戏中 不可能手动拖拽 所以希望用脚本自动生成实例


火控脚本:
using System.Collections;
using System.Collections.Generic;
using UnityEngine;
public class FireLogic : MonoBehaviour
{
// 对子弹 prefab 资源的引用
public GameObject bulletPrefab;
// Start is called before the first frame update
void Start()
{
}
// Update is called once per frame
void Update()
{
if(Input.GetMouseButtonDown(0))
{
TestFire();
}
}
private void TestFire()
{
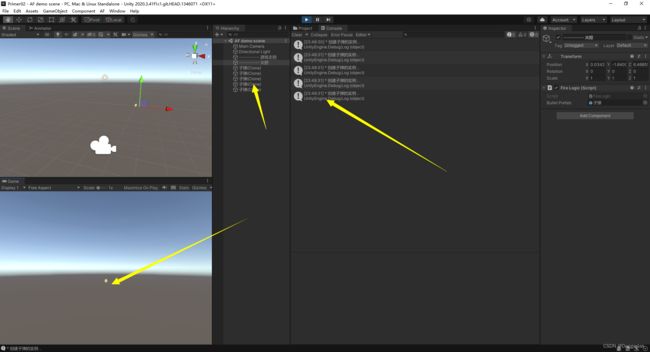
Debug.Log("* 创建子弹的实例 ..");
GameObject node = Object.Instantiate(bulletPrefab, null);//在根节点下创建bulletPrefab引用传进来的预制体实例
node.transform.position = Vector3.zero;//子弹位置
node.transform.localEulerAngles = Vector3.zero;//子弹旋转角
}
}
子弹是事先做好的预制体

演示:
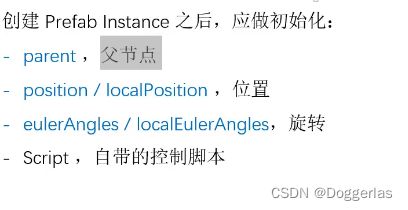
22.2 实例的初始化


火控脚本
using System.Collections;
using System.Collections.Generic;
using UnityEngine;

public class FireLogic : MonoBehaviour
{
    // 对子弹 prefab 资源的引用
    public GameObject bulletPrefab;

    //
    [Tooltip("子弹节点的管理")]
    public Transform bulletFolder;

    [Tooltip("子弹出生点")]
    public Transform firePoint;

    [Tooltip("炮塔")]
    public Transform cannon;


    // Start is called before the first frame update
    void Start()
    {

    }

    // Update is called once per frame
    void Update()
    {
        if(Input.GetMouseButtonDown(0))
        {
            TestFire();
        }
    }

    private void TestFire()
    {
        Debug.Log("* 创建子弹的实例 ..");
        GameObject node = Object.Instantiate(bulletPrefab, bulletFolder); // 指定父节点
        node.transform.position = this.firePoint.position;  // 指定出生点位置
        node.transform.eulerAngles = this.cannon.eulerAngles; // 子弹角度与炮塔角度一致

        // node.transform.rotation = this.cannon.rotation; // 这样写也可以,指定初始角度

        // 指定初始飞行速度
        BulletLogic script = node.GetComponent<BulletLogic>();
        script.speed = 0.5f;
    }
}
子弹脚本(预制体自带 程序运行时会自动挂载到实例上)
using System.Collections;
using System.Collections.Generic;
using UnityEngine;

public class BulletLogic : MonoBehaviour
{
    public float speed;

    // Start is called before the first frame update
    void Start()
    {

    }

    // Update is called once per frame
    void Update()
    {
        this.transform.Translate(0, 0, speed, Space.Self);
    }
}
演示


22.3 实例的销毁

子弹的销毁和飞行速度都属于子弹自身的属性 所以销毁逻辑写在了子弹脚本BulletLogic中

BulletLogic脚本实现子弹实例延时销毁功能
using System.Collections;
using System.Collections.Generic;
using UnityEngine;
public class BulletLogic : MonoBehaviour
{
public float speed;
public float maxDistance;
// Start is called before the first frame update
void Start()
{
float lifetime = 1;
if(speed > 0)
{
lifetime = maxDistance / speed;//10s
}
// 在 lifetime之后,调用 SelfDestroy 自毁
Invoke("SelfDestroy", lifetime);
}
// Update is called once per frame
void Update()
{
this.transform.Translate(0, 0, speed, Space.Self);
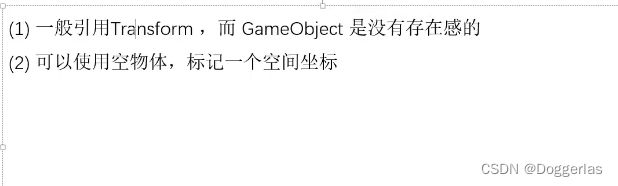
}
private void SelfDestroy()
{
Debug.Log("* 自毁 !");
// 销毁实例
Object.Destroy(this.gameObject);
//
}
}
火控脚本:
using System.Collections;
using System.Collections.Generic;
using UnityEngine;

public class FireLogic : MonoBehaviour
{
    // 对子弹 prefab 资源的引用
    public GameObject bulletPrefab;

    //
    [Tooltip("子弹节点的管理")]
    public Transform bulletFolder;

    [Tooltip("子弹出生点")]
    public Transform firePoint;

    [Tooltip("炮塔")]
    public Transform cannon;


    // Start is called before the first frame update
    void Start()
    {

    }

    // Update is called once per frame
    void Update()
    {
        if(Input.GetMouseButtonDown(0))
        {
            TestFire();
        }
    }

    private void TestFire()
    {
        Debug.Log("* 创建子弹的实例 ..");
        GameObject node = Object.Instantiate(bulletPrefab, bulletFolder); // 指定父节点
        node.transform.position = this.firePoint.position;  // 指定出生点
        node.transform.eulerAngles = this.cannon.eulerAngles; // 与炮塔角度一致

        // node.transform.rotation = this.cannon.rotation; // 这样写也可以,指定初始角度

        // 指定初始飞行速度
        BulletLogic script = node.GetComponent<BulletLogic>();
        script.speed = 0.5f;

        script.maxDistance = script.speed * 10; // 最大最行距离
    }
}
演示:


22.4 练习 火控参数
给火控预留子弹速度及销毁时间 可以自行指定 不用改程序

using System.Collections;
using System.Collections.Generic;
using UnityEngine;

public class FireLogic : MonoBehaviour
{
    // 对子弹 prefab 资源的引用
    public GameObject bulletPrefab;

    //
    [Tooltip("子弹节点的管理")]
    public Transform bulletFolder;

    [Tooltip("子弹出生点")]
    public Transform firePoint;

    [Tooltip("炮塔")]
    public Transform cannon;

    [Tooltip("子弹飞行速度")]
    public float bulletSpeed;

    [Tooltip("子弹飞行时长")]
    public float bulletLifetime;

    // Start is called before the first frame update
    void Start()
    {

    }

    // Update is called once per frame
    void Update()
    {
        if(Input.GetMouseButtonDown(0))
        {
            TestFire();
        }
    }

    private void TestFire()
    {
        Debug.Log("* 创建子弹的实例 ..");
        GameObject node = Object.Instantiate(bulletPrefab, bulletFolder); // 指定父节点
        node.transform.position = this.firePoint.position;  // 指定出生点
        node.transform.eulerAngles = this.cannon.eulerAngles; // 与炮塔角度一致

        // node.transform.rotation = this.cannon.rotation; // 这样写也可以,指定初始角度

        // 指定初始飞行速度
        BulletLogic script = node.GetComponent<BulletLogic>();
        script.speed = this.bulletSpeed; // 0.5f;
        script.maxDistance = script.speed * this.bulletLifetime; // 最大最行距离
    }
}
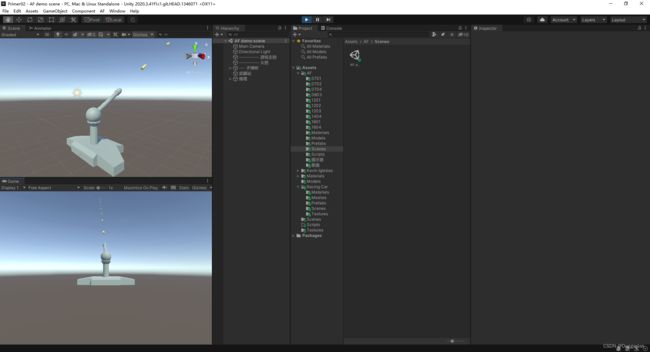
22.5 练习 按键控制
按wasd令炮塔旋转 同时子弹也在旋转
火控脚本如下即可实现
using System.Collections;
using System.Collections.Generic;
using UnityEngine;

public class FireLogic : MonoBehaviour
{
    // 对子弹 prefab 资源的引用
    public GameObject bulletPrefab;

    //
    [Tooltip("子弹节点的管理")]
    public Transform bulletFolder;

    [Tooltip("子弹出生点")]
    public Transform firePoint;

    [Tooltip("炮塔")]
    public Transform cannon;

    [Tooltip("子弹飞行速度")]
    public float bulletSpeed;

    [Tooltip("子弹飞行时长")]
    public float bulletLifetime;

    [Tooltip("子弹发射间隔")]
    public float bulletInterval;

    [Tooltip("炮塔转速")]
    public float rotateSpeed;

    // 当前转角
    private Vector3 m_eulerAngles;

    // Start is called before the first frame update
    void Start()
    {
        StartFire();
    }

    // Update is called once per frame
    void Update()
    {
        //if(Input.GetMouseButtonDown(0))
        //{
        //    TestFire();
        //}

        float delta = rotateSpeed * Time.deltaTime;

        if (Input.GetKey(KeyCode.A))
        {
            // 左转
            if (m_eulerAngles.y > -75)
                m_eulerAngles.y -= delta;
        }
        if (Input.GetKey(KeyCode.D))
        {
            // 右转
            if (m_eulerAngles.y < 75)
                m_eulerAngles.y += delta;
        }
        if (Input.GetKey(KeyCode.W))
        {
            // 上转
            if (m_eulerAngles.x > -60)
                m_eulerAngles.x -= delta;
        }
        if (Input.GetKey(KeyCode.S))
        {
            // 下转
            if (m_eulerAngles.x < 10)
                m_eulerAngles.x += delta;
        }

        // 多维度旋转时,不宜使用 Rotate
        cannon.transform.localEulerAngles = m_eulerAngles;
    }

    private void TestFire()
    {
        //Debug.Log("* 创建子弹的实例 ..");
        GameObject node = Object.Instantiate(bulletPrefab, bulletFolder); // 指定父节点
        node.transform.position = this.firePoint.position;  // 指定出生点
        node.transform.eulerAngles = this.cannon.eulerAngles; // 与炮塔角度一致

        // node.transform.rotation = this.cannon.rotation; // 这样写也可以,指定初始角度

        // 指定初始飞行速度
        BulletLogic script = node.GetComponent<BulletLogic>();
        script.speed = this.bulletSpeed; // 0.5f;
        script.maxDistance = script.speed * this.bulletLifetime; // 最大最行距离
    }

    // 开火
    public void StartFire()
    {
        if (! IsInvoking("TestFire") )
        {
            InvokeRepeating("TestFire", bulletInterval, bulletInterval);
        }
    }

    public void StopFire()
    {
        CancelInvoke("TestFire");
    }
}
23.1 物理系统


Mass是重量 相当于给苹果·一个1kg的重量 就会自己下坠

23.2 物理碰撞

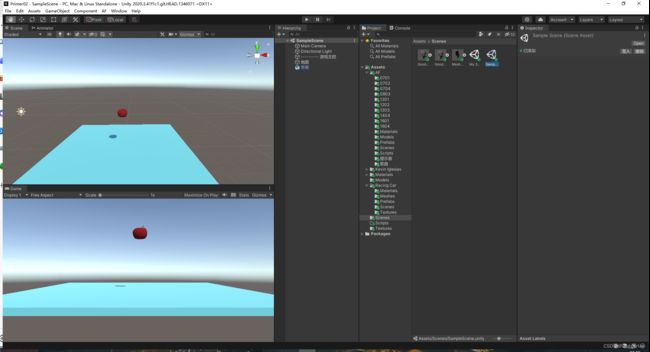
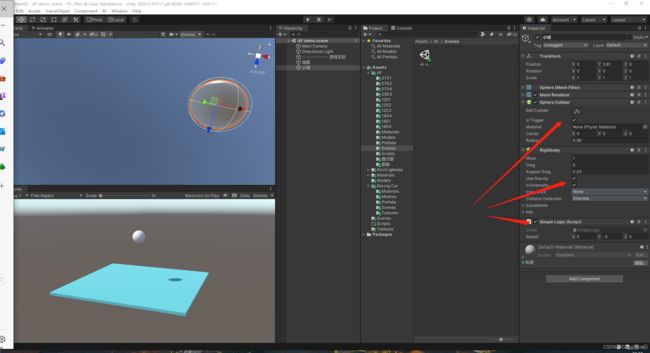
和苹果一样 给小球也添加一个刚体组件

由于小球有Sphere Collider组件 小球碰到地面会停止 不会像苹果一样一直下坠


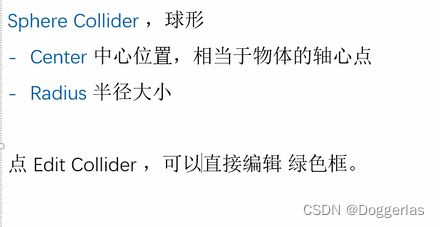
Collider为碰撞体组件 点击组件的“Edit Collider”会显示碰撞体范围 同样 地面也有一个碰撞体Box Collider 两个碰撞体相接触 就会产生碰撞


给苹果加一个球形碰撞体Physics|Sphere Collider就会产生碰撞效果 碰到地面就不会再下落了


23.3 反弹与摩擦

创建物理材质
设置静态摩擦系数 动态摩擦系数 弹性系数等

把物理材质给小球的碰撞体组件

由于弹性系数设置到了最大1 所以小球就会不断弹起来 将物理材质给地面 会观察的更为明显 (由于地面有弹性和摩擦 苹果没有 所以苹果弹一会就停了)

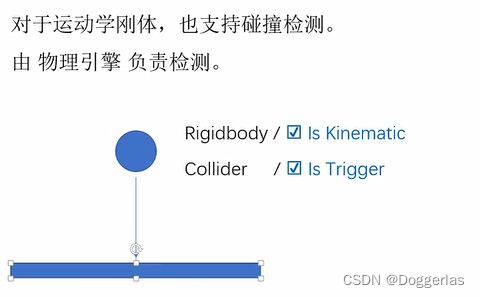
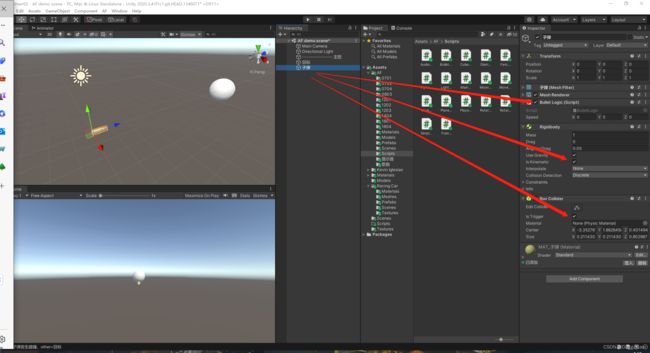
24.1 运动学刚体
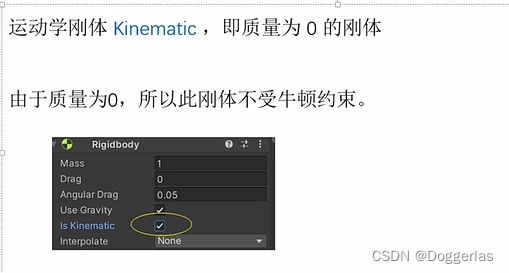
.选中这个选项 即为运动学刚体

24.2 碰撞检测

using System.Collections;
using System.Collections.Generic;
using UnityEngine;

public class SimpleLogic : MonoBehaviour
{
    public Vector3 speed;

    // Start is called before the first frame update
    void Start()
    {

    }

    // Update is called once per frame
    void Update()
    {
        this.transform.Translate(speed * Time.deltaTime, Space.Self);
    }


    private void OnTriggerEnter(Collider other)
    {
        Debug.Log("* 发生了碰撞, other=" + other.name);
    }


}
OnTriggerEnter会检测当前物体与其它物体的碰撞


24.3 碰撞体的编辑


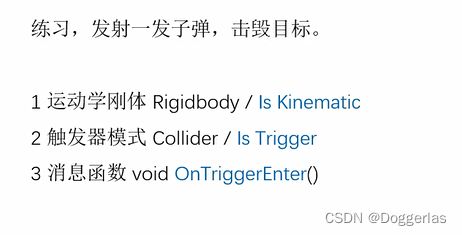
24.4 练习 击毁目标
using System.Collections;
using System.Collections.Generic;
using UnityEngine;

public class BulletLogic : MonoBehaviour
{
    public Vector3 speed;

    // Start is called before the first frame update
    void Start()
    {

    }

    // Update is called once per frame
    void Update()
    {

        this.transform.Translate(speed * Time.deltaTime, Space.Self);
    }

    private void OnTriggerEnter(Collider other)
    {
        if( other.name.Equals("目标"))
        {
            Debug.Log("* 子弹发生碰撞,other=" + other.name);

            Object.Destroy(other.gameObject);

            Object.Destroy(this.gameObject);
        }

    }
}
将子弹z轴速度设置为3 即可让子弹飞行 成功射击到小球


后记
一周左右学完了基础部分。还真就只是入门啊。剩下的几节用处不大,不更了。至少看完这篇教程unity的基础使用搞明白了。老师讲的很细致,很适合小白!
这篇教程没有Animator的使用,没有骨骼驱动动画,没有UI设计,却在隔壁看到了(有点相见恨晚),链接在下面。
Unity教程】零基础带你从小白到超神
后期可能用到哪里学哪里了。买了上面那个链接的书(印象unity 感觉还可以) 用到哪里再翻一翻吧,哈哈哈!
2023-04-23 0:36:15 睡觉睡觉 明天还要上班啊 岂可修!