android 实现一个开机自启动的service
1、概述
本文记录了如何在android11系统中创建一个native服务,实现简单的文件复制功能,并实现开机启动,通过aidl,应用层能够使用该服务。首先你得有一套android源码,并且编译过。
2、创建工程文件
在android 源码中找一个位置,创建一个工程文件夹,里面用来存放我们项目所需的各种文件,一般在vendor目录下,本文是是frameworks//vendor下创建了一个FileService文件夹,然后再创建aidl文件,包含我们需要定义的功能,aidl文件的定义如下。
package com.filetool;

interface IFileOperation{

	// 复制文件
	int copyFile(String sourceFile,String targetDir);

}
此时,目录结构如下

注意文件夹名字和包名是对应的。
2、编写Android.bp文件
编写Android.bp文件的目的是利用android源码编译我们的aidl文件,利用aidl工具生成Bn, Bp等头文件和cpp文件。
// 生成一个共享库
cc_library_static {
    name: "libfileservice_aidl",

    srcs: [
        ":fileservice_aidl",
    ],
    aidl: {
        local_include_dirs: ["aidl"],
        include_dirs: ["frameworks/native/aidl/binder"],
        export_aidl_headers: true,
    },

    shared_libs: [
        "libbinder",
        "libutils",
        "liblog",
    ],

}

filegroup {
    name: "fileservice_aidl",
    srcs: [
        "aidl/com/filetool/IFileOperation.aidl",
    ],
    path:"aidl",
}
回到android 目录下依次执行
source build/envsetup.sh
lunch 8  // 这里数字是看自己的具体版本,我之前用的两套代码中一个是8一个是51
再回到FileService目录下执行mm命令开始编译(如果提示mm命令没有找到那就是重新执行上面两个命令)
 接着在对应的生成目录下,就可以查看到生成的文件了,我的生成目录就是out/soong/.intermediates/vendor/FileService/libfileservice_aidl/android_arm64_armv8-a_core_static/gen/aidl/com/filetool,下面是生成的头文件
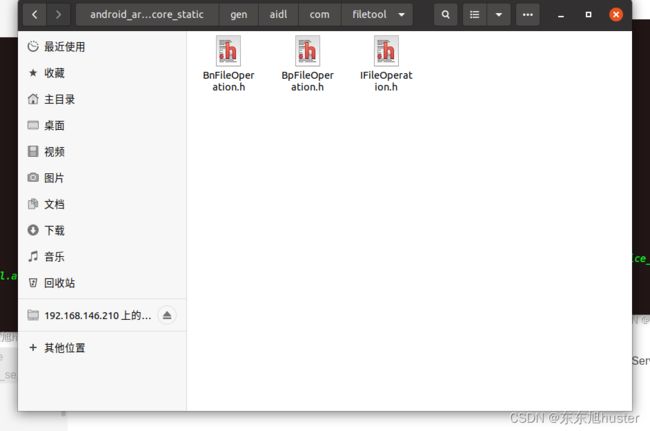 我们可以在FileService目录下创建一个文件夹,将上面的三个文件放进去,编译的时候方便引用,也可以不放,在android.bp的shared_libs中加上"libbinder",就行了。
3、实现对应的功能
写一个类FileService继承自BnFileOperation,这里我定义一个.h文件和一个.cpp文件,下面是它们的定义
FileService.h
#ifndef FILE_SERVICE_H
#define FILE_SERVICE_H

#include <com/filetool/BnFileOperation.h>

class FileService : public com::filetool::BnFileOperation
{

public:
    FileService(/* args */);
    ~FileService();
    virtual::android::binder::Status copyFile(const ::android::String16& sourceFile, const ::android::String16& targetDir, int32_t* _aidl_return);
};


#endif
FileService.cpp
#include "FileService.h"
#include <iostream>
#include <fstream>
#include <cstdio>
#include <string.h>
#include <unistd.h>
#include <sys/stat.h>
#include <sys/types.h>
#include <dirent.h>
#include <time.h>
#include <android/log.h>

FileService::FileService(){

}

FileService::~FileService(){

}

::android::binder::Status FileService::copyFile(const ::android::String16& sourceFile, const ::android::String16& targetDir, int32_t* _aidl_return){
    std::string source = ::android::String8(sourceFile).string();
    std::string target = ::android::String8(targetDir).string();

    std::string op = "copy -a " + source + " " + target;

    int status = system(op.c_str());

    if (status == -1 || WIFEXITED(status) == true || WEXITSTATUS(status)== 0){
        *_aidl_return = -1;

    }else{
        *_aidl_return = 0;
    }
    return ::android::binder::Status::ok();
}
到现在,函数的功能就都实现了,但是我们还需要将这个服务注册到ServiceManager中,其他地方才能通过binder查找到这个服务,因此我们还需要写一个函数注册服务。
main.cpp
#include <sys/types.h>
#include <binder/IPCThreadState.h>
#include <binder/ProcessState.h>
#include <binder/IServiceManager.h>
#include <cutils/log.h>
#include <FileService.h>


using namespace android;

int main(int argc, char** argv) {

    sp<ProcessState> proc(ProcessState::self());
    sp<IServiceManager> sm = defaultServiceManager();
    ALOGI("ServiceManager:%p",sm.get());
    sm->addService(String16("FileService"),new FileService());
    ProcessState::self()->startThreadPool();
    IPCThreadState::self()->joinThreadPool();

    return 0;
}
接下来,在Android.bp文件中编译,生成可执行文件。添加内容如下
cc_binary {
    name: "fileservice",
    srcs: [
        "main.cpp",
        "FileService.cpp",
    ],

    cflags: [
        "-Werror",
        "-Wno-error=deprecated-declarations",
        "-Wall",
        "-Wformat-security",
        "-Wno-unused-parameter",
    ],

    shared_libs: [
        "libbinder",
        "libcutils",
        "liblog",
        "libutils",
        "libbase",
    ],

    static_libs:[
         "libfileservice_aidl",
    ]
}
重新编译整个项目,将会生成可执行文件,我的目录在/out/target/product/generic_x86_64/system/bin, 文件名是fileservice, 将之前生成的so文件push到/syatem/lib和/system/lib64目录下,可执行文件放到fileservice目录下或者其他地方也行,一般会提示你没有权限,因为system目录是只读的,只需要依次执行adb root和adb remount重新挂载磁盘就行了。重启系统后,到可执行文件所在的目录下执行它,我们的服务就运行起来了。fileservice必须一直处于运行状态才行,如果只是测试的话这样也够了,但是每次都需要手动启动它过于麻烦,下面我们将它配置成开机启动的。
4、配置开机启动
init进程是android系统启动的第一个进程, 它的PID永远是1,并且永远不会死亡,init进程启动后才会去创建其他的进程,比如zygote进程,其他我们所常见的服务都是由它启动的。init.rc 文件是干什么的呢?它配置了init进程启动过程中的行为和动作,比如,需要启动哪些服务,需要做什么动作等等。init.rc文件中通过service 这个关键字声明一个服务,启动服务后还需要用on 关键字告诉需要做哪些动作。那我们是不是需要将我们的服务写到init.rc文件中呢?是的,不过我们不需要去更改系统的rc文件,自己在服务所在的目录创建一个就行了,然后在里面加上如下的内容,文件名自定义一个
service SOTAService /system/bin/sotaservice
    class main
    user root
    group root
    shutdown critical
解释一下上面的代码含义,第一行声明了我们服务的名字以及可执行文件所在的位置,第二行class main有什么用呢?我们之前说过启动服务是在on中通过start启动服务的,但是浏览整个init.rc文件后, 发现直接通过start启动一个服务的情况是很少的,其实,on分为两种,第一种有7种类型,他们一定会随着init进程启动并执行的,比如
on property:vold.decrypt=trigger_restart_min_framework

    class_start main
第二句class_start main就是启动main下的所有Service, 因此我们上面声明了之后,服务就能够跟着init启动啦。还需要改一下Android.bp文件,将我们的init.rc文件一起编译进去。
// 生成一个so库
cc_library_static {
    name: "libfileservice_aidl",

    srcs: [
        ":fileservice_aidl",
    ],
    aidl: {
        local_include_dirs: ["aidl"],
        include_dirs: [
        "frameworks/native/aidl/binder"
        ],
        export_aidl_headers: true,
    },

    shared_libs: [
        "libbinder",
        "libutils",
        "liblog",
    ],

}

filegroup {
    name: "fileservice_aidl",
    srcs: [
        "aidl/com/filetool/IFileOperation.aidl",
    ],
    path:"aidl",
}
//
// 生成可执行文件
cc_binary {
    name: "fileservice",
    srcs: [
        "main.cpp",
        "FileService.cpp",
    ],
    init_rc: ["sota.rc"],
    cflags: [
        "-Werror",
        "-Wno-error=deprecated-declarations",
        "-Wall",
        "-Wformat-security",
        "-Wno-unused-parameter",
    ],

    shared_libs: [
        "libbinder",
        "libcutils",
        "liblog",
        "libutils",
        "libbase",
    ],

    static_libs:[
         "libfileservice_aidl",
    ]
}
到这一步,还是没有实现开机启动,因为Linux中引入了SELINUX安全规则,需要为我们的服务配置上这个规则,关于SELINUX的细节我也不懂,下面只是简单的配置实现了开机启动。
5、SELINUX规则添加
SELINUX管理权限大概可以总结如下:任何进程,想要做任何事情,都必须先在安全策略配置文件中赋予权限。这很类似于我们在AndroidManifest中申请权限,不过编写这个te文件却比编写AndroidManifest文件复杂得多,如果要具体了解的话还要多看看官方怎么配置的,下面是我学习过的两篇参考文档。
http://blog.csdn.net/luoshengyang/article/details/35392905
http://blog.csdn.net/innost/article/details/19299937/
下面我就直接展示我所添加的配置文件了,由于之前的其他工作需要,我在device下新建了一些文件夹,我将配置文件放在了device/hht/cip/sepolicy/service这个目录中,有如下几个文件
- service.te
- service_contexts
- fileservice.te
- file_contexts
名字不用都这样,但是每个service文件都与一个context对应。
service.te
type fileservice_service, service_manager_type;
将fileservice_service的类型声明为service_manager_type,下面会用到。
service_contexts
fileservice u:object_r:fileservice_service:s0
上面的一行是什么意思?
-
u : 代表的是user
-
object_r : 代表的是这是一个文件,在Linux中,只有两种角色,文件和进程,文件是死的, 用object_r表示。
-
fileservice_service: 在上面service.te中声明过了,它的类型是service_manager_type。
-
s0:这是一种安全级别,即MLS的级别。
fileservice.te
#sepolicy rule for fileservice
# 定义了一个名为fileservice的type,它和一个名为domain的属性关联。
type fileservice, domain;
# coredomain;
# 定义了一个名为fileservice_exec的type,它和exec_type, file_type, system_file_type的属性关联。
type fileservice_exec, exec_type, file_type, system_file_type;
# 将前面定义的fileservice类型和coredomain属性关联起来
typeattribute fileservice coredomain;

init_daemon_domain(fileservice)

binder_use(fileservice)

add_service(fileservice, fileservice_service)
# 下面是赋予权限的,暂时用不到
#allow fileservice shell_data_file:file {write read create getattr};
#allow sotaservice shell_data_file:dir {write search add_name };
上面将属性关联起来有什么用呢?一般来说,系统会定义很多的type,每个type都通过了allow语句赋予了很多的权限,如果我们将自定义的属性与它们关联起来,那么就会拥有了它们的权限,就不用再通过allow去定义了。上面还有一些allow语句,我们看一下它的完整定义
allow netd proc : file write
- allow 授权语句, 除了allow还有neverallow, allowaudit等
- netd source type, 即我们要授权的对象
- proc target type,代表后面的file的类型
- file 它代表Object Class. 如File, Dir, Socket,fd, lnk_file等一些类型,它是代表了一些能够给要授权对象操作的类型。
- write 它是在Object Class中定义的操作,有很多,如write read create…
再看一个例子
allow zygote init:process sigchld;
允许zygote进程向init类型的进程发送sigchld信号。
file_contexts
/system/bin/fileservice u:object_r:fileservice_exec:s0
上面的语句中,它的含义和第一个文件相似。
6 重新编译刷机运行
最后重新编译整个项目,刷机重启,通过adb进入系统中,再通过ps查看我们的进程是否已经运行了。
