安装 timescaledb 使用navcat连接 创建 hypertable
timescaledb 是 postgres 的 一个 扩展 插件 , 所以要安装 timescaledb 就 先要安装 postgres
1 安装 postgres
https://www.postgresql.org/download/linux/redhat/
yum install https://download.postgresql.org/pub/repos/yum/11/redhat/rhel-7-x86_64/pgdg-centos11-11-2.noarch.rpm
安装 客户
yum install postgresql11
安装服务端
yum install postgresql11-server
初始化数据库 并设置为开机自动启动
/usr/pgsql-11/bin/postgresql-11-setup initdb

systemctl enable postgresql-11

systemctl start postgresql-11
2 安装 timescaledb
增加 timescaledb的yum 源
cat > /etc/yum.repos.d/timescale_timescaledb.repo <
配置 postgresql.conf 使用 postgres 启动时加载 'timescaledb'
vi /var/lib/pgsql/11/data/postgresql.conf

下添加

shared_preload_libraries = 'timescaledb'
Postgres yum 安装默认会创建一个 postgres的用户
切换到 postgres用户
su postgres
执行 psql ,进入 postgres的命令行
psql
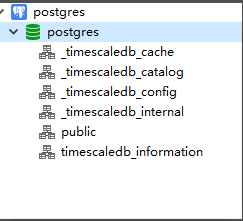
执行 以下语句,如果出现 下图 就说明 安装 成功
create extension timescaledb;
3 使用 navicat 连接 postgres
在psql 命令行 修改默认用户密码
ALTER USER postgres WITH PASSWORD '123456';
修改 postgres 的监听地址,默认只能 为 本地连接
vi /var/lib/pgsql/11/data/postgresql.conf

listen_addresses = '*'
允许 所有地址 来连接该数据库
vi /var/lib/pgsql/11/data/pg_hba.conf

host    all             all             0.0.0.0/0               trust
最后 在 window 上 就能 使用navicat登陆了
4 创建 表 并 插入数据
hypertable 是 timescaledb 抽象的 一张表,让用户操作 hypertable 就像 操作 postgres的普通表一样,在内部,timescaledb 自动将hypertable 分割成块, timescaledb 会自动操作和管理 hypertable 的分区表。这对于用户来说是透明的
创建超表有两个步骤
1 使用 postgres的标准语法创建表
CREATE TABLE conditions (

 time        TIMESTAMPTZ       NOT NULL,

 location    TEXT              NOT NULL,

 temperature DOUBLE PRECISION  NULL

);
2 使用 create_hypertable 函数 将postgres标准表转化为 hypertable
create_hypertable 有两个参数 ,第一个参数 是 表名,第二个参数 是分区列,一般为 TIMESTAMPTZ类型
例如SELECT create_hypertable('conditions', 'time');
插入 数据
INSERT INTO conditions(time, location, temperature)

  VALUES (NOW(), 'office', 70.0);


INSERT INTO conditions

  VALUES

    (NOW(), 'office', 70.0),

    (NOW(), 'basement', 66.5),

    (NOW(), 'garage', 77.0);

