Druid的介绍、使用和原理架构(数据摄取、数据查询)
文章目录
-
- 概述
-
- 简介
- 什么时候使用Druid
- 安装和部署
-
- 单节点开发环境部署
-
- 准备工作
- Druid单节点部署
- 重置集群状态
- 分布式部署
-
- 准备工作
- 基于Ambari部署
- 手工部署
-
- 手工部署说明
- 软件包安装
- 公共配置
- Coordinator配置
- Overlord配置
- Historical配置
- MiddleManager配置
- Broker配置
- 启动集群
- 入门操作
-
- 数据加载
- 数据查询
- Druid架构
-
- Druid核心概念
-
- roll-up预聚合
- 列式存储
-
- 对于分析查询,一般只需要用到少量的列,在列式存储中,只需要读取所需的数据列即可。 例如,如果您需要100列中的5列,则I / O减少20倍。
- Datasource和Segments
-
- 多级分区存储
- Segment存储结构
- Segment存储结构
- 架构
- 数据摄取
-
- 摄取方式
- Index Service
- 摄取规则
-
- type
- spec
-
- dataSchema
- ioConfig
- tunningConfig
- 批量摄取
-
- 本地批量索引
- Hadoop批量索引
- 实时摄取-kafka-indexing-service
-
- kafka-indexing-service的优势
- kafka-indexing-service导入
- 数据查询(REST API)
-
- 查询组件
-
- Filter
- granularity
- Aggregator
- Post-Aggregator
- 查询类型
-
- 时间序列查询
- TopN查询
- 分组查询
- search搜索查询
- 查询API
概述
简介
Druid是MetaMarket公司研发的一款针对海量数据进行高性能实时分析的OLAP引擎(包含存储引擎和分析引擎)。当前已经捐献给Apache基金会。
Druid具有如下一些特征:
- 低延迟交互式查询:Druid提供低延迟实时数据摄取(入库),并采用预聚合、列式存储、位图索引 等手段使得海量数据分析能够亚秒级响应。
- 高可用性( High Available ):Druid 使用 HDFS/S3 作为 Deep Storage,Segment 会在多个Historical 节点上进行加载;摄取数据时也可以多副本摄取,保证数据可用性和容错性。
- 可伸缩( Horizontal Scalable ):Druid 部署架构都可以水平扩展,增加大量服务器来加快数据摄取,以及保证亚秒级的查询服务
- 并行处理( Parallel Processing ): Druid 可以在整个集群中并行处理查询
- 丰富的查询能力( Rich Query ):Druid支持 时间序列、 TopN、 GroupBy等查询,同时提供了2种查询方式:API 和 SQL(新版本实验性功能,暂不具备上生产能力)
官网:https://druid.apache.org/
什么时候使用Druid
可以支持海量数据实时分析的引擎比较多,为啥要用到Druid呢?
Druid看起来这么牛逼,是不是它就把其他分析引擎都替代了呢?
(1)相关技术横向对比
特别注意:至今没有出现“银弹”,未来也不会有,不要奢望,如果有了咱们离失业就不远了。 注意:即系分析/查询指定是海量数据明细数据快速分析,并不是实时分析。
(2)Druid适合的场景
Druid适合带时间维度、海量数据的实时/准实时分析,拆分细化更容易理解:
- 带时间字段的数据,且时间维度为分析的主要维度
- 快速交互式查询,且亚秒级快速响应
- 多维度海量数据,能够预先定义维度
典型应用如下如下:
- 网页点击流分析
- 网络流量分析
- 监控系统、APM
- 数据运营和营销
- BI分析/OLAP
(4)Druid不适合的场景
- 要求明细查询(破解方法是数据冗余)
- 要求原生Join(提前Join再入Druid)
- 没有时间列或者不以时间作为主要分析维度
安装和部署
单节点开发环境部署
准备工作
-
准备64位Linux虚拟机一台
-
Java 8或更高版本Centos7.6
-
8G内存及以上2核cpu
-
部署Zookeeper:Druid依赖Zookeeper,在单机版Druid我们部署一个单节点的Zookeeper即可。
tar -xzf zookeeper-3.4.10.tar.gz -C /home/hadoop/app
cd /home/hadoop/app
ln -s zookeeper-3.4.10 zookeeper
cd zookeeper
cp conf/zoo_sample.cfg conf/zoo.cfg
./bin/zkServer.sh start

./bin/zkServer.sh status
./bin/zkServer.sh stop
Druid单节点部署
(1)上传安装包
我们要使用的安装包只有一个,如此下图所示:
(2)解压缩Druid安装包
tar -zxvf druid-0.12.3-bin.tar.gz -C /home/hadoop/app
cd /home/hadoop/app
ln -s druid-0.12.3 druid
解压缩之后有如下目录:
- LICENSE - license⽂件
- bin/ - ⼯具脚本
- conf/* - 集群配置⽂件
- conf-quickstart/* - quickstart配置⽂件
- extensions/* - Druid扩展包
- hadoop-dependencies/* - Druid Hadoop依赖包
- lib/* - Druid核⼼依赖包
- quickstart/* - quickstart相关⽂件
(3)初始化Druid
先确定Zookeeper是正常运行的,然后进入Druid安装目录,执行初始化操作:
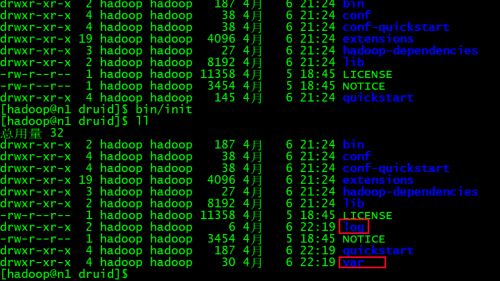
bin/init
初始化之后在Druid目录中生成了两个目录:log和var。
(4)启动Druid各个进程
这一步打开5个命令行终端,分别启动如下进程(所谓的单节点部署其实也是运行的Druid集群,只不过 都运行在一个节点上):
注意:都要在Druid安装根目录下执行
-
启动coordinator节点:
java `cat conf-quickstart/druid/coordinator/jvm.config | xargs` -cp "conf-quickstart/druid/_common:conf-quickstart/druid/coordinator:lib/*" io.druid.cli.Main server coordinator -
启动overlord节点:
java `cat conf-quickstart/druid/overlord/jvm.config | xargs` -cp "conf-quickstart/druid/_common:conf-quickstart/druid/overlord:lib/*" io.druid.cli.Main server overlord -
启动historical节点:
java `cat conf-quickstart/druid/historical/jvm.config | xargs` -cp "conf-quickstart/druid/_common:conf-quickstart/druid/historical:lib/*" io.druid.cli.Main server historical -
启动middleManager节点:
java `cat conf-quickstart/druid/middleManager/jvm.config | xargs` -cp "conf-quickstart/druid/_common:conf-quickstart/druid/middleManager:lib/*" io.druid.cli.Main server middleManager -
启动broker节点:
java `cat conf-quickstart/druid/broker/jvm.config | xargs` -cp "conf-quickstart/druid/_common:conf-quickstart/druid/broker:lib/*" io.druid.cli.Main
server broker
都启动完之后可以查看下进程:
jps
应该能看到5个叫做Main的进程,如果不是5个,请查看下各个终端看是否有报错。
(5)访问Druid Web UI
重置集群状态
咱们在单机Druid集群上可以大胆练习,一旦出现问题,可以采用如下办法重置集群状态(数据都会丢失)
(1)CTRL-C停止所有Druid进程2
(2)重新初始化Druid
进入Druid主目录:
rm -rf log
rm -rf var
bin/init
(3)重置Zookeeper状态
进入前面安装的Zookeeper的根目录:
./bin/zkServer.sh stop
rm -rf /tmp/zookeeper
./bin/zkServer.sh start
(4)重启Druid的所有进程
略。
分布式部署
Druid分布式部署可以自己手工部署,也可以通过Ambari部署,无论是哪种方式都得先部署HDFS(我们选择HDP3.1,也就是咱们已经安装的版本),因为Druid集群部署依赖HDFS。
| 部署⽅式 | 优点 | 缺点 |
|---|---|---|
| 基于Ambari部署 | ⽅便快捷 | 限制指定版本 |
| ⼿⼯部署 | 配置不熟麻烦 | 可以选择合适的版本,有必要还可以⾃⾏编译安装包 |
准备工作
(1)部署规划
我们依然在node01到node03上部署Druid集群:
| 主机 | druid组件 |
|---|---|
| node01 | Coordinator、Overlord、Broker |
| node02 | Overlord、Historical、MiddleManager、Broker |
| node03 | Coordinator、Historical、MiddleManager、Router |
(2)依赖组件部署
- MySQL5.7:Druid存储元数据
- Zookeeper:Druid用于服务发现、leader选举等
- HDFS:Druid最常用的深度存储
- YARN:Druid采用Hadoop索引方式摄取数据
- Mapreduce:同上
(3)创建元数据库
Druid会把元数据存储在MySQL,因此建议给Druid创建专用的用户和库。登录node01,并创建用户和库:
mysql -uroot -p
CREATE DATABASE IF NOT EXISTS druid DEFAULT CHARSET utf8 COLLATE utf8_general_ci;
CREATE USER 'druid'@'%' IDENTIFIED BY 'druid%123';
GRANT ALL ON druid.* TO 'druid'@'%';
FLUSH PRIVILEGES;
exit
基于Ambari部署
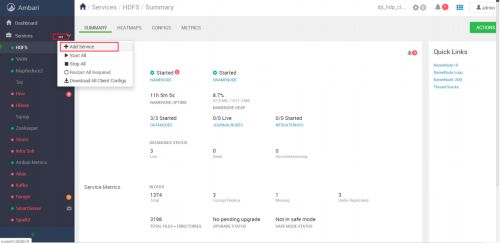
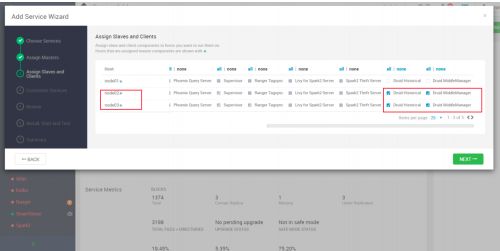
(1)部署过程截图
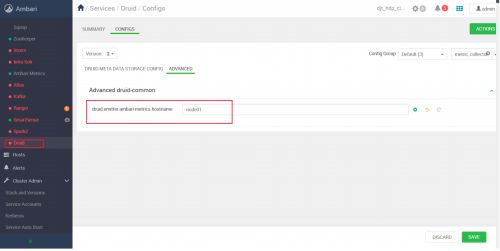
(2)特殊配置
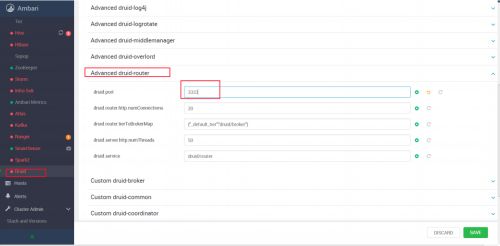
如下图所示的这个配置需要改一下:
端口如果冲突请自行修改:
将UTC时区全部修改为UTC+8:
手工部署
手工部署说明
在正式手工部署之前要做两件事情:
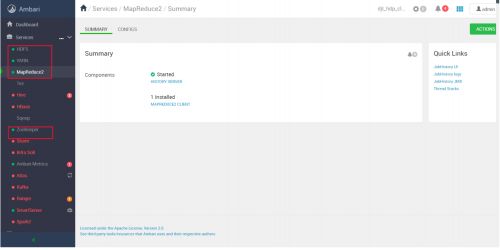
- 确认依赖组件否已经部署完成并正常启动
-
还要确定MySQL正常启动:
sudo systemctl status mysqld -
其他不必要的服务尽量停掉
Druid启动的进程较多,尽量把不必要的其他组件停止以让出系统资源。接下来的部署过程其实分为三大步骤:
-
软件包安装:上传解压缩Druid安装包到指定目录。
-
各个服务的配置:Druid有公共的服务配置文件,也有各个组件的配置文件,所以需要分别配置。
-
各个服务的启停:跟单节点部署一样,整体还是一个包,各个组件需要使用不同的命令单独启动。启动命令还是一样的, 只不过这次是在规划好的各个节点上去启动,单机版是在一个节点上启动。
软件包安装
(1)上传安装包
上传如下所示安装包到node01节点:
(2)解压缩Druid安装包
tar -zxvf druid-0.12.3-bin.tar.gz -C /home/hadoop/app
cd /home/hadoop/app
ln -s druid-0.12.3 druid
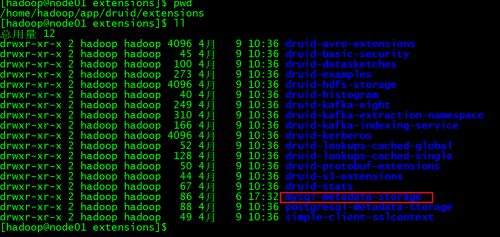
(3)解压缩mysql-metadata-storage包
把mysql-metadata-storage-0.12.3.tar.gz解压缩到Druid安装目录的extensions子目录下:
tar -zxvf mysql-metadata-storage-0.12.3.tar.gz -C /home/hadoop/app/druid/extensions
到这里我们的软件包安装就处理完了。
公共配置
从这一步开始我们要对公共已经各个组件进行配置,配置文件在如下$DRUID_HOME/conf/druid目录下:
一共有5中配置文件,这一步我们进入_common子目录,配置公共的配置项。
vi common.runtime.properties
修改主要配置如下,其余配置保持默认即可:
(1)扩展包加载配置:
druid.extensions.loadList=["druid-hdfs-storage", "mysql-metadata-storage"]
(2)Zookeeper配置:
#
# Zookeeper
#
druid.zk.service.host=node01
druid.zk.paths.base=/druid_0_12_3_byhand
注意:为了避免跟Ambari部署的Druid冲突,我这里把druid.zk.paths.base设置为了/druid_0_12_3_byhand
(3)Metadata storage配置:
#
# Metadata storage
#
# For MySQL:
druid.metadata.storage.type=mysql
druid.metadata.storage.connector.connectURI=jdbc:mysql://node01:3306/druid
druid.metadata.storage.connector.user=druid
druid.metadata.storage.connector.password=druid%123
(4)深度存储配置
深度存储推荐hdfs:
#
# Deep storage
#
# For HDFS (make sure to include the HDFS extension and that your Hadoop
config files in the cp):
druid.storage.type=hdfs
druid.storage.storageDirectory=/druid_0_12_3_byhand/segments
注意:为了避免跟Ambari部署的Druid冲突,我这里把druid.storage.storageDirectory设置为了/druid_0_12_3_byhand/segments
(5)索引服务日志配置
推荐把索引日志保存到hdfs:
#
# Indexing service logs
#
# For HDFS (make sure to include the HDFS extension and that your Hadoop
config files in the cp):
druid.indexer.logs.type=hdfs
druid.indexer.logs.directory=/druid_0_12_3_byhand/indexing-logs
注意:为了避免跟Ambari部署的Druid冲突,我这里把druid.indexer.logs.directory设置为了/druid_0_12_3_byhand/indexing-logs
(6)完整配置
#
# Extensions
#
# This is not the full list of Druid extensions, but common ones that people
often use. You may need to change this list
# based on your particular setup.
#druid.extensions.loadList=["druid-kafka-eight", "druid-s3-extensions",
"druid-histogram", "druid-datasketches", "druid-lookups-cached-global","mysql-metadata-storage"]
druid.extensions.loadList=["druid-hdfs-storage", "mysql-metadata-storage"]
# If you have a different version of Hadoop, place your Hadoop client jar
files in your hadoop-dependencies directory
# and uncomment the line below to point to your directory.
#druid.extensions.hadoopDependenciesDir=/my/dir/hadoop-dependencies
#
# Logging
# Log all runtime properties on startup. Disable to avoid logging properties
on startup:
druid.startup.logging.logProperties=true
#
# Zookeeper
#
druid.zk.service.host=node01
druid.zk.paths.base=/druid_0_12_3_byhand
#
# Metadata storage
#
# For Derby server on your Druid Coordinator (only viable in a cluster with a
single Coordinator, no fail-over):
#druid.metadata.storage.type=derby
#druid.metadata.storage.connector.connectURI=jdbc:derby://metadata.store.ip:15
27/var/druid/metadata.db;create=true
#druid.metadata.storage.connector.host=metadata.store.ip
#druid.metadata.storage.connector.port=1527
# For MySQL:
druid.metadata.storage.type=mysql
druid.metadata.storage.connector.connectURI=jdbc:mysql://node01:3306/druid
druid.metadata.storage.connector.user=druid
druid.metadata.storage.connector.password=druid%123
# For PostgreSQL (make sure to additionally include the Postgres extension):
#druid.metadata.storage.type=postgresql
#druid.metadata.storage.connector.connectURI=jdbc:postgresql://db.example.com:
5432/druid
#druid.metadata.storage.connector.user=...
#druid.metadata.storage.connector.password=...
#
# Deep storage
#
# For local disk (only viable in a cluster if this is a network mount):
#druid.storage.type=local
#druid.storage.storageDirectory=var/druid/segments
# For HDFS (make sure to include the HDFS extension and that your Hadoop
config files in the cp):
druid.storage.type=hdfs
160627611758025447 dajiangtai.com
2
文档号:160627611758025447 大讲台课程内部资料,滥发、盗版、售卖必纠! 上大讲台dajiangtai.com,几百门大数据好课等你挑!
druid.storage.storageDirectory=/druid_0_12_3_byhand/segments
# For S3:
#druid.storage.type=s3
#druid.storage.bucket=your-bucket
#druid.storage.baseKey=druid/segments
#druid.s3.accessKey=...
#druid.s3.secretKey=...
#
# Indexing service logs
#
# For local disk (only viable in a cluster if this is a network mount):
#druid.indexer.logs.type=file
#druid.indexer.logs.directory=var/druid/indexing-logs
# For HDFS (make sure to include the HDFS extension and that your Hadoop
config files in the cp):
druid.indexer.logs.type=hdfs
druid.indexer.logs.directory=/druid_0_12_3_byhand/indexing-logs
# For S3:
#druid.indexer.logs.type=s3
#druid.indexer.logs.s3Bucket=your-bucket
#druid.indexer.logs.s3Prefix=druid/indexing-logs
#
# Service discovery
#
druid.selectors.indexing.serviceName=druid/overlord
druid.selectors.coordinator.serviceName=druid/coordinator
#
# Monitoring
#
druid.monitoring.monitors=["io.druid.java.util.metrics.JvmMonitor"]
druid.emitter=logging
druid.emitter.logging.logLevel=info
# Storage type of double columns
# ommiting this will lead to index double as float at the storage layer
druid.indexing.doubleStorage=double
(7)链接Hadoop配置
我们需要把Hadoop的配置软链接到conf/druid/_common目录中:
cd /home/hadoop/app/druid/conf/druid/_common
ln -s /etc/hadoop/conf/core-site.xml ./core-site.xml
ln -s /etc/hadoop/conf/hdfs-site.xml ./hdfs-site.xml
ln -s /etc/hadoop/conf/yarn-site.xml ./yarn-site.xml
ln -s /etc/hadoop/conf/mapred-site.xml ./mapred-site.xml
注意:也可以采用直接拷贝配置文件的方式,不过不推荐
Coordinator配置
配置文件在conf/druid/coordinator目录中,需要分别配置jvm.config和runtime.properties。
(1)jvm.config
-server
-Xms1g
-Xmx2g
-Duser.timezone=UTC+8
-Dfile.encoding=UTF-8
-Djava.io.tmpdir=var/tmp
-Djava.util.logging.manager=org.apache.logging.log4j.jul.LogManager
-Dderby.stream.error.file=var/druid/derby.log
(2)runtime.properties
druid.service=druid/coordinator
druid.port=8081
druid.coordinator.startDelay=PT30S
druid.coordinator.period=PT30S
Overlord配置
配置文件在conf/druid/overlord目录中,需要分别配置jvm.config和runtime.properties。
(1)jvm.config
-server
-Xms1g
-Xmx1g
-Duser.timezone=UTC+8
-Dfile.encoding=UTF-8
-Djava.io.tmpdir=var/tmp
-Djava.util.logging.manager=org.apache.logging.log4j.jul.LogManag
(2)runtime.properties
druid.service=druid/overlord
druid.port=8090
druid.indexer.queue.startDelay=PT30S
druid.indexer.runner.type=remote
druid.indexer.storage.type=metadata
Historical配置
配置文件在conf/druid/historical目录中,需要分别配置jvm.config和runtime.properties。
(1)jvm.config
-server
-Xms1g
-Xmx3g
-XX:MaxDirectMemorySize=2048m
-Duser.timezone=UTC+8
-Dfile.encoding=UTF-8
-Djava.io.tmpdir=var/tmp
-Djava.util.logging.manager=org.apache.logging.log4j.jul.LogManager
-
注意该文件就是jvm的参数,一定要一行一个。
-
java.io.tmpdir在生产上推荐一个比较大的目录(所挂载盘的空间大)
-
-Xms和-Xmx内存配置要合理否则无法启动
-
-XX:MaxDirectMemorySize直接内存(堆外内存)配置要特别注意,要满足下面两个公式:
druid.processing.buffer.sizeBytes(druid.processing.numThreads+1+druid.processing.buffer.sizeBytes)<=MaxDirectMemorySize
最大堆内存>使用的堆外内存(-Xmx>XX:MaxDirectMemorySize)
除了MaxDirectMemorySize,其余配置在runtime.properties中。
http://druid.io/docs/0.12.3/configuration/index.html#historical
(2)runtime.properties
druid.service=druid/historical
druid.port=8083
# HTTP server threads
druid.server.http.numThreads=2
# Processing threads and buffers
druid.processing.buffer.sizeBytes=236870912
druid.processing.numThreads=2
# Segment storage
druid.segmentCache.locations=[{"path":"var/druid/segment-cache","maxSize":130000000000}]
druid.server.maxSize=130000000000
MiddleManager配置
配置文件在conf/druid/middleManager目录中,需要分别配置jvm.config和runtime.properties。
(1)jvm.config
-server
-Xms64m
-Xmx64m
-Duser.timezone=UTC+8
-Dfile.encoding=UTF-8
-Djava.io.tmpdir=var/tmp
-Djava.util.logging.manager=org.apache.logging.log4j.jul.LogManager
(2)runtime.properties
druid.service=druid/middleManager
druid.port=8091
# Number of tasks per middleManager
druid.worker.capacity=3
# Task launch parameters
druid.indexer.runner.javaOpts=-server -Xmx2g -Duser.timezone=UTC+8 -
Dfile.encoding=UTF-8 -
Djava.util.logging.manager=org.apache.logging.log4j.jul.LogManager
druid.indexer.task.baseTaskDir=var/druid/task
# HTTP server threads
druid.server.http.numThreads=2
# Processing threads and buffers on Peons
druid.indexer.fork.property.druid.processing.buffer.sizeBytes=336870912
druid.indexer.fork.property.druid.processing.numThreads=2
# Hadoop indexing
druid.indexer.task.hadoopWorkingPath=var/druid/hadoop-tmp
druid.indexer.task.defaultHadoopCoordinates=["org.apache.hadoop:hadoop-client:2.7.3"]
Broker配置
配置文件在conf/druid/broker目录中,需要分别配置jvm.config和runtime.properties。
(1)jvm.config
-server
-Xms1g
-Xmx3g
-XX:MaxDirectMemorySize=2048m
-Duser.timezone=UTC+8
-Dfile.encoding=UTF-8
-Djava.io.tmpdir=var/tmp
-Djava.util.logging.manager=org.apache.logging.log4j.jul.LogManager
(2)runtime.properties
druid.service=druid/broker
druid.port=8082
# HTTP server threads
druid.broker.http.numConnections=5
druid.server.http.numThreads=3
# Processing threads and buffers
druid.processing.buffer.sizeBytes=336870912
druid.processing.numThreads=2
# Query cache
druid.broker.cache.useCache=true
druid.broker.cache.populateCache=true
druid.cache.type=local
druid.cache.sizeInBytes=2000000000
启动集群
(1)分发安装包
在node01上把Druid安装包分发到其它各个节点:
cd /home/hadoop/app
xsync druid all
xsync druid-0.12.3 all
为了方便软连接和安装包都同步下。
(2)启动集群
| 主机 | druid组件 |
|---|---|
| node01 | Coordinator、Overlord、Broker |
| node02 | Overlord、Historical、MiddleManager、Broker |
| node03 | Coordinator、Historical、MiddleManager、Router |
根据前面的规划,在node01:
bin/coordinator.sh start
bin/overlord.sh start
bin/broker.sh start
node02:
bin/overlord.sh start
bin/historical.sh start
bin/middleManager.sh start
bin/broker.sh start
node03:
bin/coordinator.sh start
bin/historical.sh start
bin/middleManager.sh start
(3)停止集群
根据前面的规划,在node01:
bin/coordinator.sh stop
bin/overlord.sh stop
bin/broker.sh stop
node02:
bin/overlord.sh stop
bin/historical.sh stop
bin/middleManager.sh stop
node03:
bin/coordinator.sh stop
bin/historical.sh stop
bin/middleManager.sh stop
入门操作
数据加载
本小节我们导入一份文件里的数据到Druid单机环境,让大家对Druid数据入库(专业的叫法叫做数据摄取)有一个初步认识。
(1)数据文件说明
在Druid安装目录的quickstart目录下有一个文件wikiticker-2015-09-12-sampled.json,它记录的是Wikipedia(维基百科)页面的编辑事件,任取其中一行数据格式化之后如下:
{
    "timestamp":"2015-09-12T20:03:45.018Z",
    "channel":"#en.wikipedia",
    "namespace":"Main"
    "page":"Spider-Man's powers and equipment",
    "user":"foobar",
    "comment":"/* Artificial web-shooters */",
    "cityName":"New York",
    "regionName":"New York",
    "regionIsoCode":"NY",
    "countryName":"United States",
    "countryIsoCode":"US",
    "isAnonymous":false,
    "isNew":false,
    "isMinor":false,
    "isRobot":false,
    "isUnpatrolled":false,
    "added":99,
    "delta":99,
    "deleted":0,
}
(2)数据摄取规则⽂件
Druid数据摄取需要定义json格式的摄取规则⽂件,规则包含的内容⽐较多,例如告诉Druid摄取哪⾥的数据,加载到哪个表(Druid叫datasource),在Druid安装⽬录的quickstart⽬录下有⼀份已经准备好的规则⽂件wikiticker-index.json,内容如下:
{
    "type" : "index_hadoop",
    "spec" : {
        "ioConfig" : {
            "type" : "hadoop",
            "inputSpec" : {
                "type" : "static",
                "paths" : "quickstart/wikiticker-2015-09-12-sampled.json.gz"
            }
        },
        "dataSchema" : {
            "dataSource" : "wikiticker",
            "granularitySpec" : {
                "type" : "uniform",
                "segmentGranularity" : "day",
                "queryGranularity" : "none",
                "intervals" : ["2015-09-12/2015-09-13"]
            },
            "parser" : {
                "type" : "hadoopyString",
                "parseSpec" : {
                    "format" : "json",
                    "dimensionsSpec" : {
                        "dimensions" : [
                            "channel",
                            "cityName",
                            "comment",
                            "countryIsoCode",
                            "countryName",
                            "isAnonymous",
                            "isMinor",
                            "isNew",
                            "isRobot",
                            "isUnpatrolled",
                            "metroCode",
                            "namespace",
                            "page",
                            "regionIsoCode",
                            "regionName",
                            "user"
                        ]
                    },
                    "timestampSpec" : {
                        "format" : "auto",
                        "column" : "time"
                    }
                }
            },
            "metricsSpec" : [
                {
                    "name" : "count",
                    "type" : "count"
                },
                {
                    "name" : "added",
                    "type" : "longSum",
                    "fieldName" : "added"
                },
                {
                    "name" : "deleted",
                    "type" : "longSum",
                    "fieldName" : "deleted"
                },
                {
                    "name" : "delta",
                    "type" : "longSum",
                    "fieldName" : "delta"
                },
                {
                    "name" : "user_unique",
                    "type" : "hyperUnique",
                    "fieldName" : "user"
                }
            ]
        },
        "tuningConfig" : {
            "type" : "hadoop",
            "partitionsSpec" : {
                "type" : "hashed",
                "targetPartitionSize" : 5000000
            },
            "jobProperties" : {}
        }
    }
}
(3)加载数据
Druid加载数据需要通过访问overlord的http接⼝提价任务。
在Druid安装根⽬录下执⾏:
curl -X 'POST' -H 'Content-Type:application/json' -d @quickstart/wikiticker-index.json http://192.168.2.50:8090/druid/indexer/v1/task
![]()
提交任务之后会返回任务ID,我们访问overlord的web UI能看到:
任务已经完成,状态码是SUCCESS,说明数据记载成功。
(4)查看datasource
访问Coordinator web ui:
能看见已经多了一个datasource,叫做wikiticker,这个就是Druid的一个“表”
数据查询
Druid的查询数据需要通过访问broker的http接口查询请求。
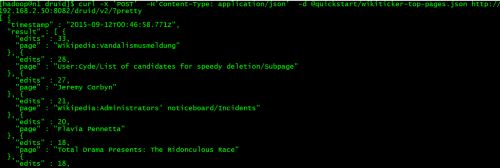
curl -X 'POST' -H'Content-Type: application/json' -d @quickstart/wikiticker-top-pages.json http://192.168.2.50:8082/druid/v2/?pretty
Druid架构
Druid为了实现海量数据实时分析采用了一些特殊的手段和比较复杂的架构。
Druid核心概念
Druid能够实现海量数据实时分析采取了如下特殊手段:
- 预聚合
- 列式存储
- 多级分区+位图索引(Datasource和Segments)
我们理解了这三个概念,就基本理解了Druid的秘密。
roll-up预聚合
分析查询逃不开聚合操作,Druid在数据入库时就提前进行了聚合,这就是所谓的预聚合(roll-up)。Druid把数据按照选定维度的相同的值进行分组聚合,可以大大降低存储大小。数据查询的时候只需要 预聚合的数据基础上进行轻量的二次过滤和聚合即可快速拿到分析结果。
要做预聚合,Druid要求数据能够分为三个部分:
- Timestamp列:Druid所有分析查询均涉及时间(思考:时间实际上是一个特殊的维度,它可以衍生出一堆维度,Druid把它单列出来了)
- Dimension列(维度):Dimension列指用于分析数据角度的列,例如从地域、产品、用户的角度来分析订单数据,一般用于过滤、分组等等。
- Metric列(度量):Metric列指的是用于做聚合和其他计算的列。一般来说是数字。
例如这样一份数据:
{"timestamp":"2018-01-01T01:01:35Z","srcIP":"1.1.1.1",
"dstIP":"2.2.2.2","packets":20,"bytes":9024} {"timestamp":"2018-01-01T01:01:51Z","srcIP":"1.1.1.1",
"dstIP":"2.2.2.2","packets":255,"bytes":21133} {"timestamp":"2018-01-01T01:01:59Z","srcIP":"1.1.1.1",
"dstIP":"2.2.2.2","packets":11,"bytes":5780} {"timestamp":"2018-01-01T01:02:14Z","srcIP":"1.1.1.1",
"dstIP":"2.2.2.2","packets":38,"bytes":6289} {"timestamp":"2018-01-01T01:02:29Z","srcIP":"1.1.1.1",
"dstIP":"2.2.2.2","packets":377,"bytes":359971} {"timestamp":"2018-01-01T01:03:29Z","srcIP":"1.1.1.1",
"dstIP":"2.2.2.2","packets":49,"bytes":10204} {"timestamp":"2018-01-02T21:33:14Z","srcIP":"7.7.7.7",
"dstIP":"8.8.8.8","packets":38,"bytes":6289} {"timestamp":"2018-01-02T21:33:45Z","srcIP":"7.7.7.7",
"dstIP":"8.8.8.8","packets":123,"bytes":93999} {"timestamp":"2018-01-02T21:35:45Z","srcIP":"7.7.7.7",
"dstIP":"8.8.8.8","packets":12,"bytes":2818}
timestamp当然是Timestamp列,srcIP和dstIP是Dimension列(维度),packets和bytes是Metric列。
该数据入库到Druid时如果我们打开预聚合功能(可以不打开聚合,数据量一大就不行了),要求对packets和bytes进行累加(sum),并且要求按条计数(count *),聚合规则配置后面会讲,聚合之后的数据是这样的:
当然预聚合是以牺牲明细数据分析查询为代价的。
列式存储
列式存储的概念我们已经讲过多次,相信大家发现一个规律,但凡在大数据领域想要解决快速存储和分析海量数据基本都会采用列式存储。
一般来说OLTP数据库使用行式存储,OLAP数据库使用列式存储:
上图中,在查询某些列的数据时,行存储需要把整行数据读出来再过滤。
如上图,列存储不同列的数据分开存储在不同文件,面对分析查询(只涉及部分列)可以大幅降低IO,因此列式存储相对于行式存储在OLAP场景下的优势可以这么来理解:
-
对于分析查询,一般只需要用到少量的列,在列式存储中,只需要读取所需的数据列即可。 例如,如果您需要100列中的5列,则I / O减少20倍。
-
按列分开存储,按数据包读取时因此更易于压缩。 列中的数据具有相同特征也更易于压缩, 这样可以进一步减少I / O量。
-
由于减少了I / O,因此更多数据可以容纳在系统缓存中,进一步提高分析性能。
Datasource和Segments
多级分区存储
Druid的数据在存储层面是按照Datasource和Segments实现多级分区存储的,并建立了位图索引。
-
Datasource相当于关系型数据库中的表
-
Datasource会按照时间来分片(类似于HBase里的Region和Kudu里的tablet),每一个时间分片被称为chunk
-
chunk并不是直接存储单元,在chunk内部数据还会被切分为一个或者多个segment
-
所有的segment独立存储,通常包含数百万行,segment与chunk的关系如下图:
-
segment是Druid数据存储的最小单元,内部采用列式存储,并建立了位图索引、对数据进行了编码和压缩
Segment存储结构
(1)Segment目录结构
我们在 数据加载 加载了一份数据,这份数据最终会存储如下目录:
/home/hadoop/app/druid/var/druid/segments/wikiticker/2015-09-12T00:00:00.000Z_2015-09-13T00:00:00.000Z/2020-04-07T04:01:57.919Z/0
/home/hadoop/app/druid是Druid安装目录,var子目录是安装时初始化生产的目录, druid/segments子目录是Druid存储segment数据的目录,剩下的目录结构如下:
wikiticker/2015-09-12T00:00:00.000Z_2015-09-13T00:00:00.000Z/2020-04-07T04:01:57.919Z/0
(2)Segment逻辑名称
Segment逻辑名称就以该⽬录命名,形如“datasource_intervalStart_intervalEnd_version_partitionNum”。
- dataSource:数据源;
- intervalStart、intervalEnd:时间间隔的起⽌,使⽤ISO-8601格式(chunk的时间范围);
- version:版本号,使⽤数据导⼊的系统时间;
- partitionNumber:分区编号,在每个时间间隔内,根据数据量的⼤⼩⼀个Segment内部可能会有多个分区。
我们在coordinator的web ui能看到Segment的信息:
Segment存储结构
Segment是自包含容器,包括基于列压缩存储的数据,以及这些列的索引数据。 在Segment存储的最底层目录我们能看见两个文件:
(1)descriptor.json
descriptor.json是一个描述性文件,描述了该Segment的相关信息,内容格式化之后如下:
{

    "dataSource": "wikiticker",//数据源
    "interval": "2015-09-12T00:00:00.000Z/2015-09-13T00:00:00.000Z",//时间范围
    "version": "2020-04-07T04:01:57.919Z",//版本号(导⼊时的系统时间)
    "loadSpec": {//存储路径
        "type": "local",
        "path": "/home/hadoop/app/druid-0.12.3/var/druid/segments/wikiticker/2015-09-12T00:00:00.000Z_2015-09-13T00:00:00.000Z/2020-04-07T04:01:57.919Z/0/index.zip"
    },
    "dimensions":
    "channel,cityName,comment,countryIsoCode,countryName,isAnonymous,isMinor,isNew,isRobot,isUnpatrolled,metroCode,namespace,page,regionIsoCode,regionName,user",//维度列
    "metrics": "count,added,deleted,delta,user_unique",//指标列
    "shardSpec": {//分⽚信息
        "type": "none"
    },
    "binaryVersion": 9,//数据格式的版本号,druid内部使⽤,不同版本有差别
    "size": 5535121,//index.zip解压后的⽂件⼤⼩
    "identifier": "wikiticker_2015-09-12T00:00:00.000Z_2015-09-13T00:00:00.000Z_2020-04-07T04:01:57.919Z"
}
(2)index.zip
index.zip文件中包括了该segment中的数据(包括数据和索引),我们解压缩它:
解压缩之后有四个文件:
-
version.bin:Segment内部标识数据结构的版本号
-
形如xxxxx.smoosh的一系列文件:xxxxx从0开始编号
存储的Druid聚合后的数据以及索引数据,xxxxx从0开始编号,为了满足Java内存文件映射MapperByteBuffer限制,改文件单个最大为2G。
-
factory.json
该文件内容如下:
{"type":"mMapSegmentFactory"}Druid对文件进行Java内存映射的实现类。
-
meta.smoosh文件
该文件记录该segment数据的元信息(记录了每个列的数据在每个xxxxx.smoosh文件中的开始和结束位置/偏移量),格式为csv,内容如下:
meta.smoosh文件分为两部分:
文件头(第一行):其中v1代表segment的版本号,2147483647(2GB)为xxxxx.smoosh文件的最大大小。1表示smoosh文件的数量,即index.zip文件中xxxxx.smoosh文件的个数。
文件体(从第二行开始为):每行都是4列,第一列是column表示列名,第二列是smooshid表示分片编号,从0开始编号,对于包含多个xxxxx.smoosh文件的index.zip,meta.smooth文件会记载多个xxxxx.smoosh文件中每列的元信 息。第三列startPos为该列在第smooshid分片中的开始位置,第四列endPos为其结束位置。
(3)位图索引
现在有这样一份数据:
以tp为时间列,appkey和city为维度,以value为度量值,导入Druid后按天聚合,最终结果是:
数据经过聚合之后查询本身就很快了,为了进一步加速对聚合之后数据的查询,Druid会建立位图索引:
上面的位图索引不是针对列而是针对列的值,记录了列的值在数据的哪一行出现过,第一列是具体列的值,后续列标识该列的值在某一行是否出现过,依次是第1列到第n列。例如appkey1在第一行出现过, 在其他行没出现,那就是1000(例子中只有四个列)。
我们以几个SQL查询为例看看位图索引到底是怎么优化查询的:
-
条件查询
Select sum(value) from xxx where time=’2019-11-11’and appkey in (‘appkey1’,’appkey2’) and area=’北京’首先根据时间段定位到segment,然后根据appkey in (‘appkey1’,’appkey2’) and area=’北京’查到各自的bitmap: (appkey1(1000) or appkey2(0110)) and 北京(1100) = (1100) 也就是说,符合条件的列是第一行和第二行,这两行的metric(value)的和为125.
-
group by 查询
select area, sum(value) from xxx where time=’2019-11-11’and appkey in (‘appkey1’,’appkey2’) group by area该查询与上面的查询不同之处在于将符合条件的列 appkey1(1000) or appkey2(0110) = (1110)
取出来,然后在内存中做分组聚合。结果为:北京:125, 广州:343 显然,我们使用位图操作比把数据读出来在判断速度要快得多。
架构
Druid核心架构中包括如下节点(Druid 的所有功能都在同一个包,通过不同的命令启动):
-
Coordinator:负责集群 Segment 的管理和发布,并确保 Segment 在 Historical 集群中的负载均衡,Coordinator 与计算节点并不直接通信,而是通过 Zookeeper 进行协调。
-
Broker:负责从客户端接收查询请求,并将查询请求转发给 Historical 节点,然后汇总查询结果,统一返回给终端用户。Broker 节点需要感知 Segment 信息在集群上的分布
-
Historical :计算节点,负责加载 Segment 文件,处理分布式查询。
-
Router(可选) :可选节点,在 Broker 集群之上的API网关,用于将查询路由到不同的 Broker,有了 Router 节点 Broker 不在是单点服务了,提高了并发查询的能力,提供类似Nginx的功能
-
Indexing Service:Indexing Service顾名思义就是指索引服务,在索引服务生成segment的过程中,由Overlord Node接收加载任务,然后生成索引任务(Index Service)并将任务分发给多个MiddleManager节点,MiddleManager节点根据索引协议生成多个Peon,Peon将完成数据的索引任务并生成segment,并将segment提交到分布式存储里面(一般是HDFS),然后Coordinator节点感知到segment生成,给Historical节点分发下载任务,Historical节点从分布式存储里面下载segment到本地(支持批量和流式摄取)。
-
Overlord:Overlord Node负责segment生成的任务,并提供任务的状态信息,当然原理跟上面类似,也在Zookeeper中对应的目录下,由实际执行任务的最小单位在Zookeeper中同步更新任务信息,类似于回调函数的执行过程。跟Coordinator Node一样,它在集群里面一般只存在一个,如果存在多个Overlord Node,Zookeeper会根据选举算法(一致性算法避免脑裂)产生一个Leader,其余的当Follower,当Leader遇到问题宕机时,Zookeeper会在Follower中再次选取一个Leader,从 而维持集群生成segment服务的正常运行。Overlord Node会将任务分发给MiddleManager Node,由MiddleManager Node负责具体的segment生成任务。
-
MiddleManager:Overlord Node会将任务分发给MiddleManager Node,所以MiddleManager Node会在Zookeeper中感知到新的索引任务。一但感知到新的索引任务,会创建Peon(segment具体执行者,也是索引过程的最小单位)来具体执行索引任务,一个MiddleManager Node会运行很多个Peon的实例。
-
Peon:Peon(segment构建任务的具体执行者,也是索引过程的最小单位),所有的Peon都会在Zookeeper对应的目录中实时更新自己的任务状态。
简单来讲:
- coordinator-Master节点,管理集群的数据视图,segment的load与drop;
- historical :历史节点,负责历史窗口内数据的查询;
- broker:查询节点,查询拆分,结果汇聚;
- indexing service-一套实时/批量数据导入任务的调度服务;
- overlord-调度服务的master节点,负责接收任务,管理任务状态;
- middleManager-worker节点,接收任务启动任务;
- peon-实际的任务进程。
外部依赖:
- Zookeeper:用于内部服务发现、协调和leader选举的。
- 深度存储(Deep storage):深度存储服务是能够被每个Druid服务都能访问的共享文件系统,一般是分布式对象存储服务,用于存 放Druid所有摄入的数据。比如S3、HDFS或网络文件系统。
- 元数据存储(Metadata store):元数据存储服务主要用于存储Druid中的一些元数据,比如segment的相关信息。一般是传统的RDMS,比如MySQL。
数据摄取
摄取方式
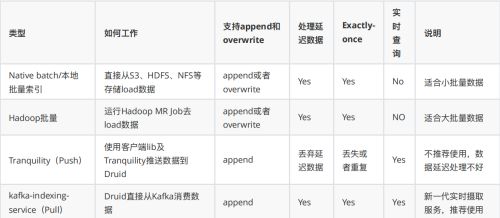
截止到 Druid0.12.3数据摄取方式有如下两种四种方法(整体分为批量和流式两大类):
注意:老版本Druid还有一种通过Real-time Node进行实时摄取的方式,由于可用性不好已经被indexing-service代替
注意:新版Druid的indexing-service已经支持了其他消息队列,可自行查阅官大文档
Druid的indexing-service既支持批量也支持流式,上表中的Native batch/本地批量索引和kafka- indexing-service(Pull)均使用了indexing-service,只不过通过摄取任务类型来区分。
(1)流式摄取
最推荐、也是最流行的流式摄取方法是直接从Kafka读取数据的 Kafka索引服务 。如果你喜欢Kinesis,Kinesis索引服务 也能很好地工作。
下表比较了主要可用选项:
| Method | Kafka | Kinesis | Tranquility |
|---|---|---|---|
| Supervisor类型 | kafka |
kinesis |
N/A |
| 如何工作 | Druid直接从 Apache Kafka读取数据 | Druid直接从Amazon Kinesis中读取数据 | Tranquility, 一个独立于Druid的库,用来将数据推送到Druid |
| 可以摄入迟到的数据 | Yes | Yes | No(迟到的数据将会被基于 windowPeriod 的配置丢弃掉) |
| 保证不重不丢(Exactly-once) | Yes | Yes | No |
(2)批量摄取
从文件进行批加载时,应使用一次性 任务,并且有三个选项:index_parallel(本地并行批任务)、index_hadoop(基于hadoop)或index(本地简单批任务)。
一般来说,如果本地批处理能满足您的需要时我们建议使用它,因为设置更简单(它不依赖于外部Hadoop集群)。但是,仍有一些情况下,基于Hadoop的批摄取可能是更好的选择,例如,当您已经有一个正在运行的Hadoop集群,并且希望使用现有集群的集群资源进行批摄取时。
此表比较了三个可用选项:
| 方式 | 本地批任务(并行) | 基于Hadoop | 本地批任务(简单) |
|---|---|---|---|
| 任务类型 | index_parallel |
index_hadoop |
index |
| 并行? | 如果 inputFormat 是可分割的且 tuningConfig 中的 maxNumConcurrentSubTasks > 1, 则 Yes |
Yes | No,每个任务都是单线程的 |
| 支持追加或者覆盖 | 都支持 | 只支持覆盖 | 都支持 |
| 外部依赖 | 无 | Hadoop集群,用来提交Map-Reduce任务 | 无 |
| 输入位置 | 任何 输入数据源 | 任何Hadoop文件系统或者Druid数据源 | 任何 输入数据源 |
| 文件格式 | 任何 输入格式 | 任何Hadoop输入格式 | 任何 输入格式 |
| Rollup modes | 如果 tuningConfig 中的 forceGuaranteedRollup = true, 则为 Perfect(最佳rollup) |
总是Perfect(最佳rollup) | 如果 tuningConfig 中的 forceGuaranteedRollup = true, 则为 Perfect(最佳rollup) |
| 分区选项 | 可选的有Dynamic, hash-based 和 range-based 三种分区方式,详情参见 分区规范 |
通过 partitionsSpec中指定 hash-based 和 range-based分区 |
可选的有Dynamic和hash-based二种分区方式,详情参见 分区规范 |
Index Service
在正式将数据摄取之前,先讲述一下Index Service。
Index Service是运行索引相关任务的高可用性分布式服务,它的架构中包括了Overlord、MiddleManager、Peon。
简单理解,Indexing Service是一套实时/批量数据导入任务的调度服务。
- Overlord-调度服务的master节点,负责接收任务,管理任务状态;
- MiddleManager-worker节点,接收任务启动任务;
- Peon-实际的任务进程(Hadoop批量索引方式下,Pero就是YARN client);
在上图中,通过index-service的方式批量摄取数据,我们需要向Overlord提交一个索引任务,Overlord 接受任务,通过Zookeeper将任务信息分配给MiddleManger,Middlemanager领取任务后创建Peon进 程,Peon通过Zookeeper向Overlord定期汇报任务状态;
摄取规则
Druid支持批量数据摄入和实时流数据摄入两种数据摄入方式,无论是哪种方式都得指定一个摄取规则 文件(Ingestion Spec)定义摄取的详细规则(类似于Flume采集数据都得指定一个配置文件一样)。
本节我们先学习下摄取规则文件的摄取规则如何配置。 摄取规则文件是json格式的,以下是一个完整示例:
{
    "type": "index",
    "spec": {
        "ioConfig": {
            "type": "index",
            "firehose": {
                "type": "local",
                "baseDir": "/home/hadoop/app/druid/djt-example/",
                "filter": "ad_event_data.json"
            }
        },
        "dataSchema": {
            "dataSource": "ad_event_local",
            "granularitySpec": {
                "type": "uniform",
                "segmentGranularity": "day",
                "queryGranularity": "hour",
                "intervals": [
                    "2018-12-01/2018-12-03"
                ]
            },
            "parser": {
                "type": "String",
                "parseSpec": {
                    "format": "json",
                    "dimensionsSpec": {
                        "dimensions": [
                            "city",
                            "platform"
                        ]
                    },
                    "timestampSpec": {
                        "format": "auto",
                        "column": "timestamp"
                    }
                }
            },
            "metricsSpec": [
                {
                    "name": "count",
                    "type": "count"
                },
                {
                    "name": "click",
                    "type": "longSum",
                    "fieldName": "click"
                }
            ]
        },
        "tuningConfig": {
            "type": "index",
            "partitionsSpec": {
                "type": "hashed",
                "targetPartitionSize": 5000000
            }
        }
    }
}
type
摄取规则文件通过最外层的type定义摄取方式:
- index:Native batch
- index_hadoop:Hadoop批量
- kafka:kafka-indexing-service(Pull)
spec
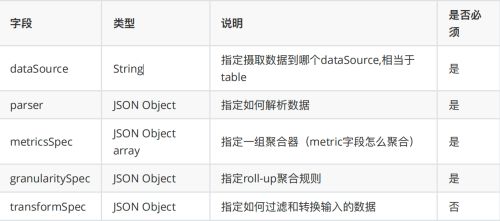
spec属性才是整正数据摄取的核心,它下面有三个重要属性:
- **ioConfig:定义数据摄取的数据源(必须配置) **
- **dataSchema:定义了数据摄入模式(必须配置),其中包括数据源名称(‘datasource’),数据解析方式(“parser"),指标计算规则(”metricsSpec"),粒度规则(“granularitySpec”) **
- tunningConfig:定义数据摄入过程中的各种优化配置(可选配置)
{
 "dataSchema" : {...},
 "ioConfig" : {...},
 "tuningConfig" : {...}
}
dataSchema
"dataSchema": {
    "dataSource": "ad_event_local",
    "granularitySpec": {
        "type": "uniform",
        "segmentGranularity": "day",
        "queryGranularity": "hour",
        "intervals": [
            "2018-12-01/2018-12-03"
        ]
    },
    "parser": {
        "type": "String",
        "parseSpec": {
            "format": "json",
            "dimensionsSpec": {
                "dimensions": [
                    "city",
                    "platform"
                ]
            },
            "timestampSpec": {
                "format": "auto",
                "column": "timestamp"
            }
        }
    },
    "metricsSpec": [
        {
            "name": "count",
            "type": "count"
        },
        {
            "name": "click",
            "type": "longSum",
            "fieldName": "click"
        }
    ]
}
(1)dataSource:dataSource不需要过多解释,就是指定摄取数据的目标dataSource,相当于表,不需要提前创建的。
(2)parser:解析器,输入数据格式不一样需要配置不同的解析器,示例如下:
"parser": {
    "type": "string",
    "parseSpec": {
        "format": "json",
        "dimensionsSpec": {
            "dimensions": [
                "city",
                "platform"
            ]
        },
        "timestampSpec": {
            "format": "auto",
            "column": "timestamp"
        }
    }
}
-
type:默认string,通常都是string,如果使用hadoop批量索引则为hadoopyString
-
parseSpec:
format:指定输入数据的格式,默认是tsv,可选格式json、csv、tsv等
dimensionsSpec:指定维度列
timestampSpec:指定timestamp列
http://druid.io/docs/0.12.3/ingestion/ingestion-spec.html
-
metricsSpec
指定一组聚合器,数据入库时按照聚合器对指标字段进行rollup,如果rollup不开启,则这里可以用空列表。
示例select xxx,count(1) as count,sum(click) as click from xxx groupby xxx:
"metricsSpec": [
    {
        "name": "count",
        "type": "count"
    },
    {
        "name": "click",//输出字段
        "type": "longSum",//聚合⽅式
        "fieldName": "click"//原始字段
    }
]
可以使用的聚合函数有:count,longSum,doubleSum,longMin,longMax,doubleMin,doubleMax;关于count我们要重点注意一下,这个行数和初始的摄入行数是不一样的,因为druid会进行原始数据的聚合,这个行数是指的聚合后的行数。
-
granularitySpec
指定rollup聚合的粒度,是按月、按天、按小时或者其他规则等等,示例:
"granularitySpec": {
    "type": "uniform",
    "segmentGranularity": "DAY",
    "queryGranularity": "HOUR",
    "intervals": [
        "2018-12-01/2018-12-03"
    ]
}
不同粒度类型配置不一样:
-
uniform粒度
就是按照预定义的时间段分割segment(按月、按天、按小时)。
-
-
transformSpec:不常用,不是必须配置项,需要的话可以参考如下链接:
http://druid.io/docs/0.12.3/ingestion/transform-spec.html
ioConfig
示例:
...
"ioConfig": {
    "type": "index",
    "firehose": {
        "type": "local",
        "baseDir": "/home/hadoop/app/druid/djt-example/",
        "filter": "ad_event_data.json"
    }
},
...
随着摄取方式不一样,ioConfig的配置会有区别。
tunningConfig
随着摄取方式不一样,tunningConfig的配置会有区别。
tunningConfig优化配置选项如图:
优化配置样例:
"tuningConfig" : {
    "type" : "hadoop",
    "partitionsSpec" : {
        "type" : "hashed",
        "targetPartitionSize": 5000000
    }
}
segment的分区:segment通常按照时间戳分区,可以通过分区规则设置进一步分区,在tunningConfig中优化选项的partitionSpec中设置;druid支持两种分区策略:基于哈希的分区和基于单维度的分区,推荐使用哈希分区方式,这种方式能更有助于提高索引性能。
基于哈希的分区:选择一些segment,然后根据这些segment每行所有维度的哈希值进行分区。分区规则的样例:
"partitionsSpec" : {
    "type" : "hashed",
    "targetPartitionSize": 5000000
}
或者
"partitionsSpec" : {
    "type" : "hashed",
    "numShards": 5
}
批量摄取
本地批量索引
(1)准备数据文件
准备数据文件ad_event_data.json,需要在所有MiddleManager节点上都有这份文件(因为任务可能调度到任意一台MiddleManager上),且最好运行Druid的用户有相应权限:
{"timestamp":"2018-12- 01T01:03.00Z","city":"beijing","platform":"pc","click":"0"}
{"timestamp":"2018-12- 01T01:01.00Z","city":"guangzhou","platform":"pc","click":"1"}
{"timestamp":"2018-12- 01T01:03.00Z","city":"beijing","platform":"pc","click":"0"}
{"timestamp":"2018-12- 01T05:01.00Z","city":"beijing","platform":"pc","click":"1"}
{"timestamp":"2018-12- 01T01:03.00Z","city":"guangzhou","platform":"pc","click":"0"}
{"timestamp":"2018-12- 01T01:01.00Z","city":"beijing","platform":"mobile","click":"0"}
{"timestamp":"2018-12- 01T01:03.00Z","city":"beijing","platform":"pc","click":"1"}
{"timestamp":"2018-12- 01T03:01.00Z","city":"shanghai","platform":"pc","click":"0"}
{"timestamp":"2018-12- 01T01:03.00Z","city":"beijing","platform":"pc","click":"0"}
{"timestamp":"2018-12- 01T01:01.00Z","city":"guangzhou","platform":"pc","click":"1"}
{"timestamp":"2018-12- 01T05:03.00Z","city":"beijing","platform":"mobile","click":"0"}
{"timestamp":"2018-12- 01T01:01.00Z","city":"shanghai","platform":"pc","click":"0"}
{"timestamp":"2018-12- 01T01:03.00Z","city":"beijing","platform":"pc","click":"0"}
{"timestamp":"2018-12- 01T01:01.00Z","city":"guangzhou","platform":"pc","click":"1"}
{"timestamp":"2018-12- 01T03:03.00Z","city":"beijing","platform":"mobile","click":"0"}
{"timestamp":"2018-12- 01T01:01.00Z","city":"shanghai","platform":"pc","click":"0"}
{"timestamp":"2018-12- 01T01:03.00Z","city":"beijing","platform":"pc","click":"0"}
{"timestamp":"2018-12- 01T05:01.00Z","city":"beijing","platform":"pc","click":"0"}
{"timestamp":"2018-12- 01T01:03.00Z","city":"beijing","platform":"mobile","click":"1"}
(2)准备摄取规则文件
本地批量索引任务规则文件ad_event_index.json:
{
    "type": "index",
    "spec": {
        "ioConfig": {
            "type": "index",
            "firehose": {
                "type": "local",
                "baseDir": "/home/hadoop/app/druid/djt-example/",
                "filter": "ad_event_data.json"
            }
        },
        "dataSchema": {
            "dataSource": "ad_event_local",
            "granularitySpec": {
                "type": "uniform",
                "segmentGranularity": "DAY",
                "queryGranularity": "NONE",
                "intervals": [
                    "2018-12-01/2018-12-03"
                ]
            },
            "parser": {
                "type": "String",
                "parseSpec": {
                    "format": "json",
                    "dimensionsSpec": {
                        "dimensions": [
                            "city",
                            "platform"
                        ]
                    },
                    "timestampSpec": {
                        "format": "auto",
                        "column": "timestamp"
                    }
                }
            },
            "metricsSpec": [
                {
                    "name": "count",
                    "type": "count"
                },
                {
                    "name": "click",
                    "type": "longSum",
                    "fieldName": "click"
                }
            ]
        },
        "tuningConfig": {
            "type": "index",
            "partitionsSpec": {
                "type": "hashed",
                "targetPartitionSize": 5000000
            }
        }
    }
}
(3)提交索引任务
curl -X 'POST' -H 'Content-Type:application/json' -d @ad_event_index.json
http://node01:8090/druid/indexer/v1/task
(4)准备查询规则文件
ad_event_query.json :
{
    "queryType":"timeseries",
    "dataSource":"ad_event_local",
    "granularity":{"type": "period", "period": "PT1H", "timeZone":
                   "Asia/Shanghai"},
    "aggregations":[
        {
            "type":"longSum",
            "name":"click",
            "fieldName":"click"
        },{
            "type":"longSum",
            "name":"pv",
            "fieldName":"count"
        }
    ],
    "intervals":["2018-06-02/2019-06-06"]
}
(5)提交查询任务
curl -X 'POST' -H'Content-Type: application/json' -d @ad_event_query.json
http://node02:8082/druid/v2/?pretty
Hadoop批量索引
使用HadoopDruidIndexer加载批量数据时,会启动MapReduce任务,将数据生成segments文件,存放在HDFS上,同时向Druid metastore中写入segments元数据。Coordinator Node监控元数据中有新增的segments,会将指令写入Zookeeper,而Historical Node监控到Zookeeper中的指令之后,从HDFS上下载segments文件到本地。之后,该批量数据便可从Druid中查询。
(1)准备数据文件
wikiticker-2015-09-12-sampled.json:
{"time":"2015-09-12T00:47:00.496Z","channel":"#ca.wikipedia","cityName":null,"comment":"Robot inserta {{Commonscat}} que enllaça amb \[\[commons:category:Rallicula\]\]","countryIsoCode":null,"countryName":null,"isAnonymous":false,"isMinor":true,"isNew":false,"isRobot":true,"isUnpatrolled":false,"metroCode":null,"namespace":"Main","page":"Rallicula","regionIsoCode":null,"regionName":null,"user":"PereBot","delta":17,"added":17,"deleted":0}
{"time":"2015-09-12T00:47:05.474Z","channel":"#en.wikipedia","cityName":"Auburn","comment":"/\* Status of peremptory norms under international law \*/ fixed spelling of 'Wimbledon'","countryIsoCode":"AU","countryName":"Australia","isAnonymous":true,"isMinor":false,"isNew":false,"isRobot":false,"isUnpatrolled":false,"metroCo de":null,"namespace":"Main","page":"Peremptory norm","regionIsoCode":"NSW","regionName":"New South Wales","user":"60.225.66.142","delta":0,"added":0,"deleted":0}
{"time":"2015-09-12T00:47:08.770Z","channel":"#vi.wikipedia","cityName":null,"comment":"fix Lỗi CS1: ngày tháng","countryIsoCode":null,"countryName":null,"isAnonymous":false,"isMinor": true,"isNew":false,"isRobot":true,"isUnpatrolled":false,"metroCode":null,"name space":"Main","page":"Apamea abruzzorum","regionIsoCode":null,"regionName":null,"user":"Cheers!- bot","delta":18,"added":18,"deleted":0}
{"time":"2015-09-12T00:47:11.862Z","channel":"#vi.wikipedia","cityName":null,"comment":"clean up using \[\[Project:AWB\|AWB\]\]","countryIsoCode":null,"countryName":null,"isAnonymous":false,"isMinor":false,"isNew":false,"isRobot":true,"isUnpatrolled":false,"metroC ode":null,"namespace":"Main","page":"Atractus flammigerus","regionIsoCode":null,"regionName":null,"user":"ThitxongkhoiAWB","delta":18,"added":18,"deleted":0}
{"time":"2015-09-12T00:47:13.987Z","channel":"#vi.wikipedia","cityName":null,"comment":"clean up using \[\[Project:AWB\|AWB\]\]","countryIsoCode":null,"countryName":null,"isAnonymous":false,"isMinor":false,"isNew":false,"isRobot":true,"isUnpatrolled":false,"metroC ode":null,"namespace":"Main","page":"Agama mossambica","regionIsoCode":null,"regionName":null,"user":"ThitxongkhoiAWB","delta":18,"added":18,"deleted":0}
{"time":"2015-09-12T00:47:17.009Z","channel":"#ca.wikipedia","cityName":null,"comment":"/\* Imperi Austrohongarès\*/","countryIsoCode":null,"countryName":null,"isAnonymous":false,"isMinor":fal se,"isNew":false,"isRobot":false,"isUnpatrolled":false,"metroCode":null,"names pace":"Main","page":"Campanya dels Balcans (1914- 1918)","regionIsoCode":null,"regionName":null,"user":"Jaumellecha","delta":-20,"added":0,"deleted":20}
文件需要上传到hdfs:
hdfs dfs -mkdir /djt-example
hdfs dfs -put wikiticker-2015-09-12-sampled.json /djt-example
(2)准备摄取规则文件
{
    "type": "index_hadoop",
    "spec": {
        "dataSchema": {
            "dataSource": "wikiticker",
            "parser": {
                "type": "hadoopyString",
                "parseSpec": {
                    "format": "json",
                    "dimensionsSpec": {
                        "dimensions": [
                            "channel",
                            "cityName",
                            "comment",
                            "countryIsoCode",
                            "countryName",
                            "isAnonymous",
                            "isMinor",
                            "isNew",
                            "isRobot",
                            "isUnpatrolled",
                            "metroCode",
                            "namespace",
                            "page",
                            "regionIsoCode",
                            "regionName",
                            "user"
                        ]
                    },
                    "timestampSpec": {
                        "format": "auto",
                        "column": "time"
                    }
                }
            },
            "metricsSpec": [
                {
                    "name": "count",
                    "type": "count"
                },
                {
                    "name": "added",
                    "type": "longSum",
                    "fieldName": "added"
                },
                {
                    "name": "deleted",
                    "type": "longSum",
                    "fieldName": "deleted"
                },
                {
                    "name": "delta",
                    "type": "longSum",
                    "fieldName": "delta"
                }
            ],
            "granularitySpec": {
                "type": "uniform",
                "segmentGranularity": "day",
                "queryGranularity": "none",
                "intervals": [
                    "2015-09-12/2015-09-13"
                ],
                "rollup": false
            }
        },
        "ioConfig": {
            "type": "hadoop",
            "inputSpec": {
                "type": "static",
                "paths": "/djt-example/wikiticker-2015-09-12-sampled.json"
            }
        },
        "tuningConfig": {
            "type": "hadoop",
            "partitionsSpec": {
                "type": "hashed",
                "targetPartitionSize": 5000000
            },
            "jobProperties": {
                "fs.defaultFS": "hdfs://node01:8020",
                "yarn.resourcemanager.hostname": "node01",
                "dfs.client.use.datanode.hostname": "true",
                "dfs.datanode.use.datanode.hostname": "true",
                "yarn.nodemanager.vmem-check-enabled": "false",
                "mapreduce.map.java.opts": "-Duser.timezone=UTC+8 -Dfile.encoding=UTF-8",
                "mapreduce.job.user.classpath.first": "true",
                "mapreduce.reduce.java.opts": "-Duser.timezone=UTC+8 -Dfile.encoding=UTF-8",
                "mapreduce.map.memory.mb": 1024,
                "mapreduce.reduce.memory.mb": 1024
            }
        }
    },
    "hadoopDependencyCoordinates": [
        "org.apache.hadoop:hadoop-client:3.1.1.3.1.4.0-315"
    ]
}
注意:hadoopdependencyCoordinate:指定为你当前hadoop集群版本,如果与druid依赖版本不一 致,需要使用命令去下载你的集群版本对应的hadoop-client.要保证数据文件存储在hdfs上并且路径正确。
(3)提交hadoop-druid索引任务
curl -X 'POST' -H 'Content-Type:application/json' -d @hadoop-index.json
http://node01:8090/druid/indexer/v1/task
(4)查询规则文件
wikiticker-topn-query.json:
{
    "queryType" : "topN",
    "dataSource" : "wikiticker",
    "intervals" : ["2015-09-12/2015-09-13"],
    "granularity" : "day",
    "dimension" : "page",
    "metric" : "edits",
    "threshold" : 25,
    "aggregations" : [
        {
            "type" : "longSum",
            "name" : "edits",
            "fieldName" : "count"
        }
    ]
}
(5)提交查询任务
curl -X 'POST' -H'Content-Type: application/json' -d @wikiticker-topnquery.json http://node01:8082/druid/v2/?pretty
实时摄取-kafka-indexing-service
kafka-indexing-service的优势
之前的流式摄取采用Realtimenode(Druid的另外一个服务进程)或者Tranquility,kafka-indexing- service相对前两种方式的优势有哪里呢?
-
RealTime node存在单点问题,并且不能有效扩展,官方是不建议生产环境使用的,新版本已经完全弃用。
-
Tranqulity方式需要启动一个扩展程序,该程序从数据源(kafka等)读取数据后推送给druid集群,但是这种方式存在一些弊端,由于其架构设计中存在一个时间窗口的概念,很容易出现数据到来时与窗口不匹配导致数据 被丢弃,所以会造成数据丢失,所以官方建议如果使用Tranqulity方式实时摄取数据时需要使用离线数据导入每天修正数据否则可能计算结果有误(Lambda架构)。
-
Kafka-indexing-service方式
- 引入SuperVisor,用于管理实时任务(Peon)的生命周期,包括任务的启动,停止,副本管 理,失败任务恢复等
- 实时任务主动消费kafka数据,不需要想Tranqulity维护一个推送程序
- 实时任务使用kafka低阶api,自己保存kafka offset,提升了数据的可靠性
- 不丢弃延时数据
Supervisor就是overlord节点启动的一个线程,该线程负责一个实时摄取任务的完整过程,创建新的任务,以及补足副本数量等
如何做到不丢弃延迟数据:一个实时任务不再只是生成一个时间范围的segment,而是根据收到的数据的事件时间来确定自己属于哪 个segment,如果所属segment已经创建,则新建一个segment的分片将数据写入该分片中实现延迟数据的追加。
kafka-indexing-service导入
(1)引入kafka-indexing-service扩展包
配置文件修改:$DRUID_HOME/conf/druid/_common/common.runtime.properties
druid.extensions.loadList=["druid-kafka-indexing-service", "druid-datasketches", "mysql-metadata-storage","druid-hdfs-storage"
(2)启动Kafka创建Topic
先启动kafka,再创建topic:
/usr/hdp/current/kafka-broker/bin/kafka-topics.sh --create --zookeeper
node01:2181 --topic adtest --replication-factor 1 --partitions 1
(3)准备摄取规则文件
kafka-index.json:
{
    "type": "kafka",
    "dataSchema": {
        "dataSource": "kafkatest",
        "parser": {
            "type": "string",
            "parseSpec": {
                "format": "json",
                "timestampSpec": {
                    "column": "timestamp",
                    "format": "auto"
                },
                "dimensionsSpec": {
                    "dimensions": [
                        "city",
                        "platform"
                    ]
                }
            }
        },
        "metricsSpec": [
            {
                "name": "count",
                "type": "count"
            },
            {
                "name": "click",
                "type": "longSum",
                "fieldName": "click"
            }
        ],
        "granularitySpec": {
            "type": "uniform",
            "segmentGranularity": "DAY",
            "queryGranularity": "NONE",
            "rollup": false
        }
    },
    "tuningConfig": {
        "type": "kafka",
        "reportParseExceptions": false
    },
    "ioConfig": {
        "topic": "adtest",
        "replicas": 2,
        "taskCount": 1,
        "taskDuration": "PT10M",
        "completionTimeout": "PT20M",
        "consumerProperties": {
            "bootstrap.servers": "node02:6667"
        }
    }
}
(4)提交kafka索引任务
curl -X POST -H 'Content-Type: application/json' -d @kafka-index.json
http://node01:8090/druid/indexer/v1/supervisor
(5)启动kafka-console-producer
/usr/hdp/current/kafka-broker/bin/kafka-console-producer.sh --topic adtest --
broker-list node02:6667
发送数据:
{"timestamp":"1559736155453","city":"beijing","platform":"pc","click":"0"} {"timestamp":"1559736155555","city":"beijing","platform":"pc","click":"1"}
(6)查询规则文件
kafka-index-query.json:
{

    "queryType":"timeseries",
    "dataSource":"kafkatest",
    "granularity":{"type": "period", "period": "P1D", "timeZone":
                   "Asia/Shanghai"},
    "aggregations":[
        {
            "type":"longSum",
            "name":"click",
            "fieldName":"click"
        },{
            "type":"longSum",
            "name":"pv",
            "fieldName":"count"
        }
    ],
    "intervals":["2018-06-02/2019-06-06"]
}
(7)提交查询
curl -X 'POST' -H'Content-Type: application/json' -d @kafka-index-query.json
http://node01:8082/druid/v2/?pretty
数据查询(REST API)
Druid一直提供REST API进行数据查询,在0.10之前第三方提供SQL支持但不是很成熟,从0.10开始原生提供实验性SQL查询功能,截止Druid0.12.3还是处于实验性阶段。
| 查询⽅式 | 优点 | 缺点 |
|---|---|---|
| REST API | 功能强⼤、灵活 | 不好理解,学习成本⾼ |
| SQL | 容易理解、学习成本低 | 实验性功能、不完善 |
查询组件
ad_event_local
使用REST API查询时需要提供查询规则,里面包含若干组件,下面分别说明。
{
    "queryType":"timeseries",
    "dataSource":"ad_event_local",
    "granularity":"day",
    "aggregations":[
        {
            "type":"longSum",
            "name":"click",
            "fieldName":"click"
        },{
            "type":"longSum",
            "name":"pv",
            "fieldName":"count"
        }
    ],
    "intervals":["2018-06-02/2019-06-06"]
}
Filter
Filter就是过滤器,用于对维度进行筛选和过滤,满足Filter的行将会被返回,类似sql中的where子句。
(1)Selector Filter
Selector Filter类似于SQL中的where colname=value,例如: filter1.json
{
    "queryType":"timeseries",
    "dataSource":"ad_event_local",
    "granularity":{"type": "period", "period": "PT1H", "timeZone":
                   "Asia/Shanghai"},
    "aggregations":[
        {
            "type":"longSum",
            "name":"click",
            "fieldName":"click"
        },{
            "type":"longSum",
            "name":"pv",
            "fieldName":"count"
        }
    ],
    "filter":{"type":"selector","dimension":"platform","value":"pc"},
    "intervals":["2018-06-02/2019-06-06"]
}
curl -X 'POST' -H'Content-Type: application/json' -d @filter1.json
http://node01:8082/druid/v2/?pretty
(2)Regex Filter
使用正则表达式对维度进行过滤筛选,任何java支持的标准正则表达式druid都支持,它的JSON格式如下:
"filter":{"type":"regex","dimension":dimension_name,"pattern":regex}
例如:
filter2.json
{
    "queryType":"timeseries",
    "dataSource":"ad_event_local",
    "granularity":{"type": "period", "period": "PT1H", "timeZone":
                   "Asia/Shanghai"},
    "aggregations":[
        {
            "type":"longSum",
            "name":"click",
            "fieldName":"click"
        },{
            "type":"longSum",
            "name":"pv",
            "fieldName":"count"
        }
    ],
    "filter":{"type":"regex","dimension":"platform","pattern":".*pc.*"},
    "intervals":["2018-06-02/2019-06-06"]
}
(3)In Filter
In Filter类似于SQL中的in语句,形如:
{"type":"in","dimension":"city","values":['beijing','shanghai']}
filter3.json:
{
    "queryType":"timeseries",
    "dataSource":"ad_event_local",
    "granularity":{"type": "period", "period": "PT1H", "timeZone":
                   "Asia/Shanghai"},
    "aggregations":[
        {
            "type":"longSum",
            "name":"click",
            "fieldName":"click"
        },{
            "type":"longSum",
            "name":"pv",
            "fieldName":"count"
        }
    ],
    "filter":{
        "type":"in",
        "dimension":"platform",
        "values":["pc","mobile"]
    },
    "intervals":["2018-06-02/2019-06-06"]
}
(4)Bound Filter
比较过滤器,包含大于,等于,小于三种,它默认支持的就是字符串比较,是基于字典顺序,如果使用 数字进行比较,需要在查询中设定alpaNumeric的值为true,需要注意的是Bound Filter默认的大小比较为>=或者<=,因此如果使用<或>,需要指定lowerStrict值为true,或者upperStrict值为true,举例:
18<=age<=30:
{
    "type":"bound",
    "dimension":"age",
    "lower":"18", #默认包含等于
    "upper":"30", #默认包含等于
    "alphaNumeric":true #数字⽐较时指定alphaNumeric为true
}
21 (5)Logincal Expression Filter Logincal Expression Filter包含and,not,or三种过滤器,支持嵌套,可以构建丰富的逻辑表达式,与sql中的and,not,or类似,JSON表达式如下: 例如: filter5.json granularity配置项指定查询时的时间聚合粒度,查询时的时间聚合粒度要>=创建索引时设置的索引粒度,druid提供了三种类型的聚合粒度分别是:Simple,Duration,Period (1)Simple druid提供的固定时间粒度,用字符串表示,默认就是Simple,定义查询规则的时候不需要显示设置type配置项,druid提供的常用Simple粒度: (2)Duration 对Simple的补充。 duration聚合粒度提供了更加灵活的粒度,不只局限于Simple聚合粒度提供的固定聚合粒度,而是以毫秒为单位自定义聚合粒度,比如两小时做一次聚合可以设置duration配置项为7200000毫秒,所以Simple聚合粒度不能够满足的聚合粒度可以选择使用Duration聚合粒度。注意:使用Duration聚合粒度需要设置配置项type值为duration。 (3)Period Period聚合粒度采用了日期格式,常用的几种时间跨度表示方法,一小时:PT1H,一周:P1W,一天: P1D,一个月:P1M;使用Period聚合粒度需要设置配置项type值为period。 聚合器在数据摄入和查询是均可以使用,在数据摄入阶段使用聚合器能够在数据被查询之前按照维度进 行聚合计算,提高查询阶段聚合计算性能,在查询过程中,使用聚合器能够实现各种不同指标的组合计 算。 (1)公共属性 (2)count 计数聚合器,等同于sql语法中的count函数,用于计算druid roll-up合并之后的数据条数,并不是原始数据条数,在定义数据模式指标规则中必须添加一个count类型的计数指标count; 比如想查询Roll-up 后有多少条数据,查询的JSON格式如下: 如果想要查询原始数据摄入多少条,在查询时使用longSum,JSON示例如下: (3)sum 求和聚合器,等同于sql语法中的sum函数,druid提供两种类型的聚合器,分别是long类型和double类型的聚合器。 (4)Min/Max 类似于sql语法中的Min/Max longMin (5)DataSketche DataSketche Aggregator是近似基数计算聚合器(去重计数,HyperLogLog),在摄入阶段指定metric,从而在查询的时候使用,要在conf/druid/_common/common.runtime.properties配置文件中声明加载依赖druid.extensions.loadList=[“druid-datasketches”]。 使用的场景:高基数维度的去重计算。 DataSketche聚合器在数据摄入阶段规则定义格式如下: 查询阶段: https://blog.csdn.net/xiaobai51509660/article/details/82011877 Post-Aggregator可以对结果进行二次加工并输出,最终的输出既包含Aggregation的结果,也包含Post-Aggregator的结果,Post-Aggregator包含的类型: (1)Arithmetic Post-Aggregator Arithmetic Post-Aggregator支持对Aggregator的结果进行加减乘除的计算,JSON格式如下: (2)Field Accessor Post-Aggregator Field Accessor Post-Aggregator返回指定的Aggregator的值,在Post-Aggregator中大部分情况下使用fieldAccess来访问Aggregator,在fieldName中指定Aggregator里定义的name,如果对HyperUnique的 结果进行访问,需要使用hyperUniqueCardinality,Field Accessor Post-Aggregator的JSON示例如下: 我们计算日期20190530的广告总点击量,曝光量和曝光率,曝光率等于点击量除以曝光量,曝光率的 计算就可以使用druid的后聚合器实现: druid如何实现: druid查询采⽤的是HTTP RESTFUL⽅式,REST接⼝负责接收客户端的查询请求,客户端只需要将查询条件封装成JSON格式,通过HTTP⽅式将JSON查询条件发送到broker节点,查询成功会返回JSON格式的结果数据。了解⼀下druid提供的查询类型。 timeseries时间序列查询对于指定时间段按照查询规则返回聚合后的结果集,查询规则中可以设置查询粒度,结果排序⽅式以及过滤条件,过滤条件可以使⽤嵌套过滤,并且⽀持后聚合。 timeseries查询属性: 案例:统计2019年05⽉30⽇北京地区曝光量,点击量 类似sql语句: druid JSON格式查询: 然后通过HTTP POST⽅式执⾏查询,注意发送的是broker节点地址。 topn查询是通过给定的规则和显示维度返回⼀个结果集,topn查询可以看做是给定排序规则,返回单⼀维度的group by查询,但是topn查询⽐group by性能更快。metric这个属性是topn专属的按照该指标排序。 topn的查询属性如下: 案例:统计2019年05⽉30⽇PC端曝光量和点击量,取点击量排名前⼆的城市 topn查询规则定义: 关于排序规则: 在实际应⽤中经常需要进⾏分组查询,等同于sql语句中的Group by查询,如果对单个维度和指标进⾏分组聚合计算,推荐使⽤topN查询,能够获得更⾼的查询性能,分组查询适合多维度,多指标聚合查询: 分组查询属性: limitSpec:limitSpec规则定义的主要作⽤是查询结果进⾏排序,提取数据条数,类似于sql中的order by 和limit的作⽤;规则定义格式如下: limitSpec属性表: 案例:统计2018年12⽉1⽇各城市PC端和TV端的曝光量,点击量,点击率,取曝光量排名前三的城市数据;曝光量相同则按照城市名称升序排列。 分组查询规则定义: search 查询返回匹配中的维度,对维度值过滤查询,类似于sql中的like语法,它的相关属性: 搜索规则⽤于搜索维度值范围内与搜索值是否相匹配,类似于sql中where限制条件中的like语法,使⽤搜索过滤器需要设置三个配置项:type过滤器类型值为:search,dimension值为维度名称,query值为json对象,定义搜索过滤规则。搜索过滤规则有Insensitive Contains,Fragment,Contains (1)Insensitive Contains 维度值的任何部分包含指定的搜索值都会匹配成功,不区分⼤⼩写,定义规则如下: sql语句中where city like '%jing%'转为等价的查询规则如下: (2)Contains 维度值的任何部分包含指定的搜索值都会匹配成功,与insensitive Contains实现的功能类似,唯⼀不同的是Contains过滤类型可以配置是否区分⼤⼩写。 样例:sql语句中where city like "%bei%"转化为等价查询规则如下: (3)Fragment Fragment提供⼀组搜索值,纬度值任何部分包含全部搜索值则匹配成功,匹配过程可以选择忽略⼤⼩写,使⽤Fragment搜索过滤器需要配置三个选项:type:fragment,values:设置⼀组值(使⽤json数组),case_sensitive:表示是否忽略⼤⼩写,默认为false,不忽略⼤⼩写;样例,sql语句中where city like ‘%bei%’ and city like '%jing%'转化为等价的查询 (1)提交查询任务 (2)提交kafka索引任务 (3)提交普通索引导⼊数据任务 (4)获取指定kafka索引任务的状态 (5)杀死⼀个kafka索引任务 (6)删除datasource,提交到coordinator{
"type":"bound",
"dimension":"age",
"lower":"21",
"lowerStrict":true, #去掉包含
"upper":"31",
"upperStrict":true, #去掉包含
"alphaNumeric":true #数字⽐较时指定alphaNumeric为true
}
"filter":{"type":"and","fields":[filter1,filter2]}
"filter":{"type":"or","fields":[filter1,filter2]}
"filter":{"type":"not","fields":[filter]}
{
    "queryType":"timeseries",
    "dataSource":"ad_event_local",
    "granularity":{"type": "period", "period": "PT1H", "timeZone":
                   "Asia/Shanghai"},
    "aggregations":[
        {
            "type":"longSum",
            "name":"click",
            "fieldName":"click"
        },{
            "type":"longSum",
            "name":"pv",
            "fieldName":"count"
        }
    ],
    "filter":{
        "type":"and",
        "fields":[
            {"type":"selector","dimension":"platform","value":"pc"},
            {"type":"selector","dimension":"city","value":"beijing"}
        ]
    },
    "intervals":["2018-06-02/2019-06-06"]
}
granularity
{
    "queryType":"timeseries",
    "dataSource":"ad_event_local",
    "granularity":"{"type": "period", "period": "PT1H", "timeZone":"Asia/Shanghai"}",
    ...
}
{
    "queryType":"timeseries",
    "dataSource":"ad_event_local",
    "granularity":{
        "type":"duration",
        "duration":7200000
    },
    "aggregations":[
        {
            "type":"longSum",
            "name":"click",
            "fieldName":"click"
        },{
            "type":"longSum",
            "name":"pv",
            "fieldName":"count"
        }
    ],
    "filter":{"type":"selector","dimension":"platform","value":"pc"},
    "intervals":["2018-06-02/2019-06-06"]
}
{

    "queryType":"timeseries",
    "dataSource":"ad_event_local",
    "granularity":{"type": "period", "period": "PT1H", "timeZone":
                   "Asia/Shanghai"},
    "aggregations":[
        {
            "type":"longSum",
            "name":"click",
            "fieldName":"click"
        },{
            "type":"longSum",
            "name":"pv",
            "fieldName":"count"
        }
    ],
    "filter":{
        "type":"in",
        "dimension":"platform",
        "values":["pc","mobile"]
    },
    "intervals":["2018-06-02/2019-06-06"]
}
Aggregator
{"type":"count","name":out_name}
{
    "queryType":"timeseries",
    "dataSource":"ad_event_local",
    "granularity":{"type": "period", "period": "PT1H", "timeZone":
                   "Asia/Shanghai"},
    "aggregations":[
        {
            "type":"count",
            "name":"count"
        }
    ],
    "filter":{
        "type":"in",
        "dimension":"platform",
        "values":["pc","mobile"]
    },
    "intervals":["2018-06-02/2019-06-06"]
}
{"type":"longSum","name":out_name,"fieldName":"count"}
{

    "queryType":"timeseries",
    "dataSource":"ad_event_local",
    "granularity":{"type": "period", "period": "PT1H", "timeZone":
                   "Asia/Shanghai"},
    "aggregations":[
        {
            "type":"count",
            "name":"count"
        },
        {
            "type":"longSum",
            "name":"pv",
            "fieldName":"count"
        }
    ],
    "filter":{
        "type":"in",
        "dimension":"platform",
        "values":["pc","mobile"]
    },
    "intervals":["2018-06-02/2019-06-06"]
}
{
    "type": "kafka",
    "dataSchema": {
        "dataSource": "kafkatest",
        "parser": {
            "type": "string",
            "parseSpec": {
                "format": "json",
                "timestampSpec": {
                    "column": "timestamp",
                    "format": "auto"
                },
                "dimensionsSpec": {
                    "dimensions": [
                        "city",
                        "platform"
                    ]
                }
            }
        },
        "metricsSpec": [
            {
                "name": "count",
                "type": "count"
            },
            {
                "name": "click",
                "type": "longSum",
                "fieldName": "click"
            },
            {
                "name": "uv",
                "fieldName": "user_id",
                "type": "thetaSketch",
                "isInputThetaSketch":"false",
                "size":"16384"
            },
            {
                "name": "click_uv",
                "fieldName": "click_user_id",
                "type": "thetaSketch",
                "isInputThetaSketch":"false",
                "size":"16384"
            }
        ],
        "granularitySpec": {
            "type": "uniform",
            "segmentGranularity": "DAY",
            "queryGranularity": "NONE",
            "rollup": false
        }
    },
    "tuningConfig": {
        "type": "kafka",
        "reportParseExceptions": false
    },
    "ioConfig": {
        "topic": "adtest",
        "replicas": 2,
        "taskCount": 1,
        "taskDuration": "PT10M",
        "completionTimeout": "PT20M",
        "consumerProperties": {
            "bootstrap.servers": "node02:6667"
        }
    }
}
{
    "queryType":"groupBy",
    "dataSource":"adclicklog",
    "granularity":{
        "type":"period",
        "period":"PT1H",
        "timeZone": "Asia/Shanghai"
    },
    "dimensions":["device_type"],
    "aggregations":[
        {
            "type": "thetaSketch",
            "name": "uv",
            "fieldName": "uv"
        }
    ],
    "intervals":["2019-05-30/2019-05-31"]
}
Post-Aggregator
"postAggregation":{
    "type":"arithmetic",
    "name":out_name,
    "fn":function,
    "fields":[post_aggregator1,post_aggregator2]
}
{
    "type":"fieldAccess",
    "name":out_name,
    "fieldName":aggregator_name
}
select t.click_cnt,t.pv_cnt,(t.click/t.pv*100) click_rate from (select sum(click_cnt) click_cnt,sum(pv_cnt) pv_cnt from ad_event where dt='20181201' ) t
{
    "queryType": "timeseries",
    "dataSource": "adclicklog",
    "granularity":{
        "type":"period",
        "period":"PT1H"
    },
    "intervals": [
        "2019-05-30/2019-05-31"
    ],
    "aggregations": [
        {
            "type": "longSum",
            "name": "pv_cnt",
            "fieldName": "count"
        },
        {
            "type": "longSum",
            "name": "click_cnt",
            "fieldName": "click_cnt"
        }
    ],
    "postAggregations": [
        {
            "type": "arithmetic",
            "name": "click_rate",
            "fn": "*",
            "fields": [
                {
                    "type": "arithmetic",
                    "name": "div",
                    "fn": "/",
                    "fields": [
                        {
                            "type": "fieldAccess",
                            "name": "click_cnt",
                            "fieldName": "click_cnt"
                        },
                        {
                            "type": "fieldAccess",
                            "name": "pv_cnt",
                            "fieldName": "pv_cnt"
                        }
                    ]
                },
                {
                    "type": "constant",
                    "name": "const",
                    "value": 100
                }
            ]
        }
    ]
}
查询类型
时间序列查询
select sum(click_cnt) click,sum(pv_cnt) pv from ad_event wehre dt='20181201' and city = 'beijing'
{
    "queryType":"timeseries",
    "dataSource":"adclicklog",
    "descending":"true",
    "granularity":"minute",
    "aggregations":[
        {
            "type":"longSum",
            "name":"click",
            "fieldName":"click_cnt"
        },{
            "type":"longSum",
            "name":"pv",
            "fieldName":"count"
        }
    ],
    "filter":{"type":"selector","dimension":"city","value":"beijing"},
    "intervals":["2019-05-30/2019-05-31"]
}
TopN查询
{
    "queryType":"topN",
    "dataSource":"adclicklog",
    "dimension":"city",
    "threshold":2,
    "metric":"click_cnt",
    "granularity":"day",
    "filter":{
        "type":"selector",
        "dimension":"device_type",
        "value":"pc"
    },
    "aggregations":[
        {
            "type":"longSum",
            "name":"pv_cnt",
            "fieldName":"count"
        },
        {
            "type":"longSum",
            "name":"click_cnt",
            "fieldName":"click_cnt"
        }
    ],
    "intervals":["2019-05-30/2019-05-31"]
}
"metric" : {
"type" : "numeric", //指定按照numeric 降序排序
"metric" : "分组查询
{
"type" "default",
"limit": <integer_value>,
"columns": [
{
"dimension" :"{
"queryType": "groupBy",
"dataSource": "adclicklog",
"granularity": "day",
"intervals": [
"2019-05-30/2019-05-31"
],
"dimensions": [
"city",
"device_type"
],
"aggregations": [
{
"type": "longSum",
"name": "pv_cnt",
"fieldName": "count"
},
{
"type": "longSum",
"name": "click_cnt",
"fieldName": "click_cnt"
}
],
"postAggregations": [
{
"type": "arithmetic",
"name": "click_rate",
"fn": "*",
"fields": [
{
"type": "arithmetic",
"name": "div",
"fn": "/",
"fields": [
{
"type": "fieldAccess",
"name": "click_cnt",
"fieldName": "click_cnt"
},
{
"type": "fieldAccess",
"name": "pv_cnt",
"fieldName": "pv_cnt"
}
]
},
{
"type": "constant",
"name": "const",
"value": 100
}
]
}
],
"limitSpec": {
"type": "default",
"limit": 3,
"columns": [
{
"dimension": "pv_cnt",
"direction": "descending"
},
{
"dimension": "city",
"direction": "ascending"
}
]
}
}
search搜索查询
{
    "type":"insensitive_contains",
    "value":"some_value"
}
{
    "queryType": "search",
    "dataSource": "adclicklog",
    "granularity": "all",
    "limit": 2,
    "searchDimensions": [
        "city"
    ],
    "query": {
        "type": "insensitive_contains",
        "value": "jing"
    },
    "sort" : {
        "type": "lexicographic"
    },
    "intervals": [
        "2019-05-29/2019-05-31"
    ]
}
{
    "queryType": "search",
    "dataSource": "adclicklog",
    "granularity": "all",
    "limit": 2,
    "searchDimensions": [
        "city"
    ],
    "query": {
        "type": "contains",
        "value": "bei",
        "case_sensitive":true
    },
    "sort" : {
        "type": "lexicographic"
    },
    "intervals": [
        "2019-05-29/2019-05-31"
    ]
}
{
    "queryType": "search",
    "dataSource": "adclicklog",
    "granularity": "all",
    "limit": 2,
    "searchDimensions": [
        "city"
    ],
    "query": {
        "type": "fragment",
        "values": ["jing","bei"],
        "case_sensitive":true
    },
    "sort" : {
        "type": "lexicographic"
    },
    "intervals": [
        "2019-05-29/2019-05-31"
    ]
}
查询API
curl -X 'POST' -H'Content-Type: application/json' -d @quickstart/ds.json http://hp103:8082/druid/v2/?pretty
curl -X POST -H 'Content-Type: application/json' -d @kafka-index.json http://hp101:8090/druid/indexer/v1/supervisor
curl -X 'POST' -H 'Content-Type:application/json' -d @hadoop-index.json hp101:8090/druid/indexer/v1/task
curl -X GET http://hp101:8090/druid/indexer/v1/supervisor/kafkaindex333/status
curl -X GET http://hp101:8090/druid/indexer/v1/supervisor/kafkaindex333/shutdown
curl -XDELETE http://hp101:8081/druid/coordinator/v1/datasources/adclicklog6


