PostgreSQL之源码编译方式安装
文章目录
- 前言
- 一、安装准备
- 二、安装步骤
-
- 1.创建postgres组和用户
- 2.安装包准备
- 3.编译安装
- 4.数据库在服务器的配置
- 总结
前言
PostgreSQL 是一个免费的对象-关系数据库服务器(ORDBMS),在灵活的BSD许可证下发行。本文将引导在linux上安装PostgreSQL;尽量的贴上操作命令,操作截图;源码包放在附件。
一、安装准备
系统版本:el7.x86_64(红帽7)
数据库版本:postgresql-12.5
数据库源码下载链接:https://ftp.postgresql.org/pub/source/ 自行选择版本下载
二、安装步骤
1.创建postgres组和用户
(1)新增postgres用户组
[root@localhost Documents]# groupadd postgres
(2)新增postgres用户,并且设置这个用户属于上面创建的postgres用户组
[root@localhost Documents]# useradd -g postgres postgres
(3)修改postgres用户密码(这里设置密码为postgres)
[root@localhost Documents]# passwd postgres
2.安装包准备
(2)解压源码包
[root@localhost test]# tar -zxvf postgresql-v12.5.tar.gz
3.编译安装
(1)进入postgresql-12.5文件夹
[root@localhost test]# cd postgresql-12.5/
(2)检查配置安装环境
[root@localhost postgresql-12.5]$ ./configure --prefix=/home/postgres
这里的prefix参数是指定安装目录。
这一步可能报错,取决于你的服务器情况,99%可能是少环境。少什么就安装什么。
一般需要安装:
gcc 安装使用命令yum install gcc(安装gcc可能会遇到麻烦,强烈推荐参考:https://www.cnblogs.com/slothph/p/11519191.html)
readline安装使用命令 yum install readline-devel
zlib安装使用命令 yum install zlib-devel
(3)编译
[root@localhost postgresql-12.5]$ make
(4)安装
[root@localhost postgresql-12.5]$ make install
看到上图最后提示,代表安装完成,可以进入/home/postgres目录,会看到有几个文件夹

(5)创建data目录
[root@localhost postgres]# mkdir data
(6)将整个数据库目录/home/postgres赋予给postgres用户
[root@localhost postgres]# chown -R postgres:postgres /home/postgres
(7)切换到postgres用户,然后初始化数据库
[root@localhost postgres]# su postgres
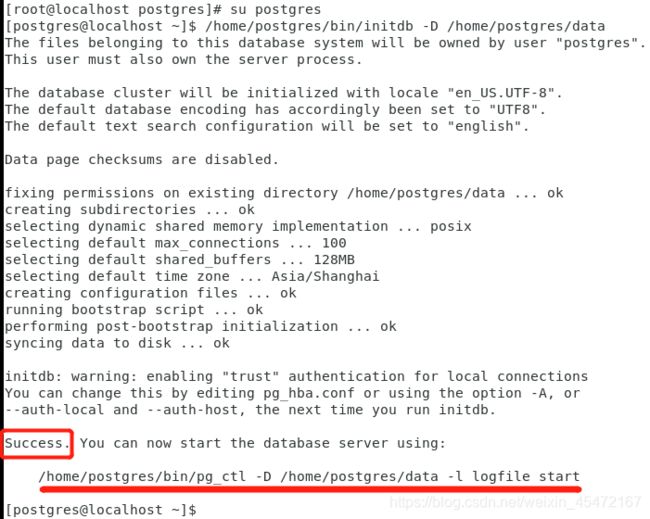
[postgres@localhost ~]$ /home/postgres/bin/initdb -D /home/postgres/data

出现如图,说明初始化成功。可以用划红线提示的命令启动数据库。
(8)启动数据库服务
[postgres@localhost ~]$ /home/postgres/bin/pg_ctl -D /home/postgres/data -l logfile start
出现如图所示,说明启动成功。
(9)测试连接数据库
[postgres@localhost ~]$ /home/postgres/bin/psql -U postgres

到这里,postgresql的安装就完成了,接下来就可以进行数据库操作了,sql几乎和mysql,oracle差不多。
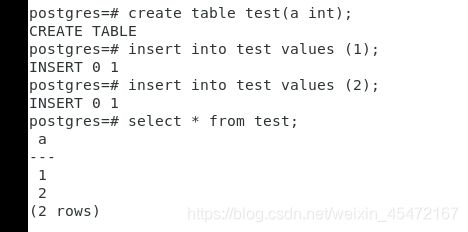
(10)简单操作数据库

关于postgresql的详细使用,请另行百度。
4.数据库在服务器的配置
(1)数据库配置文件配置
切换到root,进入data目录
[postgres@localhost ~]$ su root
[root@localhost postgres]# cd /home/postgres/data/
编辑postgresql.conf文件,修改如图三个配置,代表监听所有ip,数据库服务端口为5432,最大连接数为100。
[root@localhost data]# vim postgresql.conf
[root@localhost data]# vim pg_hba.conf
在如图位置添加一行:host all all 0.0.0.0/0 trust

添加的行表示所有用户(all),所有ip(0.0.0.0/0)都可以免密访问(trust)数据库。若想设置需要密码访问,则trust修改为md5,要设置特定ip才能访问就修改0.0.0.0/0为你想要指定的ip。
(3)设置防火墙
[root@localhost data]# iptables  -I  INPUT  -p  tcp  --dport  5432  -j  ACCEPT
[root@localhost data]# iptables  -I  INPUT  -p  tcp  --dport  22  -j  ACCEPT
[root@localhost data]# service iptables save
[root@localhost data]# service iptables restart
(3)配置环境变量
[root@localhost data]# vim /home/postgres/.bash_profile
添加如下内容:
export PGHOME=/home/postgres
export PGDATA=/home/postgres/data
export PATH=$PGHOME/bin:$PATH
然后使配置成效
[root@localhost data]# source /home/postgres/.bash_profile
(3)配置系统服务
在源码目录下的contrib/start-scripts下,有一个linux文件

[root@localhost start-scripts]# cp linux /etc/init.d/postgresql
[root@localhost start-scripts]# chmod 755 /etc/init.d/postgresql
[root@localhost start-scripts]# chkconfig --add postgresql

因为我们在最初./cofigure时自定义了安装目录,所以需要修改linux文件

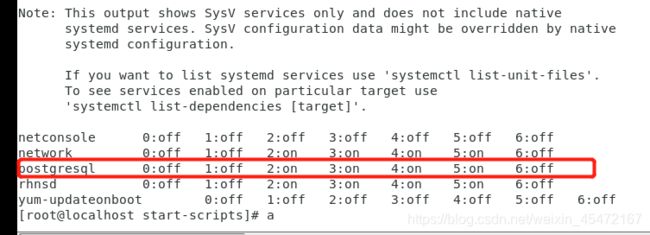
可以看到postgresql已经配置为系统服务,现在可以通过service postgresql start 启动数据库,stop关闭数据库,restart重启数据库了。如:
![]()
(4)设置开机启动
[root@localhost start-scripts]# chkconfig postgresql on
(5)手动设置数据库登录密码
数据库会自动创建用户postgres,默认密码是postgres,这里设置为123456

总结
到这里数据库安装就结束了。
以上就是PostgreSQL数据库在linux的安装配置过程,比较简单。有任何疑问欢迎在评论区探讨!


