springboot+redis+阿里云短信实现手机号登录
Springboot+Redis实现短信验证码发送功能
文章目录
- Springboot+Redis实现短信验证码发送功能
-
- 1.准备工作
-
- 1.1安装Redis
- 1.2 准备一个阿里云账户
- 2.创建工程
- 3.代码实现
-
- 3.1 service层
- 3.2 controller层
- 4. 测试
1.准备工作
1.1安装Redis
如果是开始学习的话建议安装到自己本机环境下,Redis安装
1.2 准备一个阿里云账户
这里以阿里云为例
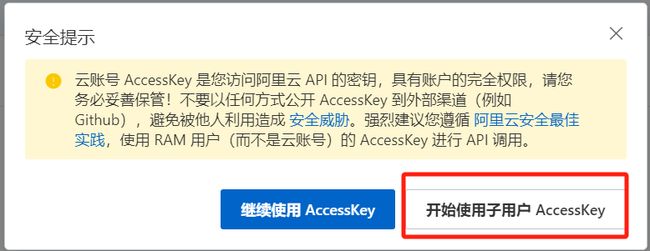
- 登录到阿里云平台后获取AccessKey

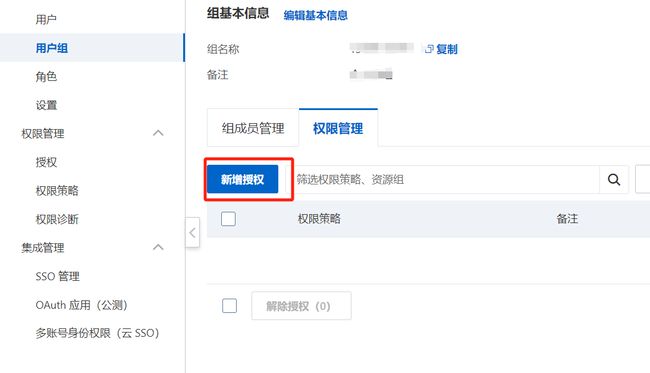
- 创建用户组和用户(记得用户创建完成后保存用户信息后面会用到,切记一定一定一定要保存好用户信息,防止泄露)


-
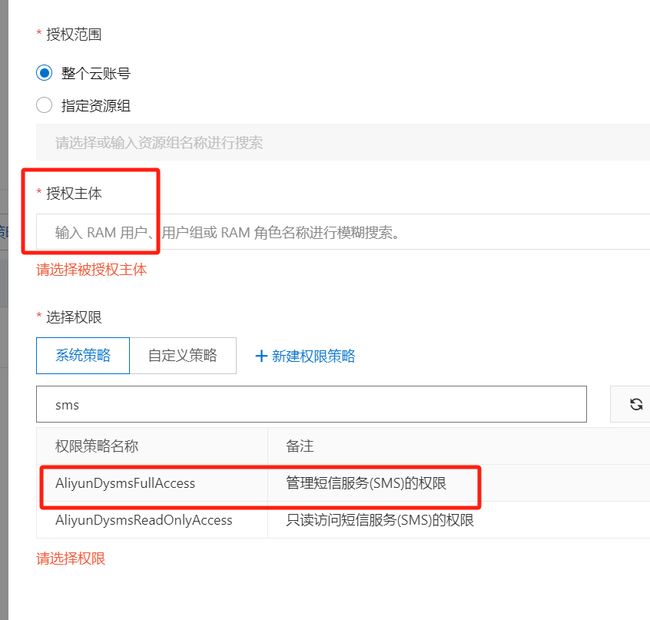
添加短信服务权限
- 开通阿里云短信服务
- 在短信服务控制台添加短信服务签名、模板,等待审核完成即可
2.创建工程
-
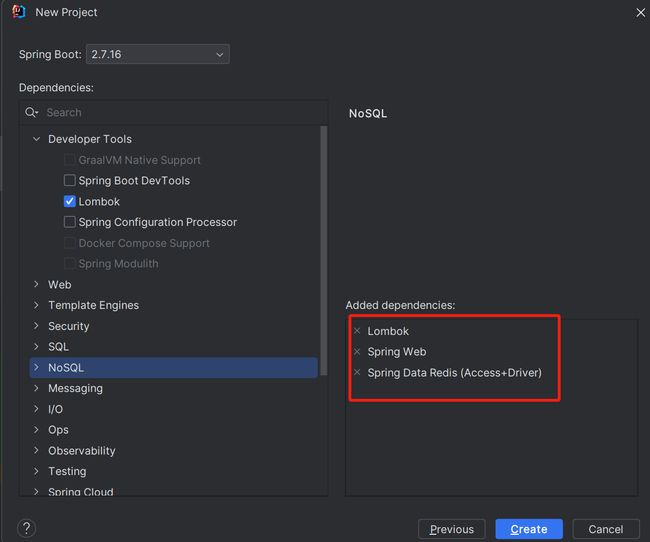
创建Springboot项目这里jdk版本为1.8,添加以下依赖即可
-
修改pom文件
<dependency> <groupId>com.aliyungroupId> <artifactId>aliyun-java-sdk-coreartifactId> <version>4.6.3version> dependency> <dependency> <groupId>com.alibabagroupId> <artifactId>fastjsonartifactId> <version>2.0.4version> dependency> -
配置yml文件
server:
  port: 8080
spring:
  redis:
    host: localhost
    port: 6379
aliyun:
  accessKeyID: 自己的accessKeyID
  accessKeySecret: 自己的accessKeySecret
-
测试,可以打开test测试一下是否可以发送成功,直接复制到IDEA中,修改部分参数即可进行测试
import com.alibaba.fastjson.JSON;
import com.aliyuncs.CommonRequest;
import com.aliyuncs.CommonResponse;
import com.aliyuncs.DefaultAcsClient;
import com.aliyuncs.IAcsClient;
import com.aliyuncs.exceptions.ClientException;
import com.aliyuncs.exceptions.ServerException;
import com.aliyuncs.http.MethodType;
import com.aliyuncs.profile.DefaultProfile;
import org.junit.jupiter.api.Test;
import org.springframework.boot.test.context.SpringBootTest;
import java.util.HashMap;
import java.util.Map;
@SpringBootTest
class SmsApplicationTests {
    @Test
    void sendSms() {
        // 指定地域名称 短信API的就是 cn-hangzhou 不能改变  后边填写您的  accessKey 和 accessKey Secret
        DefaultProfile profile = DefaultProfile.getProfile("cn-hangzhou", "accessKey", "accessKey Secret");
        IAcsClient client = new DefaultAcsClient(profile);
        // 创建通用的请求对象
        CommonRequest request = new CommonRequest();
        // 指定请求方式
        request.setMethod(MethodType.POST);
        // 短信api的请求地址  固定
        request.setDomain("dysmsapi.aliyuncs.com");
        // 签名算法版本  固定
        request.setVersion("2017-05-25");
        //请求 API 的名称。
        request.setAction("SendSms");
        // 上边已经指定过了 这里不用再指定地域名称
		//request.putQueryParameter("RegionId", "cn-hangzhou");
        // 您的申请签名
        request.putQueryParameter("SignName", "自己的签名");
        // 您申请的模板 code
        request.putQueryParameter("TemplateCode", "模板号");
        // 要给哪个手机号发送短信  指定手机号
        request.putQueryParameter("PhoneNumbers", "用于测试的手机号");
        // 创建参数集合
        Map<String, Object> params = new HashMap<>();
        // 生成短信的验证码
        String code = String.valueOf(Math.random()).substring(3, 9);
        // 这里的key就是短信模板中的 ${xxxx}
        params.put("code", code);
        // 放入参数  需要把 map转换为json格式  使用fastJson进行转换
        request.putQueryParameter("TemplateParam", JSON.toJSONString(params));
        try {
            // 发送请求 获得响应体
            CommonResponse response = client.getCommonResponse(request);
            // 打印响应体数据
            System.out.println(response.getData());
            // 打印 请求状态 是否成功
            System.out.println(response.getHttpResponse().isSuccess());
        } catch (ServerException e) {
            e.printStackTrace();
        } catch (ClientException e) {
            e.printStackTrace();
        }
    }
}
-
测试通过后就可以进行业务层的实现了
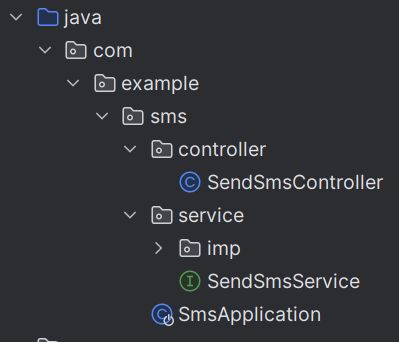
项目结构如下
3.代码实现
3.1 service层
- 创建一个
SendSmsService接口用于对外提供方法
public interface SendSmsService {

    /**
     * 发送验证码
     * @param phoneNum 手机号
     * @param code 验证码
     * @return
     */
    boolean sendSms(String phoneNum,String code);
}
- 实现
SendSmsService接口
import com.alibaba.fastjson.JSON;
import com.aliyuncs.CommonRequest;
import com.aliyuncs.CommonResponse;
import com.aliyuncs.DefaultAcsClient;
import com.aliyuncs.IAcsClient;
import com.aliyuncs.exceptions.ClientException;
import com.aliyuncs.http.MethodType;
import com.aliyuncs.profile.DefaultProfile;
import com.example.sms.service.SendSmsService;
import org.slf4j.Logger;
import org.slf4j.LoggerFactory;
import org.springframework.beans.factory.annotation.Value;
import org.springframework.stereotype.Service;

import java.util.HashMap;
import java.util.Map;


@Service
public class SendSmsServiceImp implements SendSmsService {
    private static final Logger LOGGER= LoggerFactory.getLogger(SendSmsServiceImp.class);

    //采用注入的方式传递参数
    @Value("${aliyun.accessKeyID}")
    private String accessKeyID;
    @Value("${aliyun.accessKeySecret}")
    private String accessKeySecret;


    @Override
    public boolean sendSms(String phoneNum, String code) {
        DefaultProfile profile=DefaultProfile.getProfile("cn-hangzhou", accessKeyID,accessKeySecret);
        IAcsClient client=new DefaultAcsClient(profile);

        CommonRequest request=new CommonRequest();
        request.setMethod(MethodType.POST);
        request.setDomain("dysmsapi.aliyuncs.com");
        request.setVersion("2017-05-25");
        request.setAction("SendSms");
        request.putQueryParameter("RegionId", "cn-hangzhou");
        request.putQueryParameter("SignName", "自己的签名");
        request.putQueryParameter("PhoneNumbers", phoneNum);
        request.putQueryParameter("TemplateCode", "模板号");

        Map<String,Object> param=new HashMap<>();
        param.put("code", code);

        request.putQueryParameter("TemplateParam", JSON.toJSONString(param));

        try {
            CommonResponse response=client.getCommonResponse(request);
            //System.out.println(response.getData());//返回的消息
            LOGGER.info(JSON.parseObject(response.getData(), Map.class).get("Message").toString());
            return response.getHttpResponse().isSuccess();
        } catch (ClientException e) {
            e.printStackTrace();
        }

        return false;
    }
}
3.2 controller层
import com.aliyuncs.utils.StringUtils;
import com.example.sms.service.SendSmsService;
import org.springframework.data.redis.core.RedisTemplate;
import org.springframework.data.redis.core.ValueOperations;
import org.springframework.web.bind.annotation.*;

import javax.annotation.Resource;
import java.util.concurrent.TimeUnit;

@RestController
@CrossOrigin//跨域支持
public class SendSmsController {

    @Resource
    private SendSmsService sendSmsService;

    @Resource
    private RedisTemplate redisTemplate;

    @GetMapping("/sendSms")
    public String sendSms(@RequestParam("phoneNum")String phoneNum){
        //获取到操作String的对象
        ValueOperations<String,String> value = redisTemplate.opsForValue();

        //根据手机号查询
        String phone = value.get(phoneNum);
        //如果手机号在redis中不存在的话才进行验证码的发送
        if (StringUtils.isEmpty(phone)){
            //生成6位随机数
            String code = String.valueOf(Math.random()).substring(3, 9);
            //调用业务层
            boolean sendSmsFlag = sendSmsService.sendSms(phoneNum, code);
            if (sendSmsFlag){
                // 发送成功之后往redis中存入该手机号以及验证码 并设置超时时间 5 分钟
                redisTemplate.opsForValue().set(phoneNum,code, 5, TimeUnit.MINUTES);

            }
            return "发送验证码到:" + phoneNum + "成功! " + "Message:" + sendSmsFlag;
        }else {
            return "该手机号:" + phoneNum + " 剩余:" + redisTemplate.getExpire(phoneNum) + "秒后可再次进行发送!";
        }
    }

    @GetMapping("/checkCode/{key}/{code}")
    public String checkCode(@PathVariable("key") String number,
                            @PathVariable("code")String code){
        //获取到操作String的对象
        ValueOperations<String,String> value = redisTemplate.opsForValue();
        //根据key值查询
        String redisCode = value.get(number);
        if (code.equals(redisCode)){
            return "成功";
        }

        return redisCode==null ? "请先获取验证码在进行校验!" : "错误";
    }
}
4. 测试
由于没有前端页面,我们借助postman工具来进行发送验证码功能

此时手机上收到的验证码

redis中的数据
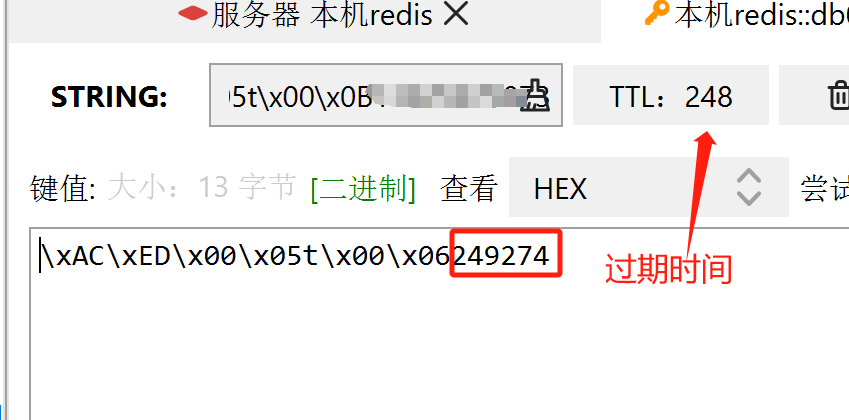
以上便是一个简单的短信验证码的发送实现,注意一定一定一定要保护好自己的AccessKey
以上仅供参考学习,其中还有许多需要改进的功能,看完留下一个三连吧
源码:gitee仓库