Hexo 博客指南
whlll-建站指南
说是指南也谈不上,因为作为一个菜鸟,也都是在网络上搜罗搜罗,东拼西凑,搭好了这个小破站,看到那些维护了5、6年的个人博客网站,顿时心生敬佩
概述:
-
网站框架:Hexo
- 选择理由:
- 机缘巧合,一眼就被它简明大气的风格吸引了(Next),难怪拥戴的人这么多
- 对我这种初出茅庐的小菜鸡比较友好
- 学生党福音,白嫖属性Max
- 选择理由:
-
部署:GitHub Pages
- 选择理由:
- 免费方便,可能之后如果要让更多的人看到,要迁移,好像是跟搜索优先级和服务器访问速度有关(不知道是不是给自己挖了一个坑)
- 上新一下Github,让自己的仓库充实一下 ,就当成一个开端吧
- 选择理由:
-
图床:PicGo + gitHub图床
- 选择理由:
- 免费!!!操作相对简单,虽然我也没有怎么体验过其他图床
- 选择理由:
-
环境版本:
- Node.js:14.18.0 -> npm:6.14.15(他俩现在是一起的绑定在一起的,就是防止出现版本不适配的问题)
- git:2.31.1
当你也想搭建一个小破站玩一玩
我推荐你阅读官方的文档和作者的指南 当然 如果你是一个和我一样的freshman 你可以将这篇文章当做一个入门,一个new beginning
-
博主搭建时 参考的文档
- 你把Hexo下下来以后 Hexo init 以后 在博客文件的根目录里的 _config.yml里里面每一个功能模块 上方的注释里都有网址 复制到浏览器查看 然后将网站的语言设置为中文 就可以开启你奇妙的探索之旅了 (反正我是这么做的)
-
跟着我这篇博客 走一遍流程
1.环境搭建
1.1、nodejs下载
Node.js 是一个开源与跨平台的 JavaScript 运行时环境。 它是一个可用于几乎任何项目的流行工具!(官网cv的,目前不太能理解,感觉有点像jre?)
坑:如果你之前下载了node.js,是beta版(最、较新的版本) 请务必删了 然后重新下载LTS版本(稳定并且长期维护的版本),不然你就会像我一样,在npm和node版本适配和vs C++环境的问题上兜兜转转十个小时,一筹莫展。记住一句话,遇到问题超过一小时还没办法解决 就删干净重装稳定版,remake

一路next:最后这里一定要选择 它会检测当前环境是否完整,然后下载确实的环境 (Attention!)

然后在PowerShell(windows)里 node -v 和 npm -v 一下 看看装好了没
1.2、Git下载和使用
- 这教程就比较多了 百度第一条 附一下
https://www.cnblogs.com/ximiaomiao/p/7140456.html
- Git的原理和相关操作的熟练 来这个网站学习一下吧 比较有趣 动手性还强
https://oschina.gitee.io/learn-git-branching/
1.3、Hexo安装
步骤:
- 就安一个内核,至于其他的第三方插件,需要再装(注意这里推荐使用GIt bash 命令行总会出一下莫名其妙的错误)
npm install hexo --save
- 查看一下hexo版本 看看安装是否成功了
hexo -v
出现如下这种 证明安装好了
hexo-cli: 4.3.0
os: win32 10.0.19042
node: 14.18.0
v8: 8.4.371.23-node.84
uv: 1.42.0
zlib: 1.2.11
brotli: 1.0.9
ares: 1.17.2
modules: 83
nghttp2: 1.42.0
napi: 8
llhttp: 2.1.3
openssl: 1.1.1l
cldr: 39.0
icu: 69.1
tz: 2021a
unicode: 13.0
- 自己找一个喜欢的位置,创建一个空的文件夹,右键git bash一下,输入
hexo init
初始化,其实就是将GitHub上的核心库clone下来,如果没有科学上网,网速较慢的话,多试几次,总有一次会成功,或者按照网上说的,去查ip,设置本地的Host,不过博主自己实践过,效果真心一般,最快的ip 延时都是 100ms+
博客文件结构如下

OK! 搞定了 简简单单~~~
1.4、Hexo测试 Hello World
- 同样在博客根目录下 git bash 一下(就是你之前创建的那个文件夹下),输入
- 清楚本地缓存
hexo clean
- 编译渲染(general)
hexo g
- 将博客网站运行在本地(server) 加上–debug本地的改动可以实时的动态在本地的4000端口查看(推荐)
hexo s --debug
- 在浏览器上输入 localhost:4000查看界面如下

- Congratulation! Everything well down~~~
2.个性化博客和deploy(发布)
在个性化博客之前,首先你需要选一个主题 可以在官网去逛一逛,如果你是被我这篇博客的风格吸引的 又或者 你不知道该怎么选择
那就选nexT 一定没错的 要相信大家的选择
- 下载主题(theme)
npm install hexo-theme-next --save
- 查看博客文件夹下的node_modules里有没有hexo-theme-next 有就下载成功了
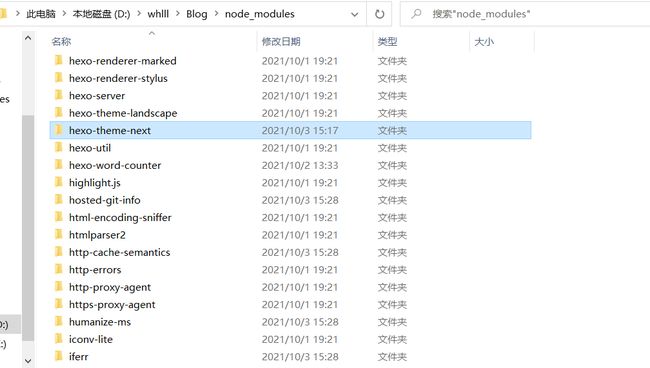
- 进入这个文件夹 以后我们对next主题的配置都是对这里的_config.yml文件配置了

在hexo-theme-next文件夹下 有一个_config.yml 这个主要是个性化主题的
在博客根目录我这里的Blog下,也有一个_config.yml这个主要是配置全局的一些东西
(由于主题配置的_config.yml里的东西太多,这篇博客就引一两个重要的说,然后根目录下的配置文件枚举说明)
- Blog/_config.yml
# Hexo Configuration
## Docs: https://hexo.io/docs/configuration.html
## Source: https://github.com/hexojs/hexo/

# Site
title: whlll-blog  # 网站标题
subtitle: ''
description: 'whlll的小破站❥' # 网站描述
keywords:
author: whlll # 网站作者
language: zh-CN # 网站语言
timezone: 'Asia/Shanghai' # 网站时区

# URL
## Set your site url here. For example, if you use GitHub Page, set url as 'https://username.github.io/project' # 设置GitHub pages 这个也可以在博客根目录下的_config.yml下配置
url: http://example.com
permalink: :year/:month/:day/:title/
permalink_defaults:
pretty_urls:
  trailing_index: true # Set to false to remove trailing 'index.html' from permalinks
  trailing_html: true # Set to false to remove trailing '.html' from permalinks

# 下面都是一些规则设置 可以不用管

# Directory
source_dir: source
public_dir: public
tag_dir: tags
archive_dir: archives
category_dir: categories
code_dir: downloads/code
i18n_dir: :lang
skip_render:

# Writing
new_post_name: :title.md # File name of new posts
default_layout: post
titlecase: false # Transform title into titlecase
external_link:
  enable: true # Open external links in new tab
  field: site # Apply to the whole site
  exclude: ''
filename_case: 0
render_drafts: false
post_asset_folder: false
relative_link: false
future: true
highlight:
  enable: true
  line_number: true
  auto_detect: false
  tab_replace: ''
  wrap: true
  hljs: false
prismjs:
  enable: false
  preprocess: true
  line_number: true
  tab_replace: ''

# Home page setting
# path: Root path for your blogs index page. (default = '')
# per_page: Posts displayed per page. (0 = disable pagination)
# order_by: Posts order. (Order by date descending by default)
index_generator:
  path: ''
  per_page: 10
  order_by: -date

# Category & Tag
default_category: uncategorized
category_map:
tag_map:

# Metadata elements
## https://developer.mozilla.org/en-US/docs/Web/HTML/Element/meta
meta_generator: true

# Date / Time format # 时间格式设置
## Hexo uses Moment.js to parse and display date
## You can customize the date format as defined in
## http://momentjs.com/docs/#/displaying/format/
date_format: YYYY-MM-DD
time_format: HH:mm:ss
## updated_option supports 'mtime', 'date', 'empty'
updated_option: 'mtime'

# Pagination
## Set per_page to 0 to disable pagination
per_page: 10
pagination_dir: page

# Include / Exclude file(s)
## include:/exclude: options only apply to the 'source/' folder
include:
exclude:
ignore:

# Extensions
## Plugins: https://hexo.io/plugins/
## Themes: https://hexo.io/themes/
theme: next # 配置主题

# Deployment
## Docs: https://hexo.io/docs/one-command-deployment

deploy: # 配置远程仓库(我这配置的是GitHub的仓库和ali云ESC服务器上的git仓库)
  type: git
  repository:
              github: https://github.com/whlll-coder/whlll-coder.github.io.git,main
              #hexo: [email protected]:/home/git/hexo.git,main

symbols_count_time: # 第三方插件 hexo-word-counter的配置 可以统计每篇博客的阅读时间 字数之类的 感觉很细节很贴心
  symbols: true
  time: true
  total_symbols: true
  total_time: true
  exclude_codeblock: false
  awl: 4
  wpm: 275
  suffix: "mins."

search: # 本地搜索在博客根目录_config.yml下的配置 还需要在主题_config.yml下enable:true一下就可以用了
  path: search.xml
  field: post
  content: true
  format: html

## Live2D小白猫
live2d: # live2d第三方插件 博客右下方小tororo的配置(live2d-widget-model-tororo)
  enable: true
  scriptFrom: local
  pluginRootPath: live2dw/
  pluginJsPath: lib/
  pluginModelPath: assets/
  model:
    #模板目录,在node_modules里
    use: live2d-widget-model-tororo
  display:
    position: right
    width: 150
    height: 300
  mobile:
    # 在手机端显示
    show: true
  rect:
    opacity:0.7
- hexo-theme-next/_config.yml(截取博主配置的)
# ---------------------------------------------------------------
# Scheme Settings
# ---------------------------------------------------------------

# Schemes # 主题样式 有四个 博主对比了一下 个人比较喜欢Mist
#scheme: Muse
scheme: Mist
#scheme: Pisces
#scheme: Gemini

# Dark Mode # 黑暗模式 网页端看不出来啥 但是移动端会变
darkmode: true


# ---------------------------------------------------------------
# Site Information Settings
# ---------------------------------------------------------------

favicon: # 网站logo设置(网上有很多免费的在线logo设计软件,虽然质量和可选择性不是那么的尽善尽美 直接改名字替换原来的就ok了 这里不知道能不能使用图床里的url地址 没有以后更新的时候把这个坑填一下)
  small: /images/favicon-16x16-next.png
  medium: /images/favicon-32x32-next.png
  apple_touch_icon: /images/apple-touch-icon-next.png
  safari_pinned_tab: /images/logo.svg
  #android_manifest: /manifest.json


# ---------------------------------------------------------------
# Menu Settings
# ---------------------------------------------------------------

# Usage: `Key: /link/ || icon`
# Key is the name of menu item. If the translation for this item is available, the translated text will be loaded, otherwise the Key name will be used. Key is case-sensitive.
# Value before `||` delimiter is the target link, value after `||` delimiter is the name of Font Awesome icon.
# External url should start with http:// or https://
menu: # 设置菜单 直接取消注解就可以了
  home: / || fa fa-home
  about: /about/ || fa fa-user
  #tags: /tags/ || fa fa-tags
  #categories: /categories/ || fa fa-th
  archives: /archives/ || fa fa-archive
  #schedule: /schedule/ || fa fa-calendar
  #sitemap: /sitemap.xml || fa fa-sitemap
  #commonweal: /404/ || fa fa-heartbeat

# Enable / Disable menu icons / item badges.
menu_settings:
  icons: true
  badges: false


# Social Links
# Usage: `Key: permalink || icon`
# Key is the link label showing to end users.
# Value before `||` delimiter is the target permalink, value after `||` delimiter is the name of Font Awesome icon.
social:	# 设置社交连接和友情连接 依葫芦画瓢
  GitHub: https://github.com/whlll-coder || fab fa-github
  E-Mail: mailto:[email protected] || fa fa-envelope
  Weibo: https://weibo.com/u/7193773610 || fab fa-weibo
  #Google: https://plus.google.com/yourname || fab fa-google
  #Twitter: https://twitter.com/yourname || fab fa-twitter
  #FB Page: https://www.facebook.com/yourname || fab fa-facebook
  #StackOverflow: https://stackoverflow.com/yourname || fab fa-stack-overflow
  #YouTube: https://youtube.com/yourname || fab fa-youtube
  #Instagram: https://instagram.com/yourname || fab fa-instagram
  #Skype: skype:yourname?call|chat || fab fa-skype

social_icons:
  enable: true
  icons_only: false
  transition: false

links:
  谁把钱丢了: https://www.jmyblog.top/


# Table of Contents in the Sidebar
# Front-matter variable (nonsupport wrap expand_all).
toc: # 设置是否开启博客的文章目录功能
  enable: true
  # Automatically add list number to toc.
  number: false
  # If true, all words will placed on next lines if header width longer then sidebar width.
  wrap: false
  # If true, all level of TOC in a post will be displayed, rather than the activated part of it.
  expand_all: false
  # Maximum heading depth of generated toc.
  max_depth: 6


# Donate (Sponsor) settings
# Front-matter variable (nonsupport animation).
reward_settings: # 开启文章的的打赏功能
  # If true, a donate button will be displayed in every article by default.
  enable: true
  animation: false
  comment: Buy me a coffee

reward: # 附上付款码
  wechatpay: https://cdn.jsdelivr.net/gh/whlll-coder/images/wechatpay.jpg
  alipay: https://cdn.jsdelivr.net/gh/whlll-coder/images/alipay.jpg
  #paypal: /images/paypal.png
  #bitcoin: /images/bitcoin.png


# `Follow me on GitHub` banner in the top-right corner.
github_banner: # 开启GitHub小标 博客右上角
  enable: true
  permalink: https://github.com/whlll-coder
  title: Follow me on GitHub


# Local Search
# Dependencies: https://github.com/next-theme/hexo-generator-searchdb
local_search: # 开启本地搜索功能
  enable: true
  # If auto, trigger search by changing input.
  # If manual, trigger search by pressing enter key or search button.
  trigger: auto
  # Show top n results per article, show all results by setting to -1
  top_n_per_article: 1
  # Unescape html strings to the readable one.
  unescape: false
  # Preload the search data when the page loads.
  preload: false

# ---------------------------------------------------------------
# Chat Services
# See: https://theme-next.js.org/docs/third-party-services/chat-services
# ---------------------------------------------------------------

# A button to open designated chat widget in sidebar.
# Firstly, you need to enable and configure the chat service.
chat: # 设置在线客服功能(客服当然是博主本人~~~)
  enable: true
  icon: fa fa-comment # Icon name in Font Awesome, set false to disable icon.
  text: Chat with me # Button text, change it as you wish.

# Chatra Support
# For more information: https://chatra.com
# Dashboard: https://app.chatra.io/settings/general
chatra: # 先用的是这个软件 感觉还可以 只需要去下面的网站注册一下 然后把setting里的id复制过来就可以了
  enable: true
  async: true
  id: cHCGeJJx2x2CH2DDt
  #embed: # Unfinished experimental feature for developers. See: https://chatra.com/help/api/#injectto


# Canvas ribbon
# For more information: https://github.com/hustcc/ribbon.js
canvas_ribbon: 彩带动画特效 个人觉得一般 喜欢可以开启看看
  enable: false
  size: 100 # The width of the ribbon
  alpha: 0.6 # The transparency of the ribbon
  zIndex: -1 # The display level of the ribbon
搞了这么多这么久 来发布一篇博客试一试吧
2.1、创建博文
- 一样的,到博客的根目录下 git bash 一下 输入
hexo new "你的博客标题"
- 在根目录下的source/_post文件夹下,你就能找到你刚刚生成的博文的md文件了 用Typora打开皆可以开启你的创作之旅了
- 在md文件里,hexo会自动帮你生成一个前缀
---
title: MySql笔记
date: 2021-10-02 19:55:12
categories:
- 工作学习
tags:
- MySql
- 数据库
---
这里的categories和tags是什么 -> 文章的分类和标签
2.2、文章分类创建
hexo new page "categories"
- 创建成功后,在Blog\source\categories下生成index.md文件 将其修改为:
---
title: 文章分类
date: 2021-10-02 19:30:09
type: "categories"
---
2.3、文章标签创建
hexo new page "tags"
- 创建成功后,在Blog\source\tags下同样生成index.mdwe文件,将其修改为:
---
title: 标签
date: 2021-10-03 14:50:12
type: "tags"
---
2.4、文章发布
- 写好文章保存之后
hexo clean

hexo g

hexo d (发布到远程仓库,通过GitHub page便可以访问)
3.第三方插件
- 在博客根目录下的 package.json 下 有你的当前使用的第三方插件和相关依赖 如下
{
  "name": "hexo-site",
  "version": "0.0.0",
  "private": true,
  "scripts": {
    "build": "hexo generate",
    "clean": "hexo clean",
    "deploy": "hexo deploy",
    "server": "hexo server"
  },
  "hexo": {
    "version": "5.4.0"
  },
  "dependencies": {
    "hexo": "^5.0.0",
    "hexo-deployer-git": "^3.0.0",
    "hexo-generator-archive": "^1.0.0",
    "hexo-generator-category": "^1.0.0",
    "hexo-generator-index": "^2.0.0",
    "hexo-generator-searchdb": "^1.4.0",
    "hexo-generator-tag": "^1.0.0",
    "hexo-helper-live2d": "^3.1.1",
    "hexo-renderer-ejs": "^1.0.0",
    "hexo-renderer-marked": "^4.0.0",
    "hexo-renderer-stylus": "^2.0.0",
    "hexo-server": "^2.0.0",
    "hexo-theme-landscape": "^0.0.3",
    "hexo-theme-next": "^8.8.0",
    "hexo-word-counter": "0.0.3",
    "live2d-widget-model-tororo": "^1.0.5"
  }
}
3.1、hexo-deployer-git
博客发布是与git适配的一个插件 第一次 hexo d 时 需要在 GitHub setting下生成一个 access token 可以参考b站Hexo教程最后一集3-5分钟搞定
npm install hexo-deployer-git --save
3.2、hexo-helper-live2d
一种应用于电子游戏的绘图渲染技术,技术由日本Cybernoids公司开发。通过一系列的连续图像和人物建模来生成一种类似三维模型的二维图像
npm install hexo-helper-live2d --save
- 本站的小tororo
npm install live2d-widget-model-tororo
在博客根目录下的_config.yml下配置一下,配置一下 开猫即用
## Live2D小白猫
live2d: # live2d第三方插件 博客右下方小tororo的配置(live2d-widget-model-tororo)
  enable: true
  scriptFrom: local
  pluginRootPath: live2dw/
  pluginJsPath: lib/
  pluginModelPath: assets/
  model:
    #模板目录,在node_modules里
    use: live2d-widget-model-tororo
  display:
    position: right
    width: 150
    height: 300
  mobile:
    # 在手机端显示
    show: true
  rect:
    opacity:0.7
3.3、hexo-word-counter
字数统计 阅读时长统计
npm i --save hexo-word-counter
3.4、hexo-tag-cloud
标签云
- 使用
eg:D:\whlll\Blog\node_modules\hexo-theme-next\layout_macro
- 修改

- 自定义:根目录下添加
# hexo-tag-cloud
tag_cloud:
  textFont: Trebuchet MS, Helvetica
  textColor: '#333'
  textHeight: 25
  outlineColor: '#E2E1D1'
  maxSpeed: 0.5
  pauseOnSelected: false # true 意味着当选中对应 tag 时,停止转动
4.迁移aliyun服务器
- 站长服务器Linux版本 -> Centos8
4.1、服务器安装nginx并启动
>yum install nginx

>nginx -v //检查是否安装成功
- /usr/sbin/nginx: nginx 主程序
- /etc/nginx: 存放 nginx 相关配置
- /var/log/nginx: 存放 nginx 日志
>cd /usr/sbin

>./nginx //启动nginx

>ps -ef|grep nginx //查看进程 是否启动成功
4.2、Clone项目到服务器
- 没有 git?
>yum install git

>git --version //检查一下

>git config --global user.name "your name"
>git config --global user.email "your email"
- nginx 默认的目录为
/var/www/html,我们将我们的博客的源代码 clone 至此,将 server 下的 root 字段值修改为 clone 后的博客目录路径
>cd /var/www/html

>git clone https://github.com/whlll-coder/whlll-coder.github.io.git

>vim /etc/nginx/nginx.conf //修改为如下
    server {
        listen       80 default_server;
        listen       [::]:80 default_server;
        server_name  _;
        root         /var/www/html/whlll-coder.github.io;
4.3、创建远程仓库实现同步部署
>adduser git

>cd /home/git

>git init --bare hexo.git //创建裸仓

>chown -R git:git hexo.git //修改仓库所有者和组的权限 不然 hexo d 会报没有权限修改

将本机的id_rsa文件内容拷贝到阿里云服务器的 /home/git/.ssh/authorized_keys 中

>vim /home/git/hexo.git/hooks/post-receive //写入如下
#!/bin/bash
git --work-tree=/var/www/html/whlll-coder.github.io --git-dir=/home/git/hexo.git checkout -f
- 仓库名写GitHub上自己的
4.2、博客根目录配置deploy
deploy:
  type: git
  repository:
              github: https://github.com/whlll-coder/whlll-coder.github.io.git,main
              hexo: [email protected]:/home/git/hexo.git,main
- 大功告成,现在来试试 hexo clean -> hexo g -> hexo d 吧