- 基于QT的电子木鱼小游戏(C/C++)
今天你debug了嘛?
qtqtc语言c++
文章目录前言今年最火爆的解压小游戏电子木鱼,现在许多软件都上架了这个小程序。我在网上看了一下基本上都是用py和Java写的,所以我用QT重新写了一下,作为小白练手项目非常适合一、界面展示二、功能模块1)木鱼缩放2)功德+1显示3)音乐4)自动5)延时6)完整代码前言今年最火爆的解压小游戏电子木鱼,现在许多软件都上架了这个小程序。我在网上看了一下基本上都是用py和Java写的,所以我用QT重新写了一
- 全渠道小程序引流指南
爱分享的程序员
微信小程序小程序
一、微信生态内部渠道1.会话场景1.1好友会话点击查看商品详情onShareAppMessage(){return{title:'爆款特惠',path:'/pages/goods?id=123',imageUrl:'/images/share.jpg'}}1.2微信群//获取群ID实现群场景服务wx.getGroupEnterInfo({success(res){console.log('群ID:
- 【Golang】Go语言Web开发之模板渲染
景天科技苑
Go语言开发零基础到高阶实战golang前端开发语言Go语言模板渲染模板渲染golang模板渲染
✨✨欢迎大家来到景天科技苑✨✨养成好习惯,先赞后看哦~作者简介:景天科技苑《头衔》:大厂架构师,华为云开发者社区专家博主,阿里云开发者社区专家博主,CSDN全栈领域优质创作者,掘金优秀博主,51CTO博客专家等。《博客》:Python全栈,Golang开发,PyQt5和Tkinter桌面开发,小程序开发,人工智能,js逆向,App逆向,网络系统安全,数据分析,Django,fastapi,flas
- Springboot 整合 Java DL4J 实现企业门禁人脸识别系统
伏羲栈
人工智能深度学习JavaDL4J-深度学习实战springbootjavaDeeplearning4jdeeplearning人工智能深度学习spring
博主简介:历代文学网(PC端可以访问:https://literature.sinhy.com/#/literature?__c=1000,移动端可微信小程序搜索“历代文学”)总架构师,15年工作经验,精通Java编程,高并发设计,Springboot和微服务,熟悉Linux,ESXI虚拟化以及云原生Docker和K8s,热衷于探索科技的边界,并将理论知识转化为实际应用。保持对新技术的好奇心,乐于
- 【FL0093】基于SSM和微信小程序的微信点餐系统小程序
猿毕设
小程序微信小程序微信springbootpython后端java
博主介绍全网粉丝10W+,CSDN全栈领域优质创作者,博客之星、掘金/知乎/b站/华为云/阿里云等平台优质作者、专注于Java、小程序/APP、python、大数据等技术领域和毕业项目实战,以及程序定制化开发、文档编写、答疑辅导等。精彩专栏推荐订阅计算机毕业设计精品项目案例(持续更新)文末获取源码+数据库+文档感兴趣的可以先收藏起来,还有大家在毕设选题,项目以及论文编写等相关问题都可以和学长沟
- uni-app开发微信小程序,数据中\n 换行符失效!解决方案
zra200714
uni-app前端
前言使用uni-app开发微信小程序时,使用text显示字符串(字符串带\n),需要在\n处直接换行。1、本地字符串,可以直接换行显示。2、后台返回字符串,直接换行失效。原因:渲染时\n直接被当成字符串处理了,根本不识别。效果图实现1、使用replace()方法,字符串内的\n做一次替换。具体演示代码1、使用后台返回字符串name:'周二至周五10:00-19:00\n周六至周日09:00-19:
- LeeCode 322-零钱兑换(经典 动态规划)
等风来0212
算法分享leetcodejavascript算法动态规划
322.零钱兑换(经典动态规划)前言博主是前大厂程序猿,不定期分享前端知识与算法。公众号:FECornerwx小程序:FECorner欢迎关注,一起探索知识~题目地址:322.零钱兑换(中等)标签:数组、动态规划题目描述:给你一个整数数组coins,表示不同面额的硬币;以及一个整数amount,表示总金额。计算并返回可以凑成总金额所需的最少的硬币个数。如果没有任何一种硬币组合能组成总金额,返回-1
- 全新租赁小程序系统源码 基于ThinkPHP+UniApp开发的租赁商城小程序
专业软件系统开发
源码下载小程序租赁商城小程序源码租赁商城小程序租赁小程序系统源码
内容目录一、详细介绍二、效果展示1.部分代码2.效果图展示三、学习资料下载一、详细介绍全新租赁小程序系统源码基于thinkphp+uniapp开发的租赁商城小程序基于thinkphp+uniapp开发的租赁商城小程序,提供用户物品租赁服务的应用程序方便客户搭建各种类型的租赁场景服务。通过小程序端多角色进行平台管理用户租赁商品缴纳租金及押金,员工端可操作商品出库和归还功能特性:1、装修模块可根据用户
- 跨端方案选型:对比Uni-app与Taro在复杂电商项目中的技术选型依据参考
向贤
前端开发uni-apptaro
跨端方案选型:对比Uni-app与Taro在复杂电商项目中的技术选型依据参考请赏析:Uni-app与Taro复杂电商项目选型对比指南一、核心选型维度速记技术栈匹配→跨端能力→性能优化→开发效率→生态支持→长期维护二、关键维度对比分析1.技术栈匹配性框架技术栈适用团队学习成本Uni-appVue.js语法+小程序API熟悉Vue或小程序的团队低(语法与Vue高度一致)TaroReact/Vue/类R
- 微信小程序 底部导航栏实现凸出内凹效果
hujie9371
微信小程序
话不多说,首先上效果展示:在微信小程序开发中,开发者往往需要根据自定义的需求实现底部导航栏,而这种凸出与内凹的效果往往使人头疼。主要难点是背景色、圆切角的过渡、透明、阴影遮挡等问题。一般的解决方案是使用图片或者svg显示凹凸,或者利用css阴影效果遮挡切角。但在【SkylineUI组件库】小程序中的底部导航栏,我则是直接使用canvas绘制,并且使用skyline渲染框架,不仅解决了以上问题,并且
- Java基于SpringBoot的校园心声墙小程序(附源码,文档)
stormjun
小程序毕业设计javaspringboot小程序校园心声墙小程序
基于SpringBoot的校园心声墙小程序博主介绍:✌stormjun、8年大厂程序员经历。全网粉丝15w+、csdn博客专家、掘金/华为云/阿里云/InfoQ等平台优质作者、专注于Java技术领域和毕业项目实战✌文末获取源码联系精彩专栏推荐订阅不然下次找不到哟Java项目精品实战案例《100套》Java微信小程序项目实战《100套》Python项目实战《100套》感兴趣的可以先收藏起来,还有大家
- uniapp——如何在onLoad和onShow中调用函数只被调用一次
耶啵奶膘
univueuni-app
说明例如:当小程序调用扫码扫描设备二维码时,展示相关套餐,同时会把码内的id存成缓存。以确保切换到其他页面回来后套餐还在。把请求套餐的接口放在onShow里面就行。但同时使用微信扫码进入的时候一般会在onLoad里面调用。这样就会出现每次进入这个页面会调用两次套餐的接口。预期结果:只调用一次接口要解决这个问题,我们可以通过设置一个标志位来控制getList()函数的调用。在onLoad函数中,我们
- 计算机毕业设计 ——jspssm507Springboot 的论坛管理系统
程序媛9688
课程设计
作者:程序媛9688开发技术:SpringBoot、SSM、Vue、MySQL、JSP、ElementUI、Python、小程序等。文末获取源码+数据库感兴趣的可以先收藏起来,还有大家在毕设选题(免费咨询指导选题),项目以及论文编写等相关问题都可以给我留言咨询,希望帮助更多的人计算机毕业设计——jspssm507Springboot的论坛管理系统JSPSSM507SpringBoot论坛管理系统功
- 计算机毕业设计 ——jspssm510springboot 的人职匹配推荐系统
程序媛9688
课程设计
作者:程序媛9688开发技术:SpringBoot、SSM、Vue、MySQL、JSP、ElementUI、Python、小程序等。文末获取源码+数据库感兴趣的可以先收藏起来,还有大家在毕设选题(免费咨询指导选题),项目以及论文编写等相关问题都可以给我留言咨询,希望帮助更多的人计算机毕业设计——jspssm510springboot的人职匹配推荐系统人职匹配推荐系统技术说明本毕业设计项目“jsps
- 计算机毕业设计 ——jspssm513Springboot 的小区物业管理系统
程序媛9688
课程设计
作者:程序媛9688开发技术:SpringBoot、SSM、Vue、MySQL、JSP、ElementUI、Python、小程序等。文末获取源码+数据库感兴趣的可以先收藏起来,还有大家在毕设选题(免费咨询指导选题),项目以及论文编写等相关问题都可以给我留言咨询,希望帮助更多的人计算机毕业设计——jspssm513Springboot的小区物业管理系统技术说明:小区物业管理系统(基于JSP+SSM+
- 计算机毕业设计 ——jspssm514Springboot 的校园新闻网站
程序媛9688
课程设计
作者:程序媛9688开发技术:SpringBoot、SSM、Vue、MySQL、JSP、ElementUI、Python、小程序等。文末获取源码+数据库感兴趣的可以先收藏起来,还有大家在毕设选题(免费咨询指导选题),项目以及论文编写等相关问题都可以给我留言咨询,希望帮助更多的人计算机毕业设计——jspssm514Springboot的校园新闻网站技术说明:JSPSSM514Springboot校园
- 计算机毕业设计 ——jspssm504springboot 职称评审管理系统
程序媛9688
课程设计
作者:程序媛9688开发技术:SpringBoot、SSM、Vue、MySQL、JSP、ElementUI、Python、小程序等。文末获取源码+数据库感兴趣的可以先收藏起来,还有大家在毕设选题(免费咨询指导选题),项目以及论文编写等相关问题都可以给我留言咨询,希望帮助更多的人计算机毕业设计——jspssm504springboot职称评审管理系统JSPSSM504SpringBoot职称评审管理
- w231乡政府管理系统设计与实现
栗子计算机毕业设计
javaspringboot后端javaspringtomcat
作者简介:多年一线开发工作经验,原创团队,分享技术代码帮助学生学习,独立完成自己的网站项目。代码可以查看文章末尾⬇️联系方式获取,记得注明来意哦~赠送计算机毕业设计600个选题excel文件,帮助大学选题。赠送开题报告模板,帮助书写开题报告。作者完整代码目录供你选择:《Springboot网站项目》400套《ssm网站项目》800套《小程序项目》300套《App项目》500套《Python网站项目
- 小程序分包优化
shaoin_2
小程序小程序javascript
1.分包的核心概念主包:包含小程序启动页面(如首页)和公共代码(如全局组件、工具类库等)。分包:开发者划分的独立功能模块,按需加载。例如:商品详情页、用户中心等。体积限制:主包大小不超过2MB(微信小程序)。所有分包总大小不超过20MB(微信小程序)。分包可以独立配置(如支付宝小程序的分包策略可能略有不同)。2.分包配置方法在app.json中通过subpackages(或subPackages)
- 微信小程序游戏源码:全开源可二开
javascript
微信小程序游戏源码技术选型在微信小程序游戏源码的技术选型过程中,开发者需要综合考虑多个因素,包括游戏性能、开发效率、跨平台兼容性、团队技术栈以及社区支持等。以下是一个详细的微信小程序游戏源码技术选型清单,旨在帮助开发者做出明智的决策。源码及演示:casgams.top/gm1、原生框架优势:性能优越:原生框架直接使用微信官方提供的开发工具和框架,如WXML(布局文件)、WXSS(样式文件)、Jav
- 批量检查微信小程序是否被封禁的Python脚本
python
概述:此Python脚本用于批量请求微信小程序的封禁状态。脚本通过访问API接口https://api.52an.fun/xcx/checkxcx.php?appid=wx81894c6dbb81c2e2来获取每个小程序的封禁状态。接口返回的JSON格式数据包含了封禁状态信息,其中"code":0表示小程序已被封禁,"code":1表示小程序正常。脚本源码:importrequestsimport
- 小程序基础 2.0
菜鸟小白Y
微信小程序java
第四单元小程序基础二一、昨日知识点回顾1.小程序中的事件2.wxs3.列表渲染4.条件渲染二、本单元知识点概述(Ⅰ)指定教材无(Ⅱ)知识点概述(Ⅲ)教学时长三、本单元教学目标(Ⅰ)重点知识目标1.下拉加载和上拉刷新2.小程序的页面跳转3.网络请求(Ⅱ)能力目标1.掌握下拉加载和上拉刷新2.掌握小程序的页面跳转3.掌握网络请求四、本单元知识详讲4.1.下拉刷新4.1.1下拉刷新的概念以及场景概念:下
- exe反编译_微信小程序反编译 wxss反编译不成功$gwx is not defined解决方案
weixin_39831242
exe反编译pythonexe反编译wxapkg反编译后的数据wxappunpackerwxss小程序inputwxss
反编译步骤:第一步:安装node.js如果没有安装nodejs,请先安装一下下载地址:https://nodejs.org/en/第二步:下载安装模拟器(要求自带root权限)可以使用夜神模拟器nox_setup_v6.2.8.3_full.exe,你也可以自选下载地址:https://www.yeshen.com/cn/download/fullPackage以及RE工具:Root_Explor
- tinyxml创建、写入和读取
@Mr_LiuYang
写过的小程序C语言tinyxmlxml创建添加xml读取
最近在集成小程序,涉及到使用tinyxml类,在这里记录本次用于输出程序执行状态的代码,包括创建、添加信息、读取信息,exportXmlParam用于创建输出,addXmlevent用于主程序部分实时显示进程信息,ReadXmlParam用于读取xml文件。(1)创建xml文件,因为本次要求输入数据在哪,输出结果文件必须在哪,故这里采用name表示输入数据的绝对地址参数voidCXMLReadfi
- app开发,小程序定制开发,小程序开发公司
灵软互动小程序开发
小程序webapp软件需求
灵软互动科技:深耕小程序定制开发的技术领跑者在数字化转型浪潮中,小程序凭借轻量化、高便捷性成为企业触达用户的重要载体。河南灵软互动网络科技有限公司(以下简称“灵软互动科技”)凭借十余年技术沉淀与行业深耕,成为小程序定制开发领域的标杆企业。一、技术实力与团队优势灵软互动科技拥有十余年经验的核心技术团队,成员兼具腾讯、阿里云等名企背景与高校科研基因,形成多元互补的技术架构。在小程序开发中,
- 家政一城一店融合小程序怎么开通,需要哪些资质?
郑州拽牛科技
开源软件系统架构大数据小程序微信小程序
手把手教你开通洗衣洗鞋团购上门融合小程序!⚠️抖音新规重大调整!2025年起家政洗护必须"一城一店"(全国仅限365家连锁资质,地级市单店垄断!)开通秘籍三步走:✅核心资质:营业执照+法人身份证+商标注册证✅硬件证明:门头实拍图+室内全景视频+高德精准定位✅平台认证:ICP许可证+电信增值业务许可证(缺一不可!)遇到难题?90%商家都卡在这3个环节:1️⃣资质不全无法过审?2️⃣小程序功能不会搭建
- 小程序中头像昵称填写
葱头的故事
小程序小程序
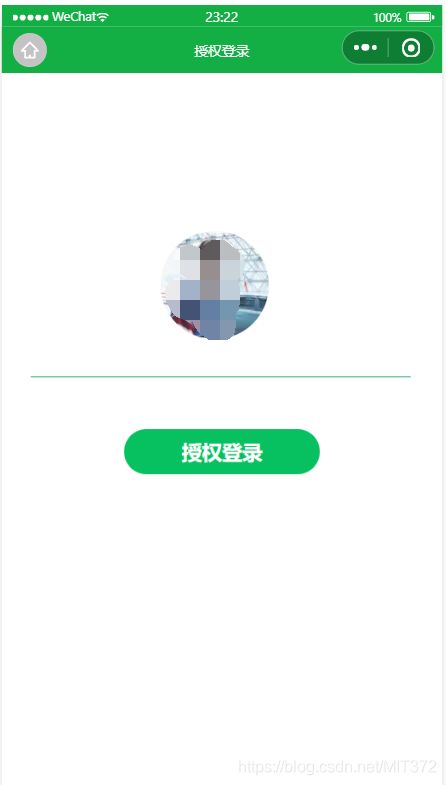
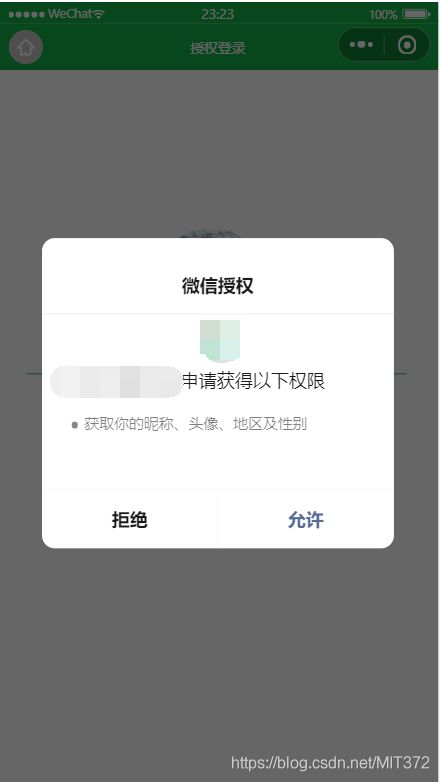
官方文档参考小程序用户头像昵称获取规则调整公告新的小程序版本不能通过wx.getUserProfile和wx.getUserInfo获取用户信息注意昵称填写,同时绑定了input和change事件(input是用户输入时触发,change是直接选择微信昵称时触发)getAvater(event){console.log(9,event);console.log('event',event.deta
- 国内短剧系统源码部署小程序体验测评讲解
南阳迈特网络科技
短剧源码短剧小程序短剧系统小程序系统架构php
在移动互联网飞速发展的今天,短剧作为一种新兴的娱乐形式,凭借其短小精悍、内容丰富的特点,迅速赢得了大量用户的青睐。作为一名软件测试人员,我有幸深入体验了一款功能全面、设计精良的短剧小程序。本文将从前端设计、后端功能、用户体验以及服务支持等多个角度,对这款小程序进行详细评测。如果您也感兴趣欢迎点我了解一起探讨一下吧一、前端设计:灵活与美观的完美融合1.运营方自由DIY:个性化定制的极致体验这款小程序
- React Native 0.76:重大更新引领移动开发新潮流
前端react-native
博主小程序体验|博主公众号分享2024年10月23日,ReactNative发布了具有里程碑意义的0.76版本,这一版本带来了众多令人瞩目的更新,将对移动应用开发产生深远影响。一、主要更新内容概览(一)新架构默认启用从0.76版本起,新架构在项目中默认开启,这标志着它已经具备了用于生产环境的条件。新架构是自2018年以来对ReactNative的全面重写,与旧架构相比有诸多优势。(二)ReactN
- 【微信小程序】uni-app开发微信小程序,7步轻松搞定,你也能成为跨平台大神
墨瑾轩
微信小程序微信小程序uni-appnotepad++
关注墨瑾轩,带你探索编程的奥秘!超萌技术攻略,轻松晋级编程高手技术宝库已备好,就等你来挖掘订阅墨瑾轩,智趣学习不孤单即刻启航,编程之旅更有趣标题:uni-app开发微信小程序,7步轻松搞定,你也能成为跨平台大神!引言亲爱的小伙伴们,你们是不是经常被微信小程序的开发困扰?每次都要为不同的平台写不同的代码,累不累呀?今天,我要给大家推荐一个神器——uni-app!只需一套代码,就能同时发布到微信小程序
- web前段跨域nginx代理配置
刘正强
nginxcmsWeb
nginx代理配置可参考server部分
server {
listen 80;
server_name localhost;
- spring学习笔记
caoyong
spring
一、概述
a>、核心技术 : IOC与AOP
b>、开发为什么需要面向接口而不是实现
接口降低一个组件与整个系统的藕合程度,当该组件不满足系统需求时,可以很容易的将该组件从系统中替换掉,而不会对整个系统产生大的影响
c>、面向接口编口编程的难点在于如何对接口进行初始化,(使用工厂设计模式)
- Eclipse打开workspace提示工作空间不可用
0624chenhong
eclipse
做项目的时候,难免会用到整个团队的代码,或者上一任同事创建的workspace,
1.电脑切换账号后,Eclipse打开时,会提示Eclipse对应的目录锁定,无法访问,根据提示,找到对应目录,G:\eclipse\configuration\org.eclipse.osgi\.manager,其中文件.fileTableLock提示被锁定。
解决办法,删掉.fileTableLock文件,重
- Javascript 面向对面写法的必要性?
一炮送你回车库
JavaScript
现在Javascript面向对象的方式来写页面很流行,什么纯javascript的mvc框架都出来了:ember
这是javascript层的mvc框架哦,不是j2ee的mvc框架
我想说的是,javascript本来就不是一门面向对象的语言,用它写出来的面向对象的程序,本身就有些别扭,很多人提到js的面向对象首先提的是:复用性。那么我请问你写的js里有多少是可以复用的,用fu
- js array对象的迭代方法
换个号韩国红果果
array
1.forEach 该方法接受一个函数作为参数, 对数组中的每个元素
使用该函数 return 语句失效
function square(num) {
print(num, num * num);
}
var nums = [1,2,3,4,5,6,7,8,9,10];
nums.forEach(square);
2.every 该方法接受一个返回值为布尔类型
- 对Hibernate缓存机制的理解
归来朝歌
session一级缓存对象持久化
在hibernate中session一级缓存机制中,有这么一种情况:
问题描述:我需要new一个对象,对它的几个字段赋值,但是有一些属性并没有进行赋值,然后调用
session.save()方法,在提交事务后,会出现这样的情况:
1:在数据库中有默认属性的字段的值为空
2:既然是持久化对象,为什么在最后对象拿不到默认属性的值?
通过调试后解决方案如下:
对于问题一,如你在数据库里设置了
- WebService调用错误合集
darkranger
webservice
Java.Lang.NoClassDefFoundError: Org/Apache/Commons/Discovery/Tools/DiscoverSingleton
调用接口出错,
一个简单的WebService
import org.apache.axis.client.Call;import org.apache.axis.client.Service;
首先必不可
- JSP和Servlet的中文乱码处理
aijuans
Java Web
JSP和Servlet的中文乱码处理
前几天学习了JSP和Servlet中有关中文乱码的一些问题,写成了博客,今天进行更新一下。应该是可以解决日常的乱码问题了。现在作以下总结希望对需要的人有所帮助。我也是刚学,所以有不足之处希望谅解。
一、表单提交时出现乱码:
在进行表单提交的时候,经常提交一些中文,自然就避免不了出现中文乱码的情况,对于表单来说有两种提交方式:get和post提交方式。所以
- 面试经典六问
atongyeye
工作面试
题记:因为我不善沟通,所以在面试中经常碰壁,看了网上太多面试宝典,基本上不太靠谱。只好自己总结,并试着根据最近工作情况完成个人答案。以备不时之需。
以下是人事了解应聘者情况的最典型的六个问题:
1 简单自我介绍
关于这个问题,主要为了弄清两件事,一是了解应聘者的背景,二是应聘者将这些背景信息组织成合适语言的能力。
我的回答:(针对技术面试回答,如果是人事面试,可以就掌
- contentResolver.query()参数详解
百合不是茶
androidquery()详解
收藏csdn的博客,介绍的比较详细,新手值得一看 1.获取联系人姓名
一个简单的例子,这个函数获取设备上所有的联系人ID和联系人NAME。
[java]
view plain
copy
public void fetchAllContacts() {
- ora-00054:resource busy and acquire with nowait specified解决方法
bijian1013
oracle数据库killnowait
当某个数据库用户在数据库中插入、更新、删除一个表的数据,或者增加一个表的主键时或者表的索引时,常常会出现ora-00054:resource busy and acquire with nowait specified这样的错误。主要是因为有事务正在执行(或者事务已经被锁),所有导致执行不成功。
1.下面的语句
- web 开发乱码
征客丶
springWeb
以下前端都是 utf-8 字符集编码
一、后台接收
1.1、 get 请求乱码
get 请求中,请求参数在请求头中;
乱码解决方法:
a、通过在web 服务器中配置编码格式:tomcat 中,在 Connector 中添加URIEncoding="UTF-8";
1.2、post 请求乱码
post 请求中,请求参数分两部份,
1.2.1、url?参数,
- 【Spark十六】: Spark SQL第二部分数据源和注册表的几种方式
bit1129
spark
Spark SQL数据源和表的Schema
case class
apply schema
parquet
json
JSON数据源 准备源数据
{"name":"Jack", "age": 12, "addr":{"city":"beijing&
- JVM学习之:调优总结 -Xms -Xmx -Xmn -Xss
BlueSkator
-Xss-Xmn-Xms-Xmx
堆大小设置JVM 中最大堆大小有三方面限制:相关操作系统的数据模型(32-bt还是64-bit)限制;系统的可用虚拟内存限制;系统的可用物理内存限制。32位系统下,一般限制在1.5G~2G;64为操作系统对内存无限制。我在Windows Server 2003 系统,3.5G物理内存,JDK5.0下测试,最大可设置为1478m。典型设置:
java -Xmx355
- jqGrid 各种参数 详解(转帖)
BreakingBad
jqGrid
jqGrid 各种参数 详解 分类:
源代码分享
个人随笔请勿参考
解决开发问题 2012-05-09 20:29 84282人阅读
评论(22)
收藏
举报
jquery
服务器
parameters
function
ajax
string
- 读《研磨设计模式》-代码笔记-代理模式-Proxy
bylijinnan
java设计模式
声明: 本文只为方便我个人查阅和理解,详细的分析以及源代码请移步 原作者的博客http://chjavach.iteye.com/
import java.lang.reflect.InvocationHandler;
import java.lang.reflect.Method;
import java.lang.reflect.Proxy;
/*
* 下面
- 应用升级iOS8中遇到的一些问题
chenhbc
ios8升级iOS8
1、很奇怪的问题,登录界面,有一个判断,如果不存在某个值,则跳转到设置界面,ios8之前的系统都可以正常跳转,iOS8中代码已经执行到下一个界面了,但界面并没有跳转过去,而且这个值如果设置过的话,也是可以正常跳转过去的,这个问题纠结了两天多,之前的判断我是在
-(void)viewWillAppear:(BOOL)animated
中写的,最终的解决办法是把判断写在
-(void
- 工作流与自组织的关系?
comsci
设计模式工作
目前的工作流系统中的节点及其相互之间的连接是事先根据管理的实际需要而绘制好的,这种固定的模式在实际的运用中会受到很多限制,特别是节点之间的依存关系是固定的,节点的处理不考虑到流程整体的运行情况,细节和整体间的关系是脱节的,那么我们提出一个新的观点,一个流程是否可以通过节点的自组织运动来自动生成呢?这种流程有什么实际意义呢?
这里有篇论文,摘要是:“针对网格中的服务
- Oracle11.2新特性之INSERT提示IGNORE_ROW_ON_DUPKEY_INDEX
daizj
oracle
insert提示IGNORE_ROW_ON_DUPKEY_INDEX
转自:http://space.itpub.net/18922393/viewspace-752123
在 insert into tablea ...select * from tableb中,如果存在唯一约束,会导致整个insert操作失败。使用IGNORE_ROW_ON_DUPKEY_INDEX提示,会忽略唯一
- 二叉树:堆
dieslrae
二叉树
这里说的堆其实是一个完全二叉树,每个节点都不小于自己的子节点,不要跟jvm的堆搞混了.由于是完全二叉树,可以用数组来构建.用数组构建树的规则很简单:
一个节点的父节点下标为: (当前下标 - 1)/2
一个节点的左节点下标为: 当前下标 * 2 + 1
&
- C语言学习八结构体
dcj3sjt126com
c
为什么需要结构体,看代码
# include <stdio.h>
struct Student //定义一个学生类型,里面有age, score, sex, 然后可以定义这个类型的变量
{
int age;
float score;
char sex;
}
int main(void)
{
struct Student st = {80, 66.6,
- centos安装golang
dcj3sjt126com
centos
#在国内镜像下载二进制包
wget -c http://www.golangtc.com/static/go/go1.4.1.linux-amd64.tar.gz
tar -C /usr/local -xzf go1.4.1.linux-amd64.tar.gz
#把golang的bin目录加入全局环境变量
cat >>/etc/profile<
- 10.性能优化-监控-MySQL慢查询
frank1234
性能优化MySQL慢查询
1.记录慢查询配置
show variables where variable_name like 'slow%' ; --查看默认日志路径
查询结果:--不用的机器可能不同
slow_query_log_file=/var/lib/mysql/centos-slow.log
修改mysqld配置文件:/usr /my.cnf[一般在/etc/my.cnf,本机在/user/my.cn
- Java父类取得子类类名
happyqing
javathis父类子类类名
在继承关系中,不管父类还是子类,这些类里面的this都代表了最终new出来的那个类的实例对象,所以在父类中你可以用this获取到子类的信息!
package com.urthinker.module.test;
import org.junit.Test;
abstract class BaseDao<T> {
public void
- Spring3.2新注解@ControllerAdvice
jinnianshilongnian
@Controller
@ControllerAdvice,是spring3.2提供的新注解,从名字上可以看出大体意思是控制器增强。让我们先看看@ControllerAdvice的实现:
@Target(ElementType.TYPE)
@Retention(RetentionPolicy.RUNTIME)
@Documented
@Component
public @interface Co
- Java spring mvc多数据源配置
liuxihope
spring
转自:http://www.itpub.net/thread-1906608-1-1.html
1、首先配置两个数据库
<bean id="dataSourceA" class="org.apache.commons.dbcp.BasicDataSource" destroy-method="close&quo
- 第12章 Ajax(下)
onestopweb
Ajax
index.html
<!DOCTYPE html PUBLIC "-//W3C//DTD XHTML 1.0 Transitional//EN" "http://www.w3.org/TR/xhtml1/DTD/xhtml1-transitional.dtd">
<html xmlns="http://www.w3.org/
- BW / Universe Mappings
blueoxygen
BO
BW Element
OLAP Universe Element
Cube Dimension
Class
Charateristic
A class with dimension and detail objects (Detail objects for key and desription)
Hi
- Java开发熟手该当心的11个错误
tomcat_oracle
java多线程工作单元测试
#1、不在属性文件或XML文件中外化配置属性。比如,没有把批处理使用的线程数设置成可在属性文件中配置。你的批处理程序无论在DEV环境中,还是UAT(用户验收
测试)环境中,都可以顺畅无阻地运行,但是一旦部署在PROD 上,把它作为多线程程序处理更大的数据集时,就会抛出IOException,原因可能是JDBC驱动版本不同,也可能是#2中讨论的问题。如果线程数目 可以在属性文件中配置,那么使它成为
- 推行国产操作系统的优劣
yananay
windowslinux国产操作系统
最近刮起了一股风,就是去“国外货”。从应用程序开始,到基础的系统,数据库,现在已经刮到操作系统了。原因就是“棱镜计划”,使我们终于认识到了国外货的危害,开始重视起了信息安全。操作系统是计算机的灵魂。既然是灵魂,为了信息安全,那我们就自然要使用和推行国货。可是,一味地推行,是否就一定正确呢?
先说说信息安全。其实从很早以来大家就在讨论信息安全。很多年以前,就据传某世界级的网络设备制造商生产的交


