Elastic Search 学习(1)---- Centos 7 安装 Elastic Search
1. 首先,应该确认下自己的系统的版本
cat /etc/os-release
NAME="CentOS Linux"
VERSION="7 (Core)"
ID="centos"
ID_LIKE="rhel fedora"
VERSION_ID="7"
PRETTY_NAME="CentOS Linux 7 (Core)"
ANSI_COLOR="0;31"
CPE_NAME="cpe:/o:centos:centos:7"
HOME_URL="https://www.centos.org/"
BUG_REPORT_URL="https://bugs.centos.org/"

CENTOS_MANTISBT_PROJECT="CentOS-7"
CENTOS_MANTISBT_PROJECT_VERSION="7"
REDHAT_SUPPORT_PRODUCT="centos"
REDHAT_SUPPORT_PRODUCT_VERSION="7"
2. 查看服务器的存储空间
df -h /
Filesystem      Size  Used Avail Use% Mounted on
/dev/vda1        50G  8.1G   39G  18% /
这里显示,我的服务器还有将近40个G的空间可以使用。足够安装 Elastic Search (官方给的建议是 64GB 以上,最低是 8GB)
3. 安装 JAVA8
由于 Elasticsearch 是基于 JVM 开发的,所以我们需要安装JAVA环境
yum install java-1.8.0-openjdk java-1.8.0-openjdk-devel
接下来配置 JAVA_HOME
JAVA在Centos下的默认安装路径应该是
/usr/lib/jvm/java-1.8.0-openjdk-1.8.0.282.b08-1.el7_9.x86_64
当然,具体还是要看具体情况,但是基本上都是在 /usr/lib 下面去找。然后配置 JAVA_HOME 路径:
vim /etc/profile
#set java environment
JAVA_HOME=/usr/lib/jvm/java-1.8.0-openjdk-1.8.0.282.b08-1.el7_9.x86_64
JRE_HOME=$JAVA_HOME/jre
CLASS_PATH=.:$JAVA_HOME/lib/dt.jar:$JAVA_HOME/lib/tools.jar:$JRE_HOME/lib
PATH=$PATH:$JAVA_HOME/bin:$JRE_HOME/bin
export JAVA_HOME JRE_HOME CLASS_PATH PATH
然后更新环境变量
source /etc/profile
4. 安装 Elastic Search (这里我们选择比较稳定的 6.8 版本,注意从版本 6开始ES开始去掉原本的Type功能 )
4.1 下载 rpm 包
wget https://artifacts.elastic.co/downloads/elasticsearch/elasticsearch-6.8.23.rpm
rpm -ivh elasticsearch-6.8.23.rpm
接下来我们会看到安装信息
[root@VM_0_16_centos elastic]# rpm -ivh elasticsearch-6.8.23.rpm
warning: elasticsearch-6.8.23.rpm: Header V4 RSA/SHA512 Signature, key ID d88e42b4: NOKEY
Preparing...                          ################################# [100%]
Creating elasticsearch group... OK
Creating elasticsearch user... OK
Updating / installing...
   1:elasticsearch-0:6.8.23-1         ################################# [100%]
### NOT starting on installation, please execute the following statements to configure elasticsearch service to start automatically using systemd
 sudo systemctl daemon-reload
 sudo systemctl enable elasticsearch.service
### You can start elasticsearch service by executing
 sudo systemctl start elasticsearch.service
Created elasticsearch keystore in /etc/elasticsearch
4.2 elasticsearch 做成 service 服务
systemctl daemon-reload
systemctl enable elasticsearch.service
systemctl start elasticsearch.service
systemctl staus elasticsearch.service
接下来应该可以看到 elasticsearch 的状态为 active
[root@VM_0_16_centos elastic]# systemctl status elasticsearch.service
● elasticsearch.service - Elasticsearch
   Loaded: loaded (/usr/lib/systemd/system/elasticsearch.service; enabled; vendor preset: disabled)
   Active: active (running) since Tue 2022-10-25 16:03:42 CST; 16s ago
     Docs: http://www.elastic.co
 Main PID: 7111 (java)
   CGroup: /system.slice/elasticsearch.service
           ├─7111 /bin/java -Xms1g -Xmx1g -XX:+UseConcMarkSweepGC -XX:CMSInitiatingOccupancyFraction=75 -XX:+UseCMSInitiatingOccupancyOnly -Des.networkaddress.cache.ttl=60 -Des.networkaddress.cache.negati...
           └─7184 /usr/share/elasticsearch/modules/x-pack-ml/platform/linux-x86_64/bin/controller
4.3 修改 /etc/elasticsearch/elasticsearch.yml
# Set the bind address to a specific IP (IPv4 or IPv6):
#
network.host: 0.0.0.0
#
# Set a custom port for HTTP:
#
http.port: 9200
这样的这里的 network.host 可以接受所有外部 ip 通过 9200 访问当前的数据库
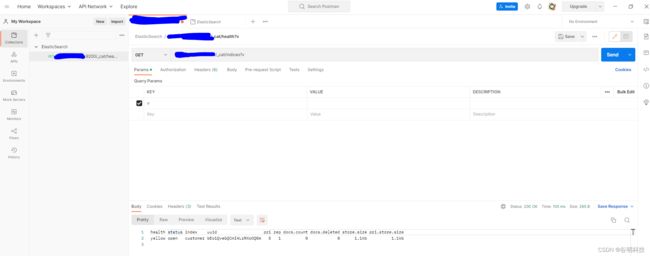
5. 使用 Postman 创建、查询、删除 Elasticsearch 等操作
Postman 是一款时下比较流行的 API 操作工具,相比于 curl, UI界面更加友好
5.1 下载桌面版并且注册账号,使用 9200 发送
5.2 安装中文分词器 ik
ik 是elasticsearch 中比较知名的分词器
/usr/share/elasticsearch/bin/elasticsearch-plugin install https://github.com/medcl/elasticsearch-analysis-ik/releases/download/v6.8.23/elasticsearch-analysis-ik-6.8.23.zip5.3 使用 Postman 进行 Elasticsearch 的操作
查询当前的所有索引 (这里的v是返回响应头)
GET /_cat/indices?v
创建索引 INDEX
PUT /INDEX
查询指定索引 INDEX
GET /INDEX
删除索引
DELETE /INDEX
新建文档 (这里最后的 1 即 id, 同时注意这里的 json 数据在 Postman 里面是作为 body 的raw data 插入的)
PUT /INDEX/_doc/1
{ "userId": 1, "name": "zhang san", "age": 20, "birthday": "2022-08-20" }
部分修改
POST /customer/1/_update
{"doc": {"name":"li si"}}
5.4 设置密码
由于初始状态下,elasticsearch 是没有密码的,所以需要额外设置密码部分,保证数据安全
参考帖子: (1条消息) Elasticsearch密码设置及其后续问题解决_这个名字还中的博客-CSDN博客_elasticsearch 密码
1.修改 elasticsearch.yml 文件,加入以下部分
#开启密码验证
xpack.security.enabled: true
xpack.license.self_generated.type: basic
xpack.security.transport.ssl.enabled: true
http.cors.allow-methods: OPTIONS, HEAD, GET, POST, PUT, DELETE
#不添加无法使用head连接es,连接时在http:ip:port/?auth_user=elastic&auth_password=密码
http.cors.allow-headers: Content-Type,Accept,Authorization, x-requested-with
2. 重启 elasticsearch 服务
systemctl restart elasticsearch.service
3. 进入 elasticsearch 源码路径,这里我的路径是
/usr/share/elasticsearch/bin
4. 开始设置密码
./elasticsearch-setup-passwords interactive
[root@VM_0_16_centos bin]# ./elasticsearch-setup-passwords interactive
Initiating the setup of passwords for reserved users elastic,apm_system,kibana,logstash_system,beats_system,remote_monitoring_user.
You will be prompted to enter passwords as the process progresses.
Please confirm that you would like to continue [y/N]y


Enter password for [elastic]:
Reenter password for [elastic]:
Enter password for [apm_system]:
Reenter password for [apm_system]:
Enter password for [kibana]:
Reenter password for [kibana]:
Enter password for [logstash_system]:
Reenter password for [logstash_system]:
Enter password for [beats_system]:
Reenter password for [beats_system]:
Enter password for [remote_monitoring_user]:
Reenter password for [remote_monitoring_user]:
Changed password for user [apm_system]
Changed password for user [kibana]
Changed password for user [logstash_system]
Changed password for user [beats_system]
Changed password for user [remote_monitoring_user]
Changed password for user [elastic]
5. 完成设置