Vue el-menu高亮设置及点击菜单项实现路由跳转
el-menu相关知识记录
- 一、el-menu菜单项高亮设置
- 二、点击菜单项实现路由跳转
2021/11/13 知识点记录
一、el-menu菜单项高亮设置
el-menu高亮是通过:default-active来设置的,一般我们都是绑定$ route.path或者$route.name这两个值,因为他们基本上都是唯一的,对于高亮的判断这是通过将:default-active绑定的值与菜单项的唯一标识index比较来显示是否高亮,如果相同则高亮。
$ route.path对应当前页面路由的路径。
$ route.name对应当前页面路由的名称。他们在router文件夹下的index.js文件中都能查到。
例如:
 path: '/',
    name: 'Home',
    component: Home,
    redirect: '/index',
    children: [
      {
        path: '/index',
        name: 'Index',
        component: () => import('../views/Index')
      },
      {
        path: '/sys/user',
        name: 'User',
        component: () => import('../views/User')
      },
      {
        path: '/sys/role',
        name: 'Role',
        component: () => import('../views/Role')
      },
      {
        path: '/sys/menu',
        name: 'Menu',
        component: () => import('../views/Menu')
      },
      {
        path: '/sys/person',
        name: 'Menu',
        component: () => import('../views/Person')
      },

    ]
  },
所以要实现高亮设置,则可以分两步;
1、设置:default-active=""绑定某个属性值

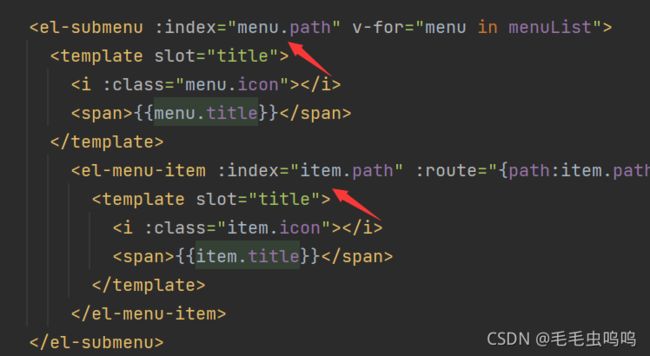
2、设置菜单项的index值,index值和:default-active绑定的值应是同一个属性值。

例如:
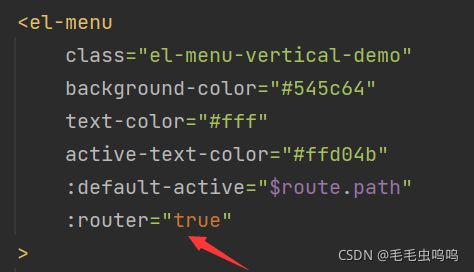
<el-menu
      class="el-menu-vertical-demo"
      background-color="#545c64"
      text-color="#fff"
      active-text-color="#ffd04b"
      :default-active="$route.path"
      :router="true"
  >
  el-submenu :index="menu.path" v-for="menu in menuList">
        <template slot="title">
          <i :class="menu.icon">i>
          <span>{{menu.title}}span>
        template>
          <el-menu-item :index="item.path" :route="{path:item.path}" v-for="item in menu.children">
            <template slot="title">
              <i :class="item.icon">i>
              <span>{{item.title}}span>
            template>
          el-menu-item>
      el-submenu>
上面代码中的menuList数据
menuList: [
        {
          name: 'SysManga',//对应index
          title: '系统管理',
          icon: 'el-icon-s-operation',
          path: '',//router-link跳转路由
          children:  [
            {
              name: 'SysUser',
              title: '用户管理',
              icon: 'el-icon-s-custom',
              path: '/sys/user',
              children: []
            },
            {
              name: 'SysRole',
              title: '角色管理',
              icon: 'el-icon-s-custom',
              path: '/sys/role',
              children: []
            },
            {
              name: 'SysMenu',
              title: '菜单管理',
              icon: 'el-icon-s-custom',
              path: '/sys/menu',
              children: []
            },

          ]
        },
        {
          name: 'SysTools',
          title: '系统工具',
          icon: 'el-icon-s-tools',
          path: '',
          children: [
            {
              name: 'SysDict',
              title: '数字字典',
              icon: 'el-icon-s-order',
              path: '/sys/dicts',
              children: []
            },
          ]
        },
      ]
二、点击菜单项实现路由跳转
分两步:
1、在el-menu中开启路由属性;即:router=“true”

2、给菜单项绑定对应的路由路径
此步骤可以不设置,如果不设置 :route,则在路由匹配时会与item的index属性匹配进行路由跳转。
官方解释:
el-menu router属性

el-item 属性route

个人分析:如果不再item中设置:route,则在路由跳转时根据item 的index绑定值跳转,如果设置了:route,则根据:route值跳转,即:route的优先级高一些。
下面是设置 :route
< el-menu-item :index=“item.path” :route="{path:item.path}" v-for=“item in menu.children”>
