首先提示一下:如果你无法在本地搭建一个web服务环境,请暂时不要测试本例。由于WebGL安全方面的限制,本例中用到一张帖图仅能通过相对路径在本域调用,file协议是无法看到下图效果的,仅能看到一片移动的方形。
效果图:(图1)
类似效果使用Canvas2d绘图也可以实现。下面这个地址就是一个2D实现的例子。(图2)
http://muse-js-lib.googlecode.com/files/DrawCircleLight.html
但是经过实际运行,发现2D绘图相当耗费资源。上面这个图仅仅绘制了15个圆形,大量的运算耗费在beginPath/closePath等等这些命令中。而图1在运行时,绘制100个对象,cpu占用仅在20%上下浮动。我的机器配置如下:
显卡:NVIDIA 7600GS
2D的绘图就不说了。WebGL绘图之所以能够效率高,我想原因也不必多说。由于需要在某个应用中绘制一个变幻背景,为了不影响主体动画的表现,对动态背景绘制的效率要求自然比较苛刻。在对2D绘图感觉失望后,继而在WebGL中实现了这个效果,感觉比较理想。
在绘制中,引用了两个js库。一个是J3DIMath.js,该库是苹果公司于2009年撰写的用于计算顶点阵列的工具类;另一个是iWebGL_beta_4.0.js,是本人正在制作WebGL绘制的库。看过本人前面文章的童鞋请注意以下:iWebGL库已经完全重写,与前面几篇文章中所引用的库完全不兼容,当前最新版本是beta4.0。
相关的类有两个。首先是Light3D类:
function Light3D(webgl, texture, baseMat, w, h){
this.tex = texture;
this.baseMat = baseMat;
this.webgl = webgl;
this.w = w;
this.h = h;
this.init();
}
Light3D.prototype = {
draw : function(element, texture){
this.matrix.translate(this.sign * .01, 0, 0);
element.matrix('u_mvpm', this.matrix);
element.bindTexture(texture);
element.uniformFloat('u_color', 1, 1, 1
, Math.sin(this.angle / 180 * Math.PI) * this.a* .3);
element.draw();
this.angle += this.step;
if(this.angle >=180){
this.angle = 0;
this.init();
}
},
init : function(){
this.step = 10 * Math.random();
this.matrix = new J3DIMatrix4(this.baseMat);
this.matrix.translate(this.randSign() * (Math.random() * this.w * .5)
, this.randSign() * (Math.random() * this.h * .5)
, 0);
var scale = Math.random() * this.randSign() + .1;
this.matrix.scale(1 + scale, 1 + scale, 1);
this.sign = this.randSign();
this.a = Math.random() * .7;
this.xPos = Math.random();
this.matrix.translate(this.xPos, 0, 0);
this.angle = 0;
},
randSign : function(){
return parseInt(Math.random() * 10) % 2 == 0 ? 1 : -1;
}
}
该类是绘制一个对象,并在一个周期内作横向和透明度的变化。init方法负责在一个限制区域(w,y)内随机生成一个位置和最终透明度值,通过运算angel属性的sin值来设置过程内的alpha变化值。同时angel属性也是生命周期的控制参数。运行时的实际生命周期长度由angle的增量step属性来控制。step也是随机的。angle属性在超过180时所有属性重置,并在新的位置开始新的绘制。
另一个类是Lights3D。这是一个创建一组Light3D对象的类,并在draw方法中对其进行循环绘制。只是为了方便,很简单:
function Lights3D(count, webgl, texture, baseMat, w, h){
count = Math.max(1, count || 1);
this.lights = [];
for(var i = 0; i < count; i++){
this.lights.push(new Light3D(webgl, texture, baseMat, w, h));
}
}
Lights3D.prototype = {
draw : function(element, texture){
for(var i = 0; i < this.lights.length; i++){
this.lights[i].draw(element, texture);
}
}
}
最后封装了一个闭包,将所有相关对象——包括shader代码——都封到一起,确保调用方便和移植方便。
/*
* showLights
* @canvas canvas元素id或者canvas对象本身
* @count 光斑个数
* @textureUrl 贴图地址
* @r, @b, @b, @a 色度RGBA
*/
function showLights(canvas, count, textureUrl, r, g, b, a){
var webgl = new iWebGL(canvas);
var vsCode = 'uniform mat4 u_mvpm;attribute vec4 a_texc;attribute vec4 a_pos;varying vec2 v_texc;'
+ 'void main(){ gl_Position=u_mvpm*a_pos;v_texc=a_texc.st; }';
var fsCode = 'precision mediump float;uniform sampler2D samp2d;uniform vec4 u_color;varying vec2 v_texc;'
+ 'void main(){'
+ ' vec4 textureColor = texture2D(samp2d, vec2(v_texc.s,v_texc.t));'
+ ' gl_FragColor = textureColor * vec4(u_color);'
+ '}';
var vs = $gl.createShader(webgl.gl, vsCode, 'VERTEX_SHADER');
var fs = $gl.createShader(webgl.gl, fsCode, 'FRAGMENT_SHADER');
vs.params = [];
$gl.getParams(vsCode, vs.params);
webgl.initShaders(vs, fs);
r = r || 0;
g = g || 0;
b = b || 0;
a = a || 1;
count = Math.max(1, count || 5);
webgl.clear([r, g, b, a], 10000);
webgl.perspective(40, 1, 10000, 2);
webgl.lookat(0, 0, 5, 0, 0, 0, 0, 1, 0);
var baseMat = new J3DIMatrix4();
baseMat.scale(.5, .5, 1);
var texture = webgl.texture(textureUrl);
var ls = new Lights3D(count, webgl, texture, baseMat, 20, 10);
var sphere = $gl.createPlane(webgl);
sphere.vertex('a_pos');
sphere.texcoord('a_texc');
setInterval(function(){
webgl.fresh();
ls.draw(sphere, texture);
}, 50)
}
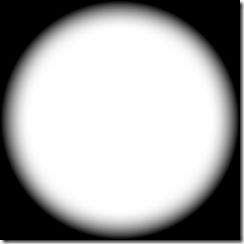
附帖图:
额……上图的一刹那我突然想到,在图2的例子中,是不是在2D中使用drawImage之类的方法,能提高2d实现的效率呢?
调用:
showLights('glcanvas', 100, 'resources/light2.png', .5, .5, 1, 1);
下面是所有相关文件。请在下载后更改iWebGL-build-17.html 中两个js类库引用路径和帖图路径。
J3DIMath.js 35.6 KB
iWebGL_beta_4.0.js 23.1 KB
iWebGL-build-17.html 3.5 KB
lightMask.png 8.7 KB
DrawCircleLight.html 3.0 KB


