树莓派安装ESP32 ESP-IDF开发环境
陈拓 2022/01/02-2022/01/05
1. 树莓派安装操作系统
因为ESP32 ESP-IDF现在还不能完全支持linux-arm64,在Ubuntu 64位系统上安装会出现下面的错误:
tool esp32ulp-elf does not have versions compatible with platform linux-arm64
下面我们将ESP32 ESP-IDF安装到32位的官方系统上。
树莓派3以上的板子都可以,树莓派3以下的板子没试过。
相比win10+WSL+Ubuntu,在树莓派上运行ESP-IDF速度快。
- 下载
raspberrypi官方系统下载网址:
https://www.raspberrypi.com/software/operating-systems/
我下载的版本:

2021-10-30-raspios-bullseye-armhf-lite.zip
其中armhf表示32位系统。
- 安装
参考《电脑连接树莓派3B+》
https://blog.csdn.net/chentuo2000/article/details/103332186
- 登录
Win10 Win+R打开终端,输入
password:raspberry

2. ESP-IDF官方文档
https://docs.espressif.com/projects/esp-idf/zh_CN/release-v4.3/esp32/index.html

选择v4.3,其他版本在树莓派上安装不了。
3. 安装软件工具
- 更新源
sudo apt update
- 安装
sudo apt-get install git wget flex bison gperf python3 python3-pip python3-setuptools cmake ninja-build ccache libffi-dev libssl-dev dfu-util libusb-1.0-0
4. 安装ESP32 ESP-IDF开发环境
国内镜像:https://gitee.com/EspressifSystems

官网: https://www.espressif.com
源码: https://github.com/espressif
安装过程请参考《用乐鑫国内Gitee镜像搭建ESP32开发环境》
https://blog.csdn.net/chentuo2000/article/details/113424934?spm=1001.2014.3001.5501
- 克隆esp-idf
mkdir esp
cd esp
安装这个版本:

说明:
v5.0-dev安装不成功。
安装v4.3.2时一切正常,但是编译项目时出错,问题如下:
配置项目idf.py menuconfig
error loading plugin: /home/pi/.espressif/tools/xtensa-esp32-elf/esp-2021r2-8.4.0/xtensa-esp32-elf/bin/../libexec/gcc/xtensa-esp32-elf/8.4.0/liblto_plugin.so: cannot open shared object file: No such file or directory
找不到liblto_plugin.so,我们来找找:
find ~/ -name liblto_plugin.so
![]()
/home/pi/.espressif/tools/xtensa-esp32-elf/esp-2021r2-8.4.0/xtensa-esp32-elf/libexec/gcc/xtensa-esp32-elf/8.4.0/liblto_plugin.so
可以找到。
解决问题的帖子:
https://github.com/espressif/esp-idf/issues/7857
v4.4 on Raspberry Pi 4 ... "gcc is not able to compile a simple test program." (IDFGH-6180) #7857
The same error happens if I use master or 4.4-dev branches, or if I use git to switch branches from 4.3.1 (as per the official docs) ...IE. 4.3.1 is the only version I can get to work - and I need v4.4 for the native USB support!
按照这个帖子所说,下面我们安装v4.3.1。
git clone -b v4.3.1 https://gitee.com/EspressifSystems/esp-idf.git
注意:仅克隆 esp-idf,不包含子模块。即git 命令不带 --recursive 参数。

- 切换分支
cd ~/esp/esp-idf
git switch -c v4.3.1
![]()
5. 安装扩展工具esp-gitee-tools
- 安装扩展工具
git clone https://gitee.com/EspressifSystems/esp-gitee-tools.git

6. 安装esp-idf开发工具和子模块
我们下面用esp-gitee-tools来安装esp-idf开发工具和子模块。
https://gitee.com/EspressifSystems/esp-gitee-tools/blob/master/docs/README-install.md
6.1 将pip源换到国内

查看我的pip版本:
![]()
pip 20.0.2 > 10.0.0,满足条件。
pip config set global.index-url http://mirrors.aliyun.com/pypi/simple
![]()
pip config set global.trusted-host mirrors.aliyun.com
![]()
6.2 安装工具子模块
除了ESP-IDF本身,还需要安装ESP-IDF使用的各种工具,比如编译器、调试器、Python包等。
注意:不要使用ESP-IDF自带的install.sh,使用esp-gitee-tools内的 install.sh。
- 设置环境变量
进入 esp-gitee-tools 目录,export install.sh 所在路径,方便后期使用:
cd ~/esp/esp-gitee-tools
export EGT_PATH=$(pwd)
![]()
测试环境变量:echo $EGT_PATH
![]()
- 安装子模块
进入 esp-idf 目录:
cd ~/esp/esp-idf
$EGT_PATH/install.sh

安装完成。
6.3 安装更新子模块 submodules
$EGT_PATH/submodule-update.sh

安装完成。
6.4 设置环境变量
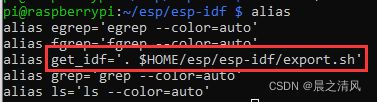
编辑文件.bashrc
nano ~/.bashrc
- 将alias get_idf='. $HOME/esp/esp-idf/export.sh'添加到最后一行。
注意,命令开始的 “.” 与路径之间应有一个空格!
- 将ESP-IDF 中的tools/目录加入PATH环境变量中
export PATH=$HOME/esp/esp-idf/tools:$PATH

- 刷新环境变量
source ~/.bashrc
- 查看别名alias
- 查看环境变量echo $PATH


6.5 关于ESP-IDF的版本
- 查看当前ESP-IDF版本
![]()
说明:
https://docs.espressif.com/projects/esp-idf/zh_CN/latest/esp32/versions.html

7. 开始创建项目工程
https://docs.espressif.com/projects/esp-idf/zh_CN/stable/esp32/get-started/

- 重新登录
- 复制项目
cd ~/esp
cp -r esp-idf/examples/get-started/hello_world/ .

将项目复制到ESP-IDF目录之外。
- 刷新esp-idf环境
cd ~/esp/hello_world
get_idf

注意:每次打开终端进入sdk都要执行一次此命令
- 设定目标芯片
idf.py set-target esp32
注意:在项目创建第一次使用,以后就不用运行这个命令了。
- 清除以前的构建
idf.py fullclean
说明:
第一次构建项目不需要,以后构建项目时如果出现下面的提示就需要使用此命令。
![]()
- 配置项目
idf.py menuconfig
进入配置工具界面:

保持默认,退出。
- 编译
idf.py build

8. 连接开发板
用USB线连接树莓派的任一USB口和ESP32开发板。
- 查看USB转串口线的连接是否成功
lsusb

识别了USB转串口芯片CH340。
- 获取端口号
ls -l /dev/ttyUSB*
![]()
9. 烧写
idf.py -p /dev/ttyUSB0 -b 115200 flash
按照编译完成后的提示,更快的烧写速度:
idf.py -p /dev/ttyUSB0 -b 460800 flash
10. 测试
- 打开监视器
idf.py -p /dev/ttyUSB0 monitor

- 退出监视器
Ctrl+]
参考文档
- toolchain for Raspberry PI 4 (8GB) ?
https://esp32.com/viewtopic.php?t=18165 - List of IDF Tools
https://docs.espressif.com/projects/esp-idf/en/latest/esp32/api-guides/tools/idf-tools.html#xtensa-esp32-elf