【C++11】多线程
-
-
- 多线程
-
- 创建线程
- thread提供的成员函数
- 获取线程id的方式
- 线程函数参数的问题
- 线程join场景和detach
- 互斥量库(mutex)
-
- mutex
- recursive_mutex
- lock_guard 和 unique_lock
- 原子性操作库(atomic)
- 条件变量库(condition_varuable)
- 综合案例(实现两个线程交替打印1-100)
-
多线程
在C++11之前,涉及到多线程问题,都是和平台相关的,比如Windows和Linux下各有自己的接口,这使得代码的可移植性比较差。C++11中最重要的特性就是对线程进行了支持,使得C++在并行编程时不需要依赖第三方库,而且在原子操作中还引入了原子类的概念
创建线程
- 调用无参的构造函数创建
thread提供了无参的构造函数,调用无参的构造函数创建出来的线程对象没有关联任何的线程函数对象,也没有启动任何线程。
thread t1;
#include 我们的thread是提供了移动赋值函数的,所以,当后序需要让该线程关联线程函数的时候,我们可以定义一个匿名的线程,然后调用移动赋值传给他

thread类是防拷贝的,不允许拷贝构造和拷贝赋值,但是可以移动构造和移动赋值,可以将一个线程对象关联线程的状态转移给其他线程对象,并且转移期间不影响线程的执行。
- 调用带参的构造函数
thread的带参构造函数的定义如下:
template <class Fn, class... Args>
explicit thread (Fn&& fn, Args&&... args);
参数说明:
- fn:可调用对象,比如:仿函数,指针,lambda表达式,被包装器包装后的可调用对象等。
- args:进行对fn进行传值。
调用带参的构造函数创建线程对象,能够将线程对象与线程函数fn进行关联。比如:
void Func(int n, int num)
{
	for (int i = 0; i < n; i++)
	{
		cout <<num<<":" << i << endl;
	}
	cout << endl;
}

int main()
{
	thread t2(Func, 10,666);

	t2.join();
	return 0;
}
结合之前的lambda函数,这么我们可以很明显的看到lambda的作用
int main()
{
	//thread t2(Func, 10,666);

	thread t2([](int n = 10, int num = 666)
		{
			for (int i = 0; i < n; i++)
			{
				cout << num << ":" << i << endl;
			}
			cout << endl;
		});

	t2.join();
	return 0;
}
其输出结果和上图是一样的,注意,这么线程的形参只有一个仿函数lambda
使用一个容器来保存线程
#include thread提供的成员函数
在我们多线程中,常用的成员函数如下:
join:对该线程进行等待,在等待的线程返回之前,调用join将会将线程进行阻塞,我们主要阻塞的是主线程。joinable:判断该线程是否已经执行完毕,如果是则返回true,否则返回false。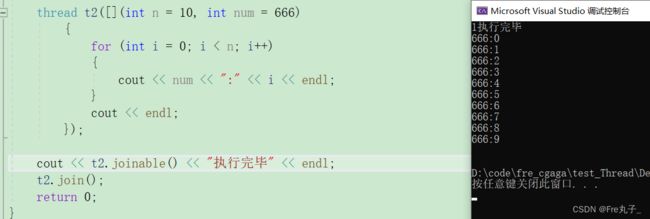
detach:将该线程进行分离主线程,被分离后,不在需要创建线程的主线程调用join进行对其等待get_id:获取该线程的id
此外,joinable函数还可以用于判定线程是否是有效的,如果是以下任意情况,则线程无效:
- 采用无参构造函数构造的线程对象。(该线程对象没有关联任何线程)
- 线程对象的状态已经转移给其他线程对象。(已经将线程交给其他线程对象管理)
- 线程已经调用join或detach结束。(线程已经结束)
获取线程id的方式
其实调用线程id的方法有两种,实际情况我们看下边的代码:
#include - 两者调用ID的环境是不同的
- 从代码中我们可以看到
get_id是需要线程对象来调用的 - 但是
this_thread::get_id我们通过多线程提供的特殊窗口可以不通过线程对象就可以直接调用
this_thread命名空间中还提供了以下三个函数:
- yield:当前线程“放弃”执行,让操作系统调度另一线程继续执行
- sleep_until :让当前线程休眠到一个具体时间点
- sleep_for:让当前线程休眠一个时间段
线程函数参数的问题
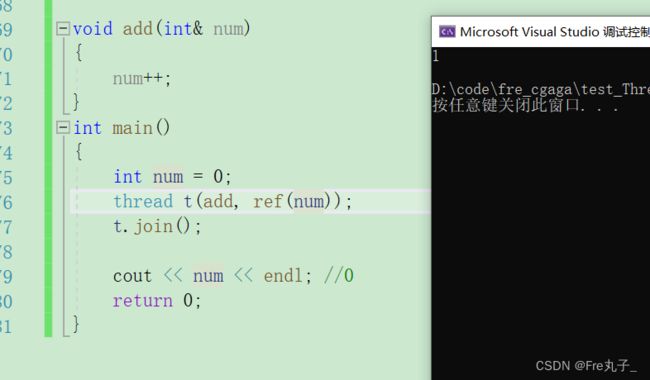
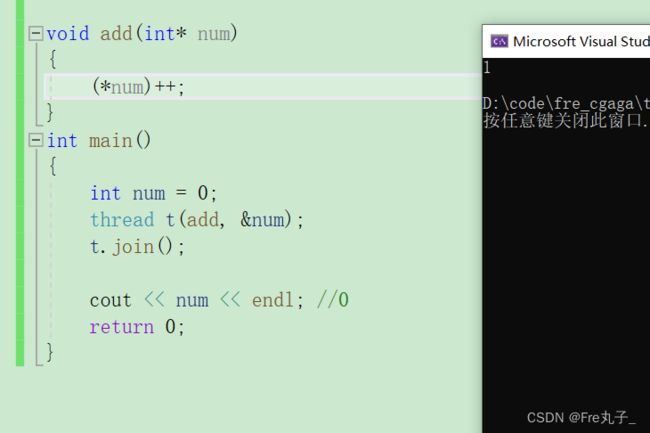
线程函数的参数是以值拷贝的方式拷贝到线程栈空间中的,就算线程函数的参数为引用类型,在线程函数中修改后也不会影响到外部实参,因为其实际引用的是线程栈中的拷贝,而不是外部实参。比如:
void add(int& num)
{
	num++;
}
int main()
{
	int num = 0;
	thread t(add, num);
	t.join();

	cout << num << endl; //0
	return 0;
}
解决其办法有三种:
线程join场景和detach
当启动线程后,如果不使用join进行阻塞等待的话程序就会直接报错,因为此时存在内存泄漏问题。
thread库给我们提供了一共两种回收线程的方法
join方式
使用join进行线程回收时,一个线程只能回收一个,如果进行多次回收就会直接报错
但是如果你对一个线程回收后,又对此线程再一次的进行了移动赋值,那么此时还可以再一次的对线程进行二次join,如下代码案例:
void func(int n = 20)
{
	cout << n << endl;
}

int main()
{
	thread t(func, 20);
	t.join();

	t = thread([](int num = 10) {cout << num << endl; });
	t.join();
}
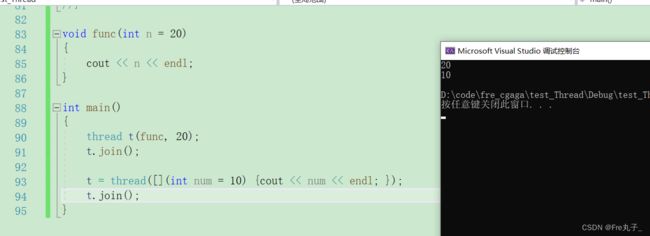
需要注意的是,如果线程运行起来后,线程的内部发生了异常,那么我们锁设置的阻塞就起不到任何作用了,
detach方式
主线程创建新线程后,也可以调用detach进行将线程和主线程分离,分离后,新线程会到后台运行,其所有权和控制权将会交给C++运行库,此时,c++运行库会保证当线程退出时,其相关资源能够被正确回收
#include 互斥量库(mutex)
在我们的c++11中,我们一共提供了四种互斥锁形式
mutex
1. std::mutex
mutex锁是C++11提供的最基本的互斥量,mutex对象之间不可以进行拷贝,也不能进行移动。
mutex中常用的成员函数如下:
- lock:对互斥量进行加锁
- unlock:对互斥量进行解锁,释放互斥量所有权
- try_lock:尝试对互斥量进行加锁。
线程函数调用lock时,可能会发生三种情况:
- 如果互斥量当前没有被其他线程锁住,则调用线程将该互斥量进行加锁,知道调用
unlock后,才对其进行解锁。 - 如果进行加锁时,发现已经被其他线程已经加过锁了,此时会进入阻塞状态。
- 如果该互斥量被当前调用线程锁住,则会产生死锁
线程函数调用try_lock时,可能会发生三种情况:
- 如果互斥量当前没有被其他线程锁住,则调用线程将该互斥量进行加锁,知道调用
unlock后,才对其进行解锁。 - 如果进行加锁时,发现已经被其他线程已经加过锁了,此时会返回false,并不会对其进行阻塞。
- 如果该互斥量被当前调用线程锁住,则会产生死锁
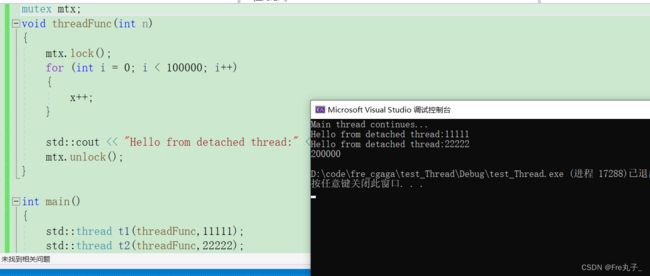
在没有对临界资源加锁的时候,由于是多个进程同时进行,这时,不能同步的,正确的完成我们的任务,此时我们就需要给临界资源进行加锁
正确做法
#include recursive_mutex
2. std::recursive_mutex
recursive_mutex叫做递归互斥锁,该锁专门用于递归函数中的加锁操作。
- 有一些线程避免不了它是递归函数,但是如果对递归里的临界资源进行加锁时,可能会持续申请自己还还未释放的锁,进而导致死锁问题。
- 而recursive_mutex允许同一个线程对互斥量进行多次上锁(即递归上锁),来获得互斥量对象的多层所有权,但是释放互斥量时需要调用与该锁层次深度相同次数的unlock。
int x = 0;
recursive_mutex mtx;

void Func(int n)
{
	if (n == 0)
		return;

	//递归锁的原理就是当调用自己本身时,发现给自己上锁的还是自己,这时会自动解锁,通过此种方法来进行重复加锁解锁
	mtx.lock();
	++x;

	Func(n - 1);

	mtx.unlock();
}

int main()
{
	thread t1(Func, 1000);
	thread t2(Func, 2000);

	t1.join();
	t2.join();

	cout << x << endl;

	return 0;
}
lock_guard 和 unique_lock
为什么要使用lock_guard 和 unique_lock呢?
在我们平时使用锁中,如果锁的范围比较大,那么极度有可能在中途时忘记解锁,此后申请这个锁的线程就会被阻塞住,也就造成了死锁的问题,例如:
mutex mtx;
void func()
{
	mtx.lock();
	//...
	FILE* fout = fopen("data.txt", "r");
	if (fout == nullptr)
	{
		//...
		return; //中途返回(未解锁)
	}
	//...
	mtx.unlock();
}
int main()
{
	func();
	return 0;
}
因此使用互斥锁时如果控制不好就会造成死锁,最常见的就是此处在锁中间代码返回,此外还有一个比较常见的情况就是在锁的范围内抛异常,也很容易导致死锁问题。
因此C++11采用RAII的方式对锁进行了封装,于是就出现了lock_guard和unique_lock。
为此c++11推出了解决方案,采用RAII的方式对锁进行了封装,于是就出现了lock_guard和unique_lock。
lock_guard
lock_guard是C++11中的一个模板类,其定义如下:
template <class Mutex>
class lock_guard;
通过这种构造对象时加锁,析构对象时自动解锁的方式就有效的避免了死锁问题。比如:
mutex mtx;
void func()
{
	lock_guard<mutex> lg(mtx); //调用构造函数加锁
	//...
	FILE* fout = fopen("data.txt", "r");
	if (fout == nullptr)
	{
		//...
		return; //调用析构函数解锁
	}
	//...
} //调用析构函数解锁
int main()
{
	func();
	return 0;
}
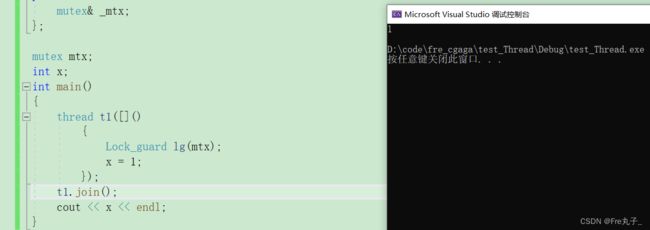
模拟实现lock_guard
模拟实现lock_guard类的步骤如下:
- lock_guard类中包含一个锁成员变量(引用类型),这个锁就是每个lock_guard对象管理的互斥锁。
- 调用lock_guard的构造函数时需要传入一个被管理互斥锁,用该互斥锁来初始化锁成员变量后,调用互斥锁的lock函数进行加锁。
- lock_guard的析构函数中调用互斥锁的unlock进行解锁。
- 需要删除lock_guard类的拷贝构造和拷贝赋值,因为lock_guard类中的锁成员变量本身也是不支持拷贝的
class Lock_guard
{
public:
	Lock_guard(mutex& mtx)
		:_mtx(mtx)
	{
		_mtx.lock(); //加锁
	}
	~Lock_guard()
	{
		_mtx.unlock();//解锁
	}
	Lock_guard(const Lock_guard&) = delete;
	Lock_guard& operator=(const Lock_guard&) = delete;
private:
	mutex& _mtx;
};

mutex mtx;
int x;
int main()
{
	thread t1([]()
		{
			Lock_guard lg(mtx);
			x = 1;
		});
	t1.join();
	cout << x << endl;
}
unique_lock
比起lock_guard来说,unique_lock的逻辑和lock_guard的逻辑是一样的,都是调用类时加锁,出作用域时解锁,但是unique_lock比起lock_guard多加了几个条件,分别是:
- 加锁/解锁操作:lock、try_lock、try_lock_for、try_lock_until和unlock。
- 修改操作:移动赋值、swap、release(返回它所管理的互斥量对象的指针,并释放所有权)。
- 获取属性:owns_lock(返回当前对象是否上了锁)、operator bool(与owns_lock的功能相同)、mutex(返回当前unique_lock所管理的互斥量的指针)。
具体实现逻辑,我们看下边的交替打印100的案例。
原子性操作库(atomic)
在上面的加锁案例中,多个线程同时对全局变量x进行++操作,并且,我们还对此操作进行了加锁,主要原因时++操作不是原子的,原子究竟是个什么呢?
原子大概的来说只有两个状态,一种是在运行,一种是不在运行,当处于在运行状态时,当其他进程进来时,发现为在运行状态就会进行等待, 知道状态模式换了才会进入下一个线程。
int main()
{
	int n = 100000;
	atomic<int> x = 0;
	//atomic x = {0};
	//atomic x{0};
	//int x = 0;

	mutex mtx;
	size_t begin = clock();

	thread t1([&, n](){
			for (int i = 0; i < n; i++)
			{
				++x;
			}
		});

	thread t2([&, n]() {
			for (int i = 0; i < n; i++)
			{
				++x;
			}
		});

	t1.join();
	t2.join();

	cout << x << endl;
	return 0;
}
条件变量库(condition_varuable)
condition_variable中提供的成员函数,可分为wait系列和notify系列两类。
wait系列成员函数(wait自带解锁功能和阻塞功能)
wait系列成员函数的作用就是让调用线程进行排队阻塞等待,包括wait、wait_for和wait_until。
下面先以wait为例子,wait函数提供了两个不同版本的接口:
//版本一
void wait(unique_lock<mutex>& lck);
//版本二
template<class Predicate>
void wait(unique_lock<mutex>& lck, Predicate pred);
函数说明:
- 调用第一个版本的时候,需要传入的参数只有一个互斥锁,线程调用wait后,就会进入阻塞状态,直到被唤醒
- 调用第二个版本的时候,不仅要传入一个互斥锁,还需要传入一个返回值类型为bool的可调用对象,与第一个版本的wait不同的是,当线程被唤醒后还需要调用传入的可调用对象,如果可调用对象的返回值为false,那么该线程还需要继续被阻塞。
实际wait具有两个功能
- 一个是让线程在条件不满足时进行阻塞等待,另一个是让线程将对应的互斥锁进行解锁。
- 当线程被阻塞时这个互斥锁会被自动解锁,而当这个线程被唤醒时,又会自动获得这个互斥锁。
notify系列成员函数
notify系列成员函数的作用就是唤醒等待的线程,包括notify_one和notify_all。
- notify_one:唤醒等待队列中的首个线程,如果等待队列为空则什么也不做。
- notify_all:唤醒等待队列中的所有线程,如果等待队列为空则什么也不做。
综合案例(实现两个线程交替打印1-100)
尝试用两个线程交替打印1-100的数字,要求一个线程打印奇数,另一个线程打印偶数,并且打印数字从小到大依次递增。
该题目主要考察的就是线程的同步和互斥。
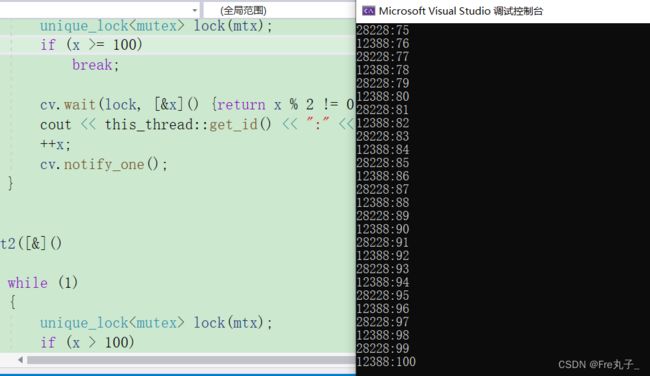
#include


