【Linux】Redhat 9.0本地虚拟机安装测试
Redhat 9.0发布说明
2022 年 5 月 18 日,IBM 收购的红帽公司宣布推出红帽企业 Linux 9 (RHEL 9),这是世界领先的企业 Linux 平台的最新版本。RHEL 9 为支持混合云创新提供了更灵活、更稳定的基础,并为跨物理、虚拟、私有和公共云和边缘部署部署应用程序和关键工作负载提供了更快、更一致的体验。
新增内容
RHEL 9 包括功能和增强功能,可通过使用通用、灵活的基础来支持创新并加快上市时间,从而帮助实现 IT 的长期成功。
主要特点和优势
1)面向当今和未来的开发人员的新平台
完成向 Python 3 的迁移,版本 3.9 将成为 RHEL 9 生命周期的默认 Python。Python 3.9 带来了一些新的增强功能,包括时区感知时间戳、最近的字符串前缀、后缀方法和字典联合操作,以帮助开发人员现代化现有的应用。
RHEL 9 还使用 GCC 11 和最新版本的 LLVM、Rust 和 Go 编译器构建。RHEL 9 基于 glibc 2.34,具有 10 多年的企业级平台稳定性 (sysin)。
最后,在 RHEL 中,链接时间优化 (LTO) 将首次在用户空间中默认启用,以对应用程序代码进行更深入的优化,以帮助构建更小、更高效的可执行文件。
2)对未来 RHEL 版本的简单贡献路径
组织现在可以开发、测试和贡献一个持续交付的发行版,该发行版在 RHEL 之前就可以跟踪。CentOS Stream 是一个上游开源开发平台,为下一个次要版本提供了无缝的贡献路径。RHEL 9 是第一个从 CentOS Stream 构建的 RHEL 主要版本,而 RHEL 9 Beta 最初是作为 CentOS Stream 9 提供的。所有未来的 RHEL 9 版本都将从 CentOS Stream 构建。
3)下一代应用程序流
在 RHEL 8 中引入应用程序流和模块打包的基础上,RHEL 9 中的所有打包方法都被合并到应用程序流中,包括模块、SCL、Flatpacks 和传统的 RPM,使其更易于使用。
4)继续致力于多种架构支持
开源软件通过防止工作负载被锁定到特定供应商,使用户能够更好地控制他们的数字化未来。RHEL 通过为需要不断发展的业务环境的用户启用不同的 CPU 架构,将这种控制扩展到源代码之外。无论您是在 x86_64、aarch64、IBM POWER9、Power10 还是 IBM Z 上运行工作负载,我们都能满足您的需求。
5)容器改进
如果您正在使用通用基础映像 (UBI) 容器映像构建应用程序,则需要查看 RHEL 9 UBI 映像。可以使用标准 UBI 映像,以及 micro、minimal 和 init 映像。要获得完整的体验,请在完全订阅的 RHEL 9 容器主机上测试 UBI 映像,从而允许您从 RHEL 9 存储库中提取额外的 RPM。
6)边缘的 RHEL
RHEL 9 引入了自动容器更新和回滚,从而扩展了自动更新容器映像的能力。Podman 现在可以检测更新的容器是否无法启动并自动回滚配置。与现有的操作系统级回滚一起,这为应用程序提供了新级别的可靠性。
7)镜像生成器即服务
RHEL 9 中的 Image Builder 增强功能可帮助组织节省时间并大规模提高系统一致性 (sysin)。借助新的 Image Builder as-a-Service,组织现在可以通过我们的托管服务构建标准化和优化的操作系统映像,并将其部署到选择的云提供商。
8)身份和安全
RHEL 9 添加的新功能有助于简化组织在部署新系统或管理现有基础架构时管理安全性和合规性的方式。RHEL 9 现在提供完整性测量架构 (IMA) 来动态验证操作系统的完整性,以检测它是否已被破坏。RHEL 9 也得到了增强,包括数字签名和哈希,可帮助组织检测整个基础架构中的恶意修改。
9)自动化和管理
组织现在可以访问 RHEL 9 Web 控制台中增强的性能指标页面,以帮助识别 CPU、内存、磁盘和网络资源使用高峰的潜在原因。此外,客户可以更轻松地将指标导出到 Grafana 服务器。还可以通过 Web 控制台进行内核实时补丁管理,以显着降低执行关键维护的复杂性。控制台还添加了一个简化的界面,用于在不使用命令行工具的情况下应用内核更新。
10)预测分析
Red Hat Insights 现在包含资源优化,它可以在公共云中正确调整 RHEL。资源优化通过评估性能指标来确定工作负载利用率来做到这一点。然后,Insights 提供可见性和建议,以针对工作负载需求优化到更合适的实例。Insights 还添加了恶意软件检测,这是一种安全评估,可分析整个企业的 RHEL 系统中已知的恶意软件签名,并提供风险的详细可见性。
Redhat 官方已经提供了 Redhat Enterprise Linux 9.0 系统镜像的下载,镜像名称为:
rhel-baseos-9.0-x86_64-dvd.iso
这个版本的镜像名称与以往的镜像名称都不一样,主要区别就是加了一个baseos,这可能会意味着这个镜像包里面的文件,与以往的镜像包比,可能会少(下面的安装也印证了我的想法)。
为了了解RHEL9.0的功能和特性,在本地虚拟机进行安装、测试。
安装过程的简要截图记录如下:

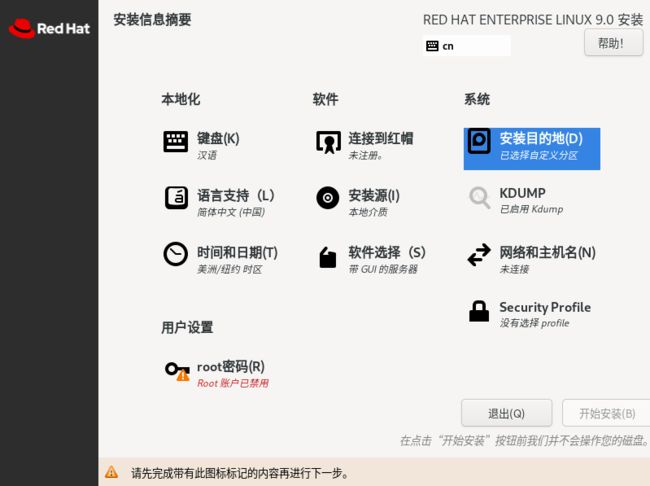
修改安装目的地、时间和日期、KDUMP、网络和主机、root密码,其中在root密码设置界面,默认禁用了使用root密码进行远程SSH登录。

设置好,如下图所示:

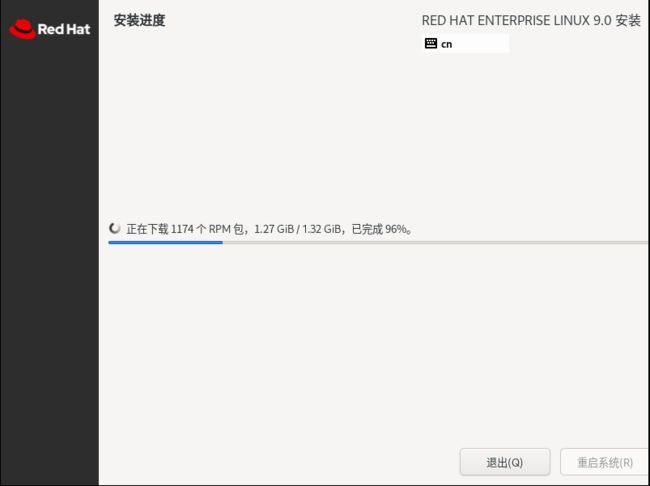
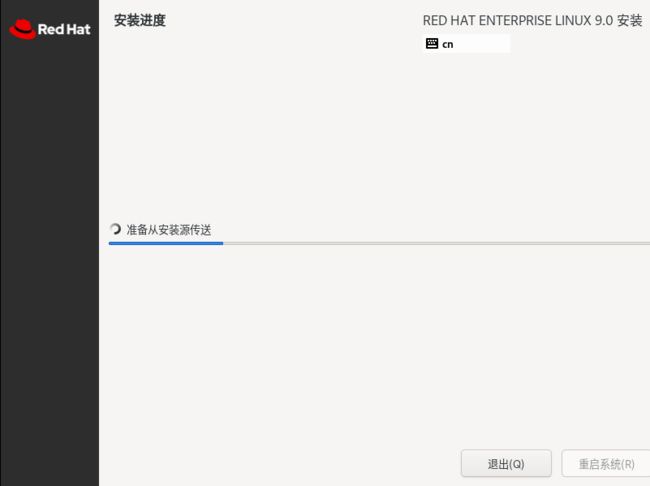
安装过程中,看起来出现了联网(需要提前配置网络以及订阅)下载rpm包的操作,1.32GB,这些包具体是什么,如果不安装,对系统的使用和运行有什么影响,目前还不得而知。如下图所示:
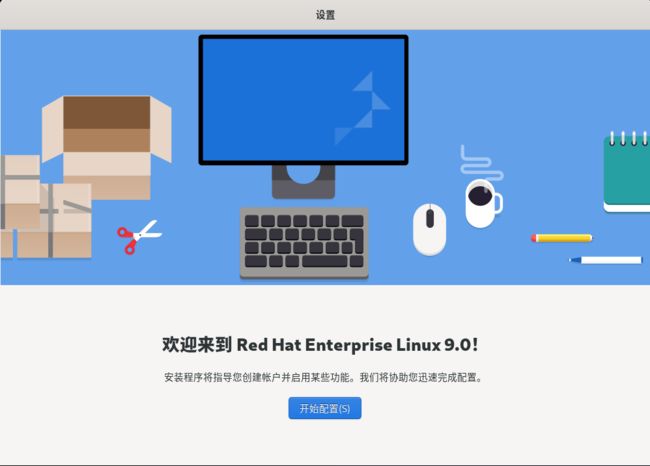
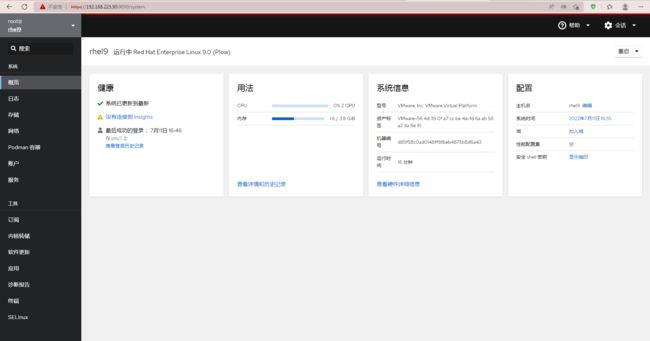
配置
看起来,提供了两个桌面,任务栏在正下方悬浮。
 系统内核版本为5.14,python版本为3.9.10,openssl版本为3.0.1

如果安装过程没有勾选允许通过ssh连接到root,那么后面通过第三方软件(如xshell / securecrt)SSH远程登录到服务器,就必须要先登录到普通用户,再su到root超级用户。直接登录root用户会报错。

开启管理后台服务,开启后可以使用root用户登录到管理后台
systemctl enable --now cockpit.socketRedhat自带的控制台默认端口为9090,访问协议为https(如果使用http访问,会自动切换到https)。
自带的podman(容器管理)信息,oci运行时用的是crun。
# podman info
host:
  arch: amd64
  buildahVersion: 1.24.1
  cgroupControllers:
  - cpuset
  - cpu
  - io
  - memory
  - hugetlb
  - pids
  - rdma
  - misc
  cgroupManager: systemd
  cgroupVersion: v2
  conmon:
    package: conmon-2.1.0-1.el9.x86_64
    path: /usr/bin/conmon
    version: 'conmon version 2.1.0, commit: 3a898eb433ae426e729088ccdc2bdae44a3164da'
  cpus: 2
  distribution:
    distribution: '"rhel"'
    version: "9.0"
  eventLogger: journald
  hostname: rhel9
  idMappings:
    gidmap: null
    uidmap: null
  kernel: 5.14.0-70.17.1.el9_0.x86_64
  linkmode: dynamic
  logDriver: journald
  memFree: 1809670144
  memTotal: 4077756416
  networkBackend: netavark
  ociRuntime:
    name: crun
    package: crun-1.4.4-2.el9_0.x86_64
    path: /usr/bin/crun
    version: |-
      crun version 1.4.4
      commit: 6521fcc5806f20f6187eb933f9f45130c86da230
      spec: 1.0.0
      +SYSTEMD +SELINUX +APPARMOR +CAP +SECCOMP +EBPF +CRIU +YAJL
  os: linux
  remoteSocket:
    exists: true
    path: /run/podman/podman.sock
  security:
    apparmorEnabled: false
    capabilities: CAP_NET_RAW,CAP_CHOWN,CAP_DAC_OVERRIDE,CAP_FOWNER,CAP_FSETID,CAP_KILL,CAP_NET_BIND_SERVICE,CAP_SETFCAP,CAP_SETGID,CAP_SETPCAP,CAP_SETUID,CAP_SYS_CHROOT
    rootless: false
    seccompEnabled: true
    seccompProfilePath: /usr/share/containers/seccomp.json
    selinuxEnabled: true
  serviceIsRemote: false
  slirp4netns:
    executable: /usr/bin/slirp4netns
    package: slirp4netns-1.1.12-4.el9.x86_64
    version: |-
      slirp4netns version 1.1.12
      commit: 7a104a101aa3278a2152351a082a6df71f57c9a3
      libslirp: 4.4.0
      SLIRP_CONFIG_VERSION_MAX: 3
      libseccomp: 2.5.2
  swapFree: 4215271424
  swapTotal: 4215271424
  uptime: 17m 42.14s
plugins:
  log:
  - k8s-file
  - none
  - passthrough
  - journald
  network:
  - bridge
  - macvlan
  volume:
  - local
registries:
  search:
  - registry.fedoraproject.org
  - registry.access.redhat.com
  - registry.centos.org
  - quay.io
  - docker.io
store:
  configFile: /etc/containers/storage.conf
  containerStore:
    number: 0
    paused: 0
    running: 0
    stopped: 0
  graphDriverName: overlay
  graphOptions:
    overlay.mountopt: nodev,metacopy=on
  graphRoot: /var/lib/containers/storage
  graphStatus:
    Backing Filesystem: xfs
    Native Overlay Diff: "false"
    Supports d_type: "true"
    Using metacopy: "true"
  imageCopyTmpDir: /var/tmp
  imageStore:
    number: 0
  runRoot: /run/containers/storage
  volumePath: /var/lib/containers/storage/volumes
version:
  APIVersion: 4.0.2
  Built: 1652984291
  BuiltTime: Fri May 20 02:18:11 2022
  GitCommit: ""
  GoVersion: go1.17.7
  OsArch: linux/amd64
  Version: 4.0.2
- Podman命令的使用
可能是先入为主的缘故,也可能是docker更加方面读写,大家更习惯于使用docker,但是作为集成在Redhat 9里面的Podman,卸载也是一件很麻烦的事情(组件之间互相依赖,导致卸载很难)。所以,可以通过下面的方法去变通使用Podman,其实podman的功能与docker比,还是很完善的。
下面是Podman的参数说明,我们在docker命令中常用的参数,如attach / exec / cp / commit / pull / save / search等,一应俱全。
# podman
Manage pods, containers and images

Usage:
  podman [options] [command]

Available Commands:
  attach      Attach to a running container
  auto-update Auto update containers according to their auto-update policy
  build       Build an image using instructions from Containerfiles
  commit      Create new image based on the changed container
  container   Manage containers
  cp          Copy files/folders between a container and the local filesystem
  create      Create but do not start a container
  diff        Display the changes to the object's file system
  events      Show podman events
  exec        Run a process in a running container
  export      Export container's filesystem contents as a tar archive
  generate    Generate structured data based on containers, pods or volumes
  healthcheck Manage health checks on containers
  help        Help about any command
  history     Show history of a specified image
  image       Manage images
  images      List images in local storage
  import      Import a tarball to create a filesystem image
  info        Display podman system information
  init        Initialize one or more containers
  inspect     Display the configuration of object denoted by ID
  kill        Kill one or more running containers with a specific signal
  load        Load image(s) from a tar archive
  login       Login to a container registry
  logout      Logout of a container registry
  logs        Fetch the logs of one or more containers
  machine     Manage a virtual machine
  manifest    Manipulate manifest lists and image indexes
  mount       Mount a working container's root filesystem
  network     Manage networks
  pause       Pause all the processes in one or more containers
  play        Play containers, pods or volumes from a structured file
  pod         Manage pods
  port        List port mappings or a specific mapping for the container
  ps          List containers
  pull        Pull an image from a registry
  push        Push an image to a specified destination
  rename      Rename an existing container
  restart     Restart one or more containers
  rm          Remove one or more containers
  rmi         Removes one or more images from local storage
  run         Run a command in a new container
  save        Save image(s) to an archive
  search      Search registry for image
  secret      Manage secrets
  start       Start one or more containers
  stats       Display a live stream of container resource usage statistics
  stop        Stop one or more containers
  system      Manage podman
  tag         Add an additional name to a local image
  top         Display the running processes of a container
  unmount     Unmounts working container's root filesystem
  unpause     Unpause the processes in one or more containers
  unshare     Run a command in a modified user namespace
  untag       Remove a name from a local image
  version     Display the Podman version information
  volume      Manage volumes
  wait        Block on one or more containers

Options:
      --cgroup-manager string       Cgroup manager to use ("cgroupfs"|"systemd") (default "systemd")
      --conmon string               Path of the conmon binary
  -c, --connection string           Connection to use for remote Podman service
      --events-backend string       Events backend to use ("file"|"journald"|"none") (default "journald")
      --help                        Help for podman
      --hooks-dir strings           Set the OCI hooks directory path (may be set multiple times) (default [/usr/share/containers/oci/hooks.d])
      --identity string             path to SSH identity file, (CONTAINER_SSHKEY)
      --log-level string            Log messages above specified level (trace, debug, info, warn, warning, error, fatal, panic) (default "warn")
      --namespace string            Set the libpod namespace, used to create separate views of the containers and pods on the system
      --network-cmd-path string     Path to the command for configuring the network
      --network-config-dir string   Path of the configuration directory for networks
      --noout                       do not output to stdout
  -r, --remote                      Access remote Podman service
      --root string                 Path to the root directory in which data, including images, is stored
      --runroot string              Path to the 'run directory' where all state information is stored
      --runtime string              Path to the OCI-compatible binary used to run containers. (default "crun")
      --runtime-flag stringArray    add global flags for the container runtime
      --storage-driver string       Select which storage driver is used to manage storage of images and containers
      --storage-opt stringArray     Used to pass an option to the storage driver
      --syslog                      Output logging information to syslog as well as the console (default false)
      --tmpdir string               Path to the tmp directory for libpod state content.

                                    Note: use the environment variable 'TMPDIR' to change the temporary storage location for container images, '/var/tmp'.

      --url string                  URL to access Podman service (CONTAINER_HOST) (default "unix:/run/podman/podman.sock")
  -v, --version                     version for podman
其实,如果想用docker来 "替代" podman,其实可以用alias来实现。如果希望每次登录,这个变量都自动生效,可以在 /root/.bash_profile 里面配置即可(记得source或者退出重新登录root用户)。如下所示:
# alias docker='podman'

# docker -v
podman version 4.0.2

# docker ps
CONTAINER ID  IMAGE       COMMAND     CREATED     STATUS      PORTS       NAMES

# docker pull nginx:1.22.0
✔ docker.io/library/nginx:1.22.0
Trying to pull docker.io/library/nginx:1.22.0...
Getting image source signatures
Copying blob af2ebcaf75cf done
Copying blob d159f65c4136 done
Copying blob 1d8e16623b7e done
Copying blob 4c9c25b794f9 done
Copying blob b85a868b505f done
Copying blob 4f4d5acfec6a done
Copying config b3c5c59017 done
Writing manifest to image destination
Storing signatures
b3c5c59017fbb3fdcebe18b977da09d1e448218354d73ecd036283ddb81b3c35

# docker images
REPOSITORY               TAG         IMAGE ID      CREATED      SIZE
docker.io/library/nginx  1.22.0      b3c5c59017fb  2 weeks ago  146 MB

# docker run -dti --name nginx -p 80:80 -d docker.io/library/nginx:1.22.0

# docker ps
CONTAINER ID  IMAGE                           COMMAND               CREATED        STATUS            PORTS               NAMES
761253d60336  docker.io/library/nginx:1.22.0  nginx -g daemon o...  3 minutes ago  Up 5 seconds ago  0.0.0.0:80->80/tcp  nginx
pod启动容器以后,在Redhat的控制台里面,就可以看到运行的容器了。

参考:
https://sysin.org/blog/rhel-9/