RabbitMQ - 基于 SpringAMQP 带你实现五种消息队列模型
目录
一、SpringAMQP
1.1、概念
1.2、案例实现
1.2.1、SpringAMQP 实现基础消息队列(BasicQueue)
1.2.2、SpringAMQP 实现工作消息队列((Work Queue)
1.2.3、SpringAMQP 实现广播交换机消息队列(Fanout Exchange)
1.2.4、Spring AMQP 实现路由交换机消息队列(Direct Exchange)
1.2.5、SpringAMQP 实现主题交换机消息模型(Topic Exchange)
一、SpringAMQP
1.1、概念
什么是 AMQP?
全称 Advanced Message Queuing Protocol,是用于在应用程序之间传递业务消息的开放标准。该协议与语言和平台无关,更符合微服务中独立性的要求。
什么是 SpringAMQP?
Spring AMQP是基于AMQP协议定义的一套API规范,提供了模板用来发送和接收消息。包含两部分,其中spring-amqp是基础抽象,spring-rabbit是底层的默认实现。
1.2、案例实现
1.2.1、SpringAMQP 实现基础消息队列(BasicQueue)
首先服务生产者 publisher:
a)由于生产者和消费者服务都需要 amqp 依赖,因此这里直接将依赖放到父工程中
    org.springframework.boot
    spring-boot-starter-amqp
b)在 publisher (消息发送)服务中编写application.yml,添加mq连接信息:
spring:
  rabbitmq:
    host: 193.168.150.185 # 主机名
    port: 5672 # 端口
    virtual-host: / # 虚拟主机
    username: root # 用户名
    password: 1234 # 密码
Ps:云服务器记得放行 5672 端口!!!
c)在publisher服务中新建一个测试类,编写测试方法:
@RunWith(SpringRunner.class)
@SpringBootTest
public class SpringAMQPTest {

    @Autowired
    private RabbitTemplate rabbitTemplate;

    @Test
    public void testSendMessageSimpleQueue() {
        String queueName = "simple.queue";
        String message = "hello, spring amqp!";
        rabbitTemplate.convertAndSend(queueName, message);
    }

}
以上可得知 SpringAMQP 发送消息需要实现以下几点:
- 引入 amqp 的 starter 依赖;
- 配置 RabbitMQ 地址;
- 利用 RabbitTemplate 的 convertAndSend 方法来指定队列发送消息。
接着是服务消费者 consumer:
a)在consumer服务中编写application.yml,添加mq连接信息:
spring:
  rabbitmq:
    host: 193.168.150.185 # 主机名
    port: 5672 # 端口
    virtual-host: / # 虚拟主机
    username: root # 用户名
    password: 1234 # 密码
b)在consumer服务中新建一个类,编写消费逻辑:
@Component
public class SpringRabbitListener {

    @RabbitListener(queues = "simple.queue")
    public void ListenQueue(String msg) {
        System.out.println("消费者接收到 simple.queue 的消息:" + msg);
    }

}
以上可得知 SpringAMQP 接收消息需要实现以下几点:
- 引入amqp的starter依赖
- 配置RabbitMQ地址
- 定义类,添加@Component注解
- 类中声明方法,添加@RabbitListener注解,方法参数就时消息
Ps:消息一旦消费就会从队列删除,RabbitMQ没有消息回溯功能
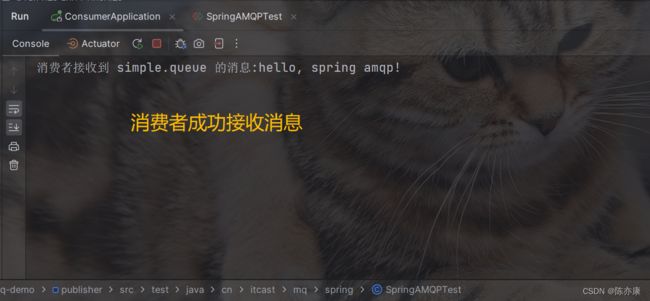
最终执行效果如下:
1.2.2、SpringAMQP 实现工作消息队列((Work Queue)
Work queue工作队列,可以提高消息处理速度,避免队列消息堆积;
遇到的问题:当消息进入 queue 时,消费者1 和 消费者2 都会先做一个操作叫做“消息预取”,也就是先取消息,但不执行操作,等从 queue 中拿完(如果不设置,默认是无限次拿)了以后再执行具体的消费操作,但这样会导致一个问题——当 消费者1 的消费处理速度是 消费者2 处理速度的两倍时,但是由于“消息预取”,他们两都会取到相等的消息数量,因此就会导致 消费者1 提前处理完,消费者2 还有很多没有处理的情况,降低了总体处理的效率。
解决办法:为了解决这种问题的发生,也可以通过修改消息预取的数量,设置为 1 ,就是拿一个处理完了以后再取下一个,就可以避免以上问题(设置为1,就是根据自身处理能力,拿去相应的数据)。
具体实现如下
a)在 publisher 服务中添加一个测试方法,循环发送 50 条消息到 simple.queue 队列(控制时间为1秒内发送完)
    @Test
    public void testSendMessageWorkQueue() throws InterruptedException {
        String queueName = "simple.queue";
        String message = "hello, workQueue!";
        for(int i = 0; i < 50; i++) {
            rabbitTemplate.convertAndSend(queueName, message + i);
            Thread.sleep(20);
        }
    }
b)在consumer服务中创建两个消费者,也监听simple.queue:
@Component
public class SpringRabbitListener {

    @RabbitListener(queues = "simple.queue")
    public void ListenQueue(String msg) throws InterruptedException {
        System.err.println("消费者接收到 simple.queue 的消息:" + msg + LocalDate.now());
        Thread.sleep(100);
    }

    @RabbitListener(queues = "simple.queue")
    public void ListenQueue2(String msg) throws InterruptedException {
        System.out.println("消费者接收到 simple.queue 的消息:" + msg + LocalDate.now());
        Thread.sleep(25);
    }

}
c)消费预取限制:修改application.yml文件,设置preFetch这个值,可以控制预取消息的上限
logging:
  pattern:
    dateformat: MM-dd HH:mm:ss:SSS
spring:
  rabbitmq:
    host: 170.193.116.135
    port: 5672
    username: root
    password: 1234
    virtual-host: /
    listener:
      simple:
        prefetch: 1
执行结果如下:
1.2.3、SpringAMQP 实现广播交换机消息队列(Fanout Exchange)
发布订阅模式与之前案例的区别就是允许将同一消息发送给多个消费者。实现方式是加入了exchange(交换机)。
常见exchange类型包括:
1. Fanout:广播
2. Direct:路由
3. Topic:话题
这里我们先来理解一下广播消息队列模型~
![]()
Fanout Exchange:会将接收到的消息广播到每一个跟其绑定的queue,最后交给对应的消费者,值得注意的是,exchange负责消息路由,而不是存储,路由失败则消息丢失。
具体实现如下:
a)在consumer服务创建一个类,添加@Configuration注解,创建队列和交换机,并声明FanoutExchange、Queue和绑定关系对象 Binding ,绑定方式是 BindingBuilder.bind(队列).to(交换机)
package cn.itcast.mq.config;

import org.springframework.amqp.core.Binding;
import org.springframework.amqp.core.BindingBuilder;
import org.springframework.amqp.core.FanoutExchange;
import org.springframework.amqp.core.Queue;
import org.springframework.context.annotation.Bean;
import org.springframework.context.annotation.Configuration;

@Configuration
public class FanoutConfig {

    //itcast.fanout
    @Bean
    public FanoutExchange fanoutExchange() {
        return new FanoutExchange("itcast.fanout");
    }

    //itcast.queue1
    @Bean
    public Queue fanoutQueue1() {
        return new Queue("fanout.queue1");
    }

    //绑定队列 1 到交换机
    @Bean
    public Binding fanoutBinding1(Queue fanoutQueue1, FanoutExchange fanoutExchange) {
        return BindingBuilder
                .bind(fanoutQueue1)
                .to(fanoutExchange);
    }

    //itcast.queue2
    @Bean
    public Queue fanoutQueue2() {
        return new Queue("fanout.queue2");
    }

    //绑定队列 2 到交换机
    @Bean
    public Binding fanoutBinding2(Queue fanoutQueue2, FanoutExchange fanoutExchange) {
        return BindingBuilder
                .bind(fanoutQueue2)
                .to(fanoutExchange);
    }

}
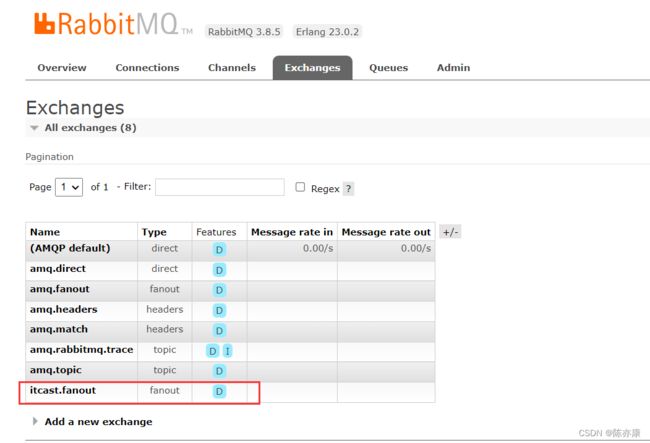
b)运行以后可以通过 RabbitMQ 客户端看到以下绑定情况:
c)添加测试方法
import org.junit.Test;
import org.junit.runner.RunWith;
import org.springframework.amqp.rabbit.core.RabbitTemplate;
import org.springframework.beans.factory.annotation.Autowired;
import org.springframework.boot.test.context.SpringBootTest;
import org.springframework.test.context.junit4.SpringRunner;

@RunWith(SpringRunner.class)
@SpringBootTest
public class SpringAMQPTest {

    @Autowired
    private RabbitTemplate rabbitTemplate;

    @Test
    public void testFanoutMessage() {
        String exchangeName = "itcast.fanout";
        String message = "hello! fanout";
        rabbitTemplate.convertAndSend(exchangeName, "", message);
    }

}
d)这里一个交换机绑定了两个队列,因此运行结果如下 :
1.2.4、Spring AMQP 实现路由交换机消息队列(Direct Exchange)
![]()
Direct Exchange 会将接收到的消息根据规则路由到指定的Queue,因此称为路由模式(routes),通常一个 Queue 都会与 Exchange 设置一个 BindingKey,发布者发送消息时会先指定 RoutingKey,这时交换机就会将消息路由到 BindingKey 与消息 RoutingKey 一致的队列。
具体实现如下:
a)在consumer服务中,编写两个消费者方法,分别监听direct.queue1和direct.queue2,并利用@RabbitListener声明Queue、Exchange、BoutingKey
    @RabbitListener(bindings = @QueueBinding(
            value = @Queue(name = "direct.queue1"), //绑定队列
            exchange = @Exchange(name = "itcast.direct", type = ExchangeTypes.DIRECT), //绑定交换机,type 可以不写,默认为 Direct
            key = {"java", "C++"} // Bindingkey
    ))
    public void listenDirectQueue1(String msg) {
        System.out.println("消费者 1 收到 Direct 消息:" + msg);
    }


    @RabbitListener(bindings = @QueueBinding(
            value = @Queue(name = "direct.queue2"), //绑定队列
            exchange = @Exchange(name = "itcast.direct", type = ExchangeTypes.DIRECT), //绑定交换机,type 可以不写,默认为 Direct
            key = {"java", "GO"} // Bindingkey
    ))
    public void listenDirectQueue2(String msg) {
        System.out.println("消费者 2 收到 Direct 消息:" + msg);
    }
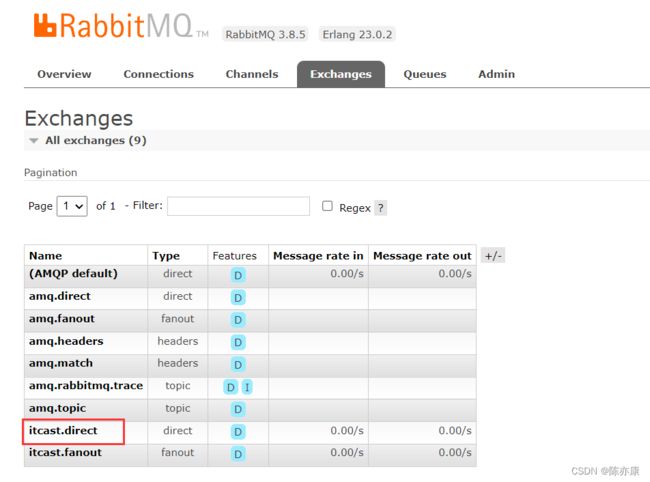
b)运行后可以观察绑定情况:
c)编写测试方法:
    @Test
    public void testDirectMessage() {
        String exchangeName = "itcast.direct";
        String message = "hello! direct";
        rabbitTemplate.convertAndSend(exchangeName, "C++", message);
    }
d)运行结果如下:
1.2.5、SpringAMQP 实现主题交换机消息模型(Topic Exchange)
![]()
TopicExchange 与 DirectExchange 十分类似,区别在于routingKey必须是多个单词的列表,并且以 . 分割。
Queue与Exchange指定BindingKey时可以使用以下通配符:
#:代指0个或多个单词
*:代指一个单词
例如: china.# 就相当于 china.new 或者 china.difa 或者 china.alhglag ......等等一切情况
具体实现如下(这里不具体说明了,除了通配符差异,用法跟 Direct 消息队列一模一样~):
@Component
public class SpringRabbitListener {

    @RabbitListener(bindings = @QueueBinding(
            value = @Queue("topic.queue1"),
            exchange = @Exchange(name = "itcast.topic", type = ExchangeTypes.TOPIC),
            key = "china.#"
    ))
    public void listenTopicQueue1(String msg) {
        System.out.println("消费者 1 收到 topic 消息:" + msg);
    }

    @RabbitListener(bindings = @QueueBinding(
            value = @Queue("topic.queue2"),
            exchange = @Exchange(name = "itcast.topic", type = ExchangeTypes.TOPIC),
            key = "#.good"
    ))
    public void listenTopicQueue2(String msg) {
        System.out.println("消费者 2 收到 topic 消息:" + msg);
    }

}
    @Test
    public void testTopicMessage() {
        String exchangeName = "itcast.topic";
        String message = "hello! topic";
        rabbitTemplate.convertAndSend(exchangeName, "china.good", message);
    }
运行结果:


