JS全栈前端后台管理部分笔记(1)- 初始化及分类CURD
JS全栈前端后台管理部分(1)- 初始化及分类CURD
组成
- 前端程序:后台管理系统
- 前端程序:手机客户端
- 后端程序
工程搭建
前台使用vue框架,创建工程使用vue-cli,安装命令:
npm install -g @vue/cli
可通过查看vue/cli版本来验证是否安装成功
vue --version
在wangzhe目录下创建前端的前后台项目
vue create web
和
vue create amdin
采用默认配置即可。
在根目录下新建server目录作为后端程序目录。进入server执行
npm init -y
新建index.js和修改package.json的启动脚本。
"scriptss":{
    "serve": "nodemon index.js"
}
与vue类似,之后执行npm run serve就会执行 nodemon index.js命令了,也就是启动后台服务。
其中nodemon需要安装,全局安装命令如下:
npm install -g nodemon
nodemon的作用于supervisior相同,为了监视我们对程序所做的更改从而重启nodejs程序。
后台管理开发
初步配置
进入admin 安装elementUI
vue add element
选择全部导入,方便使用
是否覆盖SCSS ,NO,
选择中文,确定。
安装路由
vue add router
选择N,不适用history mode,原因是需要后端配合。
安装完成后新增Main.vue文件并修改路由。
修改菜单增加路由
<el-menu router :default-openeds="['1', '3']">
- router使 el-menu支持路由
- default-opends 默认展开的菜单项
<el-menu-item index="/categories/create">新建分类el-menu-item>
<el-menu-item index="/categories/list">分类列表el-menu-item>
子路由
修改Main.vue中内容,右侧主区域设置为路由容器
 <el-main>
        <!-- 路由容器 -->
        <router-view></router-view>
 </el-main>
修改路由文件,将分类也作为子路由
{
    path: '/',
    name: 'Main',
    component: Main,
    children: [
      {
        path: "/categories/create",
        component: CategoryEdit
      }
    ]
  },
编写"新建分类"页面CategoriesEdit.vue,
-
其中 el-button中的native-type="submit"表示原生类型。
-
其中 el-form中的 @submit.native.prevent=“save” 表示submit是默认提交行为,native代表原生,prevent阻止默认提交 @是事件绑定标志,save是绑定的方法。
-
其中 default-active=$route.path 设置左侧菜单高亮与路由绑定
ajax请求
提交时需要进行ajax请求,使用axios,安装命令
npm install axios
安装完成后引入axios,在main.js同级目录下新建http.js,
//http.js
import axios from "axios"
const http = axios.create({
  baseURL: "http://localhost:3000/admin/api",
})
export default http;
在main.js中导入并绑定到Vue实例上
//main.js
import http from "./http.js"
Vue.prototype.$http = http;
将http方法加入vue的原型对象后,就可以在任意页面使用this.$http来访问http了。
在新增分类页面请求接口
//CategoryEdit.vue
async save() {
      const res = await this.$http.post("categories", this.model);
      //跳转到分类列表
      this.$router.push("/categories/list");
      this.$message({
        type: "success",
        message: "分类保存成功"
      });
    }
- save方法采用async与await,用同步语法写异步实现,方便理解,避免书写promist的then和回调函数。
- this.$http.post(“categories”, this.model);是采用post方式将this.model发送到categories接口,接口的完整路径是axios的baseURL与categories的组合。
- 请求完成后给出提示信息并跳转到公告列表页面。
其他页面
上面章节是大多基础配置。以下内容多为具体实现,只记录自己不理解的或者新学到的知识点。
分类列表
继续增加分类列表页,新建CategoryList.vue
<template>
  <div class="list">
    <h1>分类列表</h1>
    <el-table :data="items">
      <el-table-column prop="name" label="分类名称" width="220">
      </el-table-column>
      <el-table-column prop="_id" label="ID">
      </el-table-column>

    </el-table>
  </div>
</template>

<script>
export default {
  data() {
    return {
      items: []
    };
  },
  methods: {
    async fetch() {
      const res = await this.$http.get("categories");
      console.log("res", res);
      this.items = res.data;
    }
  },
  created() {
    console.log("created");
    this.fetch(); //请求列表
  }
};
</script>

<style>
</style>template
- 在钩子函数 created中请求分类列表并显示
- 这里仍然用到了async和await来写异步,方便理解。
- 封装fetch的原因是可能在其他地方也会调用列表请求,因此单独作为一个函数。
同样增加路由配置
//routes/index.js
{
        path: "/categories/list",
        component: CategoryList,
}
分类编辑
在分类列表中增加 操作 列,内容为 编辑按钮,点击后跳转到编辑页面,同时携带点击分类的id。
//CategoryList.vue
<el-table-column fixed="right" label="操作" width="180">
        <template slot-scope="scope">
          <el-button type="primary" size="small" @click="$router.push(`/categories/edit/${scope.row._id}`)">编辑 </el-button>
        </template>
      </el-table-column>
    </el-table>
- $router.push 是跳转函数,
- scope.row 与react中的 row 相同,能拿到本行数据的所有内容
//router/index.js
 {
        path: "/categories/edit/:id", //编辑分类
        component: CategoryEdit,
        props: true,
 },
- 编辑与增加使用同一个组件
- Props为true,表示将任何url参数都注入到 categoryedit的组件内
跳转后需要在组件内接收,并处理数据请求、区别数据保存。
//CategoryEdit.vue
.......
<h1> {{id ? "编辑" : "新建"}}分类</h1>

.......
props: {
    //组件接收一个id,接受url中的id
    id: {}
},
.......
async save() {
      let res;
      //根据是否具有id来判断是新建还是编辑
      if (this.id) {
        //编辑
        res = await this.$http.put(`categories/${this.id}`, this.model);
      } else {
        //新增
        res = await this.$http.post("categories", this.model);
      }
      console.log(res);
      //跳转到分类列表
      this.$router.push("/categories/list");
      this.$message({
        type: "success",
        message: "分类保存成功"
      });
    },
    async fetch() {
      const res = await this.$http.get(`categories/${this.id}`);
      console.log("res", res);
      this.model = res.data;
      // if(res.)
    }
  },
  created() {
    this.id && this.fetch();
  }
-
根据id是否存在来设置组件标题
-
id与上述定义的路由相绑定,用来接受列表传递的路由。
-
如果有了this.id,也就是到了编辑界面,进入页面时需要重新获取当前id记录的数据,并且编辑后在保存调用编辑接口,而不是新建接口。
-
编辑接口使用put方法
分类删除
在列表操作字段增加删除按钮,点击该按钮时执行删除方法
<el-button type="danger" size="small" @click="remove(scope.row)">删除 </el-button>
- 删除方法参数是整行数据,而不只是id,原因是为了利用name在删除前对用户操作做一个明确的提示。
删除方法
 async remove(row) {
      this.$confirm(`是否确认删除分类 "${row.name}"`, "提示", {
        confirmButtonText: "确定",
        cancelButtonText: "取消",
        type: "warning"
      })
        .then(async () => {
          const res = await this.$http.delete(`categories/${row._id}`);
          console.log("删除分类res", res);
          this.fetch(); //重新请求分类列表
          this.$message({
            type: "success",
            message: "删除成功!"
          });
        })
        .catch(() => {
          this.$message({
            type: "info",
            message: "已取消删除"
          });
        });
    }
  },
- 使用提示框对用户操作做提示。
- $confirm中的then方法里面用await时必须在函数名前加async
- $confirm点击确认后执行then里面的方法,取消执行catch里面的方法。
- delete方法参数为要删除的id,传递给后端。
- 删除成功后重新请求列表。
注意:到这里所有接口请求都没有判断是否成功,也就是对res的判断没有写,后期通过拦截器统一实现。
无限极分类
王者荣耀官网上大分类下有多个小分类,上文只做了一级,所以需要修改。
新建分类和编辑分类页面新增父级分类字段
//CategoryEdit.vue
<el-form-item label="父级分类">
        <el-select v-model="model.parent" placeholder="请选择">
          <el-option v-for="item in parents" :key="item._id" :label="item.name" :value="item._id">
          </el-option>
        </el-select>
      </el-form-item>
......
async fetchParents() {
      const res = await this.$http.get("categories");
      this.parents = res.data;
    }
- model.parent是form表单绑定的字段,用来提交
- fetchParents是在created钩子函数里面请求所有的分类
- 因为在修改和新增分类后提交是对整个model进行了提交,所以提交函数不用修改
为方便看出是否新增了parent属性,可以在分类列表中增加一个 父级类别 字段
//CategoryList.vue
<el-table-column prop="parent" label="父级分类">
</el-table-column>
显示如下:
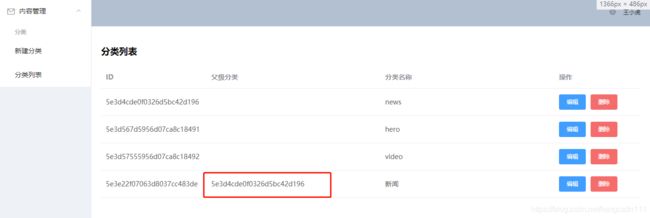
但是在实际过程中,id的展示不人性化,应该展示分类的名称。
修改接口后返回的parent是一个对象(这个对象就是父级类别),修改父级类别的显示内容为 parent.name即可。
 <el-table-column prop="parent.name" label="父级分类">
      </el-table-column>
