windows 11系统调试hive metastore 3.1.2源码新姿势
由于工作原因,需要深入了解一下hive metastore相关源码,这几天尝试了在windows中运行hive metastore代码,这边记录一下踩坑的过程以及解决方法。
window中编译遇到的问题
hive在3.0之后,独立提供hive metastore服务,我们可以直接下载hive standalone metastore相关源码即可,这边以3.1.2版本为例:
源码下载:
wget https://repo1.maven.org/maven2/org/apache/hive/hive-standalone-metastore/3.1.2/hive-standalone-metastore-3.1.2-src.tar.gz
由于hive使用thrift相关技术栈,直接运行hive standalone metastore中的HiveMetaStore主类会报相关包找不到的问题,需要先对源码进行编译然后再再idea中启动该主类。
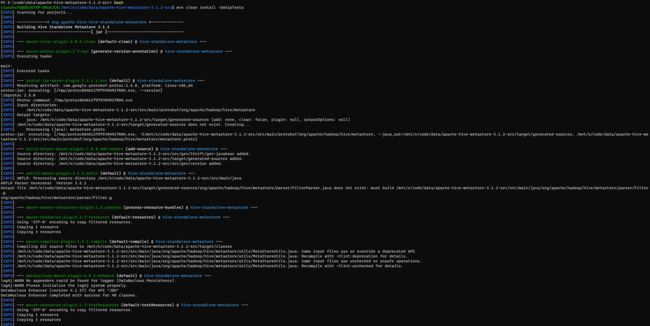
然而在windows系统对hive standalone metastore源码编译过程中,由于需要执行shell脚本,而如果我们windows如果没有安装cygwin的话是无法完成编译的,会有如下报错:
中间乱码的内容为:
由上述信息可知,我们无法在windows中执行shell脚本,但是上述提示又告诉我们可以通过安装linux子系统来解决这个问题。所以我们可以通过在ubuntu子系统中对hive standalone metastore源码进行编译,在windows中打开该项目来运行。
安装ubuntu子系统
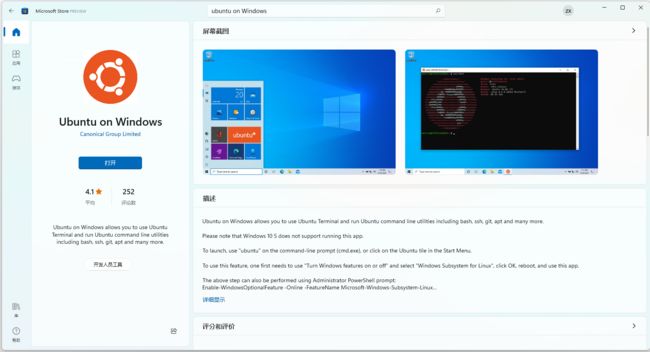
我们首先打开Microsoft Store,搜索Ubuntu on Windows,点击安装即可(我这边已经安装好了):
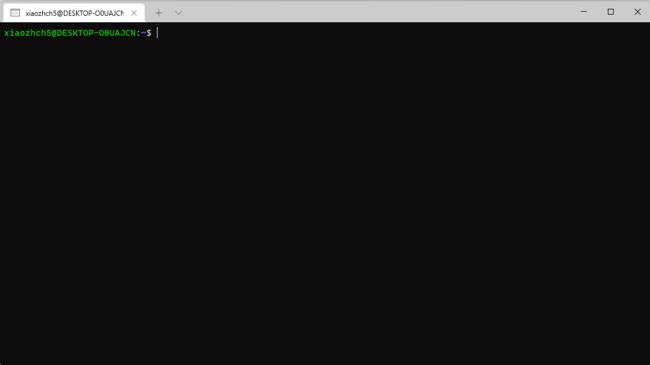
安装完成之后,点击打开,初次打开的时候会需要花几分钟的时间进行自动安装以及设置ubuntu系统的账号密码等操作。安装完成之后,再次打开ubuntu 终端,结果如下:
然后再安装一下jdk8
sudo apt update
sudo apt install openjdk-8-jre-headless
sudo apt install openjdk-8-jdk-headless
对于maven,如果你在windows系统已经装了,默认在ubuntu子系统也是可以直接用的,不需要再ubuntu中再重新安装。
安装完成之后,输入mvn命令可以看到如下输出:
mvn --version
hive Standalone metastore源码编译
安装完ubuntu子系统之后,我们便可以用这个系统进行编译了。进入刚刚我们下载的hive standalone metastore源码目录,执行bash命令进入ubuntu子系统
执行编译:
mvn clean install -DskipTests
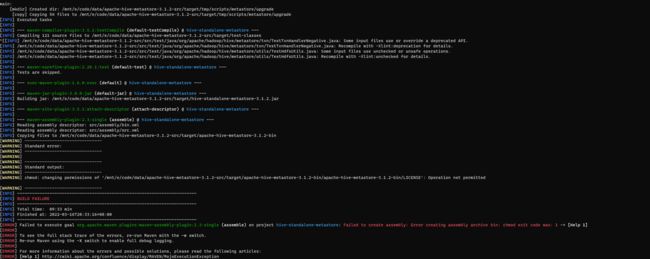
在编译过程中,我们可能会遇到无法修改文件权限的问题,
这是因为项目在打hive standalone metastore二进制包时,对相关文件以及文件夹权限进行了修改,但是我们在源码编译时是不需要进行打包的,所以可以将pom.xml文件中的下述插件部分注释掉:
      <plugin>
        <groupId>org.apache.maven.pluginsgroupId>
        <artifactId>maven-assembly-pluginartifactId>
        <version>${maven.assembly.plugin.version}version>
        <executions>
          <execution>
            <id>assembleid>
            <phase>packagephase>
            <goals>
              <goal>singlegoal>
            goals>
            <configuration>
              <finalName>apache-hive-metastore-${project.version}finalName>
              <descriptors>
                <descriptor>src/assembly/bin.xmldescriptor>
                <descriptor>src/assembly/src.xmldescriptor>
              descriptors>
              <tarLongFileMode>gnutarLongFileMode>
            configuration>
          execution>
        executions>
      plugin>
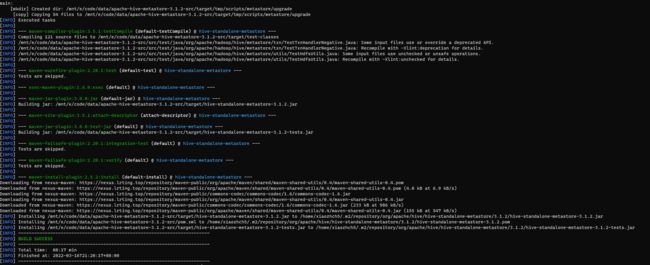
编译成功
执行HiveMetaStore主类
编译完成之后便可以在idea中打开上述目录运行HiveMetaStore主类。我们使用mysql数据库作为元数据存储,所以我们还需要在mysql中初始化源数据库。
我这边的mysql数据库信息为:
mysql verson:5.7
mysql ip:192.168.1.3
mysql port:3306
mysql username:root
mysql password:password
在apache-hive-metastore-3.1.2-src源码目录下新建warehouse目录,修改src/main/resources/metastore-site.xml文件,修改为:
<configuration>
  <property>
    <name>hive.metastore.warehouse.dirname>
    <value>file:///e:/code/data/apache-hive-metastore-3.1.2-src/warehousevalue>
  property>
  <property>
    <name>hive.metastore.localname>
    <value>truevalue>
  property>
  <property>
    <name>hive.metastore.schema.verificationname>
    <value>falsevalue>
  property>
  <property>
    <name>javax.jdo.option.ConnectionURLname>
    <value>jdbc:mysql://192.168.1.3:3306/metastore_2?useSSL=false&serverTimezone=UTCvalue>
  property>
  <property>
    <name>javax.jdo.option.ConnectionDriverNamename>
    <value>com.mysql.jdbc.Drivervalue>
  property>
  <property>
    <name>javax.jdo.option.ConnectionUserNamename>
    <value>rootvalue>
  property>
  <property>
    <name>javax.jdo.option.ConnectionPasswordname>
    <value>passwordvalue>
  property>
  <property>
    <name>hive.metastore.event.db.notification.api.authname>
    <value>falsevalue>
  property>
  <property>
    <name>hive.metastore.urisname>
    <value>thrift://localhost:9083value>
    <description>Thrift URI for the remote metastore. Used by metastore client to connect to remote metastore.description>
  property>

configuration>
同时还要还要修改pom.xml文件中的如下部分,新增metastore-site.xml文件
    <resources>
      <resource>
        <directory>${basedir}/src/main/resourcesdirectory>
        <includes>
          <include>package.jdoinclude>
        includes>
      resource>
    resources>
改为:
    <resources>
      <resource>
        <directory>${basedir}/src/main/resourcesdirectory>
        <includes>
          <include>package.jdoinclude>
          <include>metastore-site.xmlinclude>
        includes>
      resource>
    resources>
同时新增如下依赖:
    <dependency>
      <groupId>com.lmaxgroupId>
      <artifactId>disruptorartifactId>
      <version>3.4.2version>
    dependency>
    <dependency>
      <groupId>mysqlgroupId>
      <artifactId>mysql-connector-javaartifactId>
      <version>5.1.49version>
    dependency>
    <dependency>
      <groupId>org.apache.hivegroupId>
      <artifactId>hive-execartifactId>
      <version>3.1.2version>
      <scope>runtimescope>
    dependency>
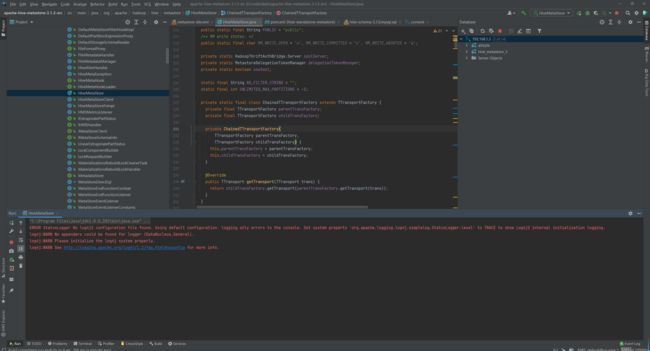
做完上述修改之后,重新编译hive standalone metastore源码,重新运行HiveMetaStore类,即可成功运行:
使用hive metastore java client访问 hive standalone metastore
我们在文章通过Java API获取Hive Metastore中的元数据信息说到如何通过Java API访问Hive Metastore。本文以上述文章为例,使用java客户端访问刚刚idea中运行的metastore
测试代码如下:
package com.zh.ch.bigdata.hms;

import org.apache.hadoop.conf.Configuration;
import org.apache.hadoop.hive.metastore.IMetaStoreClient;
import org.apache.hadoop.hive.metastore.RetryingMetaStoreClient;
import org.apache.hadoop.hive.metastore.api.*;
import org.slf4j.Logger;
import org.slf4j.LoggerFactory;

import java.util.ArrayList;
import java.util.HashMap;
import java.util.List;
import java.util.Map;


public class HMSClient {

    public static final Logger LOGGER = LoggerFactory.getLogger(HMSClient.class);

    /**
     * 初始化HMS连接
     * @param conf org.apache.hadoop.conf.Configuration
     * @return IMetaStoreClient
     * @throws MetaException 异常
     */
    public static IMetaStoreClient init(Configuration conf) throws MetaException {
        try {
            return RetryingMetaStoreClient.getProxy(conf, false);
        } catch (MetaException e) {
            LOGGER.error("hms连接失败", e);
            throw e;
        }
    }

    public static void main(String[] args) throws Exception {

        Configuration conf = new Configuration();
        conf.set("hive.metastore.uris", "thrift://localhost:9083");

        IMetaStoreClient client = HMSClient.init(conf);

        boolean enablePartitionGrouping = true;
        String tableName = "test_table_2";

        List<FieldSchema> columns = new ArrayList<>();
        columns.add(new FieldSchema("foo", "string", ""));
        columns.add(new FieldSchema("bar", "string", ""));
        List<FieldSchema> partColumns = new ArrayList<>();
        partColumns.add(new FieldSchema("dt", "string", ""));
        partColumns.add(new FieldSchema("blurb", "string", ""));
        SerDeInfo serdeInfo = new SerDeInfo("LBCSerDe",
                "org.apache.hadoop.hive.serde2.lazy.LazySimpleSerDe", new HashMap<>());
        StorageDescriptor storageDescriptor
                = new StorageDescriptor(columns, null,
                "org.apache.hadoop.hive.ql.io.RCFileInputFormat",
                "org.apache.hadoop.hive.ql.io.RCFileOutputFormat",
                false, 0, serdeInfo, null, null, null);
        Map<String, String> tableParameters = new HashMap<>();
        tableParameters.put("hive.hcatalog.partition.spec.grouping.enabled", enablePartitionGrouping ? "true":"false");
        Table table = new Table(tableName, "default", "", 0, 0, 0, storageDescriptor, partColumns, tableParameters, "", "", "");

        client.createTable(table);

        System.out.println("----------------------------查看表是否创建成功-------------------------------------");
        System.out.println(client.getTable("default", tableName).toString());

        client.close();
    }
}
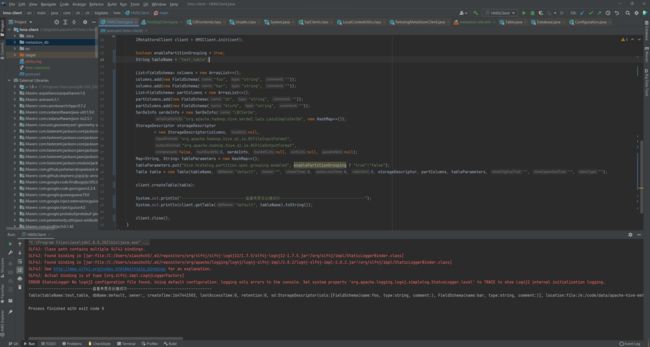
执行结果:
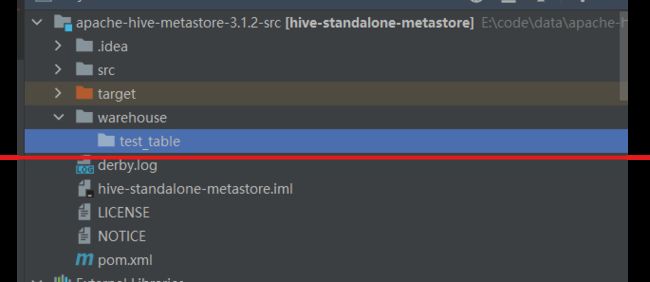
查看先前在metastore-site.xml文件中设置的本地路径,查看相关表
由于我们已经在hive metastore中的default库创建了test_table这个表,如果重新创建则会报错,接下来我们看一下重新执行上述java代码。
在客户端,我们可以看到如下报错,
而在hive metastore服务端,则是如下报错
结论
在文章的上述部分中,我们讲了如何在windows中调试hive standalone metastore 3.1.2源码,其中包括以下两个部分:
- 安装widnows中的ubuntu子系统
- 修改hive standalone metastore源码
- 创建mysql源数据库
在实际测试过程中,如果修改了代码,还需要使用ubuntu子系统对源码进行重新编译,然后才能更好再IDEA中成功运行。相信通过上述部分,也能够对hive standalone metastore源码运行与调试有一个基本的理解。
参考链接:https://lrting.top/backend/4119/


