Windows11与CentOS7.9 2009下安装配置nginx后启动整个项目
Nginx是一款高性能的开源Web服务器和反向代理服务器,被广泛用于构建现代化的Web应用和提供静态内容。
一、Windows11下安装配置nginx
1.1 下载
nginx官网
这里下载nginx-1.24.0-zip

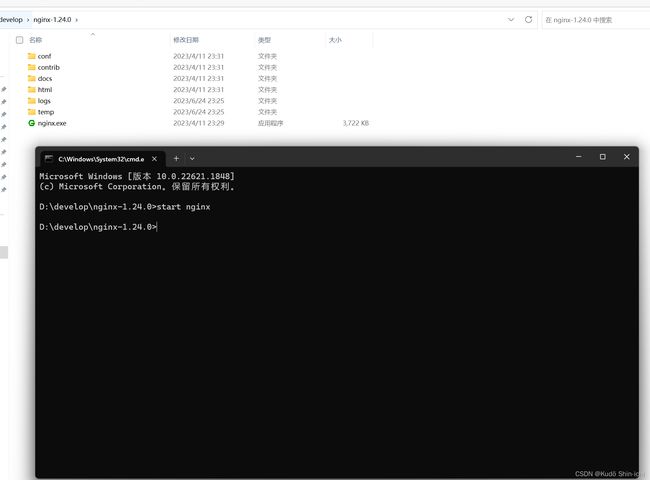
下载完成后,解压到D:\develop\nginx-1.24.0,解压完成后在文件管理器的地址栏输入cmd:

输入start nginx启动nginx服务:
正常情况下,会直接出现nginx的首页,默认IP地址为http://localhost:80/:

1.2 解决nginx默认端口80被占用
nginx默认使用80端口,如果80端口被占用就无法正常启动(我这里80端口后期被微软的Internet Information Services服务给占用了,所以默认会显示Internet Information Services的页面):

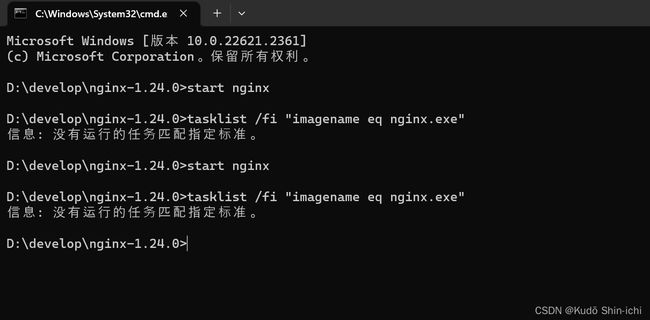
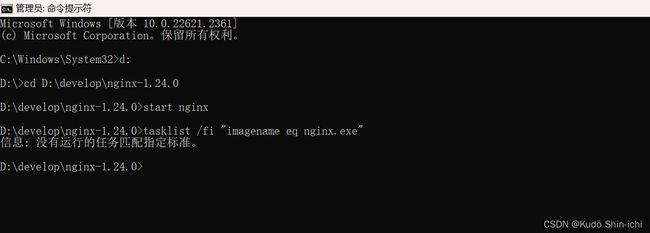
此时再输入start nginx是无法启动nginx服务的:
//查看nginx进程
tasklist /fi "imagename eq nginx.exe"
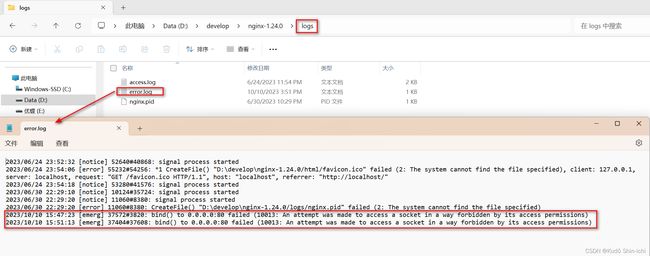
查看error.log(D:\develop\nginx-1.24.0\logs\error.log),80端口被使用了。
1.2.1 方法1-直接修改nginx的默认端口值(推荐)
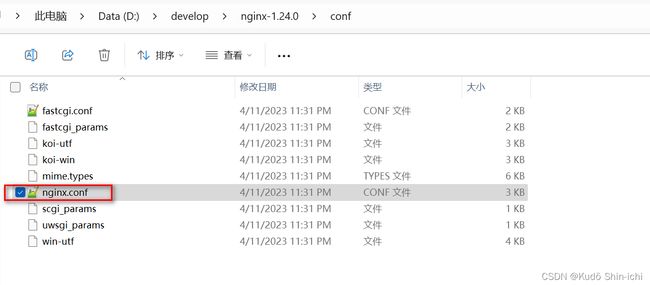
D:\develop\nginx-1.24.0\conf\nginx.conf中修改listen的端口值:
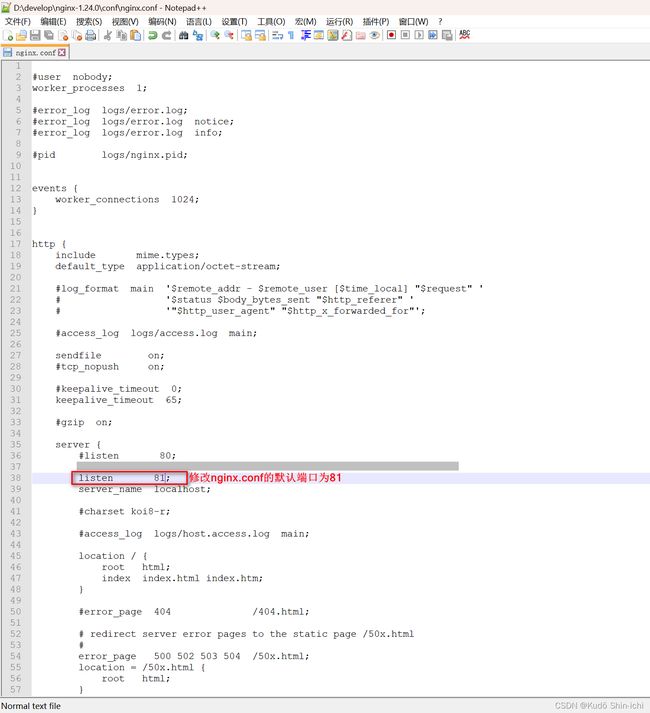
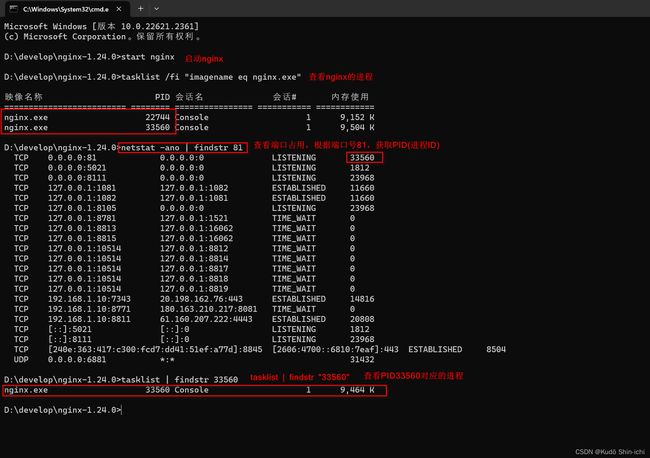
直接修改nginx的默认端口值80为81后,依次执行下列命令:
/1-进入nginx解压目录
d:
cd  D:\develop\nginx-1.24.0\

//2-启动nginx
start nginx

//3-查看nginx进程  如果显示 信息:没有运行的任务匹配指定标准  执行第4步
tasklist /fi "imagename eq nginx.exe"


//4-查看端口占用,根据端口号81,获取PID(进程ID)
netstat -ano | findstr "端口号"
netstat -ano | findstr "81"或netstat -ano | findstr 81

//5-查看PID对应的进程
tasklist | findstr "进程ID"
截图如下(可以证明81端口已经被配置给nginx.exe使用):
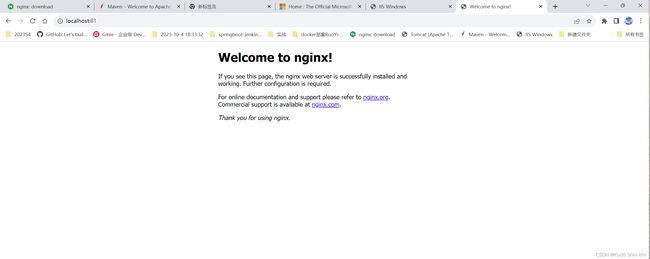
使用修改修改好的81端口访问(http://localhost:81/)
1.2.2 方法2-结束占用80端口的进程
结束占用80端口的进程:
/1-进入nginx解压目录
d:
cd  D:\develop\nginx-1.24.0\

//2-启动nginx
start nginx

//3-查看nginx进程  如果显示 信息:没有运行的任务匹配指定标准  执行第4步
tasklist /fi "imagename eq nginx.exe"


//4-查看端口占用,根据端口号80,获取PID(进程ID)
netstat -ano | findstr "端口号"
netstat -ano | findstr "80"或netstat -ano | findstr 80

//5-根据PID结束进程
taskkill /F /PID PID值
或者
taskkill -f -pid PID值
或者(可能会直接结束该程序,相当于任务管理器中结束)
taskkill  /f /t /im PID值
结束占用80端口的进程截图如下:
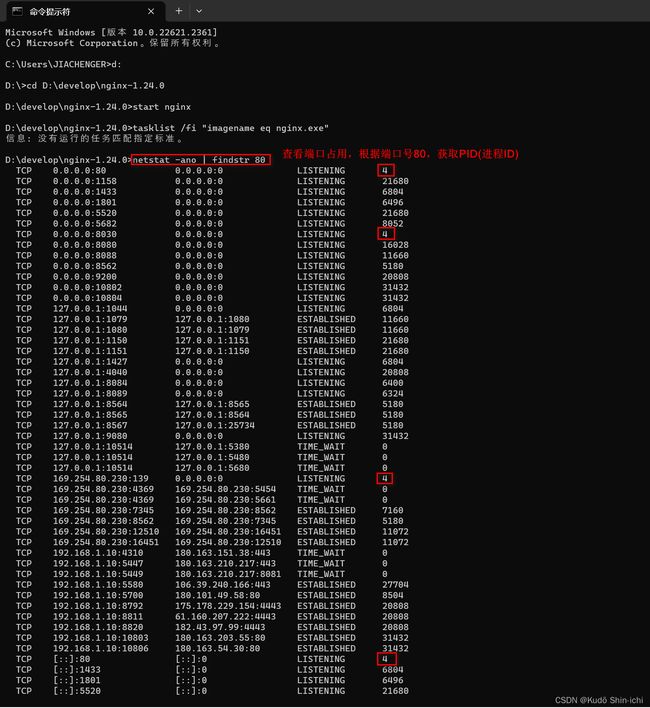
根据PID值4结束进程,显示拒绝访问:

1.3 关闭nginx
nginx -s stop
//查看nginx进程  如果显示 信息:没有运行的任务匹配指定标准 则代表关闭成功
tasklist /fi "imagename eq nginx.exe"
//快速关机
nginx -s stop

//正常关机
nginx -s quit

//重新加载(更改配置后使用新配置启动新工作进程)
nginx -s reload

//重新打开日志文件
nginx -s reopen
二、CentOS7.9 2009下安装配置nginx
2.1 下载与安装配置
//1-安装依赖项
sudo yum install gcc pcre-devel zlib-devel openssl-devel

//2-下载Nginx源码包
//2-1-下载Nginx源码包
从https://nginx.org/en/download.html查找最新的版本,使用Stable version版本。
nginx-1.24.0.tar.gz
//2-2--将下载好的tar包上传到centos701的目录中  /usr/local   nginx-1.24.0.tar.gz

或者

//2-下载Nginx源码包
//或者直接复制tar包链接(在Windows中右击复制tar包下载链接)

//2-1 CentOS系统安装wget
yum install wget -y
//2-2 Debian/Ubuntu系统安装wget,需要执行以下命令:
apt-get install -y wget

//2-2-使用wget获取nginx-1.24.0.tar.gz
wget https://nginx.org/download/nginx-1.24.0.tar.gz


3、安装
//3-1、解压安装包nginx-1.24.0.tar.gz
tar -zxvf nginx-1.24.0.tar.gz

//3-2、进入解压后的目录nginx-1.24.0
cd  nginx-1.24.0


/4、 配置编译选项,包括启用HTTPS支持
//注意这里的目录就是/usr/local/nginx1.24.0
//如果报错就执行4-1、安装依赖项
//说明:因为后续需要安装SSL证书,所以添加了几个模块;如果不需要,可以执行./configure 。
./configure --prefix=/usr/local/nginx1.24.0 --with-http_ssl_module --with-http_v2_module --with-http_stub_status_module


参数说明:
--prefix=path:默认路径为/usr/local/nginx,可不配置。
--with-http_ssl_module:配置Nginx以启用HTTPS模块。
--with-http_v2_module:配置Nginx以启用HTTP2模块。
--with-http_stub_status_module:启用状态监控模块,允许查看Nginx的运行状态和统计信息。

说明:因为后续需要安装SSL证书,所以添加了几个模块;如果不需要,可以执行./configure 。


//4-1、安装依赖项
执行yum -y install gcc openssl-devel pcre-devel zlib-devel
----
报错:2023-9-5 02:33:41
[root@localhost nginx-1.24.0]# ./configure --prefix=/usr/local/nginx1.24.0 --with-http_ssl_module --with-http_v2_module --with-http_stub_status_module
checking for OS
 + Linux 3.10.0-1160.el7.x86_64 x86_64
checking for C compiler ... not found

./configure: error: C compiler cc is not found


执行yum -y install gcc openssl-devel pcre-devel zlib-devel 后,
再次执行./configure --prefix=/usr/local/nginx1.24.0 --with-http_ssl_module --with-http_v2_module --with-http_stub_status_module
不会再报错。
----


//4-2、编译和安装Nginx
//编译安装完成后,会发现多了一个nginx1.24.0文件夹
make && make install


或者分别执行

//4-2、编译和安装Nginx
//编译安装完成后,会发现多了一个nginx1.24.0文件夹
//编译
make
//安装
sudo make install


//5、启动Nginx
//关闭防火墙
systemctl stop firewalld或systemctl stop firewalld.service

//进入nginx-1.24.0编译和安装生成的目录nginx1.24.0/sbin
cd /usr/local/nginx1.24.0/sbin

//启动nginx
./nginx

或者
sudo nginx


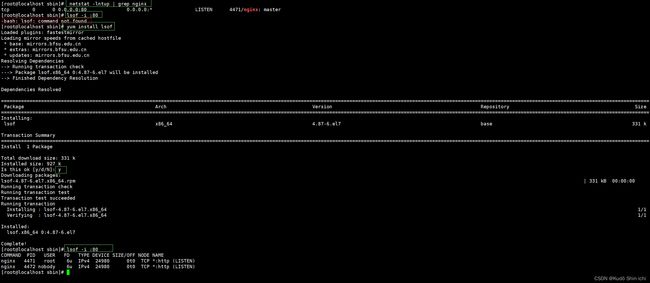
//6、查看nginx的进程
yum install net-tools -y
netstat -lntup | grep nginx

//查看启动的nginx进程
ps -ef | grep nginx

yum install lsof
lsof -i :80


//7、关闭nginx:
./nginx -s stop
2.2 截图
1-安装依赖项sudo yum install gcc pcre-devel zlib-devel openssl-devel


2-1 CentOS系统安装wget命令-yum install wget -y

2-2-使用wget获取nginx-1.24.0.tar.gz
直接复制tar包链接(在Windows中右击复制tar包下载链接)


3-1、解压安装包nginx-1.24.0.tar.gz
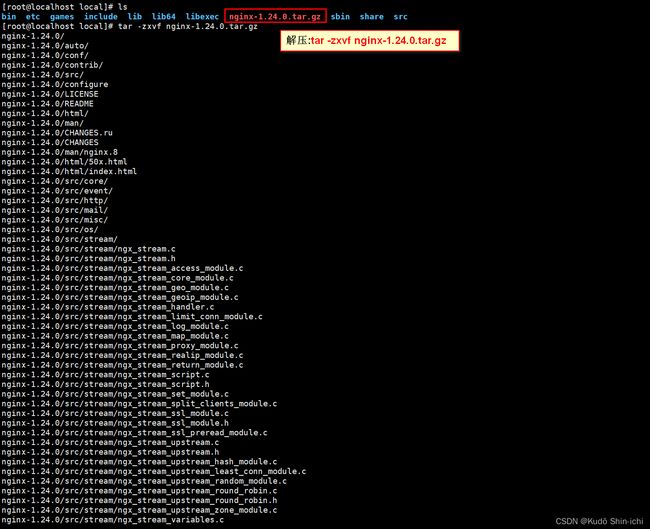
解压后的文件夹-nginx-1.24.0 :
![]()
3-2、进入解压后的目录nginx-1.24.0 :

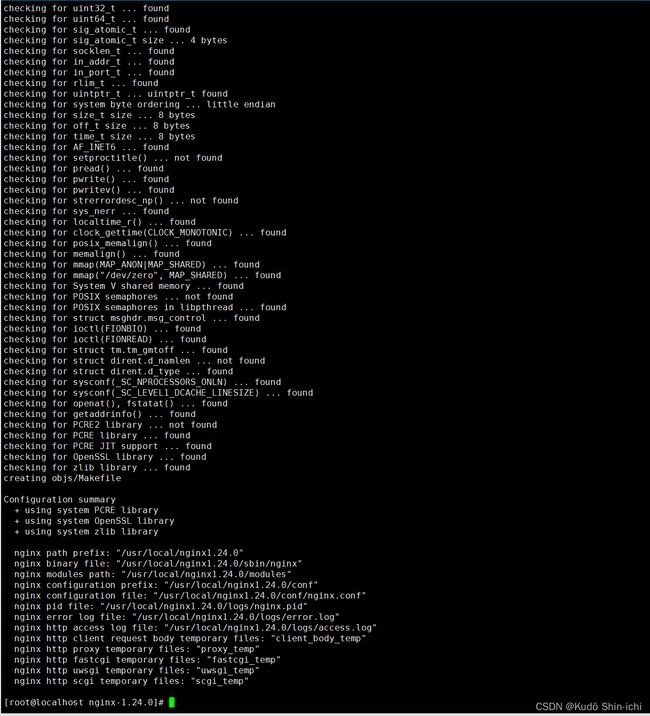
4、 配置编译选项,包括启用HTTPS支持
说明:因为后续需要安装SSL证书,所以添加了几个模块;如果不需要,可以执行./configure 。
注意-这里配置的目录是/usr/local/nginx1.24.0:
./configure --prefix=/usr/local/nginx1.24.0 --with-http_ssl_module --with-http_v2_module --with-http_stub_status_module
【注意:若是报错直接执行这个命令
yum -y install gcc openssl-devel pcre-devel zlib-devel】
--prefix=path:默认路径为/usr/local/nginx,可不配置。
说明:因为后续需要安装SSL证书,所以添加了几个模块;如果不需要,可以执行./configure 。
//这里配置的目录是nginx
./configure --prefix=/usr/local/nginx --with-http_stub_status_module --with-http_ssl_module
【注意:若是报错直接执行这个命令
yum -y install gcc openssl-devel pcre-devel zlib-devel】
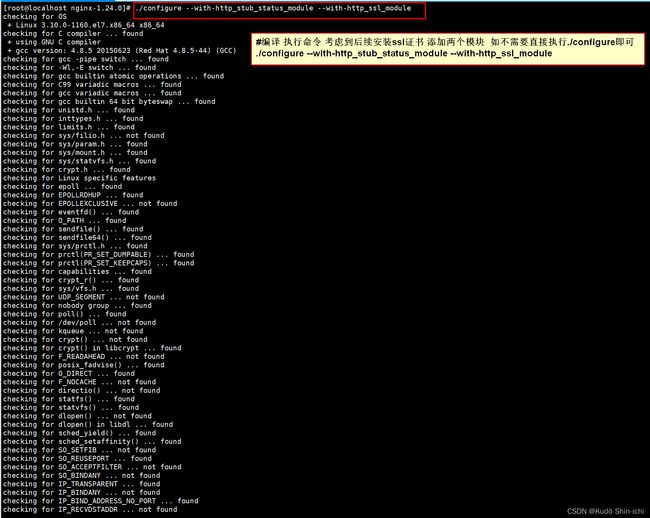
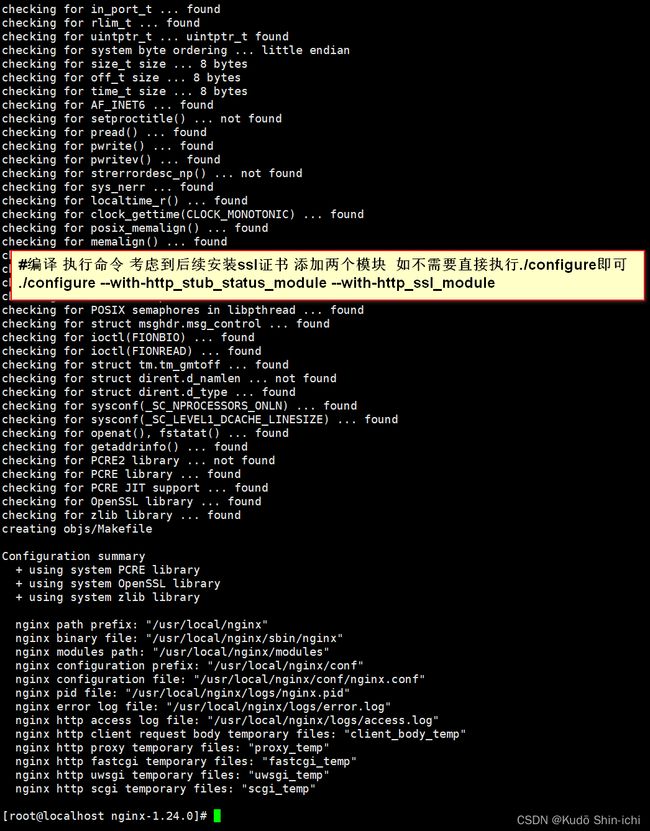
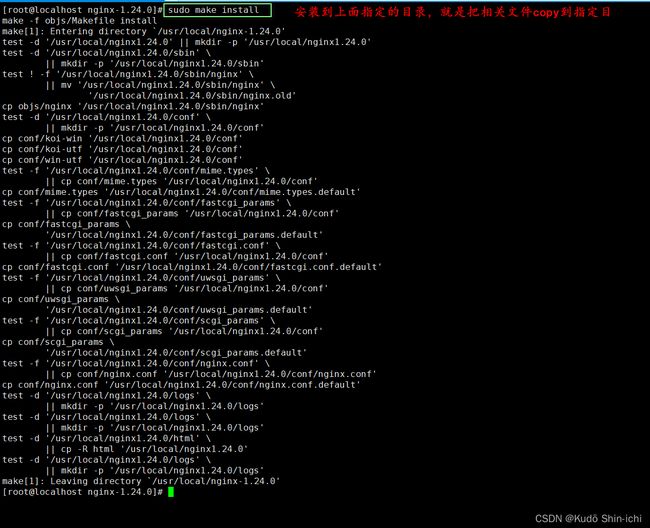
4-2、编译和安装Nginx :
make && make install
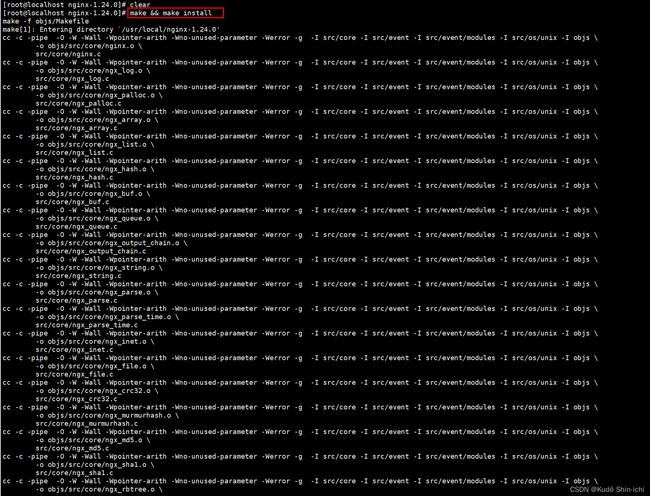
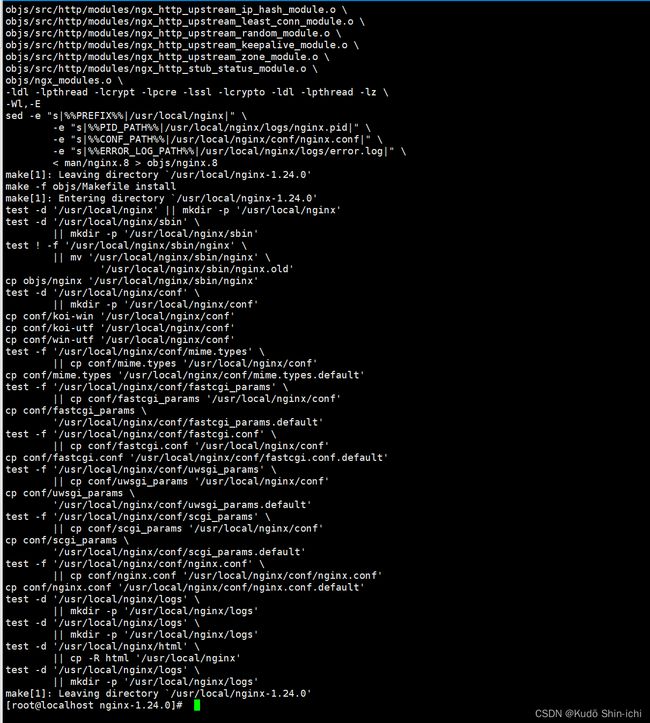
或者分别执行
//编译
make
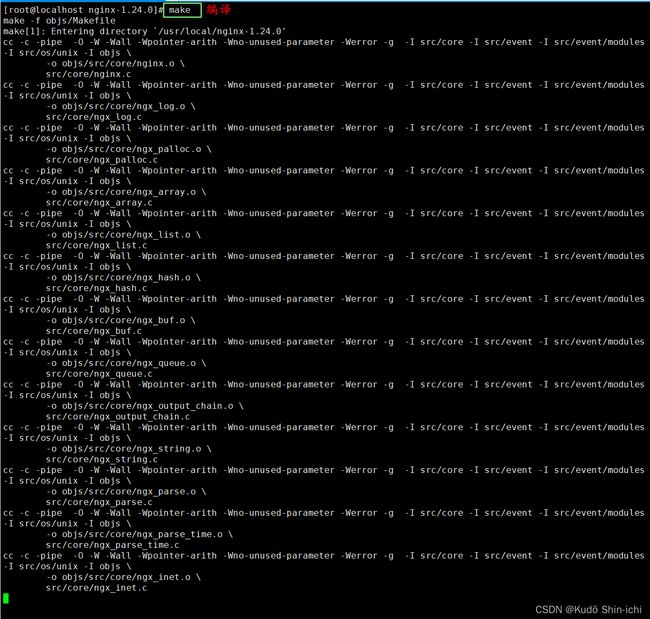
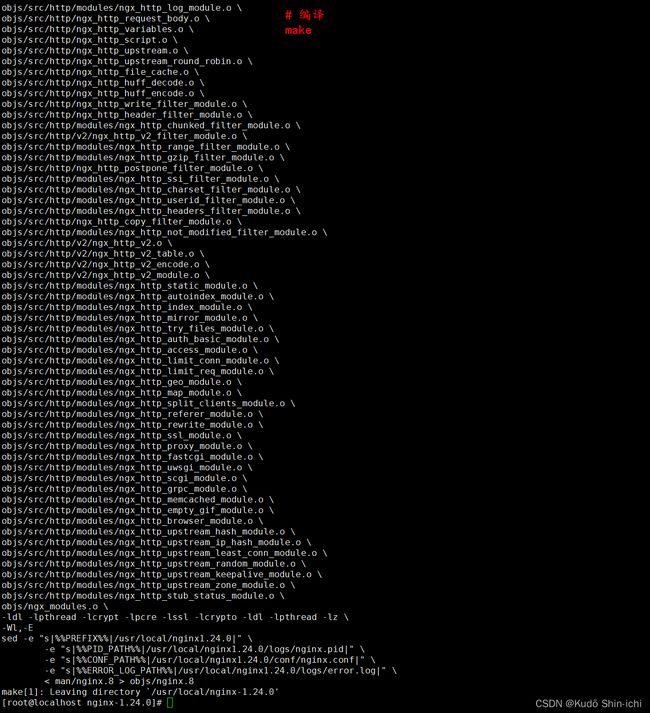
//安装
sudo make install
5、启动Nginx
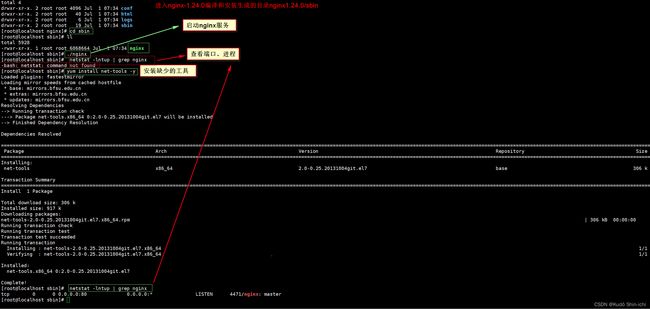
//5、启动Nginx

//关闭防火墙
systemctl stop firewalld

//进入nginx-1.24.0编译和安装生成的目录nginx1.24.0/sbin
cd /usr/local/nginx1.24.0/sbin

//启动nginx
./nginx

或者
sudo nginx
启动防火墙同时开放nginx80端口:
参考我这篇 查看CentOS版本及系统位数与设置CentOS 7.9 2009 防火墙配置放开端口的命令与过程
//禁止防火墙开机启动。这种方法方便,但不安全。
systemctl disable firewalld

下面  设置CentOS7.9 2009 防火墙配置放开端口80

//1-防火墙设置开机自启
systemctl enable firewalld

//2-查询防火墙状态
systemctl status firewalld

//3-启动防火墙
systemctl start firewalld
//关闭防火墙
systemctl stop firewalld

//4-查询防火墙状态,确保已经启动active(running)
systemctl status firewalld

//5-查看防火墙是否放行nginx80端口 no:代表没开80端口,yes表示已开nginx80端口。
firewall-cmd --query-port=80/tcp

//6-设置永久放行Nginx80端口,”–permanent“参数表示,永久生效,没有此参数重启后失效,表示重启后80端口无法通过。
firewall-cmd --add-port=80/tcp --permanent

//7-【设置永久放行Nginx80端口,重启防火墙后才能查询到防火墙已经放行Nginx80端口。】
//返回no,需要重启防火墙才能更新为yes
firewall-cmd --query-port=80/tcp
//#重启防火墙
systemctl restart firewalld
//返回yes,表示永久放行Nginx80端口
//重启防火墙后再次查看就是yes,表示80端口已经永久放行
firewall-cmd --query-port=80/tcp
6、查看nginx的进程
关闭防火墙:
systemctl stop firewalld或systemctl stop firewalld.service


访问nginx(IP:80):
查看IP(ifconfig):

在Windows浏览器输入(IP:80),访问虚拟机CentOS7.9 2009的nginx

7、关闭nginx:
./nginx -s stop


三、配置CentOS7.9 2009中nginx开机启动
3.1 命令
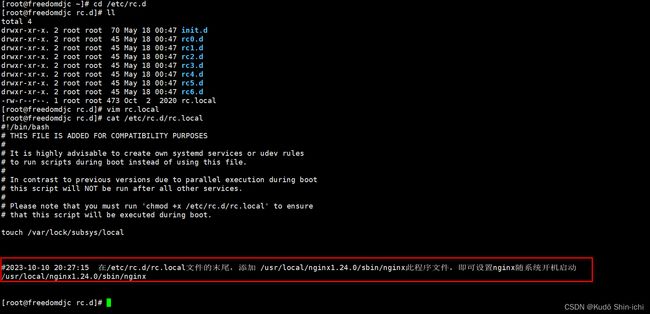
//1-修改rc.local文件的配置
//rc.local是个文件
//在/etc/rc.d/rc.local文件的末尾,添加 /usr/local/nginx1.24.0/sbin/nginx此程序文件的配置


//查看系统是否安装完整vim,如果正常安装肯定不止一行
rpm -qa|grep vim
//安装vim所有相关的包
 yum -y install vim*

//2-修改rc.local文件
vim /etc/rc.d/rc.local

//查看是否配置成功
 cat /etc/rc.d/rc.local


//3-赋予执行权限(必须运行这个命令来确保boot时,脚本能够被执行)
chmod +x /etc/rc.d/rc.local
3.2 截图

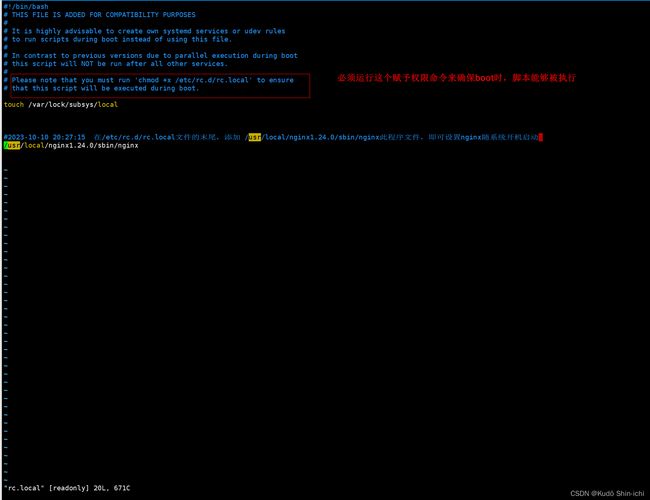
修改rc.local文件 :
vim /etc/rc.d/rc.local

查看是否配置成功 :
cat /etc/rc.d/rc.local
3-赋予执行权限(必须运行这个命令来确保boot时,脚本能够被执行)
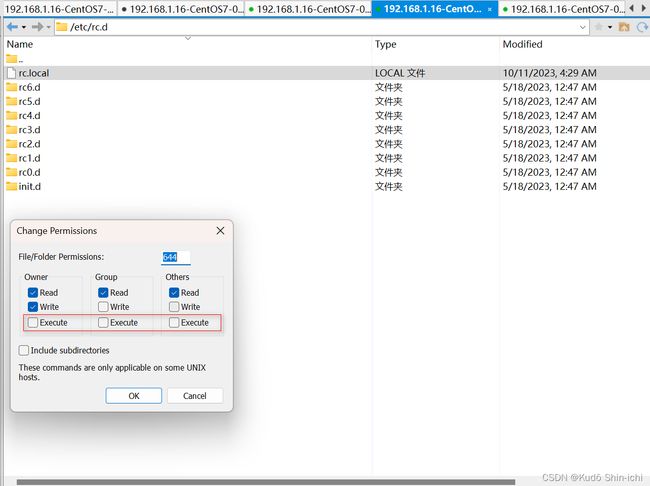
目前所有用户均无执行权限。
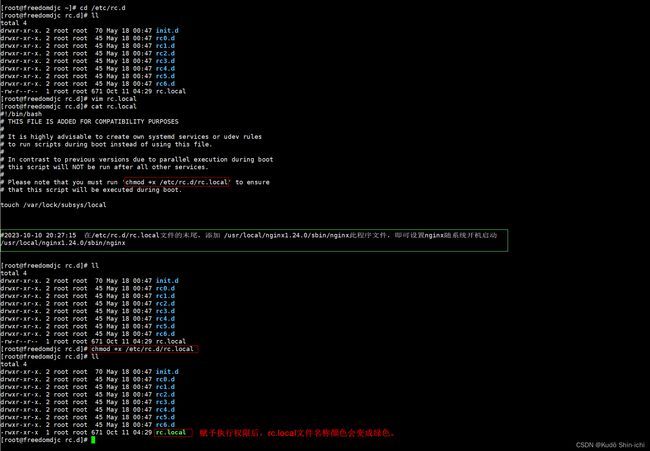
chmod +x /etc/rc.d/rc.local 赋予执行权限:
赋予执行权限后,rc.local文件名称颜色会变成绿色,变深:
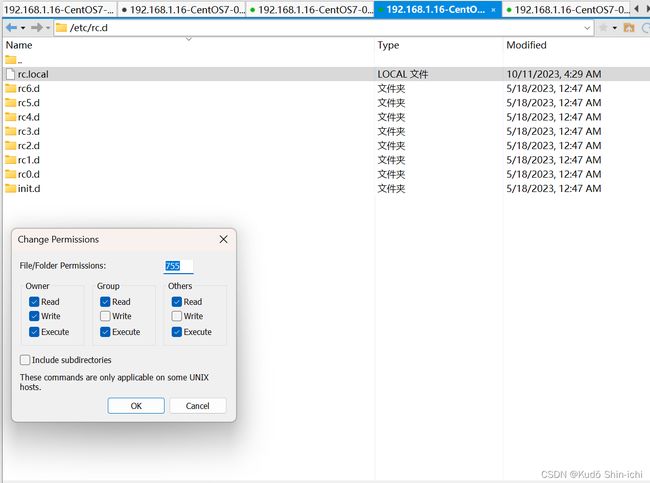
所有用户都拥有了执行权限:
重新启动服务器CentOS7.9 2009后,nginx已经可以开机自启,直接访问了,不需要再去执行./nginx 启动命令了:(此处在nginx中部署了前端的dist包)
//启动nginx
cd /usr/local/nginx1.24.0/sbin
./nginx
或
./nginx -c  /usr/local/nginx1.24.0/conf/nginx.conf
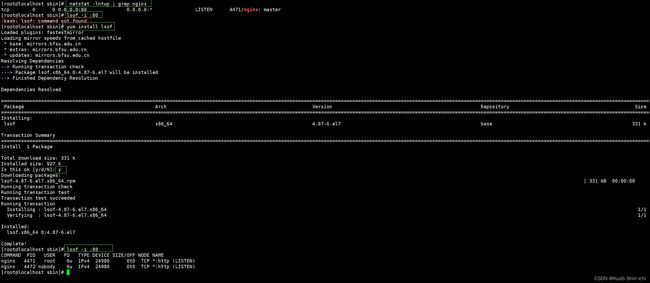
查看nginx的进程 :
//查看nginx的进程
yum install net-tools -y
netstat -lntup | grep nginx

//查看启动的nginx进程
ps -ef | grep nginx

yum install lsof
lsof -i :80
四、打包部署前端dist包
4.1 dist包
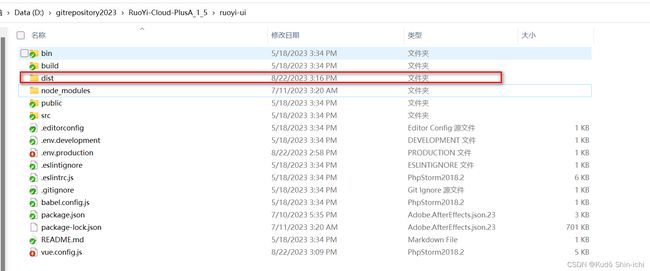
dist,即distribution,是Vue打包后生成的默认目录名称,里面包含了前端项目所需要的HTML、CSS、JavaScript等资源文件。
npm run build 一般来说都是这个打包命令。
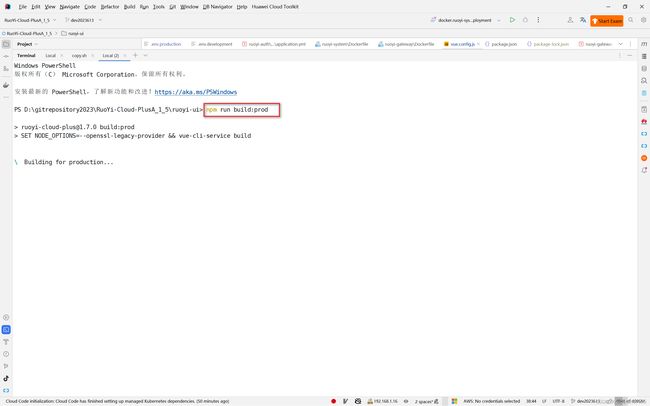
打包命令根据package.json文件中的命令中的配置来写,下面的打包命令就是npm run build:prod,prod是production的缩写,意思是打生产环境的包,其中的 SET NODE_OPTIONS=--openssl-legacy-provider 是为了解决Node.js版本过高的问题(Error:0308010C:digital envelope routines::unsupported)而添加的。
详情见我这篇文章:
IDEA中Node.js环境下npm报错Error:0308010C:digital envelope routines:unsupported
npm相关安装配置等,参考我这篇文章:
安装配置nvm-windows对Node.js与npm进行版本控制
package.json文件中的命令中配置的打包命令
  "scripts": {
    "dev": "SET NODE_OPTIONS=--openssl-legacy-provider && vue-cli-service serve",
    "build:prod": "SET NODE_OPTIONS=--openssl-legacy-provider && vue-cli-service build",
    "preview": "node build/index.js --preview",
    "lint": "eslint --ext .js,.vue src"
  },
启动防火墙同时开放nginx80端口`:
参考我这篇 查看CentOS版本及系统位数与设置CentOS 7.9 2009 防火墙配置放开端口的命令与过程
//禁止防火墙开机启动。这种方法方便,但不安全。
systemctl disable firewalld

下面  设置CentOS7.9 2009 防火墙配置放开端口80

//1-防火墙设置开机自启
systemctl enable firewalld

//2-查询防火墙状态
systemctl status firewalld

//3-启动防火墙
systemctl start firewalld
//关闭防火墙
systemctl stop firewalld

//4-查询防火墙状态,确保已经启动active(running)
systemctl status firewalld

//5-查看防火墙是否放行nginx80端口 no:代表没开80端口,yes表示已开nginx80端口。
firewall-cmd --query-port=80/tcp

//6-设置永久放行Nginx80端口,”–permanent“参数表示,永久生效,没有此参数重启后失效,表示重启后80端口无法通过。
firewall-cmd --add-port=80/tcp --permanent

//7-【设置永久放行Nginx80端口,重启防火墙后才能查询到防火墙已经放行Nginx80端口。】
//返回no,需要重启防火墙才能更新为yes
firewall-cmd --query-port=80/tcp
//#重启防火墙
systemctl restart firewalld
//返回yes,表示永久放行Nginx80端口
//重启防火墙后再次查看就是yes,表示80端口已经永久放行
firewall-cmd --query-port=80/tcp
4.2 修改前端对应的后端地址
.env.production文件中配置VUE_APP_BASE_API值 为http://192.168.1.16:8080:

vue.config.js文件中的target值修改为http://192.168.1.16:8080

上面配置端口号要与配置的springboot内置Tomcat的端口一致:
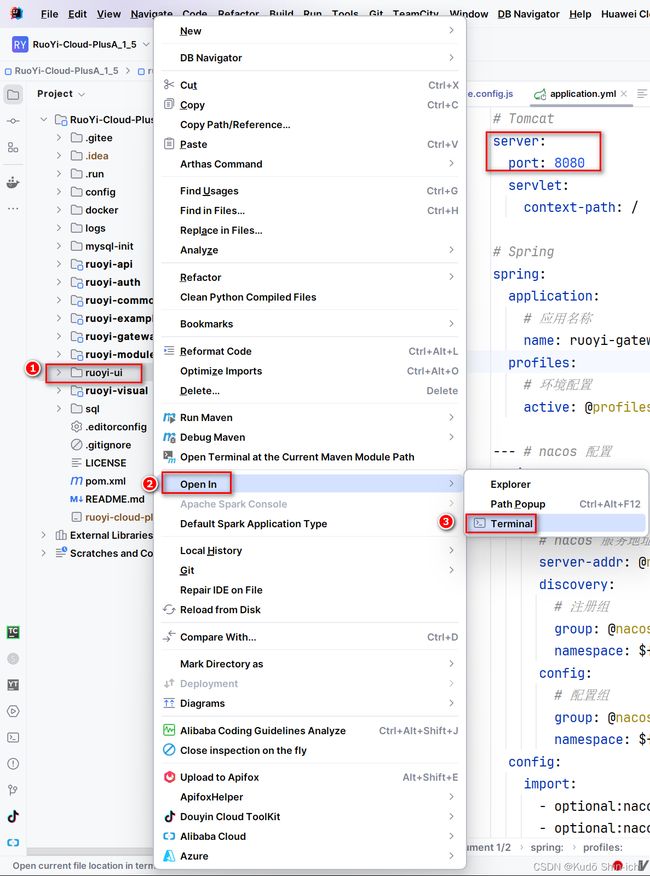
在项目目录下的src/main/resources中的application.yml文件,配置配置Tomcat端口8080:
#符号表示注释
#application.yml配置文件中指定Tomcat端口为8080
#application.yml与application.properties两个配置文件二选一
#Tomcat
server:
  port: 8080
或者
在项目目录下的src/main/resources中的application.properties文件,配置Tomcat端口8080:
#符号表示注释
#application.properties配置文件中指定Tomcat端口
#application.properties与application.yml两个配置文件二选一
server.port=8080
4.3 开始打包
执行npm run build:prod打包命令:

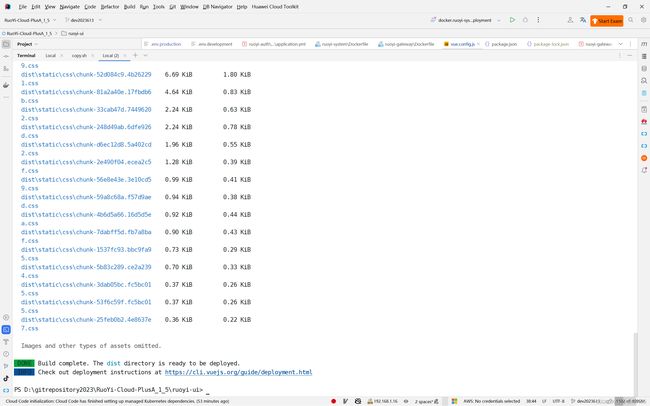
出现下面的提示,就代表打包已经完成了:
在文件管理器中查看dist包:
4.4 部署dist包
将dist包上传到指定目录/deploy/ruoyicloud_ui/中
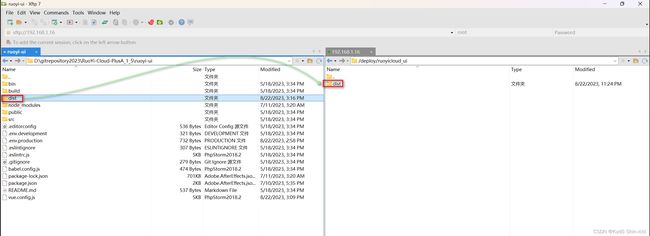
查看/deploy/ruoyicloud_ui/dist的项目结构:

修改nginx.conf中的配置
配置nginx.conf
/usr/local/nginx1.24.0/conf
/usr/local/nginx1.24.0/conf/nginx.conf
文件内容太多,为了便于修改,以及避免错误,建议下载到Windows中配置,配置好再上传回去。
//命令修改
vim /usr/local/nginx1.24.0/conf/nginx.conf
修改nginx.conf中root html为root /deploy/ruoyicloud_ui/dist 访问打好的dist包,即我们刚刚上传的dist包所在的位置。
修改nginx.conf中的server_name localhost为server_name 192.168.1.16。
#user  nobody;
worker_processes  1;

#error_log  logs/error.log;
#error_log  logs/error.log  notice;
#error_log  logs/error.log  info;

#pid        logs/nginx.pid;


events {
    worker_connections  1024;
}


http {
    include       mime.types;
    default_type  application/octet-stream;

    #log_format  main  '$remote_addr - $remote_user [$time_local] "$request" '
    #                  '$status $body_bytes_sent "$http_referer" '
    #                  '"$http_user_agent" "$http_x_forwarded_for"';

    #access_log  logs/access.log  main;

    sendfile        on;
    #tcp_nopush     on;

    #keepalive_timeout  0;
    keepalive_timeout  65;

    #gzip  on;

    server {
        listen       80;
        #server_name  localhost;
		server_name  192.168.1.16;

        #charset koi8-r;

        #access_log  logs/host.access.log  main;

        location / {
            #root   html;
            root  /deploy/ruoyicloud_ui/dist;
            index  index.html index.htm;
        }

        #error_page  404              /404.html;

        # redirect server error pages to the static page /50x.html
        #
        error_page   500 502 503 504  /50x.html;
        location = /50x.html {
            root   html;
        }

        # proxy the PHP scripts to Apache listening on 127.0.0.1:80
        #
        #location ~ \.php$ {
        #    proxy_pass   http://127.0.0.1;
        #}

        # pass the PHP scripts to FastCGI server listening on 127.0.0.1:9000
        #
        #location ~ \.php$ {
        #    root           html;
        #    fastcgi_pass   127.0.0.1:9000;
        #    fastcgi_index  index.php;
        #    fastcgi_param  SCRIPT_FILENAME  /scripts$fastcgi_script_name;
        #    include        fastcgi_params;
        #}

        # deny access to .htaccess files, if Apache's document root
        # concurs with nginx's one
        #
        #location ~ /\.ht {
        #    deny  all;
        #}
    }


    # another virtual host using mix of IP-, name-, and port-based configuration
    #
    #server {
    #    listen       8000;
    #    listen       somename:8080;
    #    server_name  somename  alias  another.alias;

    #    location / {
    #        root   html;
    #        index  index.html index.htm;
    #    }
    #}


    # HTTPS server
    #
    #server {
    #    listen       443 ssl;
    #    server_name  localhost;

    #    ssl_certificate      cert.pem;
    #    ssl_certificate_key  cert.key;

    #    ssl_session_cache    shared:SSL:1m;
    #    ssl_session_timeout  5m;

    #    ssl_ciphers  HIGH:!aNULL:!MD5;
    #    ssl_prefer_server_ciphers  on;

    #    location / {
    #        root   html;
    #        index  index.html index.htm;
    #    }
    #}

}
重新加载配置文件nginx.conf :
因为刚刚修改了配置文件nginx.conf(修改nginx.conf中root html为root /deploy/ruoyicloud_ui/dist 访问打好的dist包和修改nginx.conf中的server_name localhost为server_name 192.168.1.16。),所以要重新加载配置文件nginx.conf。
//检查Nginx配置是否正确,如果配置没有错误,将显示一条成功消息
cd /usr/local/nginx1.24.0/sbin
./nginx -t
或者/usr/local/nginx1.24.0/sbin/nginx -t


//如果需要修改配置文件 ,修改之后要重新加载配置文件
cd /usr/local/nginx1.24.0/sbin
./nginx -s reload


 //启动nginx
cd /usr/local/nginx1.24.0/sbin
./nginx
或
./nginx -c  /usr/local/nginx1.24.0/conf/nginx.conf


#关闭nginx
cd /usr/local/nginx1.24.0/sbin
./nginx -s stop # 停止
检查Nginx配置是否正确
//检查Nginx配置是否正确,如果配置没有错误,将显示一条成功消息
cd /usr/local/nginx1.24.0/sbin
./nginx -t
或者/usr/local/nginx1.24.0/sbin/nginx -t

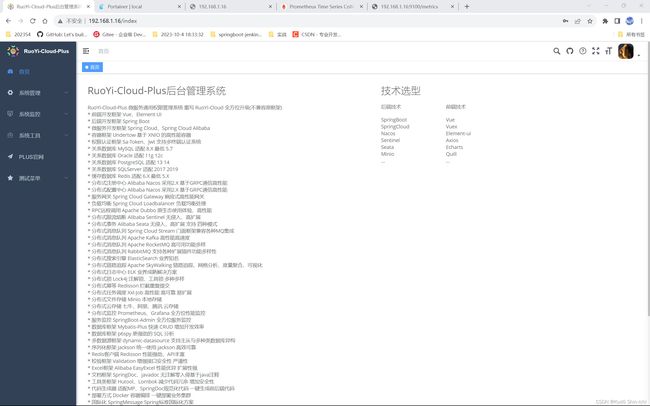
到这一步,前端dist包就部署到了nginx中,nginx还设置了nginx开机自启,意味着打开服务器就可以直接访问到前端界面(地址:http://192.168.1.16:80)。
五、运行整个项目
5.1 后端说明
四个后端基础环境(mysql redis nacos seata-server)和三大服务模块(ruoyi-gateway ruoyi-auth ruoyi-system )共七个镜像和七个容器。
后端使用了docker容器运行各个服务模块,访问地址为http://192.168.1.16:8080。
关键构建服务的镜像和运行服务的容器等过程参考我这篇文章:
无法加载验证码libfreetype.so.6: cannot open shared object file: No such file or directory
从3.3 三大模块中配置使用华为的镜像源开始看 。
【docker-compose.yml文件 与三大模块相关的内容】:
其中build参数表示环境配置的对象,表示./ruoyi2023731/auth下面的dockerfile文件。
即/opt/docker-compose/ruoyicloudplus/docker/ruoyi2023731/auth/dockerfile
ruoyi-auth(认证授权中心):
ruoyi-auth:
    image: ruoyi/ruoyi-auth:1.7.0
    container_name: ruoyi-auth

    build:
      context: ./ruoyi2023731/auth
      #dockerfile的文件名称
      dockerfile: dockerfile


    environment:
      # 时区上海
      TZ: Asia/Shanghai
    ports:
      - "9210:9210"
    volumes:
      # 配置文件
      - /docker/ruoyi-auth/logs/:/ruoyi/auth/logs
      # skywalking 探针
      - /docker/skywalking/agent/:/ruoyi/skywalking/agent
    privileged: true
    network_mode: "host"
ruoyi-gateway(网关服务):
ruoyi-gateway:
    image: ruoyi/ruoyi-gateway:1.7.0
    container_name: ruoyi-gateway

    build:
      context: ./ruoyi2023731/gateway
      #dockerfile的文件名称
      dockerfile: dockerfile


    environment:
      # 时区上海
      TZ: Asia/Shanghai
    ports:
      - "8080:8080"
    volumes:
      # 配置文件
      - /docker/ruoyi-gateway/logs/:/ruoyi/gateway/logs
      # skywalking 探针
      - /docker/skywalking/agent/:/ruoyi/skywalking/agent
    privileged: true
    network_mode: "host"
ruoyi-modules中的ruoyi-system(系统模块):
ruoyi-system:
    # 镜像名 : 仓库/标签:版本
    image: ruoyi/ruoyi-system:1.7.0
    container_name: ruoyi-system

      #djc构建镜像-images的命令  2023-8-3 18:11:13
      # 指定dockerfile的上下文路径(相对当前docker-compose.yml的位置)
    # 包含Dockerfile文件的目录路径,或者是git仓库的URL。
    #当提供的值是相对路径时,它被解释为相对于当前compose文件的位置。
    #该目录也是发送到Docker守护程序构建镜像的上下文。
    build:
      context: ./ruoyi2023731/system
      #dockerfile的文件名称
      dockerfile: dockerfile
    #本来这里有个ports的,但显示与下面的ports冲突,可能只要配置一个就可以了,对位置没有太多要求

    #  depends_on: 依赖(以指定顺序启动)

    # links也可以起到和depends_on相似的功能,即定义服务之间的依赖关系,从而确定服务启动的顺序


    environment:
      # 时区上海
      TZ: Asia/Shanghai
    ports:
      - "9201:9201"
    volumes:
      # 配置文件
      - /docker/ruoyi-system/logs/:/ruoyi/system/logs
      # skywalking 探针
      - /docker/skywalking/agent/:/ruoyi/skywalking/agent
    privileged: true
    network_mode: "host"
无法加载验证码libfreetype.so.6: cannot open shared object file: No such file or directory
从3.4.2 启动后端三大模块镜像(gateway-auth-system)开始看 。
执行脚本命令sh deploy.sh base,启动基础环境中nacos可能会报No dataset source错误,这是因为nacos的后台配置文件存放在mysql中,而mysql还没有完全启动成功,nacos就已经启动了,导致无法加载配置文件。也就是说,必须mysql启动成功后,nacos才能加载到配置文件,才能完全启动成功。
建议使用构造完镜像后,后续使用可视化工具,如portainer,手动点击,先启动mysql,再启动nacos,这样更方便控制各个服务模块启动顺序。
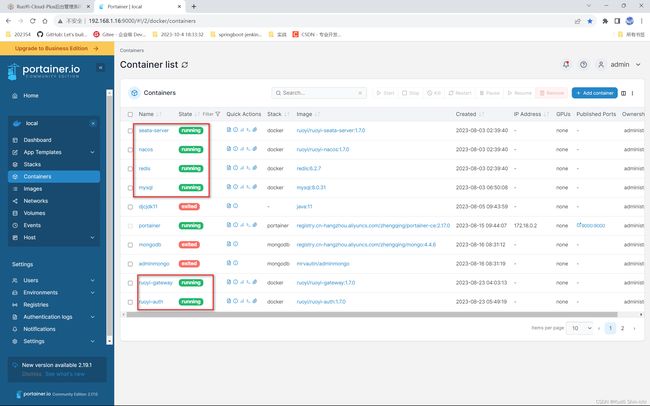
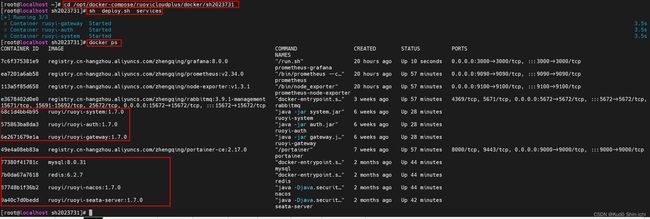
启动后端基础环境和三大服务模块后,分别查看容器是否正常启动成功。(使用docker ps命令查看正在运行的容器是否包含四个后端基础环境(mysql redis nacos seata-server)和三大服务模块(ruoyi-gateway ruoyi-auth ruoyi-system )共七个镜像和七个容器。
启动后端容器的步骤:
//1-进入登录脚本文件所在的文件夹
cd /opt/docker-compose/ruoyicloudplus/docker/sh2023731

//2-启动后端基础环境mysql redis nacos seata-server
//实际执行docker-compose up -d mysql redis nacos seata-server
sh deploy.sh base

//3-启动服务ruoyi-gateway ruoyi-auth ruoyi-system
//自动重新构建ruoyi-gateway和ruoyi-auth和ruoyi-system镜像和运行ruoyi-auth和ruoyi-system容器
//实际执行docker-compose up -d ruoyi-gateway ruoyi-auth ruoyi-system
sh  deploy.sh  services
5.2 最新前后端运行步骤总结
前端dist包部署到了nginx中,nginx还设置了nginx开机自启,意味着启动了服务器就可以直接访问到前端界面(地址:http://192.168.1.16:80),不需要再去手动启动前端了,直接去手动启动后端容器服务,就可以运行整个项目。
手动启动前端(可忽略):
//启动nginx
cd /usr/local/nginx1.24.0/sbin
./nginx
或
./nginx -c  /usr/local/nginx1.24.0/conf/nginx.conf
手动启动后端:
执行完记得使用docker ps命令查看后端服务是否完全启动成功了。
//1-进入登录脚本文件所在的文件夹
cd /opt/docker-compose/ruoyicloudplus/docker/sh2023731

//2-启动后端基础环境mysql redis nacos seata-server
//实际执行docker-compose up -d mysql redis nacos seata-server
sh deploy.sh base

//3-启动服务ruoyi-gateway ruoyi-auth ruoyi-system
//自动重新构建ruoyi-gateway和ruoyi-auth和ruoyi-system镜像和运行ruoyi-auth和ruoyi-system容器
//实际执行docker-compose up -d ruoyi-gateway ruoyi-auth ruoyi-system
sh  deploy.sh  services
5.3 启动截图
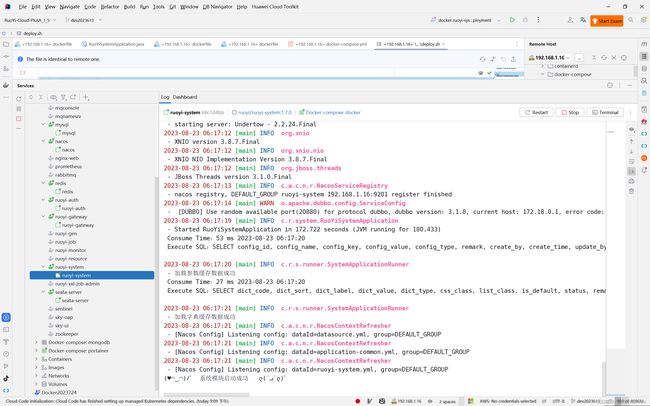
ruoyi-system:
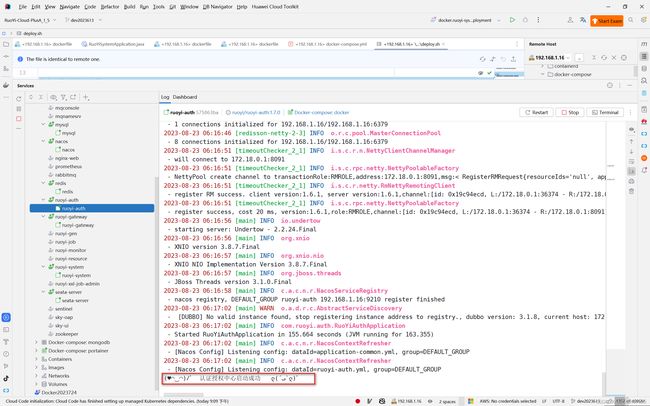
ruoyi-auth:
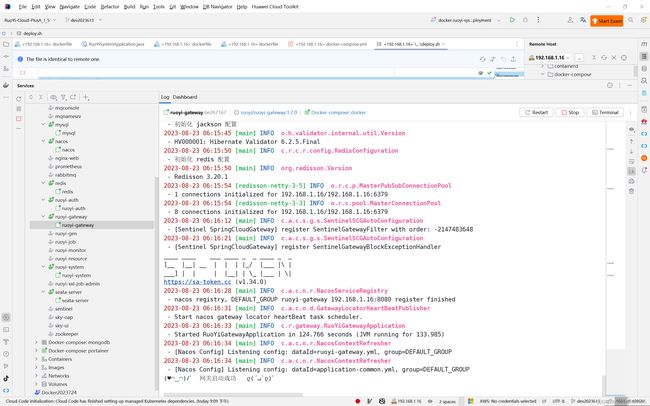
ruoyi-gateway:
sh deploy.sh base :

sh deploy.sh services:
使用可视化工具portainer查看容器启动情况(后端基础环境mysql redis nacos seata-server和服务ruoyi-gateway ruoyi-auth ruoyi-system启动成功):
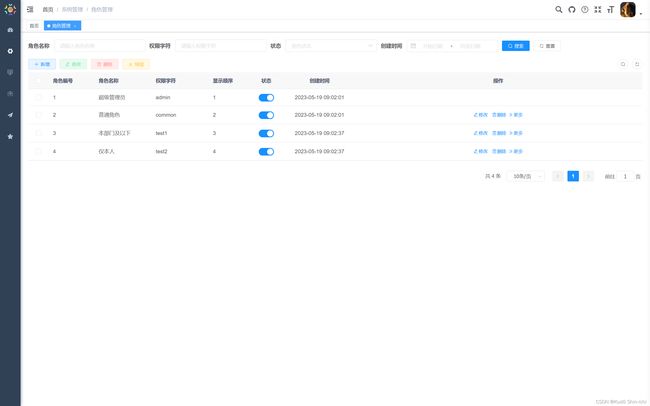
5.4 登录系统
5.5 关闭系统
//关闭  2023-8-19 20:18:01
//进入脚本文件所在的文件夹
cd /opt/docker-compose/ruoyicloudplus/docker/sh2023731

sh deploy.sh stop
5.6 sh2023731中的deploy.sh脚本内容
#!/bin/sh

# 使用说明,用来提示输入参数
usage(){
	echo "Usage: sh 执行脚本.sh [base|services|stop|rm]"
	exit 1
}

# 启动基础环境(必须)
base(){
	docker-compose up -d mysql redis nacos seata-server
}

# 启动程序模块(必须)
services(){
	docker-compose up -d ruoyi-gateway ruoyi-auth ruoyi-system
}

# 关闭所有环境/模块
stop(){
	docker-compose stop
}

# 删除所有环境/模块
rm(){
	docker-compose rm
}

# 根据输入参数,选择执行对应方法,不输入则执行使用说明
case "$1" in
"base")
	base
;;
"services")
	services
;;
"stop")
	stop
;;
"rm")
	rm
;;
*)
	usage
;;
esac
