【angular】实现简单的angular国际化(i18n)
文章目录
-
- 目标
- 过程
- 运行
- 在TS中国际化
- 参考
目标
实现简单的angular国际化。本博客实现中文版和法语版。
将Hello i18n!变为中文版:你好 i18n!或法语版:Bonjour l’i18n !。
过程
创建一个项目:
ng new i18nDemo
在集成终端中打开。
添加本地化包:
ng add @angular/localize
在html中添加格式化标识:
<h1 i18n>Hello i18n!</h1>
现在运行一下,页面是:
ng extract-i18n --output-path src/locale
生成了一个文件夹:locale,里面有一个文件messages.xlf
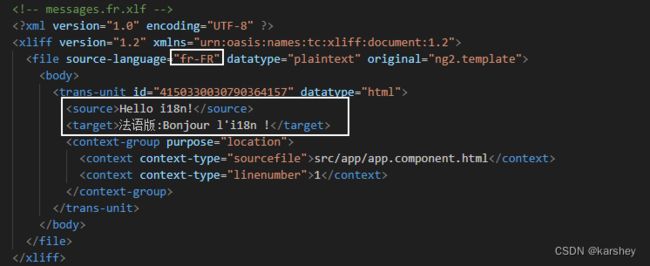
会把source里的内容翻译成target:
我们这里想有两种语言,法文和中文。因此:
为什么中文是zh-CN,法文是fr-FR,看这里:https://angular.cn/guide/i18n-common-locale-id
<xliff version="1.2" xmlns="urn:oasis:names:tc:xliff:document:1.2">
  <file source-language="zh-CN" datatype="plaintext" original="ng2.template">
    <body>
      <trans-unit id="4150330030790364157" datatype="html">
        <source>Hello i18n!source>
        <target>中文版:你好 i18n!target>
        <context-group purpose="location">
          <context context-type="sourcefile">src/app/app.component.htmlcontext>
          <context context-type="linenumber">1context>
        context-group>
      trans-unit>
    body>
  file>
xliff>
<xliff version="1.2" xmlns="urn:oasis:names:tc:xliff:document:1.2">
  <file source-language="fr-FR" datatype="plaintext" original="ng2.template">
    <body>
      <trans-unit id="4150330030790364157" datatype="html">
        <source>Hello i18n!source>
        <target>法语版:Bonjour l'i18n !target>
        <context-group purpose="location">
          <context context-type="sourcefile">src/app/app.component.htmlcontext>
          <context context-type="linenumber">1context>
        context-group>
      trans-unit>
    body>
  file>
xliff>
相关文档:https://angular.cn/guide/i18n-common-translation-files
接下来是配置angular.json(根据文档)。
"i18n": {
    "sourceLocale": "en-US",
    "locales": {
        "fr": {
            "translation": "src/locale/messages.fr.xlf"
        },
        "zh": {
            "translation": "src/locale/messages.zh.xlf"
        }
    }
},
"localize": true,
配置完了。接下来从命令行构建:
ng build --localize
然后再配置:
"build"->"configurations":
"fr": {
     "localize": [
         "fr"
     ]
 },
 "zh": {
     "localize": [
         "zh"
     ]
 }
"serve"->"configurations":
"fr": {
   "browserTarget": "i18nDemo:build:development,fr"
},
"zh": {
   "browserTarget": "i18nDemo:build:development,zh"
}
运行
法语版:
ng serve --configuration=fr
ng serve --configuration=zh
跟前面的xml文件一致。
ps:后面的生产构建ng build --configuration=production,fr报错了,不知道怎么搞,等会了再来补充。
在TS中国际化
参考:
angular6 使用信息提示框toast_angular4 消息提示框-CSDN博客
ngx-toastr - npm (npmjs.com)
https://angular.cn/guide/i18n-common-prepare
语法:
在组件代码中,翻译源文本和元数据被反引号 (`) 字符包围。 使用 $localize 标记的消息字符串在代码中标记出要翻译的字符串。
$localize `string_to_translate`;
参考
Angular 国际化
超详细的 Angular 国际化方案 - 掘金 (juejin.cn)
Angular使用内置i18n国际化配置Angular国际化_angular i18n-CSDN博客
angular 国际化 (i18n) - 简书 (jianshu.com)
Angular8升级至Angular13遇到的问题_package ‘@angular/core’ is not a dependency.-CSDN博客
angular6 使用信息提示框toast_angular4 消息提示框-CSDN博客
ngx-toastr - npm (npmjs.com)
心得:新手入门,纯看官方文档感觉太抽象太难了,就结合其他博客进行理解。然后发现其他博客的一些配置已经被废弃了,然后又去看官方文档。这个过程中过滤掉很多看不懂的(…)信息,又总结了很多能看懂优质博客(!),慢慢就学会了!感谢所有写博客的人,救我一命。。


