【进阶教程】Appium自动化测试,太详细了!
目录
Appium环境搭建
Mac iOS环境搭建
Appium基础
Appium进阶
Monkey的使用
Copyadb shell monkey -p com.lqr.wechat -v 500 > monkey.log

adb shell monkey -p com.lqr.wechat -vvv 5000 > monkey2.log

adb shell monkey -p com.lqr.wechat -vvv 5000--send=1556166765229 --throttle 500 > monkey3.log

adb shell monkey -p com.lqr.wechat -vvv 5000--send=1556166765229 --ignore-crashes > monkey4.log
参数:
-p
-v
-s
--throttle
--ignore-crashes: 忽略崩溃
--ignore-timeouts: 忽略ANR
--ignore-security-exceptions: 忽略证书问题
--kill-process-after-error: Monkey出错后结束运行
--monitor-native-crashes: 监控本地崩溃
可通过命令行指定
count=5000: 计划执行5000次
AllowPackage: 包名
Event percentages: 事件百分比, 可通过命令行修改
Switch: Activity(页面)跳转
Sending Touch: 发送动作指令
Injection Failed #注入(执行)指令失败, App无反应或不支持
CRASH: 崩溃
指定事件百分比
–pct-touch:触摸事件(点击)
–pct-motion:动作事件(拖动)
–pct-trackball:轨迹球事件(移动)
–pct-nav:基本导航事件:上下左右操作
–pct-majornav:主导航事件: 确认,菜单,返回键
–pct-syskeys:系统按键事件: 如HOME键,BACK键,拨号键,挂断键,音量键等
–pct-appswitch:应用启动事件
–pct-anyevent: 任意事件
手动停止Monkey
Copyadb shell
ps  | grep monkey   (查询进程号)
kill 进程号
Appium inspector的使用
启动和配置
定位和操作元素
录制
元素定位
通过resource_id: find_element_by_id:
通过content-desc: find_element_by__accessibility_id
通过xpath: 结合属性/上下级节点/索引定位
重复元素+索引定位: l = find_elements_by_... l[1].click()
逐级定位: driver.find_element_by_id(...).find_element_by_class_name(...)
使用By及元素定位器
from appium.webdriver.common.mobileby import By
driver.find_element(By.ID, "....")
使用uiautomator的原始定位方式
1.通过id定位
Copydriver.find_element_by_android_uiautomator('new UiSelector().resourceId(“id”)').click()
通过text定位
Copy# Text定位
driver.find_element_by_android_uiautomator('new UiSelector().text("textstr")')
# 文字包含
driver.find_element_by_android_uiautomator('new UiSelector().textContains(textStr)')
# 以哪个字符开始
driver.find_element_by_android_uiautomator('new UiSelector().textStartsWith(textStr)')
通过class属性定位
Copydriver.find_element_by_android_uiautomator('newUiSelector().className("class属性")')
多属性定位
Copydriver.find_element_by_android_uiautomator('new UiSelector().className("android.widget.TextView").text("Custom View")')
可作为过滤条件的有:
UISelector.text
UISelector.textContains
UISelector.textStartsWith
UiSelector.resourceId
UISelector.className
UISelector.textMatches
UISelector.classNameMatches
UiSelector.fromParent
UiSelector.childSelector
UiSelector.resourceIdMatches
UiSelector.description
UiSelector.descriptionStartWith
UiSelector.descriptionMatches
元素操作
click()
send_keys()
clear()
is_displayed()/is_enabled()/is_checked()
get_attribute(): 获取属性 文本/状态/是否可操作等
get_attribute("text")
get_attribute("resourceId")
get_attribute("className")
set_value(): 设置text值
text: 元素的文本
location: 获取元素坐标值
size: 获取元素大小
练习
CopynoReset: True
1. 打开微信应用 ,判断是否存在 登录按钮

2. 如果已经登录,登录按钮不存在 ,就直接进入登录页,打印 通讯录的这些属性值, resourceid,text,className,enabled,clickable,selected,Displayed

c = driver.find...()

print(c.get_attribute("clickable"))
print(c.is_enabled()/c.is_displayed()/c.is_selected())

如果登录按钮存在 ,打印这个登录按钮的上面的属性值resourceid,text,className,enabled,clickable,selected,Displayed, 并点击登录按钮,
	使用set_value())输入用户名密码
	判断登录按钮是否可用,
		可用的话打印可用,并点击登录,判断是否登录成功
		不可用打印不可用
3. 退出应用
练习提示
Copytry:  # 尝试定位登录按钮
	l = driver.find_element_by_id("")
except:  # 未定位到
	print(“没有登录按钮”)
	c = driver.find_....()    # 定位 通讯录 标签
	print(c.get_attribute('resource-id')  # 打印各种属性
	print(c.text)
	print(c.get_attribute(“class”)
	print(c.is_enabled())
	....
else:  # 如果没有异常(定位到了登录按钮)
	print(l.get_attribute("resource-id")   # 打印登录按钮的各种属性
	print(l.text)
	print(l.get_attribute(“class”)
	print(l.is_enabled())
	...
	l.click()  # 点击登录按钮
	driver.find…().set_value("18010181267")  # 使用set_value输入文字
	driver.find…().set_value("123456")  # 使用set_value输入密码
	l2 = driver.find..()  # 定位 登录 按钮
	if l2.is_enabled() isTrue:  # 判断 登录按钮 是否可用
		print(“可用”)
		l2.click()  # 点击登录按钮
		try:   # 判断是否登录成功, 登录成功后会有 "通讯录" 这个标签
			c = driver.find_....()   # 尝试定位通讯录这个标签
		except:  # 定位不到打印失败
			print(“登录失败”)
		else:  # 没有异常(定位到) 打印成功
			print(“登录成功”)
	else:
		print("不可用")  # 上面的l2登录按钮不可用打印不可用
按键操作
drvier.keyevent()
driver.press_keycode()
练习
Copy
启动 微信,登录用户名和密码,并点击登录
 进入 “我” ,点击用户名,
点击二维码名片,
截图并保存到d:\\screenshot\\VCODE.png
导入截图到手机/sdcard/images/这个路径下
返回到微信聊天列表页,并将音量放大两个分贝
点击菜单回到手机主屏
退出
屏幕操作
tap: 触控(点击指定坐标),支持多点触控
swipe: 滑动
flick: 快滑
pinch:
zoom:
get_screenshot_as_file: 截图
获取屏幕宽度
width = driver.get_window_size()['width']
height = driver.get_window_size()['height']
练习
Copy封装四个方法,
向下滑动,
向上滑动,
向左滑动,
向右滑动,
练习2
Copy打开手机设置
滑动查找页面上含有“关于“文字的 元素
如果找到了点击,如果没找到继续找,
进入关于页面,查看手机的版本信息
退出设置页面
文件操作
driver.pull()
driver.push()
app操作
autoLaunch=False
driver.is_app_installed()
driver.install_app()
driver.remove_app()
driver.launch_app()
driver.start_activity()
driver.current_activity()
driver.background_app(3)
driver.close_app()
网络状态
driver.network_connection
查找已安装app(无apk包)Package/MainActiviy方法
Copyadb shell
logcat | grep cmp=
然后在设备上操作一次app
练习
Copy1.连接appium server,不启动任何app ,(autoLaunch =False)
2.启动微信的首页activity( launch_app() )
3.打开通知栏,然后关闭通知栏(要先打开一个activity) driver.press_keyevent(“4”)
4.用start_activity()启动本地浏览器,判断当前相机activity是否正确(
获取current_activity 对比当前的activity print driver.current_activity - .Camera)
5. 截屏screenshot.png 并保存到 d:\tmp\目录下
6.把当前app放在后台运行5秒钟 driver.backGround_app—进入 入到app首页
7.查看当前的网络状态,并且输出
8. 判断微信app是否已安装,已安装卸载,未安装执行安装 driver.is_app_install(“com.sankuai.meituan”)
Driver.remove_app(“包名”)
Driver.install_app(“路径/.apk”)实战案例
光学理论是没用的,要学会跟着一起敲,要动手实操,才能将自己的所学运用到实际当中去,这时候可以搞点实战案例来学习。
电商项目实战
web测试项目
web+App+h5+小程序 测试项目
接口自动化测试实战项目
Linux实战项目
面试资料
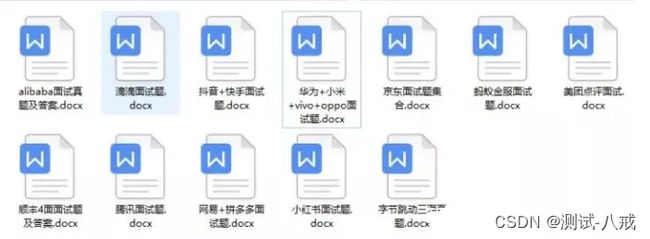
我们进阶学习自动化测试必然是为了找到高薪的工作,下面这些面试题是来自阿里、腾讯、字节等一线互联网大厂最新的面试资料,并且有字节大佬给出了权威的解答,刷完这一套面试资料相信大家都能找到满意的工作。
以上资料,对于想要测试进阶的朋友们来说应该会很有帮助,需要的小伙伴可以后台私信找我免费领取。
总结
我见过很多leader在面试的时候,遇到处于迷茫期的大龄程序员,比面试官年龄都大。这些人有一些共同特征:可能工作了好几年,更夸张的是7、8年工作内容的重复性比较高,没有什么技术含量的工作。
凡事要趁早,特别是技术行业,一定要提升技术功底,丰富自动化项目实战经验,这对于你未来几年职业规划,以及测试技术掌握的深度非常有帮助。
如果对你有帮助的话,点个赞收个藏,给作者一个鼓励。也方便你下次能够快速查找。
如有不懂还要咨询下方小卡片,博主也希望和志同道合的测试人员一起学习进步
在适当的年龄,选择适当的岗位,尽量去发挥好自己的优势。
我的自动化测试开发之路,一路走来都离不每个阶段的计划,因为自己喜欢规划和总结,
测试开发视频教程、学习笔记领取传送门!!!


