Rust 中的 Pin UnPin Async Await 实现机制
原文地址
为了保证概念的严谨性,翻译时保留了英文原文。
In this post, we explore cooperative multitasking and the async/await feature of Rust. We take a detailed look at how async/await works in Rust, including the design of the Future trait, the state machine transformation, and pinning. We then add basic support for async/await to our kernel by creating an asynchronous keyboard task and a basic executor.
在这篇文章中,我们将探讨 Rust 的协作多任务处理和异步/等待功能。我们详细了解 async/await 在 Rust 中的工作原理,包括 Future 特征的设计、状态机转换和固定。然后,我们通过创建异步键盘任务和基本执行器来向内核添加对 async/await 的基本支持。
This blog is openly developed on GitHub. If you have any problems or questions, please open an issue there. You can also leave comments at the bottom. The complete source code for this post can be found in the post-12 branch.
该博客是在 GitHub 上公开开发的。如果您有任何问题或疑问,请在那里提出问题。也可以在底部留言评论。这篇文章的完整源代码可以在 post-12 分支中找到。
1. Multitasking 多任务处理
One of the fundamental features of most operating systems is multitasking, which is the ability to execute multiple tasks concurrently. For example, you probably have other programs open while looking at this post, such as a text editor or a terminal window. Even if you have only a single browser window open, there are probably various background tasks for managing your desktop windows, checking for updates, or indexing files.
大多数操作系统的基本功能之一是多任务处理,即同时执行多个任务的能力。例如,您在查看本文时可能打开了其他程序,例如文本编辑器或终端窗口。即使您只打开一个浏览器窗口,也可能有各种后台任务用于管理桌面窗口、检查更新或索引文件。
While it seems like all tasks run in parallel, only a single task can be executed on a CPU core at a time. To create the illusion that the tasks run in parallel, the operating system rapidly switches between active tasks so that each one can make a bit of progress. Since computers are fast, we don’t notice these switches most of the time.
虽然看起来所有任务都是并行运行的,但一次只能在一个 CPU 核心上执行一个任务。为了制造任务并行运行的假象,操作系统在活动任务之间快速切换,以便每个任务都能取得一点进展。由于计算机速度很快,我们大多数时候都不会注意到这些切换。
While single-core CPUs can only execute a single task at a time, multi-core CPUs can run multiple tasks in a truly parallel way. For example, a CPU with 8 cores can run 8 tasks at the same time. We will explain how to setup multi-core CPUs in a future post. For this post, we will focus on single-core CPUs for simplicity. (It’s worth noting that all multi-core CPUs start with only a single active core, so we can treat them as single-core CPUs for now.)
单核 CPU 一次只能执行一个任务,而多核 CPU 可以以真正并行的方式运行多个任务。例如,8核CPU可以同时运行8个任务。我们将在以后的文章中解释如何设置多核 CPU。为了简单起见,在这篇文章中,我们将重点关注单核 CPU。 (值得注意的是,所有多核 CPU 都只有一个活动核心启动,因此我们现在可以将它们视为单核 CPU。)
There are two forms of multitasking: Cooperative multitasking requires tasks to regularly give up control of the CPU so that other tasks can make progress. Preemptive multitasking uses operating system functionality to switch threads at arbitrary points in time by forcibly pausing them. In the following we will explore the two forms of multitasking in more detail and discuss their respective advantages and drawbacks.
多任务处理有两种形式: 协作多任务处理要求任务定期放弃对 CPU 的控制,以便其他任务能够取得进展。抢占式多任务处理使用操作系统功能通过强制暂停线程来在任意时间点切换线程。下面我们将更详细地探讨这两种形式的多任务处理,并讨论它们各自的优点和缺点。
1.1 Preemptive Multitasking 抢占式多任务处理
The idea behind preemptive multitasking is that the operating system controls when to switch tasks. For that, it utilizes the fact that it regains control of the CPU on each interrupt. This makes it possible to switch tasks whenever new input is available to the system. For example, it would be possible to switch tasks when the mouse is moved or a network packet arrives. The operating system can also determine the exact time that a task is allowed to run by configuring a hardware timer to send an interrupt after that time.
抢占式多任务处理背后的想法是操作系统控制何时切换任务。为此,它利用了在每次中断时重新获得 CPU 控制权的事实。这使得每当系统有新输入时就可以切换任务。例如,当鼠标移动或网络数据包到达时,可以切换任务。操作系统还可以通过配置硬件定时器在该时间之后发送中断来确定允许任务运行的确切时间。
The following graphic illustrates the task switching process on a hardware interrupt:
下图说明了硬件中断时的任务切换过程:

In the first row, the CPU is executing task A1 of program A. All other tasks are paused. In the second row, a hardware interrupt arrives at the CPU. As described in the Hardware Interrupts post, the CPU immediately stops the execution of task A1 and jumps to the interrupt handler defined in the interrupt descriptor table (IDT). Through this interrupt handler, the operating system now has control of the CPU again, which allows it to switch to task B1 instead of continuing task A1.
第一行,CPU 正在执行程序 A 的任务 A1 。所有其他任务都暂停。在第二行中,硬件中断到达 CPU。正如硬件中断帖子中所述,CPU 立即停止任务 A1 的执行,并跳转到中断描述符表 (IDT) 中定义的中断处理程序。通过这个中断处理程序,操作系统现在再次控制了 CPU,这允许它切换到任务 B1 而不是继续执行任务 A1 。
1.1.1 Saving State 保存状态
Since tasks are interrupted at arbitrary points in time, they might be in the middle of some calculations. In order to be able to resume them later, the operating system must backup the whole state of the task, including its call stack and the values of all CPU registers. This process is called a context switch.
由于任务会在任意时间点中断,因此它们可能正在进行某些计算。为了能够稍后恢复它们,操作系统必须备份任务的整个状态,包括其调用堆栈和所有 CPU 寄存器的值。这个过程称为上下文切换。
As the call stack can be very large, the operating system typically sets up a separate call stack for each task instead of backing up the call stack content on each task switch. Such a task with its own stack is called a thread of execution or thread for short. By using a separate stack for each task, only the register contents need to be saved on a context switch (including the program counter and stack pointer). This approach minimizes the performance overhead of a context switch, which is very important since context switches often occur up to 100 times per second.
由于调用堆栈可能非常大,操作系统通常会为每个任务设置一个单独的调用堆栈,而不是在每次任务切换时备份调用堆栈内容。这种拥有自己的堆栈的任务称为执行线程或简称线程。通过为每个任务使用单独的堆栈,上下文切换时只需保存寄存器内容(包括程序计数器和堆栈指针)。这种方法最大限度地减少了上下文切换的性能开销,这一点非常重要,因为上下文切换通常每秒发生多达 100 次。
1.1.2 Discussion 讨论
The main advantage of preemptive multitasking is that the operating system can fully control the allowed execution time of a task. This way, it can guarantee that each task gets a fair share of the CPU time, without the need to trust the tasks to cooperate. This is especially important when running third-party tasks or when multiple users share a system.
抢占式多任务的主要优点是操作系统可以完全控制任务允许的执行时间。这样,就可以保证每个任务获得公平份额的CPU时间,而不需要信任任务之间的协作。当运行第三方任务或多个用户共享系统时,这一点尤其重要。
The disadvantage of preemption is that each task requires its own stack. Compared to a shared stack, this results in higher memory usage per task and often limits the number of tasks in the system. Another disadvantage is that the operating system always has to save the complete CPU register state on each task switch, even if the task only used a small subset of the registers.
抢占的缺点是每个任务都需要自己的堆栈。与共享堆栈相比,这会导致每个任务使用更高的内存,并且通常会限制系统中的任务数量。另一个缺点是,操作系统始终必须在每次任务切换时保存完整的 CPU 寄存器状态,即使任务仅使用寄存器的一小部分。
Preemptive multitasking and threads are fundamental components of an operating system because they make it possible to run untrusted userspace programs. We will discuss these concepts in full detail in future posts. For this post, however, we will focus on cooperative multitasking, which also provides useful capabilities for our kernel.
抢占式多任务处理和线程是操作系统的基本组件,因为它们使得运行不受信任的用户空间程序成为可能。我们将在以后的帖子中详细讨论这些概念。然而,在这篇文章中,我们将重点关注协作多任务处理,这也为我们的内核提供了有用的功能。
1.2 Cooperative Multitasking 协作多任务处理
Instead of forcibly pausing running tasks at arbitrary points in time, cooperative multitasking lets each task run until it voluntarily gives up control of the CPU. This allows tasks to pause themselves at convenient points in time, for example, when they need to wait for an I/O operation anyway.
协作多任务处理不是在任意时间点强制暂停正在运行的任务,而是让每个任务一直运行,直到它自愿放弃对 CPU 的控制。这允许任务在方便的时间点自行暂停,例如,当它们无论如何都需要等待 I/O 操作时。
Cooperative multitasking is often used at the language level, like in the form of coroutines or async/await. The idea is that either the programmer or the compiler inserts yield operations into the program, which give up control of the CPU and allow other tasks to run. For example, a yield could be inserted after each iteration of a complex loop.
协作多任务处理通常在语言级别使用,例如以协程或异步/等待的形式。这个想法是,程序员或编译器将yield操作插入到程序中,从而放弃对CPU的控制并允许其他任务运行。例如,可以在复杂循环的每次迭代之后插入一个yield。
It is common to combine cooperative multitasking with asynchronous operations. Instead of waiting until an operation is finished and preventing other tasks from running during this time, asynchronous operations return a “not ready” status if the operation is not finished yet. In this case, the waiting task can execute a yield operation to let other tasks run.
将协作多任务处理与异步操作相结合是很常见的。如果操作尚未完成,异步操作不会等待操作完成并阻止其他任务在此期间运行,而是返回“未就绪”状态。在这种情况下,等待任务可以执行yield操作来让其他任务运行。
1.2.1 Saving State 保存状态
Since tasks define their pause points themselves, they don’t need the operating system to save their state. Instead, they can save exactly the state they need for continuation before they pause themselves, which often results in better performance. For example, a task that just finished a complex computation might only need to backup the final result of the computation since it does not need the intermediate results anymore.
由于任务自己定义其暂停点,因此它们不需要操作系统来保存其状态。相反,他们可以在暂停之前准确保存继续所需的状态,这通常会带来更好的性能。例如,刚刚完成复杂计算的任务可能只需要备份计算的最终结果,因为它不再需要中间结果。
Language-supported implementations of cooperative tasks are often even able to backup the required parts of the call stack before pausing. As an example, Rust’s async/await implementation stores all local variables that are still needed in an automatically generated struct (see below). By backing up the relevant parts of the call stack before pausing, all tasks can share a single call stack, which results in much lower memory consumption per task. This makes it possible to create an almost arbitrary number of cooperative tasks without running out of memory.
语言支持的协作任务实现通常甚至能够在暂停之前备份调用堆栈的所需部分。举个例子,Rust 的 async/await 实现存储了自动生成的结构中仍然需要的所有局部变量(见下文)。通过在暂停之前备份调用堆栈的相关部分,所有任务可以共享一个调用堆栈,从而大大降低每个任务的内存消耗。这使得创建几乎任意数量的协作任务而不会耗尽内存成为可能。
1.2.2 Discussion 讨论
The drawback of cooperative multitasking is that an uncooperative task can potentially run for an unlimited amount of time. Thus, a malicious or buggy task can prevent other tasks from running and slow down or even block the whole system. For this reason, cooperative multitasking should only be used when all tasks are known to cooperate. As a counterexample, it’s not a good idea to make the operating system rely on the cooperation of arbitrary user-level programs.
协作式多任务处理的缺点是不协作的任务可能会无限期地运行。因此,恶意或有错误的任务可以阻止其他任务运行并减慢甚至阻塞整个系统。因此,只有当所有任务都已知可以协作时,才应使用协作式多任务处理。作为反例,让操作系统依赖于任意用户级程序的协作并不是一个好主意。
However, the strong performance and memory benefits of cooperative multitasking make it a good approach for usage within a program, especially in combination with asynchronous operations. Since an operating system kernel is a performance-critical program that interacts with asynchronous hardware, cooperative multitasking seems like a good approach for implementing concurrency.
然而,协作多任务处理的强大性能和内存优势使其成为在程序中使用的好方法,特别是与异步操作结合使用。由于操作系统内核是与异步硬件交互的性能关键型程序,因此协作多任务处理似乎是实现并发的好方法。
2. Async/Await in Rust
The Rust language provides first-class support for cooperative multitasking in the form of async/await. Before we can explore what async/await is and how it works, we need to understand how futures and asynchronous programming work in Rust.
Rust 语言以 async/await 的形式为协作多任务提供一流的支持。在我们探索什么是 async/await 及其工作原理之前,我们需要了解 Rust 中的 Future 和异步编程是如何工作的。
2.1 Futures
A future represents a value that might not be available yet. This could be, for example, an integer that is computed by another task or a file that is downloaded from the network. Instead of waiting until the value is available, futures make it possible to continue execution until the value is needed.
Future代表一种现在可能尚不可用的值。例如,这可以是由另一个任务计算的整数或从网络下载的文件。 Future可以继续执行,直到需要该值,而不是等到该值可用为止。
2.1.1 Example 例子
The concept of futures is best illustrated with a small example:
Future的概念可以用一个小例子来最好地说明:
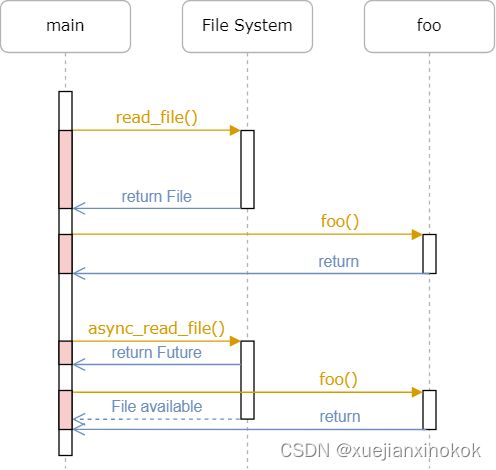
This sequence diagram shows a main function that reads a file from the file system and then calls a function foo. This process is repeated two times: once with a synchronous read_file call and once with an asynchronous async_read_file call.
此序列图显示了一个 main 函数,该函数从文件系统读取文件,然后调用函数 foo 。此过程重复两次:一次使用同步 read_file 调用,一次使用异步 async_read_file 调用。
With the synchronous call, the main function needs to wait until the file is loaded from the file system. Only then can it call the foo function, which requires it to again wait for the result.
通过同步调用, main 函数需要等待,直到文件从文件系统加载。只有这样它才能调用 foo 函数,这需要它再次等待结果。
With the asynchronous async_read_file call, the file system directly returns a future and loads the file asynchronously in the background. This allows the main function to call foo much earlier, which then runs in parallel with the file load. In this example, the file load even finishes before foo returns, so main can directly work with the file without further waiting after foo returns.
通过异步 async_read_file 调用,文件系统直接返回 future 并在后台异步加载文件。这允许 main 函数更早地调用 foo ,然后与文件加载并行运行。在此示例中,文件加载甚至在 foo 返回之前完成,因此 main 可以直接使用该文件,而无需在 foo 返回后进一步等待。
2.1.2 Futures in Rust
In Rust, futures are represented by the Future trait, which looks like this:
在 Rust 中,futures 由 Future 特征表示,如下所示:
pub trait Future {
    type Output;
    fn poll(self: Pin<&mut Self>, cx: &mut Context) -> Poll<Self::Output>;
}
The associated type Output specifies the type of the asynchronous value. For example, the async_read_file function in the diagram above would return a Future instance with Output set to File.
关联类型 Output 指定异步值的类型。例如,上图中的 async_read_file 函数将返回一个 Future 实例,其中 Output 设置为 File 。
The poll method allows to check if the value is already available. It returns a Poll enum, which looks like this:
poll 方法允许检查该值是否已经可用。它返回一个 Poll 枚举,如下所示:
pub enum Poll<T> {
    Ready(T),
    Pending,
}
When the value is already available (e.g. the file was fully read from disk), it is returned wrapped in the Ready variant. Otherwise, the Pending variant is returned, which signals to the caller that the value is not yet available.
当该值已经可用时(例如,文件已从磁盘完全读取),它将以 Ready 形式返回。否则,将返回 Pending ,这向调用者发出该值尚不可用的信号。
The poll method takes two arguments: self: Pin<&mut Self> and cx: &mut Context. The former behaves similarly to a normal &mut self reference, except that the Self value is pinned to its memory location. Understanding Pin and why it is needed is difficult without understanding how async/await works first. We will therefore explain it later in this post.
poll 方法采用两个参数: self: Pin<&mut Self> 和 cx: &mut Context 。前者的行为与普通 &mut self 引用类似,只是 Self 值固定到其内存位置。如果不先了解 async/await 的工作原理,就很难理解 Pin 以及为什么需要它。因此,我们将在本文后面对此进行解释。
The purpose of the cx: &mut Context parameter is to pass a Waker instance to the asynchronous task, e.g., the file system load. This Waker allows the asynchronous task to signal that it (or a part of it) is finished, e.g., that the file was loaded from disk. Since the main task knows that it will be notified when the Future is ready, it does not need to call poll over and over again. We will explain this process in more detail later in this post when we implement our own waker type.
cx: &mut Context 参数的用途是将 Waker 实例传递给异步任务,例如文件系统加载。这个 Waker 允许异步任务发出信号,表明它(或其一部分)已完成,例如,文件已从磁盘加载。由于主任务知道当 Future 准备好时它会收到通知,因此不需要一遍又一遍地调用 poll 。当我们实现我们自己的唤醒器类型时,我们将在本文后面更详细地解释这个过程。
2.2 Working with Futures 与 Future合作
We now know how futures are defined and understand the basic idea behind the poll method. However, we still don’t know how to effectively work with futures. The problem is that futures represent the results of asynchronous tasks, which might not be available yet. In practice, however, we often need these values directly for further calculations. So the question is: How can we efficiently retrieve the value of a future when we need it?
我们现在知道如何定义 Future 并理解 poll 方法背后的基本思想。然而,我们仍然不知道如何有效地使用 Future 。问题在于 Future 代表异步任务的结果,而这些结果可能尚不可用。然而,在实践中,我们经常直接需要这些值来进行进一步的计算。所以问题是:当我们需要时,我们如何才能有效地获取Future的值?
2.2.1 Waiting on Futures
One possible answer is to wait until a future becomes ready. This could look something like this:
一种可能的答案是等到Future准备好。这可能看起来像这样:
let future = async_read_file("foo.txt");
let file_content = loop {
    match future.poll(…) {
        Poll::Ready(value) => break value,
        Poll::Pending => {}, // do nothing
    }
}
Here we actively wait for the future by calling poll over and over again in a loop. The arguments to poll don’t matter here, so we omitted them. While this solution works, it is very inefficient because we keep the CPU busy until the value becomes available.
在这里,我们通过在循环中一遍又一遍地调用 poll 来主动等待Future。 poll 的参数在这里并不重要,因此我们省略了它们。虽然此解决方案有效,但效率非常低,因为我们让 CPU 保持忙碌,直到该值可用为止。
A more efficient approach could be to block the current thread until the future becomes available. This is, of course, only possible if you have threads, so this solution does not work for our kernel, at least not yet. Even on systems where blocking is supported, it is often not desired because it turns an asynchronous task into a synchronous task again, thereby inhibiting the potential performance benefits of parallel tasks.
更有效的方法可能是阻塞当前线程,直到Future 可用。当然,这只有在有线程的情况下才有可能,因此该解决方案不适用于我们的内核,至少目前还不行。即使在支持阻塞的系统上,通常也不需要这样做,因为它会再次将异步任务变成同步任务,从而抑制并行任务的潜在性能优势。
2.2.2 Future Combinators Future组合器
An alternative to waiting is to use future combinators. Future combinators are methods like map that allow chaining and combining futures together, similar to the methods of the Iterator trait. Instead of waiting on the future, these combinators return a future themselves, which applies the mapping operation on poll.
等待Future完成 的另一种选择是使用Future的组合器。 Future 组合器是像 map 这样的方法,允许将 future 链接和组合在一起,类似于 Iterator 特征的方法。这些组合器本身返回一个 Future,而不是等待 Future,这会在 poll 上进行map转换操作。
As an example, a simple string_len combinator for converting a Future to a Future could look like this:
例如,用于将 Future 转换为 Future 的简单 string_len 组合器可能如下所示:
struct StringLen<F> {
    inner_future: F,
}

impl<F> Future for StringLen<F> where F: Future<Output = String> {
    type Output = usize;

    fn poll(mut self: Pin<&mut Self>, cx: &mut Context<'_>) -> Poll<T> {
        match self.inner_future.poll(cx) {
            Poll::Ready(s) => Poll::Ready(s.len()),
            Poll::Pending => Poll::Pending,
        }
    }
}

fn string_len(string: impl Future<Output = String>)
    -> impl Future<Output = usize>
{
    StringLen {
        inner_future: string,
    }
}

// Usage
fn file_len() -> impl Future<Output = usize> {
    let file_content_future = async_read_file("foo.txt");
    string_len(file_content_future)
}
This code does not quite work because it does not handle pinning, but it suffices as an example. The basic idea is that the string_len function wraps a given Future instance into a new StringLen struct, which also implements Future. When the wrapped future is polled, it polls the inner future. If the value is not ready yet, Poll::Pending is returned from the wrapped future too. If the value is ready, the string is extracted from the Poll::Ready variant and its length is calculated. Afterwards, it is wrapped in Poll::Ready again and returned.
该代码不太有效,因为它不处理固定,但作为示例就足够了。基本思想是 string_len 函数将给定的 Future 实例包装到新的 StringLen 结构中,该结构还实现 Future 。当对包裹的 future 进行轮询时,它会轮询内部的 future。如果该值尚未准备好,则 Poll::Pending 也会从包装的 future 中返回。如果值已准备好,则从 Poll::Ready 变体中提取字符串并计算其长度。然后再次用 Poll::Ready 包裹并返回。
With this string_len function, we can calculate the length of an asynchronous string without waiting for it. Since the function returns a Future again, the caller can’t work directly on the returned value, but needs to use combinator functions again. This way, the whole call graph becomes asynchronous and we can efficiently wait for multiple futures at once at some point, e.g., in the main function.
通过这个 string_len 函数,我们可以计算异步字符串的长度,而无需等待。由于函数再次返回 Future ,因此调用者无法直接处理返回值,而是需要再次使用组合器函数。这样,整个调用图就变得异步了,我们可以在某个时刻(例如在主函数中)有效地同时等待多个 future。
Because manually writing combinator functions is difficult, they are often provided by libraries. While the Rust standard library itself provides no combinator methods yet, the semi-official (and no_std compatible) futures crate does. Its FutureExt trait provides high-level combinator methods such as map or then, which can be used to manipulate the result with arbitrary closures.
由于手动编写组合器函数很困难,因此它们通常由库提供。虽然 Rust 标准库本身尚未提供组合器方法,但半官方(与 no_std 兼容) futures crate 提供了。它的 FutureExt 特征提供了高级组合器方法,例如 map 或 then ,可用于通过任意闭包操作结果。
2.2.2.1 Advantages 优点
The big advantage of future combinators is that they keep the operations asynchronous. In combination with asynchronous I/O interfaces, this approach can lead to very high performance. The fact that future combinators are implemented as normal structs with trait implementations allows the compiler to excessively optimize them. For more details, see the Zero-cost futures in Rust post, which announced the addition of futures to the Rust ecosystem.
Future组合器的一大优点是它们保持操作异步。与异步 I/O 接口相结合,这种方法可以带来非常高的性能。事实上,Future的组合器被实现为具有特征实现的普通结构,这使得编译器可以过度优化它们。有关更多详细信息,请参阅 Rust 中的零成本Future 帖子,该帖子宣布在 Rust 生态系统中添加Future。
2.2.2.2 Drawbacks 缺点
While future combinators make it possible to write very efficient code, they can be difficult to use in some situations because of the type system and the closure-based interface. For example, consider code like this:
虽然Future的组合器可以编写非常高效的代码,但由于类型系统和基于闭包的接口,它们在某些情况下可能很难使用。例如,考虑这样的代码:
fn example(min_len: usize) -> impl Future<Output = String> {
    async_read_file("foo.txt").then(move |content| {
        if content.len() < min_len {
            Either::Left(async_read_file("bar.txt").map(|s| content + &s))
        } else {
            Either::Right(future::ready(content))
        }
    })
}
(Try it on the playground)
Here we read the file foo.txt and then use the then combinator to chain a second future based on the file content. If the content length is smaller than the given min_len, we read a different bar.txt file and append it to content using the map combinator. Otherwise, we return only the content of foo.txt.
在这里,我们读取文件 foo.txt ,然后使用 then 组合器根据文件内容链接第二个 Future。如果内容长度小于给定的 min_len ,我们读取不同的 bar.txt 文件并使用 map 组合器将其附加到 content 。否则,我们仅返回 foo.txt 的内容。
We need to use the move keyword for the closure passed to then because otherwise there would be a lifetime error for min_len. The reason for the Either wrapper is that if and else blocks must always have the same type. Since we return different future types in the blocks, we must use the wrapper type to unify them into a single type. The ready function wraps a value into a future, which is immediately ready. The function is required here because the Either wrapper expects that the wrapped value implements Future.
我们需要使用 move 关键字作为传递给 then 的闭包,否则 min_len 将会出现生命周期错误。使用 Either 包装器的原因是 if 和 else 块必须始终具有相同的类型。由于我们在块中返回不同的Future类型,因此我们必须使用包装器类型将它们统一为单一类型。 ready 函数将一个值包装到 future 中,该值立即准备就绪。这里需要该函数,因为 Either 包装器期望包装的值实现 Future 。
As you can imagine, this can quickly lead to very complex code for larger projects. It gets especially complicated if borrowing and different lifetimes are involved. For this reason, a lot of work was invested in adding support for async/await to Rust, with the goal of making asynchronous code radically simpler to write.
正如您可以想象的那样,这很快就会导致大型项目的代码变得非常复杂。如果涉及借用和不同的生命周期,事情就会变得特别复杂。出于这个原因,我们投入了大量的工作来向 Rust 添加对 async/await 的支持,目的是使异步代码的编写变得更加简单。
2.3 The Async/Await Pattern 异步/等待模式
The idea behind async/await is to let the programmer write code that looks like normal synchronous code, but is turned into asynchronous code by the compiler. It works based on the two keywords async and await. The async keyword can be used in a function signature to turn a synchronous function into an asynchronous function that returns a future:
async/await 背后的想法是让程序员编写看起来像普通同步代码的代码,但由编译器将其转换为异步代码。它基于两个关键字 async 和 await 工作。 async 关键字可以在函数签名中使用,将同步函数转换为返回 future 的异步函数:
async fn foo() -> u32 {
    0
}

// the above is roughly translated by the compiler to:
fn foo() -> impl Future<Output = u32> {
    future::ready(0)
}
This keyword alone wouldn’t be that useful. However, inside async functions, the await keyword can be used to retrieve the asynchronous value of a future:
单单async这个关键字并没有那么有用。但是,在 async 函数内部, await 关键字可用于获取 Future 的异步值:
async fn example(min_len: usize) -> String {
    let content = async_read_file("foo.txt").await;
    if content.len() < min_len {
        content + &async_read_file("bar.txt").await
    } else {
        content
    }
}
(Try it on the playground)
This function is a direct translation of the example function from above that used combinator functions. Using the .await operator, we can retrieve the value of a future without needing any closures or Either types. As a result, we can write our code like we write normal synchronous code, with the difference that this is still asynchronous code.
该函数是上面使用组合器函数的 example 函数的直接翻译。使用 .await 运算符,我们可以获取 Future 的值,而不需要任何闭包或 Either 类型。因此,我们可以像编写普通同步代码一样编写代码,不同之处在于这仍然是异步代码。
2.3.1 State Machine Transformation 状态机
Behind the scenes, the compiler converts the body of the async function into a state machine, with each .await call representing a different state. For the above example function, the compiler creates a state machine with the following four states:
在幕后,编译器将 async 函数的主体转换为状态机,每个 .await 调用代表不同的状态。对于上面的 example 函数,编译器创建了一个具有以下四种状态的状态机:

Each state represents a different pause point in the function. The “Start” and “End” states represent the function at the beginning and end of its execution. The “Waiting on foo.txt” state represents that the function is currently waiting for the first async_read_file result. Similarly, the “Waiting on bar.txt” state represents the pause point where the function is waiting on the second async_read_file result.
每个状态代表函数中不同的暂停点。 “Start”和“End”状态代表函数执行的开始和结束。 “Waiting on foo.txt”状态表示该函数当前正在等待第一个 async_read_file 结果。类似地,“Waiting on bar.txt”状态表示函数等待第二个 async_read_file 结果的暂停点。
The state machine implements the Future trait by making each poll call a possible state transition:
状态机通过使每个 poll 调用成为可能的状态转换来实现 Future 特征:

The diagram uses arrows to represent state switches and diamond shapes to represent alternative ways. For example, if the foo.txt file is not ready, the path marked with “no” is taken and the “Waiting on foo.txt” state is reached. Otherwise, the “yes” path is taken. The small red diamond without a caption represents the if content.len() < 100 branch of the example function.
该图使用箭头表示状态转换,使用菱形表示替代方式。例如,如果 foo.txt 文件未准备好,则采用标记为“no”的路径,并达到“Waiting on foo.txt”状态。否则,将采取“是”路径。没有标题的红色小菱形代表 example 函数的 if content.len() < 100 分支。
We see that the first poll call starts the function and lets it run until it reaches a future that is not ready yet. If all futures on the path are ready, the function can run till the “End” state, where it returns its result wrapped in Poll::Ready. Otherwise, the state machine enters a waiting state and returns Poll::Pending. On the next poll call, the state machine then starts from the last waiting state and retries the last operation.
我们看到第一个 poll 调用启动了该函数并让它运行,直到 到达 尚未准备好的 Future。如果路径上的所有 Future 都已准备好,则该函数可以运行到“End”状态,并返回包装在 Poll::Ready 中的结果。否则,状态机进入等待状态并返回 Poll::Pending 。在下一次 poll 调用中,状态机将从上次等待状态开始并重试上次操作。
2.3.2 Saving State 保存状态
In order to be able to continue from the last waiting state, the state machine must keep track of the current state internally. In addition, it must save all the variables that it needs to continue execution on the next poll call. This is where the compiler can really shine: Since it knows which variables are used when, it can automatically generate structs with exactly the variables that are needed.
为了能够从最后的等待状态 继续执行,状态机必须在内部跟踪当前状态。此外,它必须保存在下一个 poll 调用中继续执行所需的所有变量。这就是编译器真正发挥作用的地方:因为它知道何时使用哪些变量,所以它可以自动生成包含所需变量的结构。
As an example, the compiler generates structs like the following for the above example function:
例如,编译器为上面的 example 函数生成如下结构:
// The `example` function again so that you don't have to scroll up
async fn example(min_len: usize) -> String {
    let content = async_read_file("foo.txt").await;
    if content.len() < min_len {
        content + &async_read_file("bar.txt").await
    } else {
        content
    }
}

// The compiler-generated state structs:

struct StartState {
    min_len: usize,
}

struct WaitingOnFooTxtState {
    min_len: usize,
    foo_txt_future: impl Future<Output = String>,
}

struct WaitingOnBarTxtState {
    content: String,
    bar_txt_future: impl Future<Output = String>,
}

struct EndState {}
In the “start” and “Waiting on foo.txt” states, the min_len parameter needs to be stored for the later comparison with content.len(). The “Waiting on foo.txt” state additionally stores a foo_txt_future, which represents the future returned by the async_read_file call. This future needs to be polled again when the state machine continues, so it needs to be saved.
在“start”和“Waiting on foo.txt”状态下,需要存储 min_len 参数,以便稍后与 content.len() 进行比较。 “Waiting on foo.txt”状态还存储 foo_txt_future ,它表示 async_read_file 调用返回的 future。当状态机继续运行时,这个 future 需要再次轮询,因此需要保存。
The “Waiting on bar.txt” state contains the content variable for the later string concatenation when bar.txt is ready. It also stores a bar_txt_future that represents the in-progress load of bar.txt. The struct does not contain the min_len variable because it is no longer needed after the content.len() comparison. In the “end” state, no variables are stored because the function has already run to completion.
“Waiting on bar.txt”状态包含 content 变量,用于在 bar.txt 准备就绪时进行后续字符串连接。它还存储一个 bar_txt_future 表示正在进行的加载 bar.txt 。该结构不包含 min_len 变量,因为在 content.len() 比较之后不再需要它。在“End”状态下,不会存储任何变量,因为函数已经运行完成。
Keep in mind that this is only an example of the code that the compiler could generate. The struct names and the field layout are implementation details and might be different.
请记住,这只是编译器可以生成的代码的示例。结构名称和字段布局是实现细节,可能会有所不同。
2.3.3 The Full State Machine Type
完整状态机类型
While the exact compiler-generated code is an implementation detail, it helps in understanding to imagine how the generated state machine could look for the example function. We already defined the structs representing the different states and containing the required variables. To create a state machine on top of them, we can combine them into an enum:
虽然编译器生成的确切代码是实现细节,但它有助于理解想象生成的状态机如何查找 example 函数。我们已经定义了表示不同状态并包含所需变量的结构。要在它们之上创建状态机,我们可以将它们组合成 enum :
enum ExampleStateMachine {
    Start(StartState),
    WaitingOnFooTxt(WaitingOnFooTxtState),
    WaitingOnBarTxt(WaitingOnBarTxtState),
    End(EndState),
}
We define a separate enum variant for each state and add the corresponding state struct to each variant as a field. To implement the state transitions, the compiler generates an implementation of the Future trait based on the example function:
我们为每个状态定义一个单独的枚举状态,并将相应的 状态结构 作为字段添加到每个枚举状态中。为了实现状态转换,编译器根据 example 函数生成 Future 特征的实现:
impl Future for ExampleStateMachine {
    type Output = String; // return type of `example`

    fn poll(self: Pin<&mut Self>, cx: &mut Context) -> Poll<Self::Output> {
        loop {
            match self { // TODO: handle pinning
                ExampleStateMachine::Start(state) => {…}
                ExampleStateMachine::WaitingOnFooTxt(state) => {…}
                ExampleStateMachine::WaitingOnBarTxt(state) => {…}
                ExampleStateMachine::End(state) => {…}
            }
        }
    }
}
The Output type of the future is String because it’s the return type of the example function. To implement the poll function, we use a match statement on the current state inside a loop. The idea is that we switch to the next state as long as possible and use an explicit return Poll::Pending when we can’t continue.
Future 的 Output 类型是 String ,因为它是 example 函数的返回类型。为了实现 poll 函数,我们在 loop 内的当前状态上使用 match 语句。我们的想法是,我们尽可能长时间地切换到下一个状态,并在无法继续时使用显式 return Poll::Pending 。
For simplicity, we only show simplified code and don’t handle pinning, ownership, lifetimes, etc. So this and the following code should be treated as pseudo-code and not used directly. Of course, the real compiler-generated code handles everything correctly, albeit possibly in a different way.
为了简单起见,我们只显示简化的代码,不处理固定、所有权、生命周期等。因此,这段代码和下面的代码应该被视为伪代码,而不是直接使用。当然,真正的编译器生成的代码可以正确处理所有内容,尽管可能以不同的方式。
To keep the code excerpts small, we present the code for each match arm separately. Let’s begin with the Start state:
为了保持代码篇幅短点,我们分别呈现每个 match 臂的代码。让我们从 Start 状态开始:
ExampleStateMachine::Start(state) => {
    // from body of `example`
    let foo_txt_future = async_read_file("foo.txt");
    // `.await` operation
    let state = WaitingOnFooTxtState {
        min_len: state.min_len,
        foo_txt_future,
    };
    *self = ExampleStateMachine::WaitingOnFooTxt(state);
}
The state machine is in the Start state when it is right at the beginning of the function. In this case, we execute all the code from the body of the example function until the first .await. To handle the .await operation, we change the state of the self state machine to WaitingOnFooTxt, which includes the construction of the WaitingOnFooTxtState struct.
当状态机位于函数开头时,状态机处于 Start 状态。在本例中,我们执行从 example 函数主体到第一个 .await 的所有代码。为了处理 .await 操作,我们将 self 状态机的状态更改为 WaitingOnFooTxt ,其中包括 WaitingOnFooTxtState 结构体的构造。
Since the match self {…} statement is executed in a loop, the execution jumps to the WaitingOnFooTxt arm next:
由于 match self {…} 语句是在循环中执行的,所以接下来执行会跳转到 WaitingOnFooTxt 分支:
ExampleStateMachine::WaitingOnFooTxt(state) => {
    match state.foo_txt_future.poll(cx) {
        Poll::Pending => return Poll::Pending,
        Poll::Ready(content) => {
            // from body of `example`
            if content.len() < state.min_len {
                let bar_txt_future = async_read_file("bar.txt");
                // `.await` operation
                let state = WaitingOnBarTxtState {
                    content,
                    bar_txt_future,
                };
                *self = ExampleStateMachine::WaitingOnBarTxt(state);
            } else {
                *self = ExampleStateMachine::End(EndState);
                return Poll::Ready(content);
            }
        }
    }
}
In this match arm, we first call the poll function of the foo_txt_future. If it is not ready, we exit the loop and return Poll::Pending. Since self stays in the WaitingOnFooTxt state in this case, the next poll call on the state machine will enter the same match arm and retry polling the foo_txt_future.
在此 match 臂中,我们首先调用 foo_txt_future 的 poll 函数。如果还没有准备好,我们退出循环并返回 Poll::Pending 。由于在这种情况下 self 保持在 WaitingOnFooTxt 状态,因此状态机上的下一个 poll 调用将进入相同的 match 臂,并且重试轮询 foo_txt_future 。
When the foo_txt_future is ready, we assign the result to the content variable and continue to execute the code of the example function: If content.len() is smaller than the min_len saved in the state struct, the bar.txt file is read asynchronously. We again translate the .await operation into a state change, this time into the WaitingOnBarTxt state. Since we’re executing the match inside a loop, the execution directly jumps to the match arm for the new state afterward, where the bar_txt_future is polled.
当 foo_txt_future 准备好后,我们将结果赋值给 content 变量,并继续执行 example 函数的代码: If content.len() 小于状态结构体中保存的 min_len ,则异步读取 bar.txt 文件。我们再次将 .await 操作转换为状态更改,这次转换为 WaitingOnBarTxt 状态。由于我们在循环内执行 match ,因此执行会直接跳转到 match 臂以获取新状态,其中 bar_txt_future 被轮询。
In case we enter the else branch, no further .await operation occurs. We reach the end of the function and return content wrapped in Poll::Ready. We also change the current state to the End state.
如果我们进入 else 分支,则不会发生进一步的 .await 操作。我们到达函数末尾并返回包裹在 Poll::Ready 中的 content 。我们还将当前状态更改为 End 状态。
The code for the WaitingOnBarTxt state looks like this:
WaitingOnBarTxt 状态的代码如下所示:
ExampleStateMachine::WaitingOnBarTxt(state) => {
    match state.bar_txt_future.poll(cx) {
        Poll::Pending => return Poll::Pending,
        Poll::Ready(bar_txt) => {
            *self = ExampleStateMachine::End(EndState);
            // from body of `example`
            return Poll::Ready(state.content + &bar_txt);
        }
    }
}
Similar to the WaitingOnFooTxt state, we start by polling the bar_txt_future. If it is still pending, we exit the loop and return Poll::Pending. Otherwise, we can perform the last operation of the example function: concatenating the content variable with the result from the future. We update the state machine to the End state and then return the result wrapped in Poll::Ready.
与 WaitingOnFooTxt 状态类似,我们首先轮询 bar_txt_future 。如果它仍然处于待处理状态,我们退出循环并返回 Poll::Pending 。否则,我们可以执行 example 函数的最后一个操作:将 content 变量与Future的结果连接起来。我们将状态机更新为 End 状态,然后返回包装在 Poll::Ready 中的结果。
Finally, the code for the End state looks like this:
最后, End 状态的代码如下所示:
ExampleStateMachine::End(_) => {
    panic!("poll called after Poll::Ready was returned");
}
Futures should not be polled again after they returned Poll::Ready, so we panic if poll is called while we are already in the End state.
Future 在返回 Poll::Ready 后不应再次轮询,因此如果在我们已经处于 End 状态时调用 poll ,我们会感到恐慌。
We now know what the compiler-generated state machine and its implementation of the Future trait could look like. In practice, the compiler generates code in a different way. (In case you’re interested, the implementation is currently based on generators, but this is only an implementation detail.)
我们现在知道编译器生成的状态机及其 Future 特征的实现可能是什么样子。实际上,编译器以不同的方式生成代码。 (如果您感兴趣,目前的实现是基于生成器的,但这只是一个实现细节。)
The last piece of the puzzle is the generated code for the example function itself. Remember, the function header was defined like this:
最后一个难题是为 example 函数本身生成的代码。请记住,函数头的定义如下:
async fn example(min_len: usize) -> String
Since the complete function body is now implemented by the state machine, the only thing that the function needs to do is to initialize the state machine and return it. The generated code for this could look like this:
由于现在完整的函数体是由状态机实现的,因此该函数唯一需要做的就是初始化状态机并返回它。生成的代码可能如下所示:
fn example(min_len: usize) -> ExampleStateMachine {
    ExampleStateMachine::Start(StartState {
        min_len,
    })
}
The function no longer has an async modifier since it now explicitly returns an ExampleStateMachine type, which implements the Future trait. As expected, the state machine is constructed in the Start state and the corresponding state struct is initialized with the min_len parameter.
该函数不再具有 async 修饰符,因为它现在显式返回 ExampleStateMachine 类型,该类型实现 Future 特征。正如预期的那样,状态机在 Start 状态下构建,并使用 min_len 参数初始化相应的状态结构。
Note that this function does not start the execution of the state machine. This is a fundamental design decision of futures in Rust: they do nothing until they are polled for the first time.
请注意,此函数不会启动状态机的执行。这是 Rust 中 Future 的一个基本设计决策:在第一次轮询之前它们不执行任何操作。
2.4 Pinning 固定
We already stumbled across pinning multiple times in this post. Now is finally the time to explore what pinning is and why it is needed.
我们已经在这篇文章中多次偶然发现固定。现在终于是时候探讨什么是固定以及为什么需要它了。
2.4.1 Self-Referential Structs 自引用结构
As explained above, the state machine transformation stores the local variables of each pause point in a struct. For small examples like our example function, this was straightforward and did not lead to any problems. However, things become more difficult when variables reference each other. For example, consider this function:
如上所述,状态机转换将每个暂停点的局部变量存储在结构中。对于像我们的 example 函数这样的小例子,这很简单并且不会导致任何问题。然而,当变量相互引用时,事情会变得更加困难。例如,考虑这个函数:
async fn pin_example() -> i32 {
    let array = [1, 2, 3];
    let element = &array[2];
    async_write_file("foo.txt", element.to_string()).await;
    *element
}
This function creates a small array with the contents 1, 2, and 3. It then creates a reference to the last array element and stores it in an element variable. Next, it asynchronously writes the number converted to a string to a foo.txt file. Finally, it returns the number referenced by element.
此函数创建一个小的 array ,其内容为 1 、 2 和 3 。然后,它创建对最后一个数组元素的引用并将其存储在 element 变量中。接下来,它将转换为字符串的数字异步写入 foo.txt 文件。最后,它返回 element 引用的数字。
Since the function uses a single await operation, the resulting state machine has three states: start, end, and “waiting on write”. The function takes no arguments, so the struct for the start state is empty. Like before, the struct for the end state is empty because the function is finished at this point. The struct for the “waiting on write” state is more interesting:
由于该函数使用单个 await 操作,因此生成的状态机具有三种状态:开始、结束和“等待写入”。该函数不带参数,因此起始状态的结构体为空。和之前一样,结束状态的结构体是空的,因为函数此时已完成。 “等待写入”状态的结构更有趣:
struct WaitingOnWriteState {
    array: [1, 2, 3],
    element: 0x1001c, // address of the last array element
}
We need to store both the array and element variables because element is required for the return value and array is referenced by element. Since element is a reference, it stores a pointer (i.e., a memory address) to the referenced element. We used 0x1001c as an example memory address here. In reality, it needs to be the address of the last element of the array field, so it depends on where the struct lives in memory. Structs with such internal pointers are called self-referential structs because they reference themselves from one of their fields.
我们需要存储 array 和 element 变量,因为返回值需要 element ,而 array 被 element 。由于 element 是一个引用,因此它存储指向所引用元素的指针(即内存地址)。我们在这里使用 0x1001c 作为示例内存地址。实际上,它需要是 array 字段最后一个元素的地址,因此它取决于结构在内存中的位置。具有此类内部指针的结构称为自引用结构,因为它们从其字段之一引用自身。
2.4.2 The Problem with Self-Referential Structs 自引用结构的问题
The internal pointer of our self-referential struct leads to a fundamental problem, which becomes apparent when we look at its memory layout:
自引用结构的内部指针导致了一个基本问题,当我们查看其内存布局时,这个问题就变得显而易见:

The array field starts at address 0x10014 and the element field at address 0x10020. It points to address 0x1001c because the last array element lives at this address. At this point, everything is still fine. However, an issue occurs when we move this struct to a different memory address:
array 字段从地址 0x10014 开始, element 字段从地址 0x10020 开始。它指向地址 0x1001c,因为最后一个数组元素位于该地址。此时,一切都还好。但是,当我们将此结构移动到不同的内存地址时,就会出现问题:

We moved the struct a bit so that it starts at address 0x10024 now. This could, for example, happen when we pass the struct as a function argument or assign it to a different stack variable. The problem is that the element field still points to address 0x1001c even though the last array element now lives at address 0x1002c. Thus, the pointer is dangling, with the result that undefined behavior occurs on the next poll call.
我们稍微移动了结构体,使其现在从地址 0x10024 开始。例如,当我们将结构体作为函数参数传递或将其分配给不同的堆栈变量时,可能会发生这种情况。问题在于,即使最后一个 array 元素现在位于地址 0x1002c 处, element 字段仍然指向地址 0x1001c 。因此,指针悬空,导致下一次 poll 调用时出现未定义的行为。
2.4.3 Possible Solutions 可能的解决方案
There are three fundamental approaches to solving the dangling pointer problem:
解决悬空指针问题的基本方法有以下三种:
-
Update the pointer on move: The idea is to update the internal pointer whenever the struct is moved in memory so that it is still valid after the move. Unfortunately, this approach would require extensive changes to Rust that would result in potentially huge performance losses. The reason is that some kind of runtime would need to keep track of the type of all struct fields and check on every move operation whether a pointer update is required.
移动时更新指针:这个想法是每当结构体在内存中移动时更新内部指针,以便它在移动后仍然有效。不幸的是,这种方法需要对 Rust 进行大量更改,这可能会导致巨大的性能损失。原因是某种运行时需要跟踪所有结构体字段的类型,并检查每个移动操作是否需要更新指针。
-
Store an offset instead of self-references:: To avoid the requirement for updating pointers, the compiler could try to store self-references as offsets from the struct’s beginning instead. For example, the
elementfield of the aboveWaitingOnWriteStatestruct could be stored in the form of anelement_offsetfield with a value of 8 because the array element that the reference points to starts 8 bytes after the struct’s beginning. Since the offset stays the same when the struct is moved, no field updates are required.存储偏移量而不是自引用:为了避免更新指针的要求,编译器可以尝试将自引用存储为距结构开头的偏移量。例如,上述
WaitingOnWriteState结构体的element字段可以以值为 8 的element_offset字段的形式存储,因为该数组元素引用指向结构体开始后 8 个字节的位置。由于移动结构时偏移量保持不变,因此不需要更新字段。The problem with this approach is that it requires the compiler to detect all self-references. This is not possible at compile-time because the value of a reference might depend on user input, so we would need a runtime system again to analyze references and correctly create the state structs. This would not only result in runtime costs but also prevent certain compiler optimizations, so that it would cause large performance losses again.
这种方法的问题在于它要求编译器检测所有自引用。这在编译时是不可能的,因为引用的值可能取决于用户输入,因此我们再次需要一个运行时系统来分析引用并正确创建状态结构。这不仅会导致运行时成本,还会阻止某些编译器优化,从而再次造成较大的性能损失。
-
Forbid moving the struct: As we saw above, the dangling pointer only occurs when we move the struct in memory. By completely forbidding move operations on self-referential structs, the problem can also be avoided. The big advantage of this approach is that it can be implemented at the type system level without additional runtime costs. The drawback is that it puts the burden of dealing with move operations on possibly self-referential structs on the programmer.
禁止移动结构体:正如我们在上面看到的,悬空指针仅当我们在内存中移动结构体时才会出现。通过完全禁止自引用结构上的移动操作,也可以避免该问题。这种方法的一大优点是它可以在类型系统级别实现,而无需额外的运行时成本。缺点是它给程序员带来了处理可能自引用结构上的移动操作的负担。
Rust chose the third solution because of its principle of providing zero cost abstractions, which means that abstractions should not impose additional runtime costs. The pinning API was proposed for this purpose in RFC 2349. In the following, we will give a short overview of this API and explain how it works with async/await and futures.
Rust 选择第三种解决方案是因为它提供零成本抽象的原则,这意味着抽象不应该施加额外的运行时成本。 RFC 2349 中为此目的提出了固定 API。下面,我们将简要概述该 API,并解释它如何与 async/await 和 future 配合使用。
2.4.4 Heap Values 堆上分配的值
The first observation is that heap-allocated values already have a fixed memory address most of the time. They are created using a call to allocate and then referenced by a pointer type such as Box. While moving the pointer type is possible, the heap value that the pointer points to stays at the same memory address until it is freed through a deallocate call again.
第一个观察结果是,堆分配的值在大多数情况下已经具有固定的内存地址。它们是通过调用 allocate 创建的,然后由诸如 Box 之类的指针类型引用。虽然可以移动指针类型,但指针指向的堆值将保留在同一内存地址,直到再次通过 deallocate 调用将其释放。
Using heap allocation, we can try to create a self-referential struct:
使用堆分配,我们可以尝试创建一个自引用结构:
fn main() {
    let mut heap_value = Box::new(SelfReferential {
        self_ptr: 0 as *const _,
    });
    let ptr = &*heap_value as *const SelfReferential;
    heap_value.self_ptr = ptr;
    println!("heap value at: {:p}", heap_value);
    println!("internal reference: {:p}", heap_value.self_ptr);
}

struct SelfReferential {
    self_ptr: *const Self,
}
(Try it on the playground)
We create a simple struct named SelfReferential that contains a single pointer field. First, we initialize this struct with a null pointer and then allocate it on the heap using Box::new. We then determine the memory address of the heap-allocated struct and store it in a ptr variable. Finally, we make the struct self-referential by assigning the ptr variable to the self_ptr field.
我们创建一个名为 SelfReferential 的简单结构,其中包含单个指针字段。首先,我们使用空指针初始化该结构,然后使用 Box::new 在堆上分配它。然后,我们确定堆分配结构的内存地址并将其存储在 ptr 变量中。最后,我们通过将 ptr 变量分配给 self_ptr 字段来使结构体自引用。
When we execute this code on the playground, we see that the address of the heap value and its internal pointer are equal, which means that the self_ptr field is a valid self-reference. Since the heap_value variable is only a pointer, moving it (e.g., by passing it to a function) does not change the address of the struct itself, so the self_ptr stays valid even if the pointer is moved.
当我们在 Playground 上执行此代码时,我们看到堆值的地址与其内部指针相等,这意味着 self_ptr 字段是有效的自引用。由于 heap_value 变量只是一个指针,移动它(例如,通过将其传递给函数)不会更改结构本身的地址,因此 self_ptr 保持有效,即使指针被移动。
However, there is still a way to break this example: We can move out of a Box or replace its content:
然而,仍然有一种方法可以打破这个例子:我们可以移出 Box 或替换(replace)它的内容:
let stack_value = mem::replace(&mut *heap_value, SelfReferential {
    self_ptr: 0 as *const _,
});
println!("value at: {:p}", &stack_value);
println!("internal reference: {:p}", stack_value.self_ptr);
(Try it on the playground)
Here we use the mem::replace function to replace the heap-allocated value with a new struct instance. This allows us to move the original heap_value to the stack, while the self_ptr field of the struct is now a dangling pointer that still points to the old heap address. When you try to run the example on the playground, you see that the printed “value at:” and “internal reference:” lines indeed show different pointers. So heap allocating a value is not enough to make self-references safe.
这里我们使用 mem::replace 函数将堆分配的值替换为新的结构体实例。这允许我们将原始的 heap_value 移动到堆栈,而结构的 self_ptr 字段现在是一个悬空指针,仍然指向旧的堆地址。当您尝试在playground上运行该示例时,您会看到打印的“value at:”和“internal reference:”行确实显示了不同的指针。因此,堆分配值不足以使自引用安全。
The fundamental problem that allowed the above breakage is that Box allows us to get a &mut T reference to the heap-allocated value. This &mut reference makes it possible to use methods like mem::replace or mem::swap to invalidate the heap-allocated value. To resolve this problem, we must prevent &mut references to self-referential structs from being created.
导致上述损坏的根本问题是 Box 允许我们获取对堆分配值的 &mut T 引用。此 &mut 引用使得可以使用 mem::replace 或 mem::swap 等方法来使堆分配的值无效。要解决此问题,我们必须防止创建对自引用结构的 &mut 引用。
2.4.5 Pin> and Unpin
The pinning API provides a solution to the &mut T problem in the form of the Pin wrapper type and the Unpin marker trait. The idea behind these types is to gate all methods of Pin that can be used to get &mut references to the wrapped value (e.g. get_mut or deref_mut) on the Unpin trait. The Unpin trait is an auto trait, which is automatically implemented for all types except those that explicitly opt-out. By making self-referential structs opt-out of Unpin, there is no (safe) way to get a &mut T from a Pin type for them. As a result, their internal self-references are guaranteed to stay valid.
固定 API(pinning API) 以 Pin 包装类型和 Unpin 标记特征的形式提供了 &mut T 问题的解决方案。这些类型背后的想法是设法控制 Pin 的 某些方法,而这些方法可用于获取对包装值的 &mut 引用(例如 Unpin特征上的 get_mut 或 deref_mut 方法)。 Unpin 特征是一个自动特征,它会自动为所有类型实现,除了那些明确选择退出实现的类型。通过使自引用结构选择退出实现 Unpin ,使其没有(safe)方法从 Pin 类型中获取 &mut T 。因此,他们的内部自我引用保证保持有效。
( UnPin 直接翻译过来就是不固定,也就是容许 移动(move), 基本上所有的类型默认都是 UnPin的,也就是可以移动的,!UnPin 意思是 非Unpin 就是Pin )
As an example, let’s update the SelfReferential type from above to opt-out of Unpin:
例如,让我们将上面的 SelfReferential 类型更新为选择退出实现 Unpin :
use core::marker::PhantomPinned;

struct SelfReferential {
    self_ptr: *const Self,
    _pin: PhantomPinned,
}
We opt-out by adding a second _pin field of type PhantomPinned. This type is a zero-sized marker type whose only purpose is to not implement the Unpin trait. Because of the way auto traits work, a single field that is not Unpin suffices to make the complete struct opt-out of Unpin.
我们通过添加第二个 PhantomPinned 类型的 _pin 字段来选择退出。此类型是零大小的标记类型,其唯一目的是 不实现 Unpin 特征(那么就是实现Pin)。由于自动特征的工作方式,非 Unpin 的单个字段足以使 Unpin 的完整结构选择退出。
The second step is to change the Box type in the example to a Pin type. The easiest way to do this is to use the Box::pin function instead of Box::new for creating the heap-allocated value:
第二步是将示例中的 Box 类型更改为 Pin 类型。最简单的方法是使用 Box::pin 函数而不是 Box::new 来创建堆分配值:
let mut heap_value = Box::pin(SelfReferential {
    self_ptr: 0 as *const _,
    _pin: PhantomPinned,
});
In addition to changing Box::new to Box::pin, we also need to add the new _pin field in the struct initializer. Since PhantomPinned is a zero-sized type, we only need its type name to initialize it.
除了将 Box::new 更改为 Box::pin 之外,我们还需要在结构初始值设定项中添加新的 _pin 字段。由于 PhantomPinned 是一个零大小的类型,因此我们只需要它的类型名称来初始化它。
When we try to run our adjusted example now, we see that it no longer works:
当我们现在尝试运行调整后的示例时,我们发现它不再起作用:
error[E0594]: cannot assign to data in a dereference of `std::pin::Pin>`
  --> src/main.rs:10:5
   |
10 |     heap_value.self_ptr = ptr;
   |     ^^^^^^^^^^^^^^^^^^^^^^^^^ cannot assign
   |
   = help: trait `DerefMut` is required to modify through a dereference, but it is not implemented for `std::pin::Pin>`

error[E0596]: cannot borrow data in a dereference of `std::pin::Pin>` as mutable
  --> src/main.rs:16:36
   |
16 |     let stack_value = mem::replace(&mut *heap_value, SelfReferential {
   |                                    ^^^^^^^^^^^^^^^^ cannot borrow as mutable
   |
   = help: trait `DerefMut` is required to modify through a dereference, but it is not implemented for `std::pin::Pin>`
Both errors occur because the Pin type no longer implements the DerefMut trait. This is exactly what we wanted because the DerefMut trait would return a &mut reference, which we wanted to prevent. This only happens because we both opted-out of Unpin and changed Box::new to Box::pin.
这两个错误的发生是因为 Pin 类型不再实现 DerefMut 特征。这正是我们想要的,因为 DerefMut 特征将返回 &mut 引用,这是我们想要阻止的。这只发生是因为我们都选择退出 Unpin 并将 Box::new 更改为 Box::pin 。
The problem now is that the compiler does not only prevent moving the type in line 16, but also forbids initializing the self_ptr field in line 10. This happens because the compiler can’t differentiate between valid and invalid uses of &mut references. To get the initialization working again, we have to use the unsafe get_unchecked_mut method:
现在的问题是,编译器不仅阻止移动第 16 行中的类型,还禁止初始化第 10 行中的 self_ptr 字段。发生这种情况是因为编译器无法区分有效和无效的使用 &mut 引用。为了让初始化再次工作,我们必须使用不安全的 get_unchecked_mut 方法:
use std::mem;
use std::marker::PhantomPinned;
use std::pin::Pin;

fn main() {
    let mut heap_value = Box::pin(SelfReferential {
        self_ptr: 0 as *const _,
        _pin: PhantomPinned,
    });
    let ptr = &*heap_value as *const SelfReferential;

    // safe because modifying a field doesn't move the whole struct
    unsafe {
        let mut_ref = Pin::as_mut(&mut heap_value);
        Pin::get_unchecked_mut(mut_ref).self_ptr = ptr;
    }

    println!("heap value at: {:p}", heap_value);
    println!("internal reference: {:p}", heap_value.self_ptr);

    // break it

    let stack_value = mem::replace(&mut *heap_value, SelfReferential {
        self_ptr: 0 as *const _,
        _pin: PhantomPinned,
    });
    println!("value at: {:p}", &stack_value);
    println!("internal reference: {:p}", stack_value.self_ptr);
}

struct SelfReferential {
    self_ptr: *const Self,
    _pin: PhantomPinned,
}
(Try it on the playground)
The get_unchecked_mut function works on a Pin<&mut T> instead of a Pin, so we have to use Pin::as_mut for converting the value. Then we can set the self_ptr field using the &mut reference returned by get_unchecked_mut.
get_unchecked_mut 函数适用于 Pin<&mut T> 而不是 Pin ,因此我们必须使用 Pin::as_mut 来转换值。然后我们可以使用 get_unchecked_mut 返回的 &mut 引用来设置 self_ptr 字段。
Now the only error left is the desired error on mem::replace. Remember, this operation tries to move the heap-allocated value to the stack, which would break the self-reference stored in the self_ptr field. By opting out of Unpin and using Pin, we can prevent this operation at compile time and thus safely work with self-referential structs. As we saw, the compiler is not able to prove that the creation of the self-reference is safe (yet), so we need to use an unsafe block and verify the correctness ourselves.
现在剩下的唯一错误是 mem::replace 上所需的错误。请记住,此操作尝试将堆分配的值移动到栈上,这会破坏 self_ptr 字段中存储的自引用。通过选择退出 Unpin 并使用 Pin ,我们可以在编译时阻止此操作,从而安全地使用自引用结构。正如我们所看到的,编译器还无法证明自引用的创建是安全的,因此我们需要使用不安全的块并自己验证正确性。
2.4.6 Stack Pinning and Pin<&mut T>
In the previous section, we learned how to use Pin to safely create a heap-allocated self-referential value. While this approach works fine and is relatively safe (apart from the unsafe construction), the required heap allocation comes with a performance cost. Since Rust strives to provide zero-cost abstractions whenever possible, the pinning API also allows to create Pin<&mut T> instances that point to stack-allocated values.
在上一节中,我们学习了如何使用 Pin 安全地创建堆分配的自引用值。虽然这种方法工作正常并且相对安全(除了不安全的构造),但所需的堆分配会带来性能成本。由于 Rust 致力于尽可能提供零成本抽象,因此固定(pinning ) API 还允许创建指向栈分配值的 Pin<&mut T> 实例。
Unlike Pin instances, which have ownership of the wrapped value, Pin<&mut T> instances only temporarily borrow the wrapped value. This makes things more complicated, as it requires the programmer to ensure additional guarantees themselves. Most importantly, a Pin<&mut T> must stay pinned for the whole lifetime of the referenced T, which can be difficult to verify for stack-based variables. To help with this, crates like pin-utils exist, but I still wouldn’t recommend pinning to the stack unless you really know what you’re doing.
与拥有包装值所有权的 Pin 实例不同, Pin<&mut T> 实例仅临时借用包装值。这使事情变得更加复杂,因为它需要程序员自己确保额外的保证。最重要的是, Pin<&mut T> 必须在引用的 T 的整个生命周期内保持固定,这对于基于栈的变量来说很难验证。为了帮助解决这个问题,存在像 pin-utils 这样的包,但我仍然不建议固定到栈,除非你真的知道自己在做什么。
For further reading, check out the documentation of the pin module and the Pin::new_unchecked method.
如需进一步阅读,请查看 pin 模块和 Pin::new_unchecked 方法的文档。
2.4.7 Pinning and Futures
As we already saw in this post, the Future::poll method uses pinning in the form of a Pin<&mut Self> parameter:
正如我们在这篇文章中已经看到的, Future::poll 方法以 Pin<&mut Self> 参数的形式使用固定:
fn poll(self: Pin<&mut Self>, cx: &mut Context) -> Poll<Self::Output>
The reason that this method takes self: Pin<&mut Self> instead of the normal &mut self is that future instances created from async/await are often self-referential, as we saw above. By wrapping Self into Pin and letting the compiler opt-out of Unpin for self-referential futures generated from async/await, it is guaranteed that the futures are not moved in memory between poll calls. This ensures that all internal references are still valid.
此方法采用 self: Pin<&mut Self> 而不是正常的 &mut self 的原因是,从 async/await 创建的Future实例通常是自引用的,正如我们上面所看到的。通过将 Self 包装到 Pin 中,并让编译器针对从 async/await 生成的自引用 Future 并且显式退出 Unpin ,可以保证 Future 在 poll 调用之间不会在内存中移动。这可确保所有内部引用仍然有效。
It is worth noting that moving futures before the first poll call is fine. This is a result of the fact that futures are lazy and do nothing until they’re polled for the first time. The start state of the generated state machines therefore only contains the function arguments but no internal references. In order to call poll, the caller must wrap the future into Pin first, which ensures that the future cannot be moved in memory anymore. Since stack pinning is more difficult to get right, I recommend to always use Box::pin combined with Pin::as_mut for this.
值得注意的是,在第一个 poll 调用之前 Future 是可以的移动的。这是因为 Future 很懒惰,在第一次轮询之前什么都不做。因此,生成的状态机的 start 状态仅包含函数参数,但不包含内部引用,自然也不会包含自引用。为了调用 poll ,调用者必须首先将 Future 包装到 Pin 中,这确保 Future 不能再在内存中移动。由于 栈固定(stack pinning)更难正确执行,因此我建议始终将 Box::pin 与 Pin::as_mut 结合使用。
In case you’re interested in understanding how to safely implement a future combinator function using stack pinning yourself, take a look at the relatively short source of the map combinator method of the futures crate and the section about projections and structural pinning of the pin documentation.
如果您有兴趣了解如何使用栈固定(stack pinning)来安全地实Future的组合器函数,请查看 futures crate 的 map 组合器方法的源码以及文档 projections and structural pinning 中有关Pin的部分。
2.5 Executors and Wakers 执行器和唤醒器
Using async/await, it is possible to ergonomically work with futures in a completely asynchronous way. However, as we learned above, futures do nothing until they are polled. This means we have to call poll on them at some point, otherwise the asynchronous code is never executed.
使用 async/await,可以以完全异步的方式符合人体工程学地处理 Future。然而,正如我们在上面了解到的,Future在被轮询之前不会执行任何操作。这意味着我们必须在某个时刻对它们调用 poll ,否则异步代码永远不会执行。
With a single future, we can always wait for each future manually using a loop as described above. However, this approach is very inefficient and not practical for programs that create a large number of futures. The most common solution to this problem is to define a global executor that is responsible for polling all futures in the system until they are finished.
对于单个 Future,我们总是可以使用如上所述的循环手动等待每个 future。然而,这种方法效率非常低,对于创建大量Future的程序来说并不实用。这个问题最常见的解决方案是定义一个全局执行器(比如在js中的promise),负责轮询系统中的所有 Future,直到它们完成。
2.5.1 Executors 执行器
The purpose of an executor is to allow spawning futures as independent tasks, typically through some sort of spawn method. The executor is then responsible for polling all futures until they are completed. The big advantage of managing all futures in a central place is that the executor can switch to a different future whenever a future returns Poll::Pending. Thus, asynchronous operations are run in parallel and the CPU is kept busy.
执行器的目的是允许将 Future 作为独立任务生成,通常通过某种 spawn 方法。然后,执行者负责轮询所有 future,直到完成。集中管理所有 Future 的一大优点是,每当 Future 返回 Poll::Pending 时,执行者就可以切换到不同的 Future 。因此,异步操作并行运行,CPU 保持忙碌状态。
Many executor implementations can also take advantage of systems with multiple CPU cores. They create a thread pool that is able to utilize all cores if there is enough work available and use techniques such as work stealing to balance the load between cores. There are also special executor implementations for embedded systems that optimize for low latency and memory overhead.
许多执行器实现还可以利用具有多个 CPU 核心的系统。他们创建了一个线程池,如果有足够的可用工作,则能够利用所有核心,并使用工作任务窃取等技术来平衡核心之间的负载。还有针对嵌入式系统的特殊执行器实现,可优化低延迟和内存开销。
To avoid the overhead of polling futures repeatedly, executors typically take advantage of the waker API supported by Rust’s futures.
为了避免重复轮询 Future 的开销,执行器通常利用 Rust Future 支持的 waker API。
2.5.2 Wakers 唤醒器
The idea behind the waker API is that a special Waker type is passed to each invocation of poll, wrapped in the Context type. This Waker type is created by the executor and can be used by the asynchronous task to signal its (partial) completion. As a result, the executor does not need to call poll on a future that previously returned Poll::Pending until it is notified by the corresponding waker.
waker API 背后的想法是将特殊的 Waker 类型传递给 poll 的每次调用,并封装在 Context 类型中。此 Waker 类型由执行器创建,异步任务可以使用它来指示其(部分)完成。因此,执行器不需要在之前返回 Poll::Pending 的 Future 上调用 poll ,直到收到相应 Waker 的通知。
This is best illustrated by a small example:
通过一个小例子可以最好地说明这一点:
async fn write_file() {
    async_write_file("foo.txt", "Hello").await;
}
This function asynchronously writes the string “Hello” to a foo.txt file. Since hard disk writes take some time, the first poll call on this future will likely return Poll::Pending. However, the hard disk driver will internally store the Waker passed to the poll call and use it to notify the executor when the file is written to disk. This way, the executor does not need to waste any time trying to poll the future again before it receives the waker notification.
此函数将字符串“Hello”异步写入 foo.txt 文件。由于硬盘写入需要一些时间,因此对该 Future 的第一个 poll 调用可能会返回 Poll::Pending 。但是,硬盘驱动程序将在内部保存传递给 poll 调用的 Waker ,并在文件写入磁盘时使用它来通知执行器。这样,执行器在收到唤醒通知之前就不需要浪费任何时间再次尝试 poll Future。
We will see how the Waker type works in detail when we create our own executor with waker support in the implementation section of this post.
当我们在本文的实现部分创建自己的具有唤醒支持的执行器时,我们将详细了解 Waker 类型的工作原理。
2.6 Cooperative Multitasking? 协作多任务处理?
At the beginning of this post, we talked about preemptive and cooperative multitasking. While preemptive multitasking relies on the operating system to forcibly switch between running tasks, cooperative multitasking requires that the tasks voluntarily give up control of the CPU through a yield operation on a regular basis. The big advantage of the cooperative approach is that tasks can save their state themselves, which results in more efficient context switches and makes it possible to share the same call stack between tasks.
在这篇文章的开头,我们讨论了抢占式和协作式多任务处理。抢占式多任务处理依赖操作系统在正在运行的任务之间强制切换,而协作式多任务处理则要求任务定期通过让出操作自愿放弃对 CPU 的控制。协作方法的一大优点是任务可以自己保存其状态,这会导致更有效的上下文切换,并使任务之间共享相同的调用堆栈成为可能。
It might not be immediately apparent, but futures and async/await are an implementation of the cooperative multitasking pattern:
它可能不会立即显而易见,但 Future 和 async/await 是协作多任务模式的实现:
-
Each future that is added to the executor is basically a cooperative task.
添加到执行器的每个 Future 基本上都是一个合作任务。
-
Instead of using an explicit yield operation, futures give up control of the CPU core by returning
Poll::Pending(orPoll::Readyat the end).Future 不使用显式的让出 (yield) 操作,而是通过返回
Poll::Pending(或最后的Poll::Ready)来放弃对 CPU 核心的控制。-
There is nothing that forces futures to give up the CPU. If they want, they can never return from
poll, e.g., by spinning endlessly in a loop.没有什么可以迫使Future放弃CPU。如果他们愿意,他们永远无法从
poll返回,例如,通过循环无休止地自旋。 -
Since each future can block the execution of the other futures in the executor, we need to trust them to not be malicious.
由于每个 Future 都可以阻止执行器中其他 Future 的执行,因此我们需要相信它们不是恶意的。
-
-
Futures internally store all the state they need to continue execution on the next
pollcall. With async/await, the compiler automatically detects all variables that are needed and stores them inside the generated state machine.Future 内部存储在下一个
poll调用中继续执行所需的所有状态。使用 async/await,编译器会自动检测所需的所有变量并将它们存储在生成的状态机中。-
Only the minimum state required for continuation is saved.
仅保存继续所需的最低状态。
-
Since the
pollmethod gives up the call stack when it returns, the same stack can be used for polling other futures.由于
poll方法在返回时放弃调用堆栈,因此可以使用相同的堆栈来轮询其他 Future。
-
We see that futures and async/await fit the cooperative multitasking pattern perfectly; they just use some different terminology. In the following, we will therefore use the terms “task” and “future” interchangeably.
我们看到 Futures 和 async/await 非常适合协作多任务模式;他们只是使用一些不同的术语。因此,在下文中,我们将互换使用术语“Task”和“Future”。
3. Implementation 实现
Now that we understand how cooperative multitasking based on futures and async/await works in Rust, it’s time to add support for it to our kernel. Since the Future trait is part of the core library and async/await is a feature of the language itself, there is nothing special we need to do to use it in our #![no_std] kernel. The only requirement is that we use at least nightly 2020-03-25 of Rust because async/await was not no_std compatible before.
现在我们了解了 Rust 中基于 Future 和 async/await 的协作多任务如何工作,是时候在我们的内核中添加对其的支持了。由于 Future 特征是 core 库的一部分,并且 async/await 是语言本身的一个功能,因此我们不需要做任何特殊的事情就可以在 #![no_std] 内核中使用。唯一的要求是我们至少使用 Rust 的 nightly 2020-03-25 ,因为 async/await 之前与 no_std 不兼容。
With a recent-enough nightly, we can start using async/await in our main.rs:
使用最近的 Rust nightly 版本,我们可以开始在 main.rs 中使用 async/await :
// in src/main.rs

async fn async_number() -> u32 {
    42
}

async fn example_task() {
    let number = async_number().await;
    println!("async number: {}", number);
}
The async_number function is an async fn, so the compiler transforms it into a state machine that implements Future. Since the function only returns 42, the resulting future will directly return Poll::Ready(42) on the first poll call. Like async_number, the example_task function is also an async fn. It awaits the number returned by async_number and then prints it using the println macro.
async_number 函数是一个 async fn ,因此编译器将其转换为实现 Future 的状态机。由于该函数仅返回 42 ,因此最终的 future 将在第一次 poll 调用时直接返回 Poll::Ready(42) 。与 async_number 一样, example_task 函数也是 async fn 。它等待 async_number 返回的数字,然后使用 println 宏打印它。
To run the future returned by example_task, we need to call poll on it until it signals its completion by returning Poll::Ready. To do this, we need to create a simple executor type.
要运行 example_task 返回的 Future,我们需要对其调用 poll ,直到它通过返回 Poll::Ready 发出完成信号。为此,我们需要创建一个简单的执行器类型。
3.1 Task 任务
Before we start the executor implementation, we create a new task module with a Task type:
在开始执行器实现之前,我们创建一个具有 Task 类型的新 task 模块:
// in src/lib.rs

pub mod task;
// in src/task/mod.rs

use core::{future::Future, pin::Pin};
use alloc::boxed::Box;

pub struct Task {
    future: Pin<Box<dyn Future<Output = ()>>>,
}
The Task struct is a newtype wrapper around a pinned, heap-allocated, and dynamically dispatched future with the empty type () as output. Let’s go through it in detail:
Task 结构是一个新类型包装器,封装了 固定的 (Pin)、堆分配(Box)的和动态分派(dyn )的 future,以空类型 () 作为输出。让我们详细了解一下:
-
We require that the future associated with a task returns
(). This means that tasks don’t return any result, they are just executed for their side effects. For example, theexample_taskfunction we defined above has no return value, but it prints something to the screen as a side effect. -
我们要求与任务关联的 future 返回
()。这意味着任务不会返回任何结果,它们只是因其副作用而被执行。例如,我们上面定义的example_task函数没有返回值,但它会在屏幕上打印一些内容作为副作用。 -
The
dynkeyword indicates that we store a trait object in theBox. This means that the methods on the future are dynamically dispatched, allowing different types of futures to be stored in theTasktype. This is important because eachasync fnhas its own type and we want to be able to create multiple different tasks. -
dyn关键字表示我们在Box中存储一个特征对象。这意味着 Future 的方法是动态派发的,允许不同类型的 Future 存储在Task类型中。这很重要,因为每个async fn都有自己的类型,我们希望能够创建多个不同的任务。 -
As we learned in the section about pinning, the
Pintype ensures that a value cannot be moved in memory by placing it on the heap and preventing the creation of&mutreferences to it. This is important because futures generated by async/await might be self-referential, i.e., contain pointers to themselves that would be invalidated when the future is moved. -
正如我们在有关固定(Pin)的部分中了解到的,
Pin类型通过将值放置在堆上并防止创建对其的&mut引用来确保值无法在内存中移动。这很重要,因为由 async/await 生成的 Future 可能是自引用的,即包含指向自身的指针,当 future 移动时,这些指针将失效。
To allow the creation of new Task structs from futures, we create a new function:
为了允许从 Future 创建新的 Task 结构,我们创建一个 new 函数:
// in src/task/mod.rs

impl Task {
    pub fn new(future: impl Future<Output = ()> + 'static) -> Task {
        Task {
            future: Box::pin(future),
        }
    }
}
The function takes an arbitrary future with an output type of () and pins it in memory through the Box::pin function. Then it wraps the boxed future in the Task struct and returns it. The 'static lifetime is required here because the returned Task can live for an arbitrary time, so the future needs to be valid for that time too.
该函数采用输出类型为 () 的任意 Future,并通过 Box::pin 函数将其固定在内存中。然后它将装箱的 Future 包装在 Task 结构中并返回它。这里需要 'static 生命周期,因为返回的 Task 可以存活任意时间(即Task 可以长时间运行),因此 Future 也需要在该时间内有效。
We also add a poll method to allow the executor to poll the stored future:
我们还添加了一个 poll 方法来允许执行器轮询存储的 Future:
// in src/task/mod.rs

use core::task::{Context, Poll};

impl Task {
    fn poll(&mut self, context: &mut Context) -> Poll<()> {
        self.future.as_mut().poll(context)
    }
}
Since the poll method of the Future trait expects to be called on a Pin<&mut T> type, we use the Pin::as_mut method to convert the self.future field of type Pin first. Then we call poll on the converted self.future field and return the result. Since the Task::poll method should only be called by the executor that we’ll create in a moment, we keep the function private to the task module.
由于 Future 特征的 poll 方法期望在 Pin<&mut T> 类型上调用,因此我们使用 Pin::as_mut 方法来转换 <首先是 b4> 类型为 Pin 的字段。然后我们对转换后的 self.future 字段调用 poll 并返回结果。由于 Task::poll 方法只能由我们稍后创建的执行器调用,因此我们将该函数保留为 task 模块的私有函数。
3.2 Simple Executor 简单执行器
Since executors can be quite complex, we deliberately start by creating a very basic executor before implementing a more featureful executor later. For this, we first create a new task::simple_executor submodule:
由于执行器可能非常复杂,因此我们特意从创建一个非常基本的执行器开始,然后再实现功能更强大的执行器。为此,我们首先创建一个新的 task::simple_executor 子模块:
// in src/task/mod.rs

pub mod simple_executor;
// in src/task/simple_executor.rs

use super::Task;
use alloc::collections::VecDeque;

pub struct SimpleExecutor {
    task_queue: VecDeque<Task>,
}

impl SimpleExecutor {
    pub fn new() -> SimpleExecutor {
        SimpleExecutor {
            task_queue: VecDeque::new(),
        }
    }

    pub fn spawn(&mut self, task: Task) {
        self.task_queue.push_back(task)
    }
}
The struct contains a single task_queue field of type VecDeque, which is basically a vector that allows for push and pop operations on both ends. The idea behind using this type is that we insert new tasks through the spawn method at the end and pop the next task for execution from the front. This way, we get a simple FIFO queue (“first in, first out”).
该结构体包含一个 VecDeque 类型的 task_queue 字段,它基本上是一个允许两端进行入栈和出栈操作的 Vec 。使用这种类型背后的想法是,我们通过末尾的 spawn 方法 push 新任务,并从前面 pop 下一个任务来执行。这样,我们就得到了一个简单的 FIFO 队列(“先进先出”)。
3.2.1 Dummy Waker
In order to call the poll method, we need to create a Context type, which wraps a Waker type. To start simple, we will first create a dummy waker that does nothing. For this, we create a RawWaker instance, which defines the implementation of the different Waker methods, and then use the Waker::from_raw function to turn it into a Waker:
为了调用 poll 方法,我们需要创建一个 Context 类型,它包装一个 Waker 类型。首先简单地开始,我们将首先创建一个不执行任何操作的虚拟唤醒器。为此,我们创建一个 RawWaker 实例,它定义了不同 Waker 方法的实现,然后使用 Waker::from_raw 函数将其转换为 Waker :
// in src/task/simple_executor.rs

use core::task::{Waker, RawWaker};

fn dummy_raw_waker() -> RawWaker {
    todo!();
}

fn dummy_waker() -> Waker {
    unsafe { Waker::from_raw(dummy_raw_waker()) }
}
The from_raw function is unsafe because undefined behavior can occur if the programmer does not uphold the documented requirements of RawWaker. Before we look at the implementation of the dummy_raw_waker function, we first try to understand how the RawWaker type works.
from_raw 函数是 unsafe 的,因为如果程序员不遵守 RawWaker 记录的要求,则可能会发生未定义的行为。在查看 dummy_raw_waker 函数的实现之前,我们首先尝试了解 RawWaker 类型的工作原理。
3.2.1.1 RawWaker
The RawWaker type requires the programmer to explicitly define a virtual method table (vtable) that specifies the functions that should be called when the RawWaker is cloned, woken, or dropped. The layout of this vtable is defined by the RawWakerVTable type. Each function receives a *const () argument, which is a type-erased pointer to some value. The reason for using a *const () pointer instead of a proper reference is that the RawWaker type should be non-generic but still support arbitrary types. The pointer is provided by putting it into the data argument of RawWaker::new, which just initializes a RawWaker. The Waker then uses this RawWaker to call the vtable functions with data.
RawWaker 类型要求程序员显式定义一个虚拟方法表 (vtable),该表指定在克隆、唤醒或删除 RawWaker 时应调用的函数。该虚函数表的布局由 RawWakerVTable 类型定义。每个函数接收一个 *const () 参数,它是一个指向某个值的类型擦除指针。使用 *const () 指针而不是正确的引用的原因是 RawWaker 类型应该是非泛型的,但仍支持任意类型。通过将指针放入 RawWaker::new 的 data 参数中来提供指针,该参数仅初始化 RawWaker 。然后 Waker 使用此 RawWaker 通过 data 调用 vtable 函数。
Typically, the RawWaker is created for some heap-allocated struct that is wrapped into the Box or Arc type. For such types, methods like Box::into_raw can be used to convert the Box to a *const T pointer. This pointer can then be cast to an anonymous *const () pointer and passed to RawWaker::new. Since each vtable function receives the same *const () as an argument, the functions can safely cast the pointer back to a Box or a &T to operate on it. As you can imagine, this process is highly dangerous and can easily lead to undefined behavior on mistakes. For this reason, manually creating a RawWaker is not recommended unless necessary.
通常, RawWaker 是为包装到 Box 或 Arc 类型中的某些堆分配结构创建的。对于此类类型,可以使用 Box::into_raw 等方法将 Box 转换为 *const T 指针。然后可以将该指针转换为匿名 *const () 指针并传递给 RawWaker::new 。由于每个 vtable 函数都接收相同的 *const () 作为参数,因此函数可以安全地将指针强制转换回 Box 或 &T 来对其进行操作。可以想象,这个过程是非常危险的,很容易导致错误的未定义行为。因此,除非必要,否则不建议手动创建 RawWaker 。
3.2.1.2 A Dummy RawWaker
While manually creating a RawWaker is not recommended, there is currently no other way to create a dummy Waker that does nothing. Fortunately, the fact that we want to do nothing makes it relatively safe to implement the dummy_raw_waker function:
虽然不建议手动创建 RawWaker ,但目前没有其他方法可以创建不执行任何操作的虚拟 Waker 。幸运的是,我们不想做任何事情,这使得实现 dummy_raw_waker 函数相对安全:
// in src/task/simple_executor.rs

use core::task::RawWakerVTable;

fn dummy_raw_waker() -> RawWaker {
    fn no_op(_: *const ()) {}
    fn clone(_: *const ()) -> RawWaker {
        dummy_raw_waker()
    }

    let vtable = &RawWakerVTable::new(clone, no_op, no_op, no_op);
    RawWaker::new(0 as *const (), vtable)
}
First, we define two inner functions named no_op and clone. The no_op function takes a *const () pointer and does nothing. The clone function also takes a *const () pointer and returns a new RawWaker by calling dummy_raw_waker again. We use these two functions to create a minimal RawWakerVTable: The clone function is used for the cloning operations, and the no_op function is used for all other operations. Since the RawWaker does nothing, it does not matter that we return a new RawWaker from clone instead of cloning it.
首先,我们定义两个名为 no_op 和 clone 的内部函数。 no_op 函数参数是 *const () 指针,但不执行任何操作。 clone 函数还接受一个 *const () 指针,并通过再次调用 dummy_raw_waker 返回一个新的 RawWaker 。我们使用这两个函数创建一个最小的 RawWakerVTable : clone 函数用于克隆操作, no_op 函数用于所有其他操作。由于 RawWaker 不执行任何操作,因此我们从 clone 返回新的 RawWaker 而不是克隆它并不重要。
After creating the vtable, we use the RawWaker::new function to create the RawWaker. The passed *const () does not matter since none of the vtable functions use it. For this reason, we simply pass a null pointer.
创建 vtable 后,我们使用 RawWaker::new 函数创建 RawWaker 。传递的 *const () 并不重要,因为没有 vtable 函数使用它。因此,我们只需传递一个空指针即可。
3.2.3 A run Method
Now we have a way to create a Waker instance, we can use it to implement a run method on our executor. The most simple run method is to repeatedly poll all queued tasks in a loop until all are done. This is not very efficient since it does not utilize the notifications of the Waker type, but it is an easy way to get things running:
现在我们有了创建 Waker 实例的方法,我们可以使用它在执行器上实现 run 方法。最简单的 run 方法是在循环中重复轮询所有排队的任务,直到所有任务完成。这不是很有效,因为它不利用 Waker 类型的通知,但这是一种让事情运行的简单方法:
// in src/task/simple_executor.rs

use core::task::{Context, Poll};

impl SimpleExecutor {
    pub fn run(&mut self) {
        while let Some(mut task) = self.task_queue.pop_front() {
            let waker = dummy_waker();
            let mut context = Context::from_waker(&waker);
            match task.poll(&mut context) {
                Poll::Ready(()) => {} // task done
                Poll::Pending => self.task_queue.push_back(task),
            }
        }
    }
}
The function uses a while let loop to handle all tasks in the task_queue. For each task, it first creates a Context type by wrapping a Waker instance returned by our dummy_waker function. Then it invokes the Task::poll method with this context. If the poll method returns Poll::Ready, the task is finished and we can continue with the next task. If the task is still Poll::Pending, we add it to the back of the queue again so that it will be polled again in a subsequent loop iteration.
该函数使用 while let 循环来处理 task_queue 中的所有任务。对于每个任务,它首先通过包装 dummy_waker 函数返回的 Waker 实例来创建 Context 类型。然后它使用 context 调用 Task::poll 方法。如果 poll 方法返回 Poll::Ready ,则任务完成,我们可以继续下一个任务。如果任务仍然是 Poll::Pending ,我们再次将其添加到队列后面,以便在后续循环迭代中再次轮询它。
3.2.4 Trying It 尝试一下
With our SimpleExecutor type, we can now try running the task returned by the example_task function in our main.rs:
使用我们的 SimpleExecutor 类型,我们现在可以尝试运行 main.rs 中的 example_task 函数返回的任务:
// in src/main.rs

use blog_os::task::{Task, simple_executor::SimpleExecutor};

fn kernel_main(boot_info: &'static BootInfo) -> ! {
    // […] initialization routines, including `init_heap`

    let mut executor = SimpleExecutor::new();
    executor.spawn(Task::new(example_task()));
    executor.run();

    // […] test_main, "it did not crash" message, hlt_loop
}


// Below is the example_task function again so that you don't have to scroll up

async fn async_number() -> u32 {
    42
}

async fn example_task() {
    let number = async_number().await;
    println!("async number: {}", number);
}
When we run it, we see that the expected “async number: 42” message is printed to the screen:
当我们运行它时,我们看到预期的“async number:42”消息被打印到屏幕上:
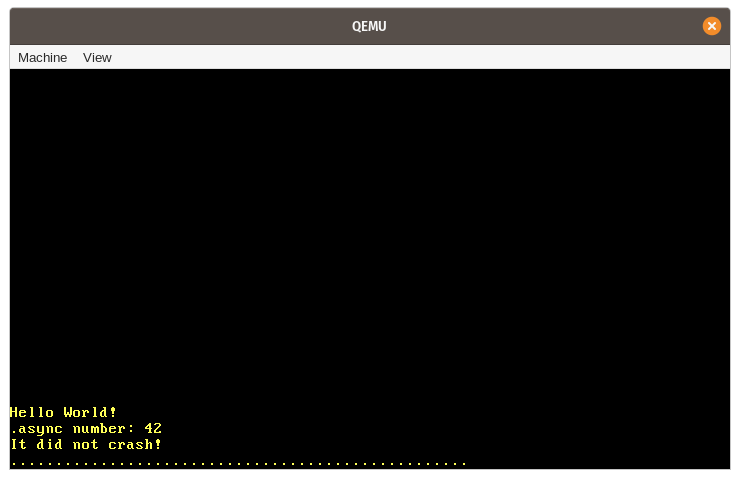
Let’s summarize the various steps that happen in this example:
让我们总结一下此示例中发生的各个步骤:
-
First, a new instance of our
SimpleExecutortype is created with an emptytask_queue.首先,使用空的
task_queue创建SimpleExecutor类型的新实例。 -
Next, we call the asynchronous
example_taskfunction, which returns a future. We wrap this future in theTasktype, which moves it to the heap and pins it, and then add the task to thetask_queueof the executor through thespawnmethod.接下来,我们调用异步
example_task函数,它返回一个 future。我们将这个 future 包装在Task类型中,将其移动到堆中并将其固定,然后通过spawn中> 方法。 -
We then call the
runmethod to start the execution of the single task in the queue. This involves:然后我们调用
run方法来开始执行队列中的单个任务。这涉及:-
Popping the task from the front of the
task_queue.从
task_queue前面 pop 任务。 -
Creating a
RawWakerfor the task, converting it to aWakerinstance, and then creating aContextinstance from it.为任务创建一个
RawWaker,将其转换为Waker实例,然后从中创建一个Context实例。 -
Calling the
pollmethod on the future of the task, using theContextwe just created.使用我们刚刚创建的
Context调用Future任务的poll方法。 -
Since the
example_taskdoes not wait for anything, it can directly run till its end on the firstpollcall. This is where the “async number: 42” line is printed.由于
example_task不等待任何内容,因此它可以直接运行到第一次poll调用时结束。这是打印“async number: 42”行的地方。 -
Since the
example_taskdirectly returnsPoll::Ready, it is not added back to the task queue.由于
example_task直接返回Poll::Ready,因此不会将其添加回任务队列。
-
-
The
runmethod returns after thetask_queuebecomes empty. The execution of ourkernel_mainfunction continues and the “It did not crash!” message is printed.run方法在task_queue变空后返回。我们的kernel_main函数继续执行,并且 消息“It did not crash!”被打印。
3.3 Async Keyboard Input 异步键盘输入
Our simple executor does not utilize the Waker notifications and simply loops over all tasks until they are done. This wasn’t a problem for our example since our example_task can directly run to finish on the first poll call. To see the performance advantages of a proper Waker implementation, we first need to create a task that is truly asynchronous, i.e., a task that will probably return Poll::Pending on the first poll call.
我们的简单执行器不使用 Waker 通知,而是简单地循环所有任务直到完成。对于我们的示例来说这不是问题,因为我们的 example_task 可以直接运行以完成第一个 poll 调用。要了解正确 Waker 实现的性能优势,我们首先需要创建一个真正异步的任务,即可能在第一个 poll 的任务 调用。
We already have some kind of asynchronicity in our system that we can use for this: hardware interrupts. As we learned in the Interrupts post, hardware interrupts can occur at arbitrary points in time, determined by some external device. For example, a hardware timer sends an interrupt to the CPU after some predefined time has elapsed. When the CPU receives an interrupt, it immediately transfers control to the corresponding handler function defined in the interrupt descriptor table (IDT).
我们的系统中已经有了某种可以用于此目的的异步性:硬件中断。正如我们在中断帖子中了解到的,硬件中断可以在任意时间点发生,由某些外部设备决定。例如,硬件定时器在经过某个预定义时间后向 CPU 发送中断。当CPU收到中断时,它立即将控制权转移到中断描述符表(IDT)中定义的相应处理函数。
In the following, we will create an asynchronous task based on the keyboard interrupt. The keyboard interrupt is a good candidate for this because it is both non-deterministic and latency-critical. Non-deterministic means that there is no way to predict when the next key press will occur because it is entirely dependent on the user. Latency-critical means that we want to handle the keyboard input in a timely manner, otherwise the user will feel a lag. To support such a task in an efficient way, it will be essential that the executor has proper support for Waker notifications.
下面我们将创建一个基于键盘中断的异步任务。键盘中断是一个很好的选择,因为它既不确定又对延迟至关重要。不确定性意味着无法预测下一次按键何时发生,因为它完全取决于用户。延迟关键意味着我们要及时处理键盘输入,否则用户会感到延迟。为了以有效的方式支持此类任务,执行器必须对 Waker 通知提供适当的支持。
3.3.1 Scancode Queue 输入队列
Currently, we handle the keyboard input directly in the interrupt handler. This is not a good idea for the long term because interrupt handlers should stay as short as possible as they might interrupt important work. Instead, interrupt handlers should only perform the minimal amount of work necessary (e.g., reading the keyboard scancode) and leave the rest of the work (e.g., interpreting the scancode) to a background task.
目前,我们直接在中断处理程序中处理键盘输入。从长远来看,这不是一个好主意,因为中断处理程序应该尽可能短,因为它们可能会中断重要的工作。相反,中断处理程序应该只执行最少量的必要工作(例如,读取键盘扫描码),并将其余工作(例如,解释扫描码)留给后台任务。
A common pattern for delegating work to a background task is to create some sort of queue. The interrupt handler pushes units of work to the queue, and the background task handles the work in the queue. Applied to our keyboard interrupt, this means that the interrupt handler only reads the scancode from the keyboard, pushes it to the queue, and then returns. The keyboard task sits on the other end of the queue and interprets and handles each scancode that is pushed to it:
将工作委派给后台任务的常见模式是创建某种队列。中断处理程序将工作单元推送到队列,后台任务处理队列中的工作。应用于我们的键盘中断,这意味着中断处理程序仅从键盘读取扫描码,将其推送到队列,然后返回。键盘任务位于队列的另一端,解释并处理推送给它的每个扫描码:

A simple implementation of that queue could be a mutex-protected VecDeque. However, using mutexes in interrupt handlers is not a good idea since it can easily lead to deadlocks. For example, when the user presses a key while the keyboard task has locked the queue, the interrupt handler tries to acquire the lock again and hangs indefinitely. Another problem with this approach is that VecDeque automatically increases its capacity by performing a new heap allocation when it becomes full. This can lead to deadlocks again because our allocator also uses a mutex internally. Further problems are that heap allocations can fail or take a considerable amount of time when the heap is fragmented.
该队列的一个简单实现可以是受互斥锁保护的 VecDeque 。然而,在中断处理程序中使用互斥体并不是一个好主意,因为它很容易导致死锁。例如,当用户在键盘任务锁定队列时按下某个键时,中断处理程序会尝试再次获取锁定并无限期挂起。此方法的另一个问题是 VecDeque 在变满时通过执行新的堆分配来自动增加其容量。这可能会再次导致死锁,因为我们的分配器也在内部使用互斥体。进一步的问题是,当堆碎片时,堆分配可能会失败或花费大量时间。
To prevent these problems, we need a queue implementation that does not require mutexes or allocations for its push operation. Such queues can be implemented by using lock-free atomic operations for pushing and popping elements. This way, it is possible to create push and pop operations that only require a &self reference and are thus usable without a mutex. To avoid allocations on push, the queue can be backed by a pre-allocated fixed-size buffer. While this makes the queue bounded (i.e., it has a maximum length), it is often possible to define reasonable upper bounds for the queue length in practice, so that this isn’t a big problem.
为了防止这些问题,我们需要一个队列实现,其 push 操作不需要互斥体或分配。此类队列可以通过使用无锁原子操作来推送和弹出元素来实现。这样,就可以创建仅需要 &self 引用的 push 和 pop 操作,因此无需互斥体即可使用。为了避免 push 上的分配,队列可以由预先分配的固定大小缓冲区支持。虽然这使得队列有界(即它具有最大长度),但在实践中通常可以为队列长度定义合理的上限,因此这不是一个大问题。
3.3.1.1 The crossbeam Crate
Implementing such a queue in a correct and efficient way is very difficult, so I recommend sticking to existing, well-tested implementations. One popular Rust project that implements various mutex-free types for concurrent programming is crossbeam. It provides a type named ArrayQueue that is exactly what we need in this case. And we’re lucky: the type is fully compatible with no_std crates with allocation support.
以正确且有效的方式实现这样的队列非常困难,因此我建议坚持使用现有的、经过充分测试的实现。 crossbeam 是一个流行的 Rust 项目,它为并发编程实现了各种无互斥类型。它提供了一个名为 ArrayQueue 的类型,这正是我们在本例中所需要的。我们很幸运:该类型与具有分配支持的 no_std crate 完全兼容。
To use the type, we need to add a dependency on the crossbeam-queue crate:
要使用该类型,我们需要添加对 crossbeam-queue 包的依赖:
# in Cargo.toml

[dependencies.crossbeam-queue]
version = "0.2.1"
default-features = false
features = ["alloc"]
By default, the crate depends on the standard library. To make it no_std compatible, we need to disable its default features and instead enable the alloc feature. (Note that we could also add a dependency on the main crossbeam crate, which re-exports the crossbeam-queue crate, but this would result in a larger number of dependencies and longer compile times.)
默认情况下,crate 依赖于标准库。为了使其 no_std 兼容,我们需要禁用其默认功能(default-features = false)并启用 alloc 功能。 (请注意,我们还可以添加对主 crossbeam 包的依赖项,它会重新导出 crossbeam-queue 包,但这会导致更多的依赖项和更长的编译时间。 )
3.3.1.2 Queue Implementation 队列实现
Using the ArrayQueue type, we can now create a global scancode queue in a new task::keyboard module:
使用 ArrayQueue 类型,我们现在可以在新的 task::keyboard 模块中创建全局扫描代码队列:
// in src/task/mod.rs

pub mod keyboard;
// in src/task/keyboard.rs

use conquer_once::spin::OnceCell;
use crossbeam_queue::ArrayQueue;

static SCANCODE_QUEUE: OnceCell<ArrayQueue<u8>> = OnceCell::uninit();
Since ArrayQueue::new performs a heap allocation, which is not possible at compile time (yet), we can’t initialize the static variable directly. Instead, we use the OnceCell type of the conquer_once crate, which makes it possible to perform a safe one-time initialization of static values. To include the crate, we need to add it as a dependency in our Cargo.toml:
由于 ArrayQueue::new 执行堆分配,这在编译时是不可能的,所以我们不能直接初始化静态变量。相反,我们使用 conquer_once 包的 OnceCell 类型,这使得可以对静态值执行安全的一次性初始化。要包含该包,我们需要将其添加为 Cargo.toml 中的依赖项:
# in Cargo.toml

[dependencies.conquer-once]
version = "0.2.0"
default-features = false
Instead of the OnceCell primitive, we could also use the lazy_static macro here. However, the OnceCell type has the advantage that we can ensure that the initialization does not happen in the interrupt handler, thus preventing the interrupt handler from performing a heap allocation.
我们还可以在这里使用 lazy_static 宏来代替 OnceCell 原语。然而, OnceCell 类型的优点是我们可以确保初始化不会发生在中断处理程序中,从而阻止中断处理程序执行堆分配。
3.3.2 Filling the Queue 填充队列
To fill the scancode queue, we create a new add_scancode function that we will call from the interrupt handler:
为了填充扫描码队列,我们创建一个新的 add_scancode 函数,我们将从中断处理程序中调用该函数:
// in src/task/keyboard.rs

use crate::println;

/// Called by the keyboard interrupt handler
///
/// Must not block or allocate.
pub(crate) fn add_scancode(scancode: u8) {
    if let Ok(queue) = SCANCODE_QUEUE.try_get() {
        if let Err(_) = queue.push(scancode) {
            println!("WARNING: scancode queue full; dropping keyboard input");
        }
    } else {
        println!("WARNING: scancode queue uninitialized");
    }
}
We use OnceCell::try_get to get a reference to the initialized queue. If the queue is not initialized yet, we ignore the keyboard scancode and print a warning. It’s important that we don’t try to initialize the queue in this function because it will be called by the interrupt handler, which should not perform heap allocations. Since this function should not be callable from our main.rs, we use the pub(crate) visibility to make it only available to our lib.rs.
我们使用 OnceCell::try_get 来获取对初始化队列的引用。如果队列尚未初始化,我们将忽略键盘扫描码并打印警告。重要的是,我们不要尝试在此函数中初始化队列,因为它将由中断处理程序调用,而中断处理程序不应执行堆分配。由于该函数不应从 main.rs 调用,因此我们使用 pub(crate) 可见性使其仅可用于 lib.rs 。
The fact that the ArrayQueue::push method requires only a &self reference makes it very simple to call the method on the static queue. The ArrayQueue type performs all the necessary synchronization itself, so we don’t need a mutex wrapper here. In case the queue is full, we print a warning too.
ArrayQueue::push 方法仅需要 &self 引用这一事实使得在静态队列上调用该方法变得非常简单。 ArrayQueue 类型本身执行所有必要的同步,因此我们在这里不需要互斥锁包装器。如果队列已满,我们也会打印一条警告。
To call the add_scancode function on keyboard interrupts, we update our keyboard_interrupt_handler function in the interrupts module:
要在键盘中断时调用 add_scancode 函数,我们更新 interrupts 模块中的 keyboard_interrupt_handler 函数:
// in src/interrupts.rs

extern "x86-interrupt" fn keyboard_interrupt_handler(
    _stack_frame: InterruptStackFrame
) {
    use x86_64::instructions::port::Port;

    let mut port = Port::new(0x60);
    let scancode: u8 = unsafe { port.read() };
    crate::task::keyboard::add_scancode(scancode); // new

    unsafe {
        PICS.lock()
            .notify_end_of_interrupt(InterruptIndex::Keyboard.as_u8());
    }
}
We removed all the keyboard handling code from this function and instead added a call to the add_scancode function. The rest of the function stays the same as before.
我们从此函数中删除了所有键盘处理代码,而是添加了对 add_scancode 函数的调用。其余功能与以前相同。
As expected, keypresses are no longer printed to the screen when we run our project using cargo run now. Instead, we see the warning that the scancode queue is uninitialized for every keystroke.
正如预期的那样,当我们现在使用 cargo run 运行项目时,按键不再打印到屏幕上。相反,我们看到警告:每次击键扫描码队列都未初始化。
3.3.3 Scancode Stream
To initialize the SCANCODE_QUEUE and read the scancodes from the queue in an asynchronous way, we create a new ScancodeStream type:
为了初始化 SCANCODE_QUEUE 并以异步方式从队列中读取扫描码,我们创建一个新的 ScancodeStream 类型:
// in src/task/keyboard.rs

pub struct ScancodeStream {
    _private: (),
}

impl ScancodeStream {
    pub fn new() -> Self {
        SCANCODE_QUEUE.try_init_once(|| ArrayQueue::new(100))
            .expect("ScancodeStream::new should only be called once");
        ScancodeStream { _private: () }
    }
}
The purpose of the _private field is to prevent construction of the struct from outside of the module. This makes the new function the only way to construct the type. In the function, we first try to initialize the SCANCODE_QUEUE static. We panic if it is already initialized to ensure that only a single ScancodeStream instance can be created.
_private 字段的目的是防止从模块外部构造结构。这使得 new 函数成为构造该类型的唯一方法。在函数中,我们首先尝试初始化 SCANCODE_QUEUE 静态。如果它已经初始化,我们会感到恐慌,以确保只能创建一个 ScancodeStream 实例。
To make the scancodes available to asynchronous tasks, the next step is to implement a poll-like method that tries to pop the next scancode off the queue. While this sounds like we should implement the Future trait for our type, this does not quite fit here. The problem is that the Future trait only abstracts over a single asynchronous value and expects that the poll method is not called again after it returns Poll::Ready. Our scancode queue, however, contains multiple asynchronous values, so it is okay to keep polling it.
为了使扫描码可用于异步任务,下一步是实现类似 poll 的方法,尝试从队列中弹出下一个扫描码。虽然这听起来像是我们应该为我们的类型实现 Future 特征,但这不太适合这里。问题在于 Future 特征仅抽象单个异步值,并期望 poll 方法在返回 Poll::Ready 后不会再次调用。然而,我们的扫描码队列包含多个异步值,因此可以继续轮询它。
3.3.3.1The Stream Trait Stream 特征
Since types that yield multiple asynchronous values are common, the futures crate provides a useful abstraction for such types: the Stream trait. The trait is defined like this:
由于产生多个异步值的类型很常见,因此 futures 包为此类类型提供了有用的抽象: Stream 特征。该特征的定义如下:
pub trait Stream {
    type Item;

    fn poll_next(self: Pin<&mut Self>, cx: &mut Context)
        -> Poll<Option<Self::Item>>;
}
This definition is quite similar to the Future trait, with the following differences:
这个定义与 Future 特征非常相似,但有以下区别:
- The associated type is named
Iteminstead ofOutput.
关联的类型被命名为 Item 而不是 Output 。
-
Instead of a
pollmethod that returnsPoll, theStreamtrait defines apoll_nextmethod that returns aPoll(note the additionalOption).Stream特征定义了一个返回Poll的poll_next方法,而不是返回Poll的poll方法。 (注意附加的Option)。
There is also a semantic difference: The poll_next can be called repeatedly, until it returns Poll::Ready(None) to signal that the stream is finished. In this regard, the method is similar to the Iterator::next method, which also returns None after the last value.
还有一个语义差异: poll_next 可以重复调用,直到它返回 Poll::Ready(None) 以表示流已完成。在这方面,该方法类似于 Iterator::next 方法,它也在最后一个值之后返回 None 。
3.3.3.2 Implementing Stream
Let’s implement the Stream trait for our ScancodeStream to provide the values of the SCANCODE_QUEUE in an asynchronous way. For this, we first need to add a dependency on the futures-util crate, which contains the Stream type:
让我们为 ScancodeStream 实现 Stream 特征,以异步方式提供 SCANCODE_QUEUE 的值。为此,我们首先需要添加对 futures-util 包的依赖,其中包含 Stream 类型:
# in Cargo.toml

[dependencies.futures-util]
version = "0.3.4"
default-features = false
features = ["alloc"]
We disable the default features to make the crate no_std compatible and enable the alloc feature to make its allocation-based types available (we will need this later). (Note that we could also add a dependency on the main futures crate, which re-exports the futures-util crate, but this would result in a larger number of dependencies and longer compile times.)
我们禁用默认功能以使包 no_std 兼容,并启用 alloc 功能以使其基于分配的类型可用(稍后我们将需要它)。 (请注意,我们还可以添加对主 futures 包的依赖项,它会重新导出 futures-util 包,但这会导致更多的依赖项和更长的编译时间。 )
Now we can import and implement the Stream trait:
现在我们可以导入并实现 Stream 特征:
// in src/task/keyboard.rs

use core::{pin::Pin, task::{Poll, Context}};
use futures_util::stream::Stream;

impl Stream for ScancodeStream {
    type Item = u8;

    fn poll_next(self: Pin<&mut Self>, cx: &mut Context) -> Poll<Option<u8>> {
        let queue = SCANCODE_QUEUE.try_get().expect("not initialized");
        match queue.pop() {
            Ok(scancode) => Poll::Ready(Some(scancode)),
            Err(crossbeam_queue::PopError) => Poll::Pending,
        }
    }
}
We first use the OnceCell::try_get method to get a reference to the initialized scancode queue. This should never fail since we initialize the queue in the new function, so we can safely use the expect method to panic if it’s not initialized. Next, we use the ArrayQueue::pop method to try to get the next element from the queue. If it succeeds, we return the scancode wrapped in Poll::Ready(Some(…)). If it fails, it means that the queue is empty. In that case, we return Poll::Pending.
我们首先使用 OnceCell::try_get 方法来获取对初始化的扫描码队列的引用。这应该永远不会失败,因为我们在 new 函数中初始化了队列,因此我们可以安全地使用 expect 方法来恐慌如果它没有初始化。接下来,我们使用 ArrayQueue::pop 方法尝试从队列中获取下一个元素。如果成功,我们返回包裹在 Poll::Ready(Some(…)) 中的扫描码。如果失败,则说明队列为空。在这种情况下,我们返回 Poll::Pending 。
3.3.4 Waker Support
Like the Futures::poll method, the Stream::poll_next method requires the asynchronous task to notify the executor when it becomes ready after Poll::Pending is returned. This way, the executor does not need to poll the same task again until it is notified, which greatly reduces the performance overhead of waiting tasks.
与 Futures::poll 方法一样, Stream::poll_next 方法要求异步任务在返回 Poll::Pending 后准备就绪时通知执行器。这样,执行器就不需要再次轮询同一个任务,直到收到通知为止,这大大降低了等待任务的性能开销。
To send this notification, the task should extract the Waker from the passed Context reference and store it somewhere. When the task becomes ready, it should invoke the wake method on the stored Waker to notify the executor that the task should be polled again.
要发送此通知,任务应从传递的 Context 引用中提取 Waker 并将其存储在某处。当任务准备就绪时,它应该调用存储的 Waker 上的 wake 方法来通知执行器应该再次轮询该任务。
3.3.4.1 AtomicWaker
To implement the Waker notification for our ScancodeStream, we need a place where we can store the Waker between poll calls. We can’t store it as a field in the ScancodeStream itself because it needs to be accessible from the add_scancode function. The solution to this is to use a static variable of the AtomicWaker type provided by the futures-util crate. Like the ArrayQueue type, this type is based on atomic instructions and can be safely stored in a static and modified concurrently.
为了实现 ScancodeStream 的 Waker 通知,我们需要一个可以在 poll 调用之间存储 Waker 的地方。我们无法将其作为字段存储在 ScancodeStream 本身中,因为它需要可以从 add_scancode 函数访问。解决方案是使用 futures-util 包提供的 AtomicWaker 类型的静态变量。与 ArrayQueue 类型一样,该类型基于原子指令,可以安全地存储在 static 中并并发修改。
Let’s use the AtomicWaker type to define a static WAKER:
让我们使用 AtomicWaker 类型来定义静态 WAKER :
// in src/task/keyboard.rs

use futures_util::task::AtomicWaker;

static WAKER: AtomicWaker = AtomicWaker::new();
The idea is that the poll_next implementation stores the current waker in this static, and the add_scancode function calls the wake function on it when a new scancode is added to the queue.
这个想法是 poll_next 实现将当前唤醒器存储在此静态中,并且当将新的扫描码添加到时, add_scancode 函数调用其上的 wake 函数队列。
3.3.4.2 Storing a Waker 存储唤醒器
The contract defined by poll/poll_next requires the task to register a wakeup for the passed Waker when it returns Poll::Pending. Let’s modify our poll_next implementation to satisfy this requirement:
poll / poll_next 定义的协定要求任务在返回 Poll::Pending 时为传递的 Waker 注册唤醒。让我们修改 poll_next 实现来满足此要求:
// in src/task/keyboard.rs

impl Stream for ScancodeStream {
    type Item = u8;

    fn poll_next(self: Pin<&mut Self>, cx: &mut Context) -> Poll<Option<u8>> {
        let queue = SCANCODE_QUEUE
            .try_get()
            .expect("scancode queue not initialized");

        // fast path
        if let Ok(scancode) = queue.pop() {
            return Poll::Ready(Some(scancode));
        }

        WAKER.register(&cx.waker());
        match queue.pop() {
            Ok(scancode) => {
                WAKER.take();
                Poll::Ready(Some(scancode))
            }
            Err(crossbeam_queue::PopError) => Poll::Pending,
        }
    }
}
Like before, we first use the OnceCell::try_get function to get a reference to the initialized scancode queue. We then optimistically try to pop from the queue and return Poll::Ready when it succeeds. This way, we can avoid the performance overhead of registering a waker when the queue is not empty.
和之前一样,我们首先使用 OnceCell::try_get 函数来获取对初始化的扫描码队列的引用。然后,我们乐观地尝试从队列中取出 pop ,并在成功时返回 Poll::Ready 。这样,我们就可以避免在队列不为空时注册唤醒程序的性能开销。
If the first call to queue.pop() does not succeed, the queue is potentially empty. Only potentially because the interrupt handler might have filled the queue asynchronously immediately after the check. Since this race condition can occur again for the next check, we need to register the Waker in the WAKER static before the second check. This way, a wakeup might happen before we return Poll::Pending, but it is guaranteed that we get a wakeup for any scancodes pushed after the check.
如果对 queue.pop() 的第一次调用不成功,则队列可能为空。唯一可能的原因是中断处理程序可能在检查后立即异步填充队列。由于这种竞争条件可能会在下一次检查中再次发生,因此我们需要在第二次检查之前在 WAKER 静态中注册 Waker 。这样,唤醒可能会在我们返回 Poll::Pending 之前发生,但可以保证我们在检查后推送的任何扫描码都会得到唤醒。
After registering the Waker contained in the passed Context through the AtomicWaker::register function, we try to pop from the queue a second time. If it now succeeds, we return Poll::Ready. We also remove the registered waker again using AtomicWaker::take because a waker notification is no longer needed. In case queue.pop() fails for a second time, we return Poll::Pending like before, but this time with a registered wakeup.
通过 AtomicWaker::register 函数注册了传递的 Context 中包含的 Waker 后,我们尝试第二次从队列中弹出。如果现在成功,我们返回 Poll::Ready 。我们还使用 AtomicWaker::take 再次删除已注册的唤醒器,因为不再需要唤醒器通知。如果 queue.pop() 第二次失败,我们会像以前一样返回 Poll::Pending ,但这次带有注册的唤醒。
Note that there are two ways that a wakeup can happen for a task that did not return Poll::Pending (yet). One way is the mentioned race condition when the wakeup happens immediately before returning Poll::Pending. The other way is when the queue is no longer empty after registering the waker, so that Poll::Ready is returned. Since these spurious wakeups are not preventable, the executor needs to be able to handle them correctly.
请注意,对于尚未返回 Poll::Pending 的任务,可以通过两种方式进行唤醒。一种方法是在返回 Poll::Pending 之前立即发生唤醒时提到的竞争条件。另一种方式是注册唤醒器后队列不再为空时,返回 Poll::Ready 。由于这些虚假唤醒是无法预防的,因此执行器需要能够正确处理它们。
3.3.4.3 Waking the Stored Waker 唤醒存储的唤醒器
To wake the stored Waker, we add a call to WAKER.wake() in the add_scancode function:
为了唤醒存储的 Waker ,我们在 add_scancode 函数中添加对 WAKER.wake() 的调用:
// in src/task/keyboard.rs

pub(crate) fn add_scancode(scancode: u8) {
    if let Ok(queue) = SCANCODE_QUEUE.try_get() {
        if let Err(_) = queue.push(scancode) {
            println!("WARNING: scancode queue full; dropping keyboard input");
        } else {
            WAKER.wake(); // new
        }
    } else {
        println!("WARNING: scancode queue uninitialized");
    }
}
The only change that we made is to add a call to WAKER.wake() if the push to the scancode queue succeeds. If a waker is registered in the WAKER static, this method will call the equally-named wake method on it, which notifies the executor. Otherwise, the operation is a no-op, i.e., nothing happens.
我们所做的唯一更改是,如果推送到扫描码队列成功,则添加对 WAKER.wake() 的调用。如果唤醒程序在 WAKER 静态中注册,则此方法将调用其上同名的 wake 方法,该方法会通知执行程序。否则,该操作是无操作,即什么也不会发生。
It is important that we call wake only after pushing to the queue because otherwise the task might be woken too early while the queue is still empty. This can, for example, happen when using a multi-threaded executor that starts the woken task concurrently on a different CPU core. While we don’t have thread support yet, we will add it soon and don’t want things to break then.
重要的是,我们仅在推送到队列后才调用 wake ,否则任务可能会在队列仍为空时过早被唤醒。例如,当使用多线程执行器在不同的 CPU 内核上同时启动唤醒任务时,可能会发生这种情况。虽然我们还没有线程支持,但我们很快就会添加它,并且不希望事情到那时就被破坏。
3.3.5 Keyboard Task 键盘任务
Now that we implemented the Stream trait for our ScancodeStream, we can use it to create an asynchronous keyboard task:
现在我们已经为 ScancodeStream 实现了 Stream 特征,我们可以使用它来创建异步键盘任务:
// in src/task/keyboard.rs

use futures_util::stream::StreamExt;
use pc_keyboard::{layouts, DecodedKey, HandleControl, Keyboard, ScancodeSet1};
use crate::print;

pub async fn print_keypresses() {
    let mut scancodes = ScancodeStream::new();
    let mut keyboard = Keyboard::new(layouts::Us104Key, ScancodeSet1,
        HandleControl::Ignore);

    while let Some(scancode) = scancodes.next().await {
        if let Ok(Some(key_event)) = keyboard.add_byte(scancode) {
            if let Some(key) = keyboard.process_keyevent(key_event) {
                match key {
                    DecodedKey::Unicode(character) => print!("{}", character),
                    DecodedKey::RawKey(key) => print!("{:?}", key),
                }
            }
        }
    }
}
The code is very similar to the code we had in our keyboard interrupt handler before we modified it in this post. The only difference is that, instead of reading the scancode from an I/O port, we take it from the ScancodeStream. For this, we first create a new Scancode stream and then repeatedly use the next method provided by the StreamExt trait to get a Future that resolves to the next element in the stream. By using the await operator on it, we asynchronously wait for the result of the future.
该代码与我们在本文中修改之前在键盘中断处理程序中的代码非常相似。唯一的区别是,我们不是从 I/O 端口读取扫描码,而是从 ScancodeStream 读取扫描码。为此,我们首先创建一个新的 Scancode 流,然后重复使用 StreamExt 特征提供的 next 方法来获取 Future 解析为流中的下一个元素。通过对其使用 await 运算符,我们异步等待Future的结果。
We use while let to loop until the stream returns None to signal its end. Since our poll_next method never returns None, this is effectively an endless loop, so the print_keypresses task never finishes.
我们使用 while let 进行循环,直到流返回 None 以表示其结束。由于我们的 poll_next 方法永远不会返回 None ,这实际上是一个无限循环,因此 print_keypresses 任务永远不会完成。
Let’s add the print_keypresses task to our executor in our main.rs to get working keyboard input again:
让我们将 print_keypresses 任务添加到 main.rs 中的执行器中,以再次获得有效的键盘输入:
// in src/main.rs

use blog_os::task::keyboard; // new

fn kernel_main(boot_info: &'static BootInfo) -> ! {

    // […] initialization routines, including init_heap, test_main

    let mut executor = SimpleExecutor::new();
    executor.spawn(Task::new(example_task()));
    executor.spawn(Task::new(keyboard::print_keypresses())); // new
    executor.run();

    // […] "it did not crash" message, hlt_loop
}
When we execute cargo run now, we see that keyboard input works again:
当我们现在执行 cargo run 时,我们看到键盘输入再次起作用:

If you keep an eye on the CPU utilization of your computer, you will see that the QEMU process now continuously keeps the CPU busy. This happens because our SimpleExecutor polls tasks over and over again in a loop. So even if we don’t press any keys on the keyboard, the executor repeatedly calls poll on our print_keypresses task, even though the task cannot make any progress and will return Poll::Pending each time.
如果您密切关注计算机的 CPU 利用率,您会发现 QEMU 进程现在持续使 CPU 处于繁忙状态。发生这种情况是因为我们的 SimpleExecutor 在循环中一遍又一遍地轮询任务。因此,即使我们没有按键盘上的任何键,执行器也会在我们的 print_keypresses 任务上重复调用 poll ,即使该任务无法取得任何进展并会返回 Poll::Pending 每次。
3.4 Executor with Waker Support
具有 Waker 支持的执行器
To fix the performance problem, we need to create an executor that properly utilizes the Waker notifications. This way, the executor is notified when the next keyboard interrupt occurs, so it does not need to keep polling the print_keypresses task over and over again.
为了解决性能问题,我们需要创建一个正确利用 Waker 通知的执行器。这样,当下一个键盘中断发生时,执行器就会收到通知,因此不需要一遍又一遍地不断轮询 print_keypresses 任务。
3.4.1 Task Id 任务编号
The first step in creating an executor with proper support for waker notifications is to give each task a unique ID. This is required because we need a way to specify which task should be woken. We start by creating a new TaskId wrapper type:
创建对唤醒通知提供适当支持的执行程序的第一步是为每个任务提供唯一的 ID。这是必需的,因为我们需要一种方法来指定应该唤醒哪个任务。我们首先创建一个新的 TaskId 包装类型:
// in src/task/mod.rs

#[derive(Debug, Clone, Copy, PartialEq, Eq, PartialOrd, Ord)]
struct TaskId(u64);
The TaskId struct is a simple wrapper type around u64. We derive a number of traits for it to make it printable, copyable, comparable, and sortable. The latter is important because we want to use TaskId as the key type of a BTreeMap in a moment.
TaskId 结构是 u64 的简单包装类型。我们为其赋予了许多特征,使其可打印、可复制、可比较和可排序。后者很重要,因为我们稍后想使用 TaskId 作为 BTreeMap 的键类型。
To create a new unique ID, we create a TaskId::new function:
为了创建新的唯一 ID,我们创建一个 TaskId::new 函数:
use core::sync::atomic::{AtomicU64, Ordering};

impl TaskId {
    fn new() -> Self {
        static NEXT_ID: AtomicU64 = AtomicU64::new(0);
        TaskId(NEXT_ID.fetch_add(1, Ordering::Relaxed))
    }
}
The function uses a static NEXT_ID variable of type AtomicU64 to ensure that each ID is assigned only once. The fetch_add method atomically increases the value and returns the previous value in one atomic operation. This means that even when the TaskId::new method is called in parallel, every ID is returned exactly once. The Ordering parameter defines whether the compiler is allowed to reorder the fetch_add operation in the instructions stream. Since we only require that the ID be unique, the Relaxed ordering with the weakest requirements is enough in this case.
该函数使用 AtomicU64 类型的静态 NEXT_ID 变量来确保每个 ID 仅分配一次。 fetch_add 方法在一个原子操作中原子地增加值并返回前一个值。这意味着即使并行调用 TaskId::new 方法,每个 ID 也只会返回一次。 Ordering 参数定义是否允许编译器对指令流中的 fetch_add 操作进行重新排序。由于我们只要求 ID 唯一,因此在这种情况下,要求最弱的 Relaxed 排序就足够了。
We can now extend our Task type with an additional id field:
我们现在可以使用附加的 id 字段来扩展 Task 类型:
// in src/task/mod.rs

pub struct Task {
    id: TaskId, // new
    future: Pin<Box<dyn Future<Output = ()>>>,
}

impl Task {
    pub fn new(future: impl Future<Output = ()> + 'static) -> Task {
        Task {
            id: TaskId::new(), // new
            future: Box::pin(future),
        }
    }
}
The new id field makes it possible to uniquely name a task, which is required for waking a specific task.
新的 id 字段可以唯一地命名任务,这是唤醒特定任务所必需的。
3.4.2 The Executor Type
We create our new Executor type in a task::executor module:
我们在 task::executor 模块中创建新的 Executor 类型:
// in src/task/mod.rs

pub mod executor;
// in src/task/executor.rs

use super::{Task, TaskId};
use alloc::{collections::BTreeMap, sync::Arc};
use core::task::Waker;
use crossbeam_queue::ArrayQueue;

pub struct Executor {
    tasks: BTreeMap<TaskId, Task>,
    task_queue: Arc<ArrayQueue<TaskId>>,
    waker_cache: BTreeMap<TaskId, Waker>,
}

impl Executor {
    pub fn new() -> Self {
        Executor {
            tasks: BTreeMap::new(),
            task_queue: Arc::new(ArrayQueue::new(100)),
            waker_cache: BTreeMap::new(),
        }
    }
}
Instead of storing tasks in a VecDeque like we did for our SimpleExecutor, we use a task_queue of task IDs and a BTreeMap named tasks that contains the actual Task instances. The map is indexed by the TaskId to allow efficient continuation of a specific task.
我们不像 SimpleExecutor 那样将任务存储在 VecDeque 中,而是使用任务 ID 的 task_queue 和名为 BTreeMap 包含实际的 Task 实例。该映射由 TaskId 索引,以允许高效地继续特定任务。
The task_queue field is an ArrayQueue of task IDs, wrapped into the Arc type that implements reference counting. Reference counting makes it possible to share ownership of the value among multiple owners. It works by allocating the value on the heap and counting the number of active references to it. When the number of active references reaches zero, the value is no longer needed and can be deallocated.
task_queue 字段是任务 ID 的 ArrayQueue ,包装到实现引用计数的 Arc 类型中。引用计数使得在多个所有者之间共享该值的所有权成为可能。它的工作原理是在堆上分配值并计算对其的活动引用的数量。当活动引用的数量达到零时,不再需要该值并且可以释放该值。
We use this Arc type for the task_queue because it will be shared between the executor and wakers. The idea is that the wakers push the ID of the woken task to the queue. The executor sits on the receiving end of the queue, retrieves the woken tasks by their ID from the tasks map, and then runs them. The reason for using a fixed-size queue instead of an unbounded queue such as SegQueue is that interrupt handlers should not allocate on push to this queue.
我们将这个 Arc 类型用于 task_queue ,因为它将在执行器和唤醒器之间共享。这个想法是唤醒器将唤醒任务的 ID 推送到队列中。执行器位于队列的接收端,通过 ID 从 tasks 映射中检索唤醒的任务,然后运行它们。使用固定大小队列而不是无界队列(例如 SegQueue )的原因是中断处理程序不应在推送到此队列时进行分配。
In addition to the task_queue and the tasks map, the Executor type has a waker_cache field that is also a map. This map caches the Waker of a task after its creation. This has two reasons: First, it improves performance by reusing the same waker for multiple wake-ups of the same task instead of creating a new waker each time. Second, it ensures that reference-counted wakers are not deallocated inside interrupt handlers because it could lead to deadlocks (there are more details on this below).
除了 task_queue 和 tasks 映射之外, Executor 类型还有一个 waker_cache 字段,它也是一个映射。该映射在任务创建后缓存其 Waker 。这有两个原因:首先,它通过重复使用同一个唤醒程序来多次唤醒同一任务,而不是每次创建一个新的唤醒程序,从而提高性能。其次,它确保引用计数唤醒器不会在中断处理程序内释放,因为它可能导致死锁(下面有更多详细信息)。
To create an Executor, we provide a simple new function. We choose a capacity of 100 for the task_queue, which should be more than enough for the foreseeable future. In case our system will have more than 100 concurrent tasks at some point, we can easily increase this size.
为了创建 Executor ,我们提供了一个简单的 new 函数。我们为 task_queue 选择容量 100,这对于可预见的Future来说应该足够了。如果我们的系统在某个时候有超过 100 个并发任务,我们可以轻松地增加这个大小。
3.4.3 Spawning Tasks 生成任务
As for the SimpleExecutor, we provide a spawn method on our Executor type that adds a given task to the tasks map and immediately wakes it by pushing its ID to the task_queue:
至于 SimpleExecutor ,我们在 Executor 类型上提供了 spawn 方法,该方法将给定任务添加到 tasks 映射中并立即唤醒通过将其 ID 推送到 task_queue 来实现:
// in src/task/executor.rs

impl Executor {
    pub fn spawn(&mut self, task: Task) {
        let task_id = task.id;
        if self.tasks.insert(task.id, task).is_some() {
            panic!("task with same ID already in tasks");
        }
        self.task_queue.push(task_id).expect("queue full");
    }
}
If there is already a task with the same ID in the map, the [BTreeMap::insert] method returns it. This should never happen since each task has a unique ID, so we panic in this case since it indicates a bug in our code. Similarly, we panic when the task_queue is full since this should never happen if we choose a large-enough queue size.
如果map中已经存在具有相同 ID 的任务,则 [ BTreeMap::insert ] 方法将返回该任务。这种情况永远不应该发生,因为每个任务都有一个唯一的 ID,因此在这种情况下我们会感到恐慌,因为它表明我们的代码中存在错误。同样,当 task_queue 已满时,我们会感到恐慌,因为如果我们选择足够大的队列大小,则永远不会发生这种情况。
3.4.5 Running Tasks 运行任务
To execute all tasks in the task_queue, we create a private run_ready_tasks method:
为了执行 task_queue 中的所有任务,我们创建一个私有 run_ready_tasks 方法:
// in src/task/executor.rs

use core::task::{Context, Poll};

impl Executor {
    fn run_ready_tasks(&mut self) {
        // destructure `self` to avoid borrow checker errors
        let Self {
            tasks,
            task_queue,
            waker_cache,
        } = self;

        while let Ok(task_id) = task_queue.pop() {
            let task = match tasks.get_mut(&task_id) {
                Some(task) => task,
                None => continue, // task no longer exists
            };
            let waker = waker_cache
                .entry(task_id)
                .or_insert_with(|| TaskWaker::new(task_id, task_queue.clone()));
            let mut context = Context::from_waker(waker);
            match task.poll(&mut context) {
                Poll::Ready(()) => {
                    // task done -> remove it and its cached waker
                    tasks.remove(&task_id);
                    waker_cache.remove(&task_id);
                }
                Poll::Pending => {}
            }
        }
    }
}
The basic idea of this function is similar to our SimpleExecutor: Loop over all tasks in the task_queue, create a waker for each task, and then poll them. However, instead of adding pending tasks back to the end of the task_queue, we let our TaskWaker implementation take care of adding woken tasks back to the queue. The implementation of this waker type will be shown in a moment.
这个函数的基本思想和我们的 SimpleExecutor 类似:循环遍历 task_queue 中的所有任务,为每个任务创建一个唤醒器,然后轮询它们。但是,我们不是将挂起的任务添加回 task_queue 的末尾,而是让 TaskWaker 实现负责将唤醒的任务添加回队列。稍后将展示此唤醒器类型的实现。
Let’s look into some of the implementation details of this run_ready_tasks method:
让我们看一下这个 run_ready_tasks 方法的一些实现细节:
-
We use destructuring to split
selfinto its three fields to avoid some borrow checker errors. Namely, our implementation needs to access theself.task_queuefrom within a closure, which currently tries to borrowselfcompletely. This is a fundamental borrow checker issue that will be resolved when RFC 2229 is implemented. -
我们使用解构将
self拆分为三个字段,以避免一些借用检查器错误。也就是说,我们的实现需要从闭包内访问self.task_queue,当前它试图完全借用self。这是一个基本的借用检查器问题,将在实施 RFC 2229 时得到解决。 -
For each popped task ID, we retrieve a mutable reference to the corresponding task from the
tasksmap. Since ourScancodeStreamimplementation registers wakers before checking whether a task needs to be put to sleep, it might happen that a wake-up occurs for a task that no longer exists. In this case, we simply ignore the wake-up and continue with the next ID from the queue. -
对于每个弹出的任务 ID,我们从
tasks映射中检索对相应任务的可变引用。由于我们的ScancodeStream实现在检查任务是否需要进入睡眠状态之前注册唤醒器,因此可能会发生唤醒不再存在的任务的情况。在这种情况下,我们只需忽略唤醒并继续处理队列中的下一个 ID。 -
To avoid the performance overhead of creating a waker on each poll, we use the
waker_cachemap to store the waker for each task after it has been created. For this, we use theBTreeMap::entrymethod in combination withEntry::or_insert_withto create a new waker if it doesn’t exist yet and then get a mutable reference to it. For creating a new waker, we clone thetask_queueand pass it together with the task ID to theTaskWaker::newfunction (implementation shown below). Since thetask_queueis wrapped into anArc, thecloneonly increases the reference count of the value, but still points to the same heap-allocated queue. Note that reusing wakers like this is not possible for all waker implementations, but ourTaskWakertype will allow it. -
为了避免在每个轮询上创建唤醒器的性能开销,我们在创建每个任务后使用
waker_cache映射来存储每个任务的唤醒器。为此,我们使用BTreeMap::entry方法与Entry::or_insert_with结合使用来创建一个新的唤醒程序(如果它尚不存在),然后获取对其的可变引用。为了创建新的唤醒程序,我们克隆task_queue并将其与任务 ID 一起传递给TaskWaker::new函数(实现如下所示)。由于task_queue被包装到Arc中,因此clone仅增加值的引用计数,但仍然指向相同的堆分配队列。请注意,并非所有唤醒器实现都可以像这样重用唤醒器,但我们的TaskWaker类型允许这样做。
A task is finished when it returns Poll::Ready. In that case, we remove it from the tasks map using the BTreeMap::remove method. We also remove its cached waker, if it exists.
当任务返回 Poll::Ready 时,任务就完成了。在这种情况下,我们使用 BTreeMap::remove 方法将其从 tasks 映射中删除。我们还删除其缓存的唤醒程序(如果存在)。
3.4.6 Waker Design
The job of the waker is to push the ID of the woken task to the task_queue of the executor. We implement this by creating a new TaskWaker struct that stores the task ID and a reference to the task_queue:
唤醒器的工作是将被唤醒任务的ID推送到执行器的 task_queue 。我们通过创建一个新的 TaskWaker 结构来实现这一点,该结构存储任务 ID 和对 task_queue 的引用:
// in src/task/executor.rs

struct TaskWaker {
    task_id: TaskId,
    task_queue: Arc<ArrayQueue<TaskId>>,
}
Since the ownership of the task_queue is shared between the executor and wakers, we use the Arc wrapper type to implement shared reference-counted ownership.
由于 task_queue 的所有权在执行器和唤醒器之间共享,因此我们使用 Arc 包装类型来实现共享引用计数所有权。
The implementation of the wake operation is quite simple:
唤醒操作的实现非常简单:
// in src/task/executor.rs

impl TaskWaker {
    fn wake_task(&self) {
        self.task_queue.push(self.task_id).expect("task_queue full");
    }
}
We push the task_id to the referenced task_queue. Since modifications to the ArrayQueue type only require a shared reference, we can implement this method on &self instead of &mut self.
我们将 task_id 推送到引用的 task_queue 。由于对 ArrayQueue 类型的修改只需要共享引用,因此我们可以在 &self 而不是 &mut self 上实现此方法。
3.4.6.1 The Wake Trait
In order to use our TaskWaker type for polling futures, we need to convert it to a Waker instance first. This is required because the Future::poll method takes a Context instance as an argument, which can only be constructed from the Waker type. While we could do this by providing an implementation of the RawWaker type, it’s both simpler and safer to instead implement the Arc-based Wake trait and then use the From implementations provided by the standard library to construct the Waker.
为了使用我们的 TaskWaker 类型来轮询 future,我们需要首先将其转换为 Waker 实例。这是必需的,因为 Future::poll 方法采用 Context 实例作为参数,该实例只能从 Waker 类型构造。虽然我们可以通过提供 RawWaker 类型的实现来做到这一点,但实现基于 Arc 的 Wake 特征然后使用标准库提供的 From 实现用于构造 Waker 。
The trait implementation looks like this:
特征实现如下所示:
// in src/task/executor.rs

use alloc::task::Wake;

impl Wake for TaskWaker {
    fn wake(self: Arc<Self>) {
        self.wake_task();
    }

    fn wake_by_ref(self: &Arc<Self>) {
        self.wake_task();
    }
}
Since wakers are commonly shared between the executor and the asynchronous tasks, the trait methods require that the Self instance is wrapped in the Arc type, which implements reference-counted ownership. This means that we have to move our TaskWaker to an Arc in order to call them.
由于唤醒程序通常在执行程序和异步任务之间共享,因此特征方法要求将 Self 实例包装在 Arc 类型中,该类型实现引用计数所有权。这意味着我们必须将 TaskWaker 移动到 Arc 才能调用它们。
The difference between the wake and wake_by_ref methods is that the latter only requires a reference to the Arc, while the former takes ownership of the Arc and thus often requires an increase of the reference count. Not all types support waking by reference, so implementing the wake_by_ref method is optional. However, it can lead to better performance because it avoids unnecessary reference count modifications. In our case, we can simply forward both trait methods to our wake_task function, which requires only a shared &self reference.
wake 和 wake_by_ref 方法之间的区别在于,后者仅需要对 Arc 的引用,而前者则拥有 Arc 方法是可选的。但是,它可以带来更好的性能,因为它避免了不必要的引用计数修改。在我们的例子中,我们可以简单地将两个特征方法转发到我们的 wake_task 函数,该函数只需要一个共享的 &self 引用。
3.4.6.2 Creating Wakers 创造唤醒者
Since the Waker type supports From conversions for all Arc-wrapped values that implement the Wake trait, we can now implement the TaskWaker::new function that is required by our Executor::run_ready_tasks method:
由于 Waker 类型支持所有实现 Wake 特征的 Arc 包装值的 From 转换,我们现在可以实现 TaskWaker::new 我们的 Executor::run_ready_tasks 方法所需的函数:
// in src/task/executor.rs

impl TaskWaker {
    fn new(task_id: TaskId, task_queue: Arc<ArrayQueue<TaskId>>) -> Waker {
        Waker::from(Arc::new(TaskWaker {
            task_id,
            task_queue,
        }))
    }
}
We create the TaskWaker using the passed task_id and task_queue. We then wrap the TaskWaker in an Arc and use the Waker::from implementation to convert it to a Waker. This from method takes care of constructing a RawWakerVTable and a RawWaker instance for our TaskWaker type. In case you’re interested in how it works in detail, check out the implementation in the alloc crate.
我们使用传递的 task_id 和 task_queue 创建 TaskWaker 。然后,我们将 TaskWaker 包装在 Arc 中,并使用 Waker::from 实现将其转换为 Waker 。这个 from 方法负责为我们的 TaskWaker 类型构造一个 RawWakerVTable 和一个 RawWaker 实例。如果您对它的详细工作原理感兴趣,请查看 alloc 箱中的实现。
3.4.7 A run Method
With our waker implementation in place, we can finally construct a run method for our executor:
完成唤醒器实现后,我们最终可以为执行器构造一个 run 方法:
// in src/task/executor.rs

impl Executor {
    pub fn run(&mut self) -> ! {
        loop {
            self.run_ready_tasks();
        }
    }
}
This method just calls the run_ready_tasks function in a loop. While we could theoretically return from the function when the tasks map becomes empty, this would never happen since our keyboard_task never finishes, so a simple loop should suffice. Since the function never returns, we use the ! return type to mark the function as diverging to the compiler.
该方法只是在循环中调用 run_ready_tasks 函数。虽然理论上我们可以在 tasks 映射变空时从函数返回,但这种情况永远不会发生,因为我们的 keyboard_task 永远不会完成,因此一个简单的 loop 就足够了。由于该函数永远不会返回,因此我们使用 ! 返回类型将该函数标记为与编译器不同。
We can now change our kernel_main to use our new Executor instead of the SimpleExecutor:
我们现在可以更改 kernel_main 以使用新的 Executor 而不是 SimpleExecutor :
// in src/main.rs

use blog_os::task::executor::Executor; // new

fn kernel_main(boot_info: &'static BootInfo) -> ! {
    // […] initialization routines, including init_heap, test_main

    let mut executor = Executor::new(); // new
    executor.spawn(Task::new(example_task()));
    executor.spawn(Task::new(keyboard::print_keypresses()));
    executor.run();
}
We only need to change the import and the type name. Since our run function is marked as diverging, the compiler knows that it never returns, so we no longer need a call to hlt_loop at the end of our kernel_main function.
我们只需要更改导入和类型名称。由于我们的 run 函数被标记为发散,编译器知道它永远不会返回,因此我们不再需要在 kernel_main 末尾调用 hlt_loop 功能。
When we run our kernel using cargo run now, we see that keyboard input still works:
现在,当我们使用 cargo run 运行内核时,我们看到键盘输入仍然有效:

However, the CPU utilization of QEMU did not get any better. The reason for this is that we still keep the CPU busy the whole time. We no longer poll tasks until they are woken again, but we still check the task_queue in a busy loop. To fix this, we need to put the CPU to sleep if there is no more work to do.
然而,QEMU 的 CPU 利用率并没有得到任何改善。原因是我们仍然让 CPU 一直处于忙碌状态。我们不再轮询任务,直到它们再次被唤醒,但我们仍然在繁忙循环中检查 task_queue 。为了解决这个问题,如果没有更多的工作要做,我们需要让 CPU 进入睡眠状态。
3.4.8 Sleep If Idle
The basic idea is to execute the hlt instruction when the task_queue is empty. This instruction puts the CPU to sleep until the next interrupt arrives. The fact that the CPU immediately becomes active again on interrupts ensures that we can still directly react when an interrupt handler pushes to the task_queue.
基本思想是当 task_queue 为空时执行 hlt 指令。该指令使 CPU 进入睡眠状态,直到下一个中断到来。事实上,CPU 在发生中断时立即再次激活,这确保了当中断处理程序推送到 task_queue 时我们仍然可以直接做出反应。
To implement this, we create a new sleep_if_idle method in our executor and call it from our run method:
为了实现这一点,我们在执行器中创建一个新的 sleep_if_idle 方法,并从 run 方法中调用它:
// in src/task/executor.rs

impl Executor {
    pub fn run(&mut self) -> ! {
        loop {
            self.run_ready_tasks();
            self.sleep_if_idle();   // new
        }
    }

    fn sleep_if_idle(&self) {
        if self.task_queue.is_empty() {
            x86_64::instructions::hlt();
        }
    }
}
Since we call sleep_if_idle directly after run_ready_tasks, which loops until the task_queue becomes empty, checking the queue again might seem unnecessary. However, a hardware interrupt might occur directly after run_ready_tasks returns, so there might be a new task in the queue at the time the sleep_if_idle function is called. Only if the queue is still empty, do we put the CPU to sleep by executing the hlt instruction through the instructions::hlt wrapper function provided by the x86_64 crate.
由于我们在 run_ready_tasks 之后直接调用 sleep_if_idle ,循环直到 task_queue 变空,因此再次检查队列似乎没有必要。但是,硬件中断可能会在 run_ready_tasks 返回后立即发生,因此在调用 sleep_if_idle 函数时队列中可能有一个新任务。只有当队列仍然为空时,我们才会通过 x86_64 包提供的 instructions::hlt 包装函数执行 hlt 指令来让 CPU 进入睡眠状态。
Unfortunately, there is still a subtle race condition in this implementation. Since interrupts are asynchronous and can happen at any time, it is possible that an interrupt happens right between the is_empty check and the call to hlt:
不幸的是,这个实现中仍然存在微妙的竞争条件。由于中断是异步的并且可能随时发生,因此中断可能发生在 is_empty 检查和调用 hlt 之间:
if self.task_queue.is_empty() {
    /// <--- interrupt can happen here
    x86_64::instructions::hlt();
}
In case this interrupt pushes to the task_queue, we put the CPU to sleep even though there is now a ready task. In the worst case, this could delay the handling of a keyboard interrupt until the next keypress or the next timer interrupt. So how do we prevent it?
如果此中断推送到 task_queue ,即使现在有一个就绪任务,我们也会让 CPU 进入睡眠状态。在最坏的情况下,这可能会延迟键盘中断的处理,直到下一次按键或下一次定时器中断。那么我们该如何预防呢?
The answer is to disable interrupts on the CPU before the check and atomically enable them again together with the hlt instruction. This way, all interrupts that happen in between are delayed after the hlt instruction so that no wake-ups are missed. To implement this approach, we can use the interrupts::enable_and_hlt function provided by the x86_64 crate.
答案是在检查之前禁用 CPU 上的中断,然后与 hlt 指令一起以原子方式再次启用它们。这样,其间发生的所有中断都会在 hlt 指令之后延迟,从而不会错过任何唤醒。为了实现这种方法,我们可以使用 x86_64 包提供的 interrupts::enable_and_hlt 函数。
The updated implementation of our sleep_if_idle function looks like this:
我们的 sleep_if_idle 函数的更新实现如下所示:
// in src/task/executor.rs

impl Executor {
    fn sleep_if_idle(&self) {
        use x86_64::instructions::interrupts::{self, enable_and_hlt};

        interrupts::disable();
        if self.task_queue.is_empty() {
            enable_and_hlt();
        } else {
            interrupts::enable();
        }
    }
}
To avoid race conditions, we disable interrupts before checking whether the task_queue is empty. If it is, we use the enable_and_hlt function to enable interrupts and put the CPU to sleep as a single atomic operation. In case the queue is no longer empty, it means that an interrupt woke a task after run_ready_tasks returned. In that case, we enable interrupts again and directly continue execution without executing hlt.
为了避免竞争条件,我们在检查 task_queue 是否为空之前禁用中断。如果是,我们使用 enable_and_hlt 函数来启用中断并使 CPU 作为单个原子操作进入睡眠状态。如果队列不再为空,则意味着 run_ready_tasks 返回后中断唤醒了任务。这种情况下,我们再次开启中断,直接继续执行,而不执行 hlt 。
Now our executor properly puts the CPU to sleep when there is nothing to do. We can see that the QEMU process has a much lower CPU utilization when we run our kernel using cargo run again.
现在,我们的执行器在无事可做时正确地将 CPU 置于睡眠状态。当我们再次使用 cargo run 运行内核时,我们可以看到 QEMU 进程的 CPU 利用率要低得多。
3.4.9 Possible Extensions 可能的扩展
Our executor is now able to run tasks in an efficient way. It utilizes waker notifications to avoid polling waiting tasks and puts the CPU to sleep when there is currently no work to do. However, our executor is still quite basic, and there are many possible ways to extend its functionality:
我们的执行器现在能够以有效的方式运行任务。它利用唤醒通知来避免轮询等待任务,并在当前没有工作可做时让 CPU 进入睡眠状态。然而,我们的执行器仍然非常基础,并且有很多可能的方法来扩展其功能:
-
Scheduling: For our
task_queue, we currently use theVecDequetype to implement a first in first out (FIFO) strategy, which is often also called round robin scheduling. This strategy might not be the most efficient for all workloads. For example, it might make sense to prioritize latency-critical tasks or tasks that do a lot of I/O. See the scheduling chapter of the Operating Systems: Three Easy Pieces book or the Wikipedia article on scheduling for more information.调度:对于我们的
task_queue,我们当前使用VecDeque类型来实现先进先出(FIFO)策略,这通常也称为循环调度。此策略可能并非对于所有工作负载都是最有效的。例如,优先考虑延迟关键型任务或执行大量 I/O 的任务可能是有意义的。有关详细信息,请参阅《Operating Systems: Three Easy Pieces》一书的调度章节或有关调度的 Wikipedia 文章。 -
Task Spawning: Our
Executor::spawnmethod currently requires a&mut selfreference and is thus no longer available after invoking therunmethod. To fix this, we could create an additionalSpawnertype that shares some kind of queue with the executor and allows task creation from within tasks themselves. The queue could be thetask_queuedirectly or a separate queue that the executor checks in its run loop.任务生成:我们的
Executor::spawn方法当前需要&mut self引用,因此在调用run方法后不再可用。为了解决这个问题,我们可以创建一个额外的Spawner类型,它与执行器共享某种队列,并允许从任务本身内部创建任务。该队列可以直接是task_queue,也可以是执行程序在其运行循环中检查的单独队列。 -
Utilizing Threads: We don’t have support for threads yet, but we will add it in the next post. This will make it possible to launch multiple instances of the executor in different threads. The advantage of this approach is that the delay imposed by long-running tasks can be reduced because other tasks can run concurrently. This approach also allows it to utilize multiple CPU cores.
利用线程:我们尚不支持线程,但我们将在下一篇文章中添加它。这将使在不同线程中启动执行器的多个实例成为可能。这种方法的优点是可以减少长时间运行的任务造成的延迟,因为其他任务可以同时运行。这种方法还允许它利用多个 CPU 核心。
-
Load Balancing: When adding threading support, it becomes important to know how to distribute the tasks between the executors to ensure that all CPU cores are utilized. A common technique for this is work stealing.
负载平衡:添加线程支持时,了解如何在执行器之间分配任务以确保所有 CPU 核心都得到利用变得很重要。一种常见的技术是工作窃取。
4.Summary 总结
We started this post by introducing multitasking and differentiating between preemptive multitasking, which forcibly interrupts running tasks regularly, and cooperative multitasking, which lets tasks run until they voluntarily give up control of the CPU.
我们在这篇文章的开头介绍了多任务处理,并区分了抢占式多任务处理(强制定期中断正在运行的任务)和协作式多任务处理(允许任务一直运行,直到它们自愿放弃对 CPU 的控制)。
We then explored how Rust’s support of async/await provides a language-level implementation of cooperative multitasking. Rust bases its implementation on top of the polling-based Future trait, which abstracts asynchronous tasks. Using async/await, it is possible to work with futures almost like with normal synchronous code. The difference is that asynchronous functions return a Future again, which needs to be added to an executor at some point in order to run it.
然后我们探讨了 Rust 对 async/await 的支持如何提供协作多任务处理的语言级实现。 Rust 的实现基于基于轮询的 Future 特征,该特征抽象了异步任务。使用 async/await,可以像使用普通同步代码一样使用 future。不同之处在于,异步函数再次返回 Future ,需要在某个时刻将其添加到执行器才能运行它。
Behind the scenes, the compiler transforms async/await code to state machines, with each .await operation corresponding to a possible pause point. By utilizing its knowledge about the program, the compiler is able to save only the minimal state for each pause point, resulting in a very small memory consumption per task. One challenge is that the generated state machines might contain self-referential structs, for example when local variables of the asynchronous function reference each other. To prevent pointer invalidation, Rust uses the Pin type to ensure that futures cannot be moved in memory anymore after they have been polled for the first time.
在幕后,编译器将 async/await 代码转换为状态机,每个 .await 操作对应一个可能的暂停点。通过利用有关程序的知识,编译器能够仅保存每个暂停点的最小状态,从而使每个任务的内存消耗非常小。一项挑战是生成的状态机可能包含自引用结构,例如当异步函数的局部变量相互引用时。为了防止指针失效,Rust 使用 Pin 类型来确保 future 在第一次轮询后不能再在内存中移动。
For our implementation, we first created a very basic executor that polls all spawned tasks in a busy loop without using the Waker type at all. We then showed the advantage of waker notifications by implementing an asynchronous keyboard task. The task defines a static SCANCODE_QUEUE using the mutex-free ArrayQueue type provided by the crossbeam crate. Instead of handling keypresses directly, the keyboard interrupt handler now puts all received scancodes in the queue and then wakes the registered Waker to signal that new input is available. On the receiving end, we created a ScancodeStream type to provide a Future resolving to the next scancode in the queue. This made it possible to create an asynchronous print_keypresses task that uses async/await to interpret and print the scancodes in the queue.
对于我们的实现,我们首先创建了一个非常基本的执行器,它在繁忙循环中轮询所有生成的任务,而根本不使用 Waker 类型。然后,我们通过实现异步键盘任务展示了唤醒通知的优势。该任务使用 crossbeam 包提供的无互斥体 ArrayQueue 类型定义静态 SCANCODE_QUEUE 。键盘中断处理程序现在不再直接处理按键,而是将所有接收到的扫描码放入队列中,然后唤醒已注册的 Waker 以发出新输入可用的信号。在接收端,我们创建了一个 ScancodeStream 类型来提供解析队列中下一个扫描码的 Future 类型。这使得创建一个异步 print_keypresses 任务成为可能,该任务使用 async/await 来解释和打印队列中的扫描代码。
To utilize the waker notifications of the keyboard task, we created a new Executor type that uses an Arc-shared task_queue for ready tasks. We implemented a TaskWaker type that pushes the ID of woken tasks directly to this task_queue, which are then polled again by the executor. To save power when no tasks are runnable, we added support for putting the CPU to sleep using the hlt instruction. Finally, we discussed some potential extensions to our executor, for example, providing multi-core support.
为了利用键盘任务的唤醒通知,我们创建了一个新的 Executor 类型,它使用 Arc 共享 task_queue 来执行就绪任务。我们实现了一个 TaskWaker 类型,它将唤醒任务的 ID 直接推送到这个 task_queue ,然后由执行器再次轮询。为了在没有可运行的任务时节省电量,我们添加了使用 hlt 指令让 CPU 进入睡眠状态的支持。最后,我们讨论了执行器的一些潜在扩展,例如提供多核支持。
5. What’s Next? 下一步是什么?
Using async/wait, we now have basic support for cooperative multitasking in our kernel. While cooperative multitasking is very efficient, it leads to latency problems when individual tasks keep running for too long, thus preventing other tasks from running. For this reason, it makes sense to also add support for preemptive multitasking to our kernel.
使用 async/wait,我们现在在内核中对协作多任务处理有了基本的支持。虽然协作式多任务处理非常高效,但当单个任务运行时间过长时,会导致延迟问题,从而阻止其他任务运行。因此,向我们的内核添加对抢占式多任务处理的支持是有意义的。
In the next post, we will introduce threads as the most common form of preemptive multitasking. In addition to resolving the problem of long-running tasks, threads will also prepare us for utilizing multiple CPU cores and running untrusted user programs in the future.
在下一篇文章中,我们将介绍线程作为抢占式多任务处理的最常见形式。除了解决长时间运行任务的问题之外,线程还可以为我们将来利用多个CPU核心和运行不受信任的用户程序做好准备。
扩展阅读文章:
Rust PIN思考