Spring Boot + Spring Security 集成 swagger + knife4j
既然搜索得到这个东西,那肯定也知道它的作用了,咱们也不再展开描述其作用了。
总之就是不需要你写API文档了。在接口上写上注解就可以自动生成API文档。
直接上配置看看怎么使用这两个东西。
一、使用Swagger
1、引入swagger依赖
注意:swagger、swagger-ui(就是在浏览器打开显示文档UI界面的依赖)这两个都需要加入。
这里因为我不使用它了所以打了注释,大家对应加入这两个依赖就可以。因为我是用的Grdle进行依赖管理,大家使用Maven也是一样的道理,将依赖复制加入到你们的pom文件中即可!
对应的依赖大家可以到Maven仓库搜索: https://mvnrepository.com/
2、编写配置文件
@Configuration
@EnableSwagger2
// @EnableKnife4j //
public class SwaggerConfig extends WebMvcConfigurationSupport { // implements WebMvcConfigurer
    @Bean
    public Docket api() {
        return new Docket(DocumentationType.SWAGGER_2).apiInfo(apiInfo()).pathMapping("/").select()
            .apis(RequestHandlerSelectors.basePackage("com.boss")).paths(PathSelectors.any()).build();
    }

    private ApiInfo apiInfo() {
        ApiInfo apiInfo = new ApiInfoBuilder().title("BOSS接口文档").termsOfServiceUrl("http://swagger.io/")
            .contact(new Contact("", "", "")).description("暂时没有描述").version("0.0.1Apah").build();
        return apiInfo;
    }

    // 添加资源
    public void addResourceHandlers(ResourceHandlerRegistry registry) {
        registry.addResourceHandler("swagger-ui.html").addResourceLocations("classpath:/META-INF/resources/");
        registry.addResourceHandler("/webjars/**").addResourceLocations("classpath:/META-INF/resources/webjars/");
        registry.addResourceHandler("doc.html").addResourceLocations("classpath:/META-INF/resources/");
        registry.addResourceHandler("/webjars/**").addResourceLocations("classpath:/META-INF/resources/webjars/");
    }
}需要注意的是,这里需要将swagger的相关资源添加到静态资源文件夹中,就需要实现implements WebMvcConfigurer 接口。也可以像我这里这样子继承 extends WebMvcConfigurationSupport
随后在类中写上以上配置。
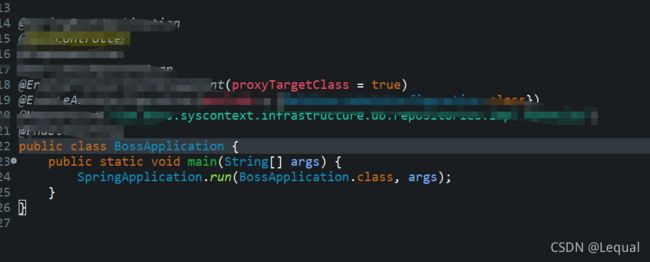
启动类中啥也不需要做
3、启动项目
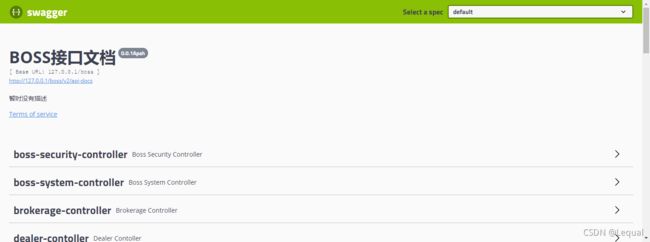
打开浏览器,输入地址: http://{主机ip}:{端口号}/swagger-ui.html 打开即可看到swagger接口文档的页面如下所示
二、不使用Swagger,使用knife4j替换文档UI页面
在这种情况下,我们可以不导入swagger的相关依赖,只需要加入knife4j 的启动依赖即可,如下图所示
对应的依赖大家可以到Maven仓库搜索: https://mvnrepository.com/
这时候呢,我们的配置文件也不需要 做改变,只需要加多一个注解@EnableKnife4j 即可
如下所示
@Configuration
@EnableSwagger2 // 这个注解无论什么时候都需要
@EnableKnife4j  // 这个只有需要加强UI的时候才启用
public class SwaggerConfig extends WebMvcConfigurationSupport { // implements WebMvcConfigurer
    @Bean
    public Docket api() {
        return new Docket(DocumentationType.SWAGGER_2).apiInfo(apiInfo()).pathMapping("/").select()
            .apis(RequestHandlerSelectors.basePackage("com.boss")).paths(PathSelectors.any()).build();
    }

    private ApiInfo apiInfo() {
        ApiInfo apiInfo = new ApiInfoBuilder().title("BOSS接口文档").termsOfServiceUrl("http://swagger.io/")
            .contact(new Contact("", "", "")).description("暂时没有描述").version("0.0.1Apah").build();
        return apiInfo;
    }

    // 添加资源
    public void addResourceHandlers(ResourceHandlerRegistry registry) {
        registry.addResourceHandler("swagger-ui.html").addResourceLocations("classpath:/META-INF/resources/");
        registry.addResourceHandler("/webjars/**").addResourceLocations("classpath:/META-INF/resources/webjars/");
        registry.addResourceHandler("doc.html").addResourceLocations("classpath:/META-INF/resources/");
        registry.addResourceHandler("/webjars/**").addResourceLocations("classpath:/META-INF/resources/webjars/");
    }
}
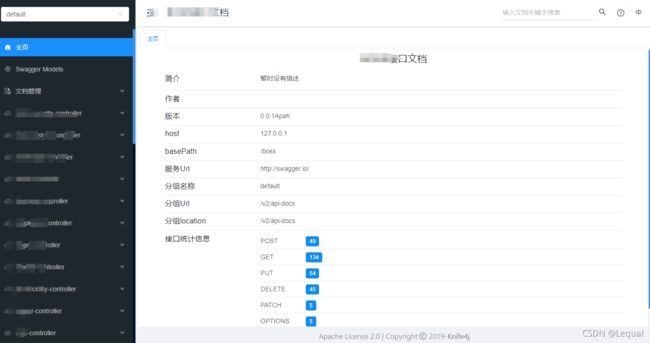
这时候我们保存,启动项目 ,在浏览器中打开: http://{主机ip}:{端口号}/doc.html 即可看到效果
三、swagger、knife4j都开启支持
若这两个都需要开启,则需要加入swagger的两个依赖 + knife4j的依赖,配置文件以上面第二次配置文件为准进行使用。
四、关于在Spring Security中使用
为了不让路径被拦截,需要在拦截器中配置如下信息:
@Configuration
@EnableWebSecurity // 开启WebSecurity支持
@EnableGlobalMethodSecurity(prePostEnabled = true) // 开启prePostEnabled注解支持
public class WebSecurityConfig extends WebSecurityConfigurerAdapter {
@Override
    protected void configure(HttpSecurity http) throws Exception {
http.csrf().disable() // 禁用csrf保护
            .sessionManagement().sessionCreationPolicy(SessionCreationPolicy.STATELESS) // 禁用session
            .and().authorizeRequests() // 所有请求都要验证
            .antMatchers("/api/*/auth/**", "/test/**").permitAll() // 登录注册等请求过滤 // 傻瓜式乱测

            .antMatchers("/doc.html", "/doc.html/**", "/webjars/**", "/v2/**", "/swagger-resources",
                "/swagger-resources/**", "/swagger-ui.html", "/swagger-ui.html/**")
            .permitAll()
            // API手册
            // 请求过滤
            .anyRequest().fullyAuthenticated().and().exceptionHandling()
            .authenticationEntryPoint(new RestAuthenticationEntryPoint());
        // 添加JWT filter
        http.addFilterBefore(authenticationTokenFilterBean(), UsernamePasswordAuthenticationFilter.class);

    }
}
防止其拦截swagger、doc相关的资源。
希望可以帮助到大家,有什么疑问可以在评论区留言!


