【脑机接口】MNE-python 安装与入门使用
一开始接触EEG脑电数据分析,师哥推荐用Matlab的EEGLAB,但感觉实在是不习惯Matlab的使用方式,于是开始找python里可以用于处理脑电数据的包。从百度上很快就找到了MNE这个包,果然这世界上跟我一样想用python处理脑电的人大有人在(

MNE是一个用于可视化和分析人类神经生理数据的开源 Python 包,可以分析并处理MEG、EEG、sEEG、ECoG、NIRS 等生理数据。
1. 安装
首先确保安装好了numpy、scipy、matlibplot等MNE的依赖库
pip install -i https://pypi.tuna.tsinghua.edu.cn/simple MNE
import os
import mne
import matplotlib.pyplot as plt
import numpy as np

from scipy import signal
2.数据读取
MNE提供了多种读取函数,可以读取.set; .fdt; .edf; .gdf等不同的脑电数据格式
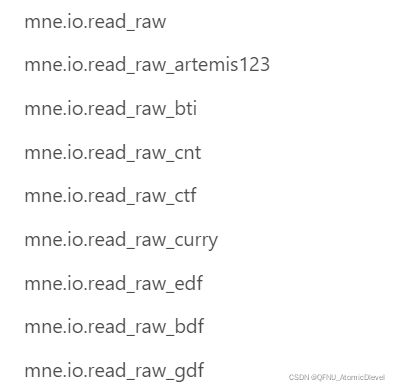
以.gdf格式为例

返回的是一个raw实例
参数说明
input_fname [str]
Path to the GDF file.
GDF文件的路径
eog [list or tuple]
Names of channels or list of indices that should be designated EOG channels. Values should correspond to the electrodes in the file. Default is None.
指定眼电通道
misc [list or tuple]
Names of channels or list of indices that should be designated MISC channels. Values should correspond to the electrodes in the file. Default is None.
指定MISC通道
stim_channel [‘auto’ | str | list of str | int | list of int]
Defaults to ‘auto’, which means that channels named ‘status’ or ‘trigger’ (case insensitive) are set to STIM. If str (or list of str), all channels matching the name(s) are set to STIM. If int (or list of ints), channels corresponding to the indices are set to STIM.
指定STIM通道(默认设置名为‘status’ or ‘trigger’的通道为STIM)
excludelist of str | str
Channel names to exclude. This can help when reading data with different sampling rates to avoid unnecessary resampling. A str is interpreted as a regular expression.
指定读取时排除的通道
preloadbool or str (default False)
Preload data into memory for data manipulation and faster indexing. If True, the data will be preloaded into memory (fast, requires large amount of memory). If preload is a string, preload is the file name of a memory-mapped file which is used to store the data on the hard drive (slower, requires less memory).
将数据预加载到内存中,以便进行数据操作和加快索引
verbosebool | str | int | None
Control verbosity of the logging output. If None, use the default verbosity level. See the logging documentation and mne.verbose() for details. Should only be passed as a keyword argument.
控制日志输出的详细程度
脑电数据来自BCI Competition IV dataset 2a
path = "D:\\Work\\BCI_2a\\BCICIV_2a_gdf\\"
fileName = "A02T"
raw = mne.io.read_raw_gdf(path+fileName+".gdf",
						  preload=True,
						  eog=['EOG-left', 'EOG-central', 'EOG-right'])
print(raw)
print(raw.info)
print(raw.ch_names)
输出信息:
<RawGDF | A02T.gdf, 25 x 677169 (2708.7 s), ~129.2 MB, data loaded>
<Info | 7 non-empty values
 bads: []
 ch_names: EEG-Fz, EEG-0, EEG-1, EEG-2, EEG-3, EEG-4, EEG-5, EEG-C3, EEG-6, ...
 chs: 22 EEG, 3 EOG
 custom_ref_applied: False
 highpass: 0.5 Hz
 lowpass: 100.0 Hz
 meas_date: 2004-11-15 12:00:00 UTC
 nchan: 25
 projs: []
 sfreq: 250.0 Hz
>
['EEG-Fz', 'EEG-0', 'EEG-1', 'EEG-2', 'EEG-3', 'EEG-4', 'EEG-5', 'EEG-C3', 'EEG-6', 'EEG-Cz', 'EEG-7', 'EEG-C4', 'EEG-8', 'EEG-9', 'EEG-10', 'EEG-11', 'EEG-12', 'EEG-13', 'EEG-14', 'EEG-Pz', 'EEG-15', 'EEG-16', 'EOG-left', 'EOG-central', 'EOG-right']
raw类的部分可视化方法(详细请查看API文档)
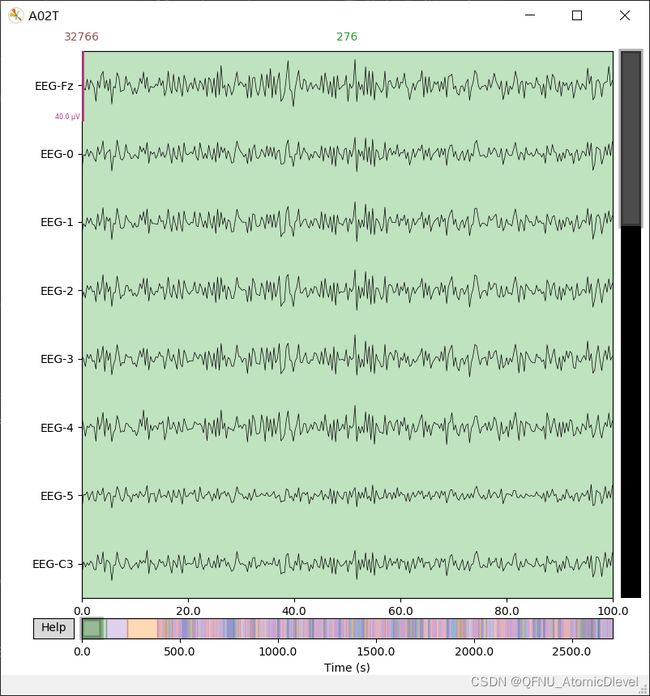
① raw.plot() 按通道绘制波形图
plot(events=None, duration=10.0, start=0.0, n_channels=20, bgcolor='w', color=None,
bad_color='lightgray', event_color='cyan', scalings=None, remove_dc=True, order=None,
show_options=False, title=None, show=True, block=False, highpass=None, lowpass=None,
filtorder=4, clipping=1.5, show_first_samp=False, proj=True, group_by='type',
butterfly=False, decim='auto', noise_cov=None, event_id=None,
show_scrollbars=True, show_scalebars=True, time_format='float', precompute='auto',
use_opengl=None, verbose=None)
event 包含的事件
duration 绘制的持续时间(取duration和raw文件时间长度的中的较小值)
start 起始时间点
n_channels 同一页面上显示的通道数
bgcolor 背景色
color 颜色
颜色默认为
dict(mag='darkblue', grad='b', eeg='k', eog='k', ecg='m',
     emg='k', ref_meg='steelblue', misc='k', stim='k',
     resp='k', chpi='k')
bad_color 坏道颜色
event_color 事件颜色
title 标题
show 为真则显示窗口
highpass 高通滤波,显示波形的最高频率
lowpass 低通滤波,显示波形的最低频率
filtorder 指定滤波器 (默认0为FIR)
noise_cov 指定白化的噪声协方差矩阵
use_opengl 使用OpenGL绘制图像
raw.plot(duration=5, n_channels=8, title='A02T',lowpass=1, filtorder=0)
② raw.plot_psd() 绘制功率密度图
plot_psd(fmin=0, fmax=inf, tmin=None, tmax=None, proj=False, n_fft=None, n_overlap=0,
reject_by_annotation=True, picks=None, ax=None, color='black', xscale='linear', area_mode='std',
area_alpha=0.33, dB=True, estimate='auto', show=True, n_jobs=1, average=False, line_alpha=None,
spatial_colors=True, sphere=None, window='hamming', exclude='bads', verbose=None)
fmin 启动频率
fmax 截止频率
tmin 开始时间
tmax 结束时间
picks 要包含的通道
exclude 要排除的通道
raw.plot_psd(fmin=1,fmax=20)

raw类的常用方法
#复制
raw,copy()
#截取某段
raw.crop([tmin, tmax, include_tmax])
#滤波
raw.filter(l_freq, h_freq[, picks, ...])
#选择通道子集
raw.pick(picks[, exclude, verbose])