苍穹外卖day02项目日志
1. 描述清楚新增员工的实现流程
1.1需求分析与设计
参考产品原型,设计表和接口。
1.1.1设计表
看员工管理的产品原型:
有员工姓名、账号、手机号、账号状态、最后操作时间等。
注意,操作一栏不是字段,其中的启用禁用才是。
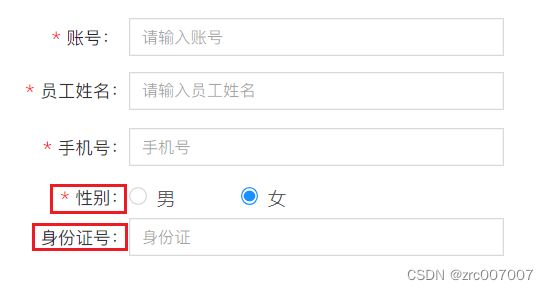
再看添加员工的原型:
可以发现还有性别和身份证号。
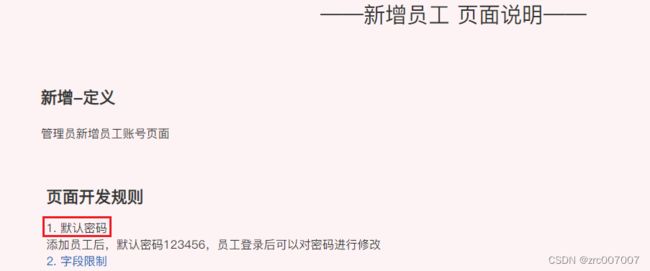
不要忘了旁边:
还有密码。
总结出了以下字段:
员工姓名name
用户名username
密码password
手机号tel
性别gender
身份证号idNumber
启用禁用状态status
更新时间update_time
这些统称为业务字段。
不过除了这些,还有基础字段:
主键id
创建时间create_time
创建操作人create_user
更新时间update_time
更新操作人update_user
这样就设计完了表。
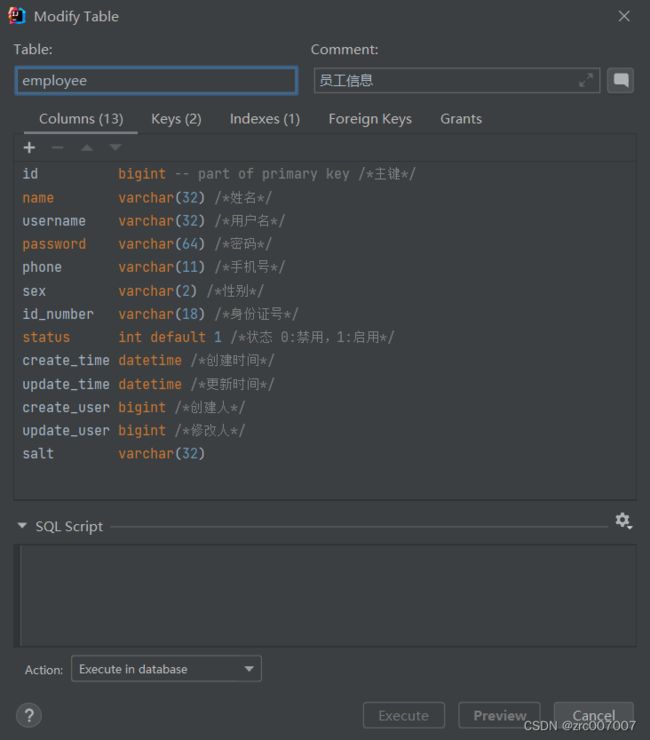
作为练习,然后我们可以回过头来和设计好的表进行对比,看我们漏了哪一步没有。
可以看到,多了一个昨天加的,用来验证登录的盐值salt,其他都一样。
1.1.2设计接口
设计接口需要设计4个东西:
- 请求路径
- 请求参数
- 请求方式
- 响应数据
对应我们这个新增员工的接口就是如下设计:
- 请求路径 /admin/employee(可以加/add,也可以通过请求方式确定添加操作)
- 请求参数 传json(如{“username”:”xxx”, “name”:””, “tel”:””, “sex(或gender)”:””})
- 请求方式 POST
- 响应数据 {“code”:””,”msg(错误信息,错了是什么原因)”:””, data:””}
注意,在公司里,接口设计或多或少都会和现在学的有些出入,这是正常的,习惯一下。
另外,正真在公司里,设计表会比较少,因为就那么几个;但设计接口会比较多。而复杂点的表,小后端的水平也设计不太来。没关系,慢慢学。
1.2代码开发
3步,分别是写Controller、写Service、写Mapper。
1.2.1写入表现层Controller
接受请求参数,调用service完成添加操作,响应结果。
代码如下:
/**
 * 员工管理
 */
@RestController
@RequestMapping("/admin/employee")
@Slf4j
@Api(tags = "硬普洛伊康戳勒 员工相关接口")
public class EmployeeController {

    @Autowired
    private EmployeeService employeeService;

    ...

    /**
     * 员工新增功能
     * @param employeeDTO 前端提交的参数
     * @return 成功的结果
     */
    @PostMapping
    public Result add(@RequestBody EmployeeDTO employeeDTO) {
        employeeService.addEmp(employeeDTO);
        return Result.success();
    }
}
1.2.2写入业务层Service
根据数据库中字段的要求,完善数据,调用mapper完成添加操作。
接口中:
public interface EmployeeService {

    ...

    /**
     * 员工新增功能
     */
    void addEmp(EmployeeDTO employeeDTO);
}
实现类中:
@Service
public class EmployeeServiceImpl implements EmployeeService {

    @Autowired
    private EmployeeMapper employeeMapper;

    ...

    @Override
    public void addEmp(EmployeeDTO employeeDTO) {
        // employeeDTO: username name phone sex idNumber
        // database: id password status salt create_tim create_user update_time update_user
        // our preparing work: password(described in origin) salt create_time update_time
        // our preparing work: create_user update_user(awkward somehow, do it later)

        // Create object of Employee
        Employee employee = new Employee();

        // copy data in EmployeeDTO to employee
        BeanUtils.copyProperties(employeeDTO, employee);

        // supplement data
        LocalDateTime now = LocalDateTime.now();
        employee.setUpdateTime(now);
        employee.setCreateTime(now);
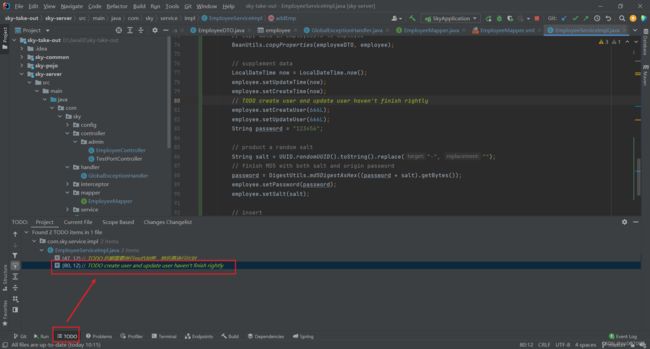
        // TODO create user and update user haven't finish rightly
        employee.setCreateUser(666L);
        employee.setUpdateUser(666L);
        String password = "123456";

        // product a random salt
        String salt = UUID.randomUUID().toString().replace("-", "");
        // finish MD5 with both salt and origin password
        password = DigestUtils.md5DigestAsHex((password + salt).getBytes());
        employee.setPassword(password);
        employee.setSalt(salt);

        // insert
        employeeMapper.insertEmp(employee);
    }

}
注意那个TODO注释,可以在idea下面窗口中显示你还需要完善的代码。
讲到这,老师讲了一个惨痛的经历:
有个老哥,写测试类忘改了,下单都是0.01元,给公司损失了几十上百万……
这老哥被开没开,被告没告,不知道,不过大家一定要吸取教训啊。
1.2.3写入持久层Mapper
@Mapper
public interface EmployeeMapper {

    /**
     * 根据用户名查询员工
     * @param username
     * @return
     */
    @Select("select * from employee where username = #{username}")
    Employee getByUsername(String username);

    /**
     * 添加员工
     * @param employee
     */
    void insertEmp(Employee employee);
}
对应xml文件中:
        insert into employee (name, username, password, phone, sex, id_number, create_time, update_time, create_user,
                              update_user, salt)
        value (#{name}, #{username}, #{password}, #{phone}, #{sex}, #{idNumber}, #{createTime}, #{updateTime},
            #{createUser}, #{updateUser}, #{salt})
1.2.4Swagger测试
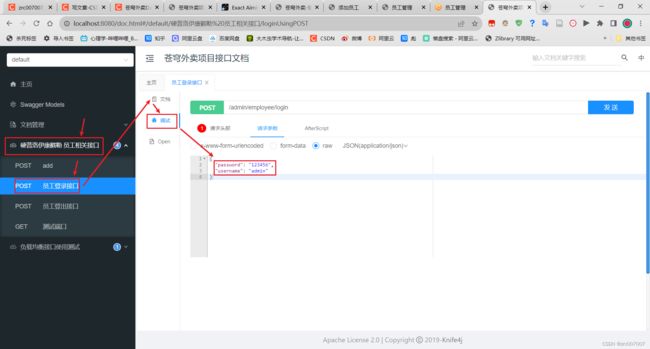
运行项目,进入Swagger链接:
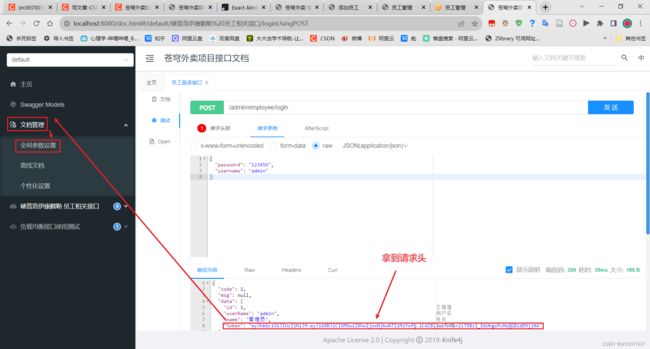
http://localhost:8080/doc.html首先到登录接口,用管理员账户登录,获得请求头。
到全局参数设置,加入我们的请求头。
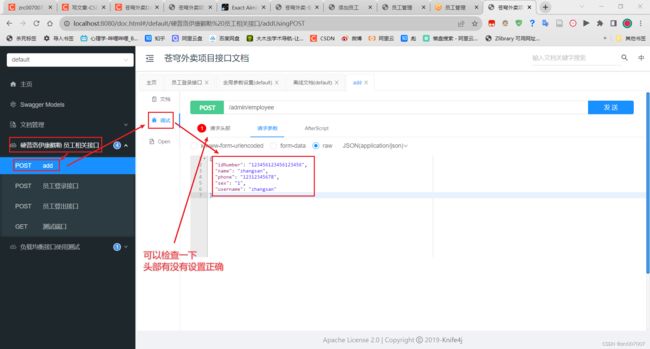
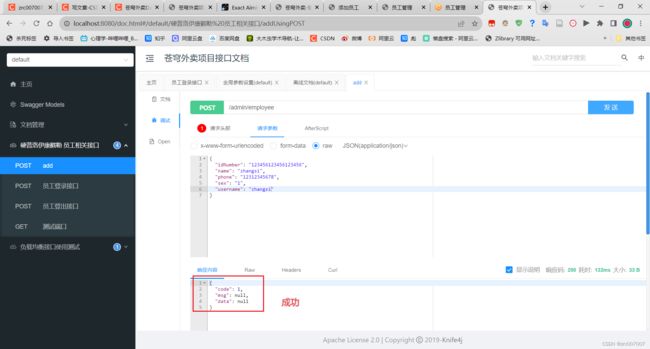
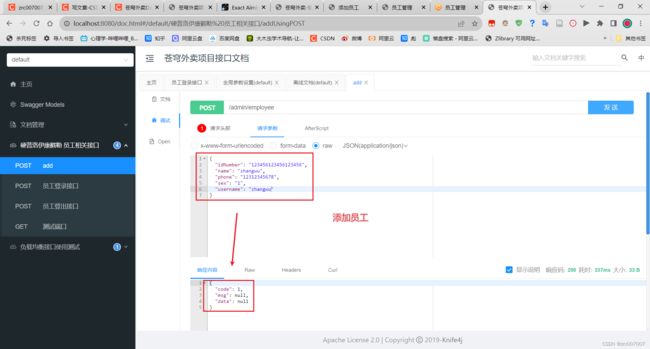
然后进入添加员工界面,输入参数测试是否正常添加员工。
查看显示结果:
1.3代码完善
1.3.1异常处理
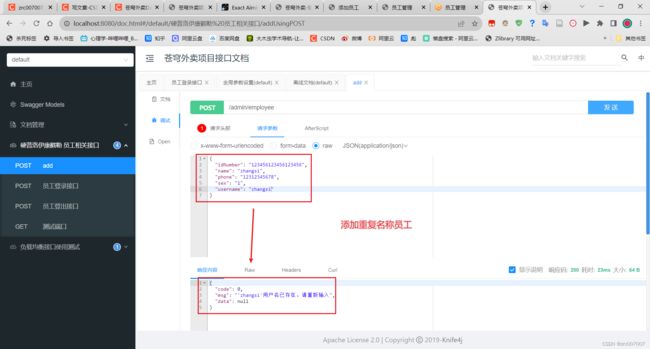
用户输入的用户名在数据库中已经存在,这种情况下会报错,需要处理。
解决方式:
在全局异常处理器中添加一个方法,专门处理这个异常;
在异常处理方法中,截取重复的用户名,响应错误信息给前端。
代码:
@ExceptionHandler
public Result sqlIntegrityConstraintViolationExceptionHandler(SQLIntegrityConstraintViolationException ex){
    String message = ex.getMessage();
    log.error("异常信息:{}", message);
    // 1. 判断异常类型是否是想处理的类型 / 是否包含Duplicate entry
    if (message.contains("Duplicate entry")) {
        // 2. 如果是,则获取异常message  Duplicate entry 'abc' for key 'employee.idx_username'
        // 3. 截取用户名信息
        String username = message.split(" ")[2];
        // 4. 拼接提示信息 “xxx用户名已存在,请重新输入”
        // 5. 返回错误信息给前端
        return Result.error(username+"用户名已存在,请重新输入");
    }

    return Result.error(ex.getMessage());
}1.3.2创建/修改人设置(ThreadLocal)
详见下面第三大问。
1.4测试
1.4.1接口测试
用Swagger。
测试正常添加功能:
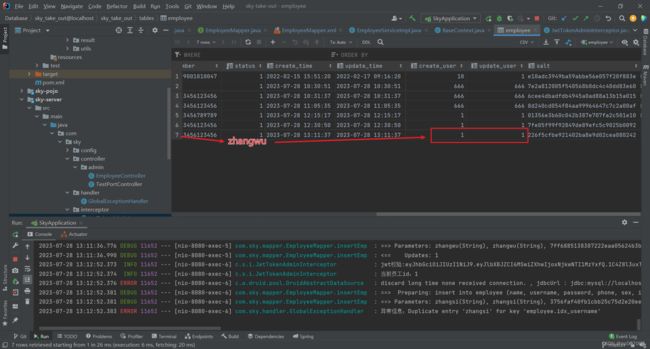
在数据库中查看添加人情况:
添加重复名称员工,测试异常处理功能:
1.4.2前端后端联调
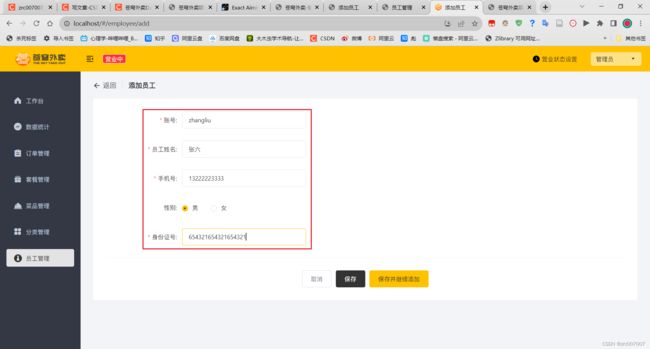
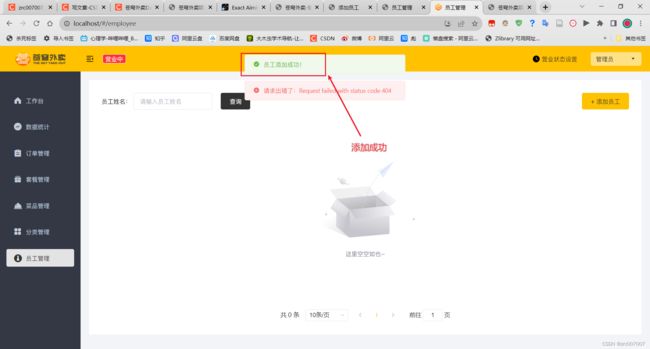
测试正常添加功能:
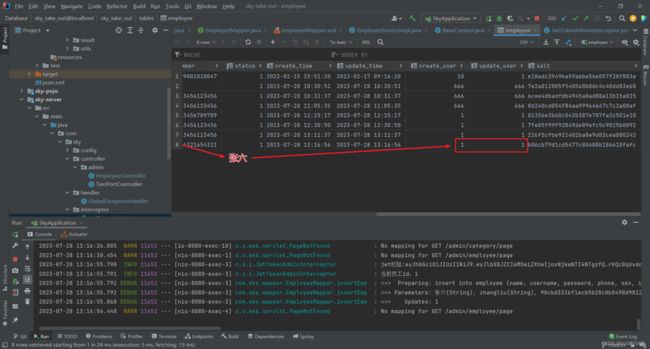
在数据库中查看添加人情况:
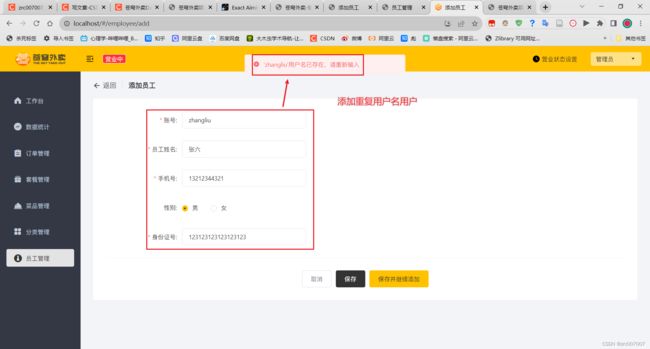
添加重复名称员工,测试异常处理功能:
2. 描述清楚员工分页条件查询的实现流程
2.1需求分析
2.1.1分析产品原型扣细节
查询需要加分页和查询条件(模糊匹配,动态SQL)。
排序按照创建时间降序排列。
2.1.2接口设计
- 请求路径
/admin/employee
至于添加子路径,那得看情况。可能有很多不同种的查询,就加路径;简单情况下,还是用get请求就行了。
所以加路径就/admin/employee/page - 请求参数 ?page=1&pageSize=10&name=zhangsan
- 请求方式 GET
- 响应数据
{
“code”:1
“msg”:””,(失败才有msg)
“data”:{
“total(或rows)”:100,
“records”: [
{},
{},
]
}
}
2.2代码开发
2.2.1Controller层
@ApiOperation(value = "员工分页查询接口")
@GetMapping("/page")
public Result page(EmployeePageQueryDTO employeePageQueryDTO) {
    PageResult pr = employeeService.pageQuery(employeePageQueryDTO);
    return Result.success(pr);
}
2.2.2Service层
@Override
public PageResult pageQuery(EmployeePageQueryDTO employeePageQueryDTO) {
    // 1. 设置分页参数,开启分页查询
    PageHelper.startPage(employeePageQueryDTO.getPage(), employeePageQueryDTO.getPageSize());
    // 2. 调用mapper执行分页查询,返回分页结果对象 Page
    Page page = employeeMapper.selectByPageAndName(employeePageQueryDTO.getName());
    // 3. 通过分页对象Page中获取当前页的数据和总记录
    long total = page.getTotal();
    List records = page.getResult();
    // 4. 封装当前页数据和总记录,封装进PageResult,并返回
    return new PageResult(total, records);
}
2.2.3Mapper层
2.3测试
2.3.1接口测试
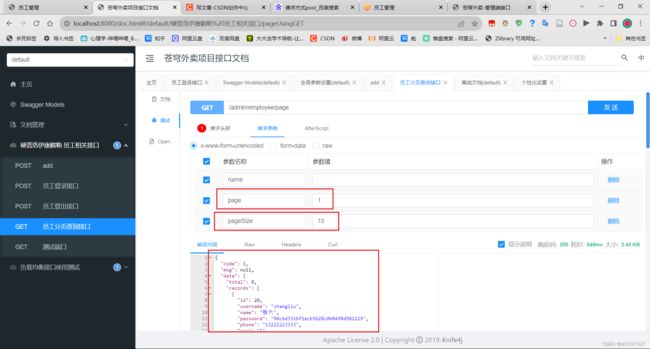
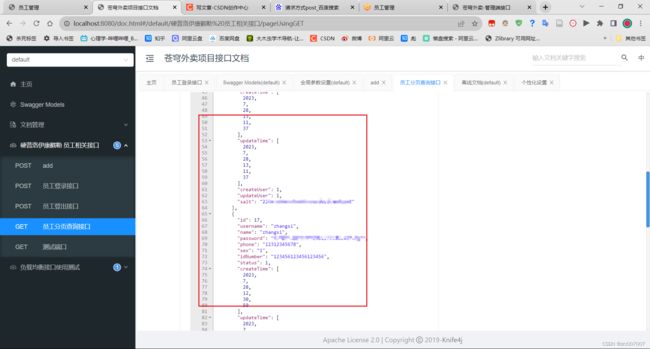
Swagger结果:
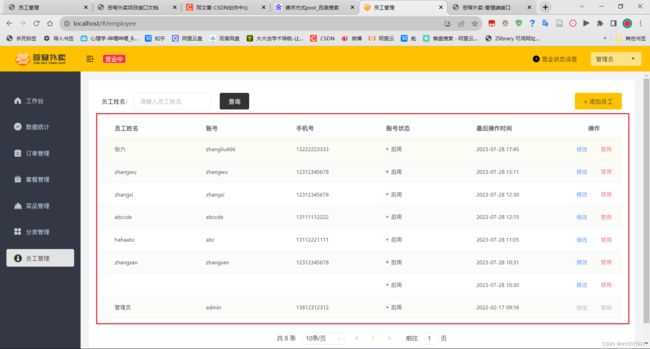
2.3.2前后端联调
3. 如何用ThreadLocal实现员工ID的获取?
3.1简化意义
之前学过拿到请求头的方法。大致是:注入request对象,获取请求头,拿到token,再解析token拿到登入id。
这样子做是可以。但存在问题:
代码太繁琐了,后期其他地方用到id又要再次编写上面代码,冗余的地方就会很多。
于是我们用到了新方案: 利用线程对象(包含一个集合,可以实现在一个线程之间共享数据),在登录验证的拦截器中实现获取id的操作,id设置到线程对象变成共享的,使用的时候获取即可。这就是ThreadLocal技术思路。
3.2实现
我们已经定义好了一个封装了ThreadLocal的类,在common模块下的context包中,有个BaseContext。
我们看看它的代码:
package com.sky.context;

public class BaseContext {
    public static ThreadLocal threadLocal = new ThreadLocal<>();

    public static void setCurrentId(Long id) {
        threadLocal.set(id);
    }

    public static Long getCurrentId() {
        return threadLocal.get();
    }

    public static void removeCurrentId() {
        threadLocal.remove();
    }

}
3.2.1set方法
其中setCurrentId调用了ThreadLocal的set方法, 设置id。
3.2.2get方法
getCurrentId则调用了get方法,用于得到设置好的,或者默认的id。
3.2.3remove方法
removeCurrentId调用了remove方法,可以移除设置的参数,让内存回收。
再看入具体实现:
3.2.4拦截器中添加代码
//2、校验令牌
try {
    log.info("jwt校验:{}", token);
    Claims claims = JwtUtil.parseJWT(jwtProperties.getAdminSecretKey(), token);
    Long empId = Long.valueOf(claims.get(JwtClaimsConstant.EMP_ID).toString());
    log.info("当前员工id:{}", empId);
    // put hte id in thread
    BaseContext.setCurrentId(empId);  // 添加到此处
    //3、通过,放行
    return true;
} catch (Exception ex) {
    //4、不通过,响应401状态码
    response.setStatus(401);
    return false;
}
再这里,我们要获取当前员工的id,并得到。之后就可以调用ThreadLocal对象,直接得到员工id,方便插入操作人的操作。
3.2.5业务层添加代码
添加代码如下:
Long currentId = BaseContext.getCurrentId();
employee.setCreateUser(currentId);
employee.setUpdateUser(currentId);
这里就直接用保存的员工id,进行添加了。
3.2.6思考题
什么时候remove比较合适呢?代码又应该写在哪里呢?
3.3原理
我们可以看一看ThreadLocal中的set方法:
public void set(T value) {
    Thread t = Thread.currentThread();
    ThreadLocalMap map = getMap(t);
    if (map != null)
        map.set(this, value);
    else
        createMap(t, value);
}
可以看到,它将线程和map绑定,以达到我们的用线程可以得到绑定值的效果。
再看看get方法:
public T get() {
    Thread t = Thread.currentThread();
    ThreadLocalMap map = getMap(t);
    if (map != null) {
        ThreadLocalMap.Entry e = map.getEntry(this);
        if (e != null) {
            @SuppressWarnings("unchecked")
            T result = (T)e.value;
            return result;
        }
    }
    return setInitialValue();
}
也是同上的原理,调用绑定的线程就可以获取对应的设置的值。
如果还有不清楚,可以再点进具体的类中看看,比如getMap函数、ThreadLocalMap对象中去看。
3.4思考题答案
我们在线程结束,request结束的时候,把它remove了最好。在这之前,可能还是会用到。
所以写在拦截器的后面两个要重写的方法中即可。这里就挑第一个,postHandle。第二个的afterCompletion也可以。
@Override
public void postHandle(HttpServletRequest request, HttpServletResponse response, Object handler, ModelAndView modelAndView) throws Exception {
    BaseContext.removeCurrentId();
}
4. Java对象转json的日期格式如何指定?
4.1方案一
在每个日期属性上都加上格式转换的代码。
@JsonFormat(pattern = "yyyy-MM-dd HH:mm:ss")
private LocalDateTime createTime;

@JsonFormat(pattern = "yyyy-MM-dd HH:mm:ss")
private LocalDateTime updateTime;
4.1.1缺点
繁琐,每一个都要加。
4.2方案二
在WebMvcConfiguration中扩展SpringMVC的消息转换器,统一对日期类型进行格式处理。
使用sky-common模块中,json包下的JacksonObjectMapper类
package com.sky.json;

import com.fasterxml.jackson.databind.DeserializationFeature;
import com.fasterxml.jackson.databind.ObjectMapper;
import com.fasterxml.jackson.databind.module.SimpleModule;
import com.fasterxml.jackson.datatype.jsr310.deser.LocalDateDeserializer;
import com.fasterxml.jackson.datatype.jsr310.deser.LocalDateTimeDeserializer;
import com.fasterxml.jackson.datatype.jsr310.deser.LocalTimeDeserializer;
import com.fasterxml.jackson.datatype.jsr310.ser.LocalDateSerializer;
import com.fasterxml.jackson.datatype.jsr310.ser.LocalDateTimeSerializer;
import com.fasterxml.jackson.datatype.jsr310.ser.LocalTimeSerializer;

import java.time.LocalDate;
import java.time.LocalDateTime;
import java.time.LocalTime;
import java.time.format.DateTimeFormatter;

import static com.fasterxml.jackson.databind.DeserializationFeature.FAIL_ON_UNKNOWN_PROPERTIES;

/**
 * 对象映射器:基于jackson将Java对象转为json,或者将json转为Java对象
 * 将JSON解析为Java对象的过程称为 [从JSON反序列化Java对象]
 * 从Java对象生成JSON的过程称为 [序列化Java对象到JSON]
 */
public class JacksonObjectMapper extends ObjectMapper {

    public static final String DEFAULT_DATE_FORMAT = "yyyy-MM-dd";
    //public static final String DEFAULT_DATE_TIME_FORMAT = "yyyy-MM-dd HH:mm:ss";
    public static final String DEFAULT_DATE_TIME_FORMAT = "yyyy-MM-dd HH:mm";
    public static final String DEFAULT_TIME_FORMAT = "HH:mm:ss";

    public JacksonObjectMapper() {
        super();
        //收到未知属性时不报异常
        this.configure(FAIL_ON_UNKNOWN_PROPERTIES, false);

        //反序列化时,属性不存在的兼容处理
        this.getDeserializationConfig().withoutFeatures(DeserializationFeature.FAIL_ON_UNKNOWN_PROPERTIES);

        SimpleModule simpleModule = new SimpleModule()
                .addDeserializer(LocalDateTime.class, new LocalDateTimeDeserializer(DateTimeFormatter.ofPattern(DEFAULT_DATE_TIME_FORMAT)))
                .addDeserializer(LocalDate.class, new LocalDateDeserializer(DateTimeFormatter.ofPattern(DEFAULT_DATE_FORMAT)))
                .addDeserializer(LocalTime.class, new LocalTimeDeserializer(DateTimeFormatter.ofPattern(DEFAULT_TIME_FORMAT)))
                .addSerializer(LocalDateTime.class, new LocalDateTimeSerializer(DateTimeFormatter.ofPattern(DEFAULT_DATE_TIME_FORMAT)))
                .addSerializer(LocalDate.class, new LocalDateSerializer(DateTimeFormatter.ofPattern(DEFAULT_DATE_FORMAT)))
                .addSerializer(LocalTime.class, new LocalTimeSerializer(DateTimeFormatter.ofPattern(DEFAULT_TIME_FORMAT)));

        //注册功能模块 例如,可以添加自定义序列化器和反序列化器
        this.registerModule(simpleModule);
    }
}
然后在配置类WebMvcConfiguration中加入以下代码:
protected void extendMessageConverters(List> converters) {
    log.info("扩展消息转换器...");
    //创建一个消息转换器对象
    MappingJackson2HttpMessageConverter converter = new MappingJackson2HttpMessageConverter();
    //需要为消息转换器设置一个对象转换器,对象转换器可以将Java对象序列化为json数据
    converter.setObjectMapper(new JacksonObjectMapper());
    //将自己的消息转化器加入容器中
    converters.add(0,converter);
}
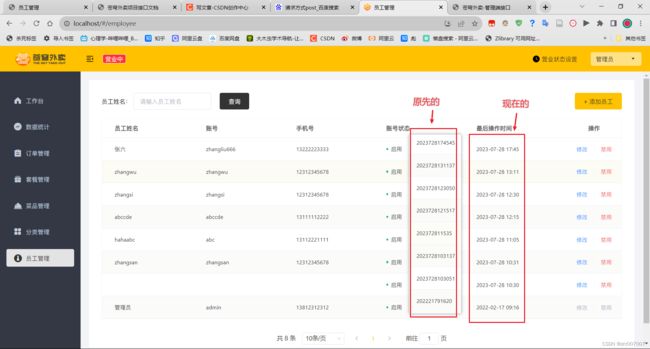
4.3结果验证
5. 描述清楚修改员工的实现流程
包括修改员工状态和编辑员工。
5.1需求分析和设计
5.1.1具体业务
修改员工状态:
用户点击启用/禁用按钮,切换用户状态。
编辑员工:
数据回显:根据id查询员工信息,并展示在编辑的表单中。
提交修改:根据id修改数据。
5.1.2设计接口
修改员工状态:
- 请求路径 /admin/employee/status/{status}
- 请求参数 ?id=1
- 请求方式 POST
- 响应数据
{
“code”:1,
“msg”:””,
“data”:null
}
编辑员工:
- 请求路径 /admin/employee
- 请求参数 json,用EmployeeDTO接收
- 请求方式 PUT
- 响应数据 还是code、msg和data。
5.2代码开发
5.2.1Controller层
/**
 * 启用/禁用员工账号接口
 * @param status
 * @param id
 * @return
 */
@ApiOperation(value = "启用/禁用员工账号接口")
@PostMapping("/status/{status}")
public Result updateStatus(@PathVariable Integer status, Long id) {
    employeeService.updateStatus(status, id);
    return Result.success();
}

/**
 * 根据id查询员工信息
 * @param id
 * @return
 */
@GetMapping("/{id}")
public Result getByID(@PathVariable Long id) {
    Employee employee = employeeService.getById(id);
    return Result.success(employee);
}

/**
 * 编辑员工信息
 * @param employeeDTO
 * @return
 */
@PutMapping
public Result update(@RequestBody EmployeeDTO employeeDTO) {
    employeeService.update(employeeDTO);
    return Result.success();
}
5.2.2Service层
public void updateStatus(Integer status, Long id) {
    Employee employee = new Employee();
    employee.setStatus(status);
    employee.setId(id);
    employee.setUpdateTime(LocalDateTime.now());
    employee.setUpdateUser(BaseContext.getCurrentId());
    employeeMapper.updateById(employee);
}

@Override
public Employee getById(Long id) {
    return employeeMapper.getById(id);
}

@Override
public void update(EmployeeDTO employeeDTO) {
    Employee employee = new Employee();
    BeanUtils.copyProperties(employeeDTO, employee);
    employee.setUpdateTime(LocalDateTime.now());
    employee.setUpdateUser(BaseContext.getCurrentId());
    employeeMapper.updateById(employee);
}
5.2.3Mapper层
Java代码:
/**
     * 根据id修改员工状态
     * @param employee
     */
    void updateById(Employee employee);

    @Select("select * from employee where id=#{id}")
    Employee getById(Long id);
xml文件:
    update employee

            name = #{name},
            username = #{username},
            password = #{password},
            phone = #{phone},
            sex = #{sex},
            id_number = #{idNumber},
            update_time = #{updateTime},
            update_user = #{updateUser},
            status = #{status},

    where id = #{id};
5.3测试
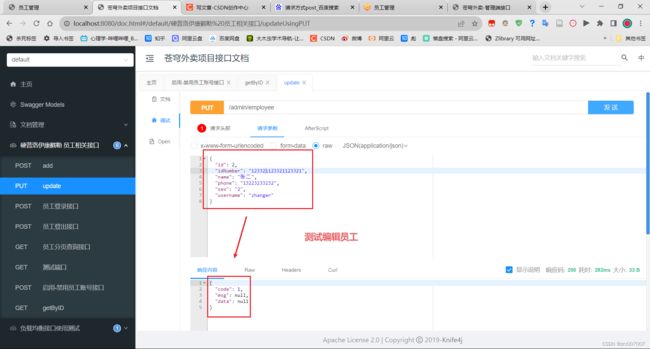
5.2.1接口测试
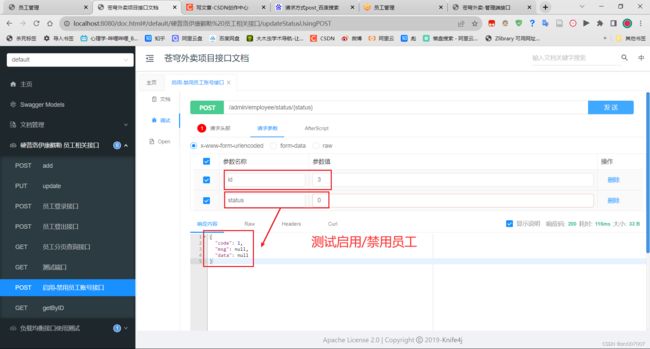
修改员工状态:
编辑员工
5.2.2前后端联调
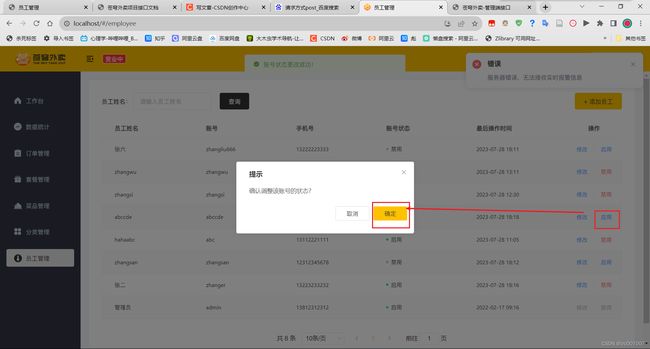
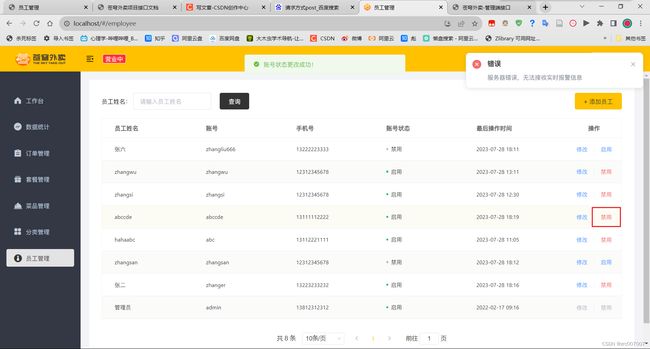
修改员工状态
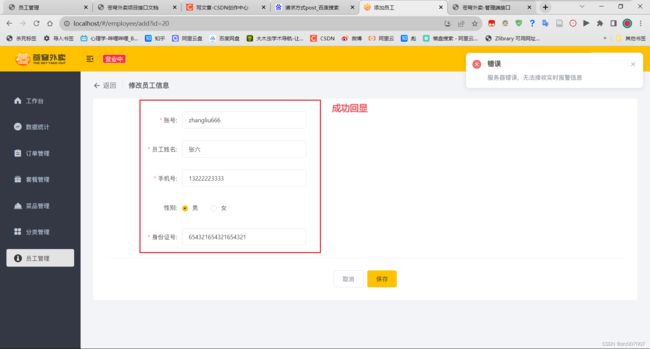
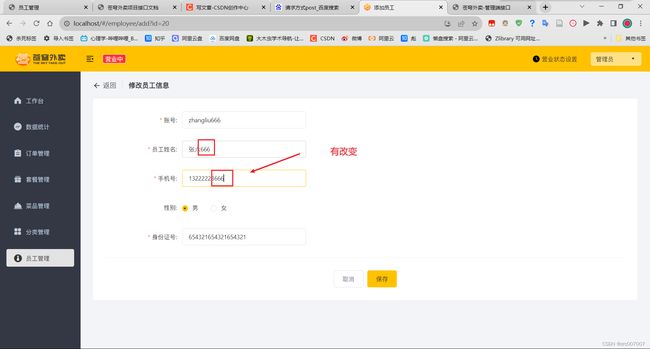
编辑员工

