SpringBoot-2-web开发
文章目录
-
-
- 1 web场景
-
- 1.1 静态资源访问
- 1.2 welcome&favicon
- 1.3 静态资源配置原理
- 2 请求处理
-
- 2.1 Rest映射
- 2.2 请求映射原理
- 2.3 普通参数与常用注解
-
- 2.3.1 @PathVariable、@RequestHeader、@RequestParam...
- 2.3.2 @RequestAttribute、@MatrixVariable
- 2.4 参数处理原理
- 3 拦截器&Web组件注入
-
- 3.1 拦截器使用
- 3.2 拦截器原理
- 3.3 Servlet、Filter、Listener注入
1 web场景
1.1 静态资源访问
只要将静态资源放在类路径下,如static、public、resources、META-INF/resources中
也可以在application.yaml中配置静态资源的位置
spring:
  resources:
    static-locations: classpath:[/pic/]
就可以直接通过localhost:8080/ + 静态资源名 访问静态资源
当请求先到来时,先找Controller看能不能处理,如果不能交给静态资源处理器
静态资源处理器如果能在static、public、resources、META-INF/resources中找到则显示
如果找不到则是404
一般访问静态资源都需要加前缀,以区分访问静态资源还是动作请求
可以在application.yaml中配置访问前缀:
spring:
  mvc:
    static-path-pattern: /res/**
此时访问静态资源需要以res/开头
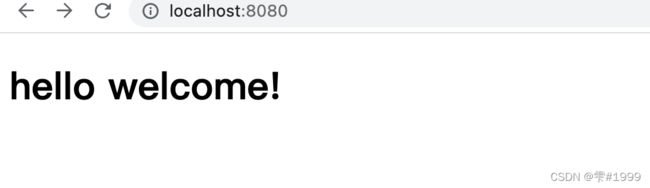
1.2 welcome&favicon
SpringBoot还提供欢迎页
只需将index.html文件放在静态资源路径下即可
注意可以配置静态资源路径,但不能配置静态资源访问前缀,否则导致index.html无法访问
同时还可以为访问页设置小图标,只需将小图标命名为favicon.ico
并存放在静态资源路径下,即可自动生效
1.3 静态资源配置原理
静态资源的配置原理也属于SpringBoot的自动配置过程
1,首先所有的自动配置项对应的java文件都以xxxAutoConfiguration结尾
这些文件都可以在spring-boot-autoconfigure包下

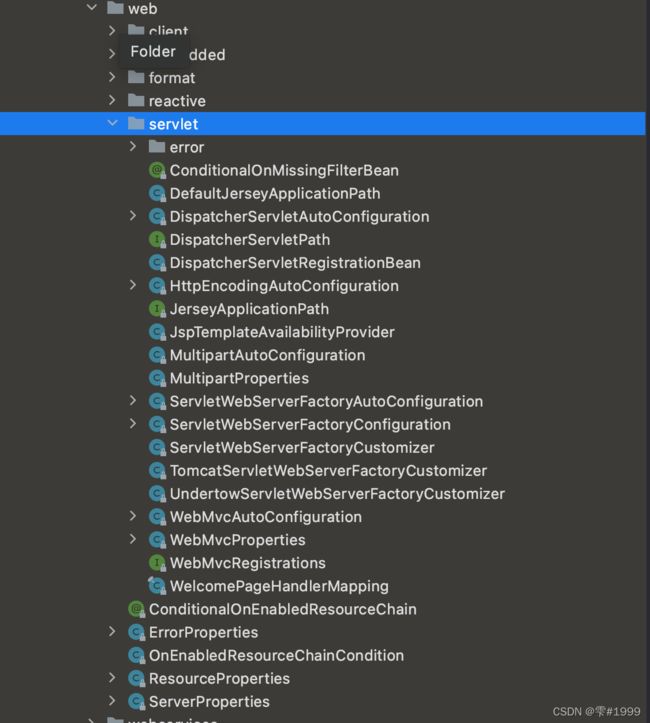
2,静态资源属于web范围,在org.springframework.boot.autoconfigure包下寻找
在web包下的servlet包里,可以看到有许多AutoConfiguration
如DispatcherServletAutoConfiguration,以及编码的HttpEncodingAutoConfiguration…
3,静态资源所属配置在WebMvcAutoConfiguration中
在该类中可以看到一个内部类WebMvcAutoConfigurationAdapter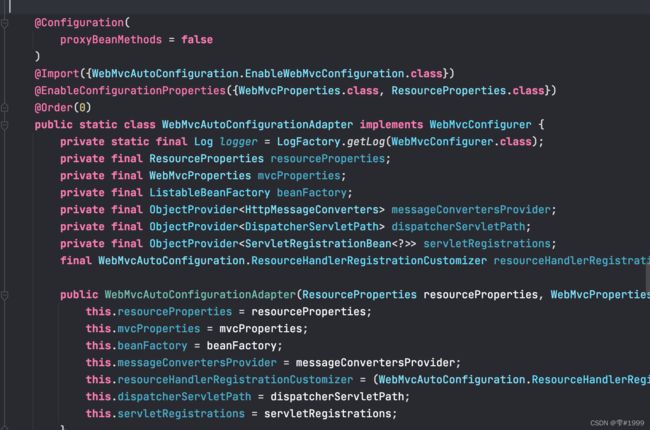
可以看到该配置类带有@EnableConfigurationProperties注解
即该配置类的相关属性关联了两个配置文件WebMvcProperties和ResourceProperties
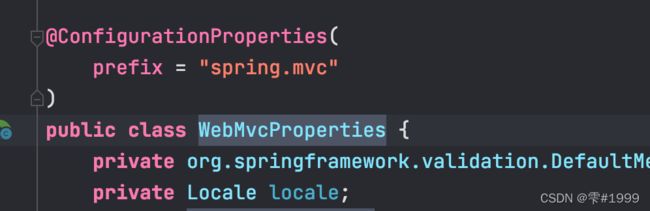
进入WebMvcProperties,可以看到它带有@ConfigurationProperties属性
且prefix为spring.mvc 意味着我们可以在properties文件或yaml文件中
以spring.mvc开头来覆盖底层默认的配置
同理ResourceProperties绑定了spring.resources配置
4,内部类WebMvcAutoConfigurationAdapter只有一个有参构造
这代表有参构造需要的所有参数都要从容器中找
public WebMvcAutoConfigurationAdapter(ResourceProperties resourceProperties, WebMvcProperties mvcProperties, ListableBeanFactory beanFactory, ObjectProvider<HttpMessageConverters> messageConvertersProvider, ObjectProvider<WebMvcAutoConfiguration.ResourceHandlerRegistrationCustomizer> resourceHandlerRegistrationCustomizerProvider, ObjectProvider<DispatcherServletPath> dispatcherServletPath, ObjectProvider<ServletRegistrationBean<?>> servletRegistrations) {
            this.resourceProperties = resourceProperties;
            this.mvcProperties = mvcProperties;
            this.beanFactory = beanFactory;
            this.messageConvertersProvider = messageConvertersProvider;
            this.resourceHandlerRegistrationCustomizer = (WebMvcAutoConfiguration.ResourceHandlerRegistrationCustomizer)resourceHandlerRegistrationCustomizerProvider.getIfAvailable();
            this.dispatcherServletPath = dispatcherServletPath;
            this.servletRegistrations = servletRegistrations;
        }
先看其中的两项赋值this.resourceProperties = resourceProperties;
和this.mvcProperties = mvcProperties;
即从容器中取出WebMvcProperties和ResourceProperties实例赋值
WebMvcProperties和ResourceProperties又分别绑定了配置spring.mvc和spring.resources
当SpringBoot启动时,加载默认的WebMvcProperties和ResourceProperties配置
如在yaml文件或application文件中使用了spring.mvc和spring.resources配置,则会加载新配置
5,回到静态资源配置,resourceHandlerRegistrationCustomizer也是从容器中获得的
接着看内部类中关于静态资源配置的方法
	public void addResourceHandlers(ResourceHandlerRegistry registry) {
		    // 获取ResourceProperties中的isAddMappings属性 默认为true
		    // ResourceProperties对应yaml中的spring.resources配置
		    // addMappings属性决定是否禁用默认静态资源配置
            if (!this.resourceProperties.isAddMappings()) {
                logger.debug("Default resource handling disabled");
            } else {
                Duration cachePeriod = this.resourceProperties.getCache().getPeriod();
                CacheControl cacheControl = this.resourceProperties.getCache().getCachecontrol().toHttpCacheControl();
                // 配置webjars相关规则
                if (!registry.hasMappingForPattern("/webjars/**")) {
                    this.customizeResourceHandlerRegistration(registry.addResourceHandler(new String[]{"/webjars/**"}).addResourceLocations(new String[]{"classpath:/META-INF/resources/webjars/"}).setCachePeriod(this.getSeconds(cachePeriod)).setCacheControl(cacheControl));
                }
				// 通过mvcProperties.getStaticPathPattern()配置静态资源路径
				// 该方法对应的是WebMvcProperties的staticPathPattern属性
				// 可以在yaml中配置静态资源路径
                String staticPathPattern = this.mvcProperties.getStaticPathPattern();
                if (!registry.hasMappingForPattern(staticPathPattern)) {
                // 具体的路径在resourceProperties.getStaticLocations()中
                // 是一个数组默认 "classpath:/META-INF/resources/", "classpath:/resources/", "classpath:/static/", "classpath:/public/"
                    this.customizeResourceHandlerRegistration(registry.addResourceHandler(new String[]{staticPathPattern}).addResourceLocations(WebMvcAutoConfiguration.getResourceLocations(this.resourceProperties.getStaticLocations())).setCachePeriod(this.getSeconds(cachePeriod)).setCacheControl(cacheControl));
                }

            }
        }
2 请求处理
2.1 Rest映射
对现有的请求,我们在Controller层常用@RequestMapping接收
并使用Rest风格来确定动作的执行方式(使用HTTP请求方式动词来表示对资源的操作)
如对user的操作
GET		获取用户
DELETE	删除用户
PUT		修改用户
POST	保存用户

	@RequestMapping(value = "/user", method = RequestMethod.GET)
    public String getUser() {
        return "zhangsan";
    }
但是html中的form表单的method只支持get和post,并不支持put和delete
在SpringMVC中需要配置HiddenHttpMethodFilter以开启Rest风格
但在SpringBoot中 WebMvcAutoConfiguration中,此项功能已经默认配置
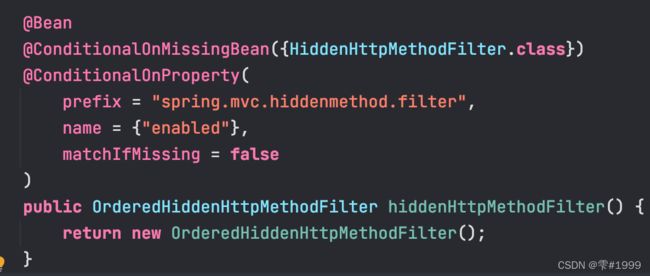 并需要在yaml中开启该功能
spring:
  mvc:
    hiddenmethod:
      filter:
        enabled: true
想要使用PUT和DELETE请求,只需在html界面中的form表单中新增一个input标签即可
<form action = "/user" method = "get">
	<input value = "REST-GET 提交" type = "submit" />
</form>

// 对于put请求和delete请求 仍然使用post 但需增加新的input标签
<form action = "/user" method = "post">
	<input name = "_method" type = "hidden" value = "DELETE" >
	<input value = "REST-DELETE 提交" type = "submit" />
</form>
其原理大致是:
请求会携带_method参数,到达服务器后会被HiddenHttpMethodFilter拦截
执行doFilterInternal方法
	protected void doFilterInternal(HttpServletRequest request, HttpServletResponse response, FilterChain filterChain) throws ServletException, IOException {
        HttpServletRequest requestToUse = request;
        // 判断是否是post请求且请求是否正常
        if ("POST".equals(request.getMethod()) && request.getAttribute("javax.servlet.error.exception") == null) {
        // 获取到_method的值
            String paramValue = request.getParameter(this.methodParam);
            // _method的值不为空
            if (StringUtils.hasLength(paramValue)) {
            	// 强转大写
                String method = paramValue.toUpperCase(Locale.ENGLISH);
                // 查看列表中是否有method对应的value
                // ALLOWED_METHODS列表已被静态初始化 其中包含put delete patch
                if (ALLOWED_METHODS.contains(method)) {
                	// 将原生request 使用装饰者模式创建了新请求 其中的method已被更换
                    requestToUse = new HiddenHttpMethodFilter.HttpMethodRequestWrapper(request, method);
                }
            }
        }

		// 使用包装后的request继续chain的执行
        filterChain.doFilter((ServletRequest)requestToUse, response);
    }
2.2 请求映射原理
当封装好新的request后,再来看请求如何找到Controller层对应的方法
所有的请求首先都会到达DispatcherServlet,在DispatcherServlet的父类中FrameworkServlet
重写了超类HttpServlet中的doGet和doPost及doPut和doDelete方法

这些方法又调用了processRequest方法
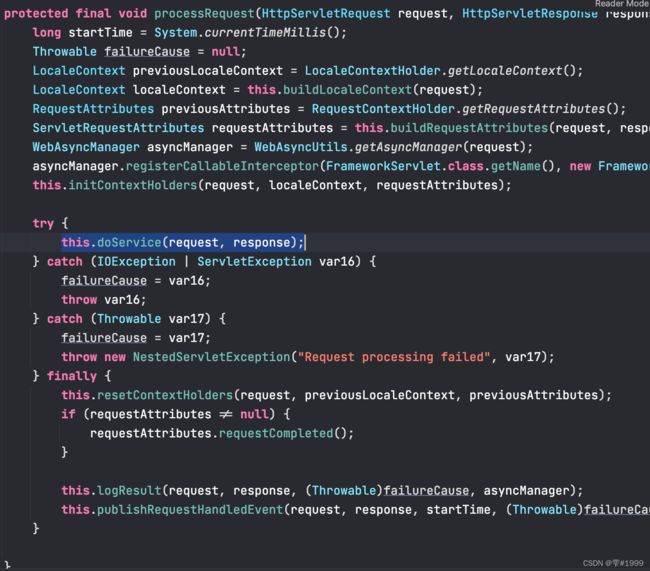
该方法的核心处理在于doService方法
![]()
该方法是一个抽象方法,由子类DispatcherServlet实现
protected void doService(HttpServletRequest request, HttpServletResponse response) throws Exception {
...
try {
// 其核心在于doDispatch方法
this.doDispatch(request, response);
} finally {
if (!WebAsyncUtils.getAsyncManager(request).isConcurrentHandlingStarted() && attributesSnapshot != null) {
this.restoreAttributesAfterInclude(request, attributesSnapshot);
}
}
}
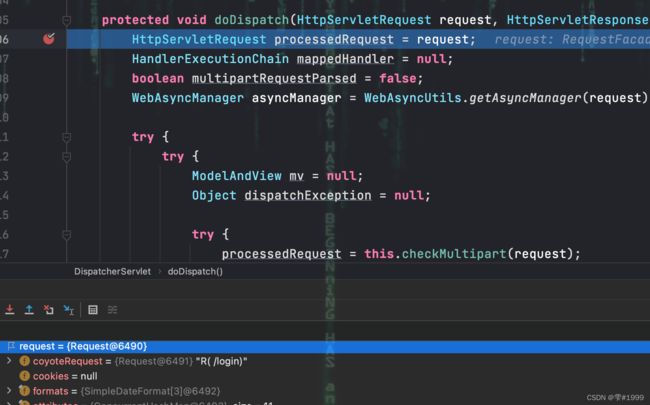
protected void doDispatch(HttpServletRequest request, HttpServletResponse response) throws Exception {
HttpServletRequest processedRequest = request;
HandlerExecutionChain mappedHandler = null;
boolean multipartRequestParsed = false;
WebAsyncManager asyncManager = WebAsyncUtils.getAsyncManager(request);
try {
try {
ModelAndView mv = null;
Object dispatchException = null;
try {
// 检查是否为文件上传请求
processedRequest = this.checkMultipart(request);
multipartRequestParsed = processedRequest != request;
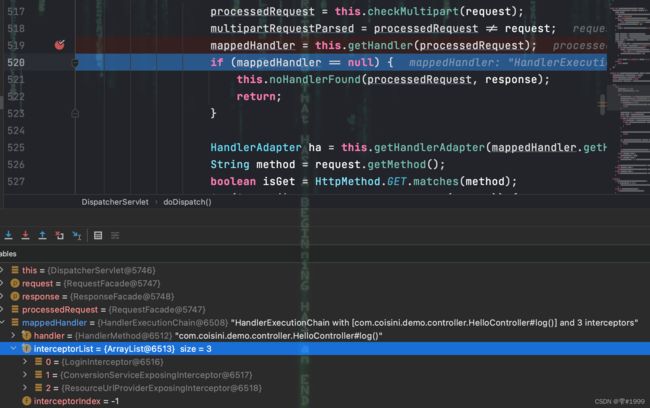
// 核心方法
// 能找到哪个Handler(Controller)可以处理该请求
mappedHandler = this.getHandler(processedRequest);
if (mappedHandler == null) {
this.noHandlerFound(processedRequest, response);
return;
}
...
}
protected HandlerExecutionChain getHandler(HttpServletRequest request) throws Exception {
// 从handlerMappings中匹配
// handlerMappings是一个List 由initHandlerMappings初始化
if (this.handlerMappings != null) {
Iterator var2 = this.handlerMappings.iterator();
while(var2.hasNext()) {
HandlerMapping mapping = (HandlerMapping)var2.next();
HandlerExecutionChain handler = mapping.getHandler(request);
if (handler != null) {
return handler;
}
}
}
return null;
}
打断点进行调试时,发现handlerMappings中此时已经有5个HandlerMapping
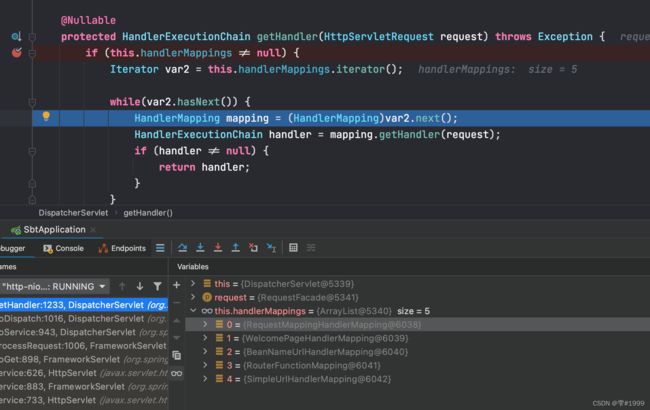
此时进入了RequestMappingHandlerMapping,即对应@RequestMapping注解
在其中可以看到我们发来的GET /user被注册在其中
并确认了由HelloController的getUser()方法处理

类似RequestMappingHandleMapping这样的handle都是Bean被存放在容器中
同样的,可以在webMvcAutoConfiguration中看到默认配置
如果需要一些自定义的映射处理,也可以向容器中存放自定义的HandleMapping

2.3 普通参数与常用注解
2.3.1 @PathVariable、@RequestHeader、@RequestParam…
1、@PathVariable:
@PathVariable
获取路径变量
使用方式:
	@GetMapping("/pet/{id}/owner/{username}")
    public String getPet(@PathVariable("id") Integer id,
    						@PathVariable("username") String username) {
        Person person = new Person();
        person.setName("tom");
        return new Pet("caka", 6, person).toString();
    }
2、@RequestHeader:
@RequestHeader
用于获取请求头中的内容,如host、浏览器信息等
可以指明获取一个,也可以通过Map<String, String>获取全部
使用方式:
	@GetMapping("/header")
    public String getPet(@RequestHeader("User-Agent") String userAgent,
                         @RequestHeader Map<String, String> header) {

        System.out.println(userAgent);
        for(String k : header.keySet()) {
            System.out.println(k + " : " + header.get(k));
        }

        return "";
    }
3、@RequestParam:
@RequestParam
获取请求参数 如url: "pet/1/person/1?name=caka&age=18"
使用方式:
	@GetMapping("/pet")
    public String getPet(@RequestParam("name") Integer name,
                         @RequestParam("age") String age) {

        System.out.println("age: " + age + " name: " + name);
        return "";
    }

	获取全部参数:
	@GetMapping("/pet")
    public String getPet(@RequestParam Map<String, String> params) {
        return "";
    }
4、@CookieValue:
@CookieValue
获取cookie中存储的信息或Cookie对象
使用方式:
	@GetMapping("/pet")
    public String getPet(@CookieValue("_ga") String _ga) {
        System.out.println(_ga);
        return "";
    }

	直接获取Cookie对象
	@GetMapping("/pet")
    public String getPet(@CookieValue("_ga") Cookie _ga) {
        System.out.println(_ga);
        return "";
    }
5、@RequestBody:
@RequestBody
获取请求体中的内容,如表单中内容
使用方式:
	@PostMapping("/save")
    public String doSomeThing(@RequestBody String content) {
        System.out.println(content);
        return "";
    }
2.3.2 @RequestAttribute、@MatrixVariable
1、@RequestAttribute:
@RequestAttribute
获取请求域中的值
使用方式:
	@ResponseBody
    @GetMapping("/success")
    public String success(@RequestAttribute("msg") String msg,
                          @RequestAttribute("code") Integer code) {

        return "success";
    }

	获取ServletRequest后再get
	@ResponseBody
    @GetMapping("/success")
    public String success(HttpServletRequest request) {

        String msg = (String) request.getAttribute("msg");
        Integer code = (Integer) request.getAttribute("code");

        return "success";
    }
2、@MatrixVariable
获取矩阵变量的值
常用的 /pet/{path}?xxx=xxx&yyy=yyy 称为queryString
以;分隔属性的类似/pet/sell;age=10;color=white,yellow 称为矩阵变量

当cookie被禁用时,可以使用矩阵变量将cookie中的内容存储其中
以供后端解析并与queryString区分
SpringBoot默认禁用了矩阵变量的功能,为此需要在yaml中开启
先看下WebMvcAutoConfig中关于路径的处理
	public void configurePathMatch(PathMatchConfigurer configurer) {
            if (this.mvcProperties.getPathmatch().getMatchingStrategy() == MatchingStrategy.PATH_PATTERN_PARSER) {
                configurer.setPatternParser(WebMvcAutoConfiguration.pathPatternParser);
            }

            configurer.setUseSuffixPatternMatch(this.mvcProperties.getPathmatch().isUseSuffixPattern());
            configurer.setUseRegisteredSuffixPatternMatch(this.mvcProperties.getPathmatch().isUseRegisteredSuffixPattern());
            this.dispatcherServletPath.ifAvailable((dispatcherPath) -> {
                String servletUrlMapping = dispatcherPath.getServletUrlMapping();
                if (servletUrlMapping.equals("/") && this.singleDispatcherServlet()) {
                    UrlPathHelper urlPathHelper = new UrlPathHelper();
                    urlPathHelper.setAlwaysUseFullPath(true);
                    configurer.setUrlPathHelper(urlPathHelper);
                }

            });
        }
其中涉及到了一个UrlPathHelper,该类中存在属性removeSemicolonContent
且默认值设置了true,即我们的矩阵变量路径中的;会被截取并删除
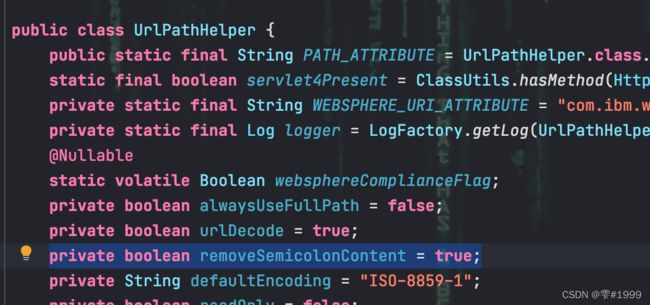
为此需要关闭该功能,有两种方式:
1,自定义Config类,实现WebMvcConfigurer接口,重写configurePathMatch方法
@Configuration(proxyBeanMethods = true)
public class MyConfig implements WebMvcConfigurer {

  	@Override
    public void configurePathMatch(PathMatchConfigurer configurer) {
        UrlPathHelper pathHelper = new UrlPathHelper();
        // 关闭路径移除分号功能
        pathHelper.setRemoveSemicolonContent(false);
        configurer.setUrlPathHelper(pathHelper);
    }

}

2,在自定义Config类中,创建一个新的WebMvcConfigurer的Bean
重新实现configurePathMatch方法即可
@Configuration(proxyBeanMethods = true)
public class MyConfig {

    @Bean
    public WebMvcConfigurer webMvcConfigurer() {
        return new WebMvcConfigurer() {
            @Override
            public void configurePathMatch(PathMatchConfigurer configurer) {
                UrlPathHelper pathHelper = new UrlPathHelper();
                // 关闭路径移除分号功能
                pathHelper.setRemoveSemicolonContent(false);
                configurer.setUrlPathHelper(pathHelper);
            }
        };
    }

}
使用方式:
	// pets/sell;age=10;color=yellow,white
    @GetMapping("/pets/{path}")
    public Map petSell(@MatrixVariable("age") Integer age,
                       @MatrixVariable("color") List<String> color) {
        Map<String, Object> map = new HashMap<>();
        map.put("age", age);
        for(String s : color) {
            map.put(s, "");
        }

        return map;
    }
2.4 参数处理原理
所有的请求都会通过DispatcherServlet的doDispatcher方法来处理
首先通过getHandler找到对应的Controller以及其中的方法

接着找到对应的Adapter,这里是RequestMappingHandlerAdapter

接着沿着Adapter的handle方法一路向下调用,来到RequestMappingHandlerAdapter的invokeHandlerMethod方法,执行方法前会看到设置ArgumentResolvers的过程
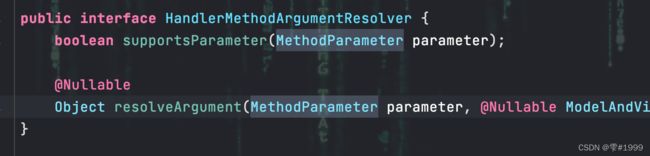
在这里设置了27个参数解析器,如RequestParamMethodArgumentResolver
该参数解析器就是用来处理带@RequestParam注解的参数
每个解析器都实现了HandlerMethodArgumentResolver接口
实现了其中两个方法,一个判断参数是否支持由当前解析器解析
如果支持则调用另一个方法解析参数,还原成Object类型数据,后续用于反射执行
接着配置返回值处理器,返回值处理器有15种,如ModelAndView
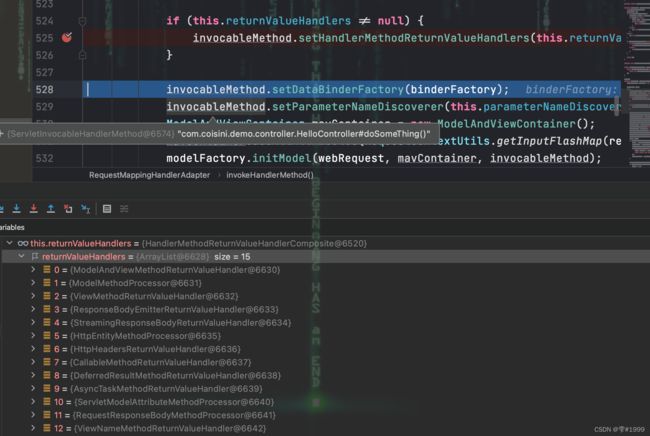
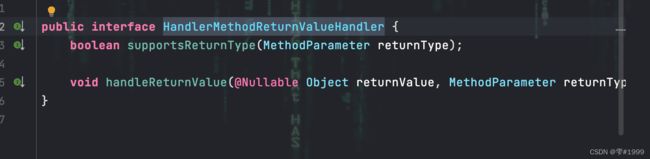
每个返回值处理器都实现了HandlerMethodReturnValueHandler接口
其中两个方法分别用来判断返回值类型和处理返回值
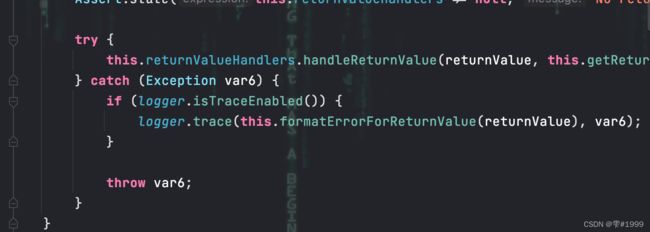
接着一路向下,来到真正的执行过程invokeAndHandle
![]()

进入invokeAndHandle方法后,会反射调用Controller层中对应的方法
首先使用提前设置好的参数解析器依次解析参数,组装Object[]
再通过doInvoke方法反射执行
	@Nullable
    protected Object doInvoke(Object... args) throws Exception {
        Method method = this.getBridgedMethod();

        try {
            return KotlinDetector.isSuspendingFunction(method)
            ? CoroutinesUtils.invokeSuspendingFunction(method, this.getBean(), args)
            : method.invoke(this.getBean(), args);
        } catch (IllegalArgumentException var5) {
        ...
执行完毕后,再回到invokeAndHandle方法中
再完成最后的返回值处理,整个调用过程结束
3 拦截器&Web组件注入
3.1 拦截器使用
SpringBoot提供了拦截器的功能,底层存在HandlerInterceptor接口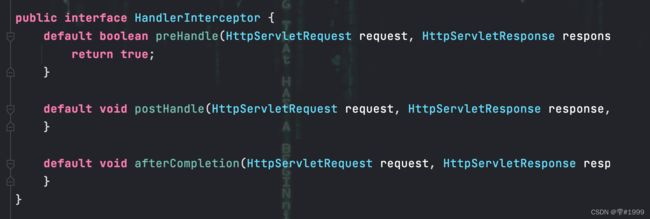
其中preHandle方法用于拦截前,postHandle方法用于执行后
afterCompletion方法用于整个请求处理完后
可以实现HandlerInterceptor接口,自定义拦截器来完成id校验等功能
使用拦截器,需要先编写好拦截器
之后在配置类中注册拦截器且配置好需要拦截的请求路径
public class LoginInterceptor implements HandlerInterceptor {

    @Override
    public boolean preHandle(HttpServletRequest request, HttpServletResponse response, Object handler) throws Exception {
        // 登录检查逻辑
        Object loginUser = request.getSession().getAttribute("loginUser");
        if(Objects.isNull(loginUser)) {
            return false;
        }

        return true;
    }

    @Override
    public void postHandle(HttpServletRequest request, HttpServletResponse response, Object handler, ModelAndView modelAndView) throws Exception {
    }

    @Override
    public void afterCompletion(HttpServletRequest request, HttpServletResponse response, Object handler, Exception ex) throws Exception {
    }
}

@Configuration(proxyBeanMethods = true)
public class MyConfig implements WebMvcConfigurer {

    @Override
    public void addInterceptors(InterceptorRegistry registry) {
        // 注册并配置拦截器
        registry.addInterceptor(new LoginInterceptor())
            .addPathPatterns("/**") // 所有请求都会被拦截 包括静态资源
            .excludePathPatterns("/", "/login", "/css/**",
                            "/fonts/**", "/image/**", "/js/**");
    }
}
3.2 拦截器原理
仍然从DispatcherServlet进入开始debug
找到该处理该请求的mappedHandler,并得到处理该请求的拦截器链
接着在执行handle处理请求之前,会依次执行拦截器链中每个拦截器的applyHandle方法
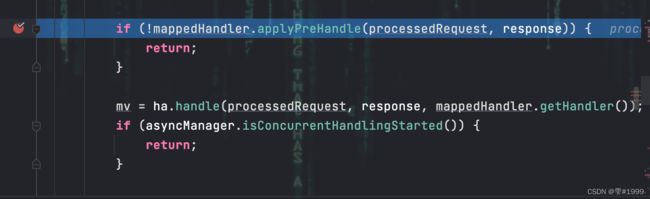
如果当前拦截器preHandle的返回值为true,则执行下一个拦截器的preHandle方法
如果当前拦截器返回false,则直接倒叙执行所有已执行了的拦截器的afterCompletion方法
如果任何一个拦截器返回false,则不再执行处理请求的方法
	boolean applyPreHandle(HttpServletRequest request, HttpServletResponse response) throws Exception {
        for(int i = 0; i < this.interceptorList.size(); this.interceptorIndex = i++) {
            HandlerInterceptor interceptor = (HandlerInterceptor)this.interceptorList.get(i);
            if (!interceptor.preHandle(request, response, this.handler)) {
                this.triggerAfterCompletion(request, response, (Exception)null);
                return false;
            }
        }

        return true;
    }

	void triggerAfterCompletion(HttpServletRequest request, HttpServletResponse response, @Nullable Exception ex) {
        for(int i = this.interceptorIndex; i >= 0; --i) {
            HandlerInterceptor interceptor = (HandlerInterceptor)this.interceptorList.get(i);

            try {
                interceptor.afterCompletion(request, response, this.handler, ex);
            } catch (Throwable var7) {
                logger.error("HandlerInterceptor.afterCompletion threw exception", var7);
            }
        }

    }
处理完请求后,倒叙执行拦截器链的postHandle方法

	void applyPostHandle(HttpServletRequest request, HttpServletResponse response, @Nullable ModelAndView mv) throws Exception {
        for(int i = this.interceptorList.size() - 1; i >= 0; --i) {
            HandlerInterceptor interceptor = (HandlerInterceptor)this.interceptorList.get(i);
            interceptor.postHandle(request, response, this.handler, mv);
        }

    }
如果执行过程中存在异常或页面成功渲染后,都会倒叙触发拦截器链的afterCompletion方法
	void triggerAfterCompletion(HttpServletRequest request, HttpServletResponse response, @Nullable Exception ex) {
        for(int i = this.interceptorIndex; i >= 0; --i) {
            HandlerInterceptor interceptor = (HandlerInterceptor)this.interceptorList.get(i);

            try {
                interceptor.afterCompletion(request, response, this.handler, ex);
            } catch (Throwable var7) {
                logger.error("HandlerInterceptor.afterCompletion threw exception", var7);
            }
        }

    }
3.3 Servlet、Filter、Listener注入
首先需要在SpringBoot启动类上使用@ServletComponentScan来标明
需要注入生效的Servlet所在的包,这样SpringBoot在启动时就会扫描并解析这些Servlet

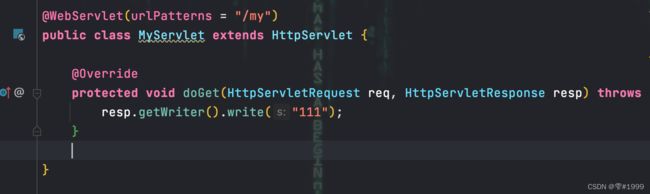
完成后在确定的包下编写自定义的Servlet,需继承HttpServlet
并在该类上使用@WebServlet注解,确定访问路径
同理,Filter和Listener都可以用类似的方式完成注入
注意需要在启动类上使用@ServletComponentScan涵盖这些类的包路径
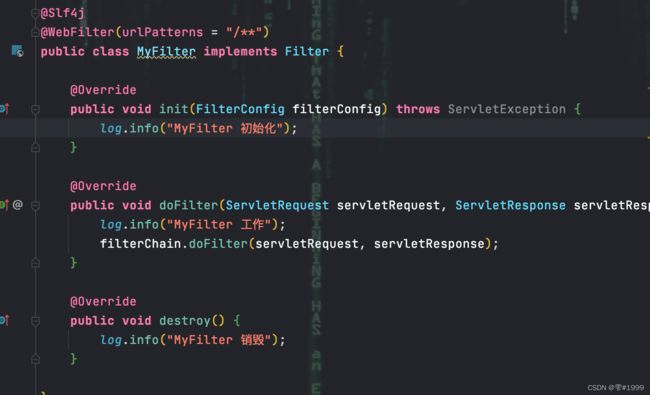
自定义Filter类需要实现Filter接口,且使用@WebFilter注解并明确拦截路径
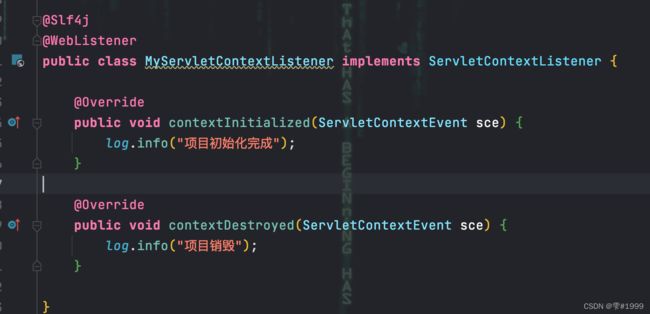
自定义Listener类需要实现对应的接口,且使用@WebListener注解
也可以通过RegistrationBean注入
通过Bean的形式将这些组件配置好后装入容器
@Configuration(proxyBeanMethods = true)
public class MyRegistrationConfig {

    @Bean
    public ServletRegistrationBean myServlet() {
        Servlet servlet = new MyServlet();
        return new ServletRegistrationBean(servlet, "/my");
    }

    @Bean
    public FilterRegistrationBean myFilter() {
        Filter filter = new MyFilter();

        FilterRegistrationBean filterRegistrationBean = new FilterRegistrationBean(filter);
        filterRegistrationBean.setUrlPatterns(Arrays.asList("/**"));
        return filterRegistrationBean;
    }

    @Bean
    public ServletListenerRegistrationBean myListener() {
        MyServletContextListener listener = new MyServletContextListener();
        return new ServletListenerRegistrationBean(listener);
    }

}