Compose Desktop 使用中的几个问题(分平台加载资源、编写Gradle 任务下载平台资源、桌面特有组件、鼠标&键盘事件)
前言
在我之前的文章 Compose For Desktop 实践:使用 Compose-jb 做一个时间水印助手 中,我们使用 Compose For Desktop 写了一个用于读取照片 EXIF 中的拍摄日期参数并以文字水印的方式添加到照片上的桌面程序。
但是事实上,这个程序的名字叫做 TimelapseHelper 也就是延时助手,是我写来辅助做延时视频的。
即然取名取的这么大,功能自然也要符合它的名字啊,只是添加时间水印可不行啊。
恰好,最近又有了点时间,所以抽空逐渐完善了它的功能,最最主要的当然是给它加上了使用图片直接生成视频的功能了。
本文会讲解一些这次在完善功能时遇到的问题。
如何在 Compose Desktop 中使用 FFmpeg (C/C++) ?
其实说到音视频的处理,大多数人第一时间想到的都是大名鼎鼎的 ffmpeg,而我自然也不例外。
我跟 ffmpeg 可算是老熟人了,之前写的某个原生安卓 app,核心功能全是使用 ffmpeg 实现的,所以这次需要实现图片合成视频的功能,我第一时间想到的自然也是使用 ffmpeg 实现。
而想要在程序中使用 ffmpeg ,一般有两种方式,一种是自己深度定制修改 ffmpeg 源码后,提供接口给程序原生调用,一种是使用命令行调用已编译好的 ffmpeg 二进制文件。
对于第一种方式,在原生安卓中通常使用 JNI 实现,对于 compose 或者说对于 kotlin,它同样提供了 cinterop 用于与 C/C++ 互操作,同时,由于我这个项目并不是跨平台项目,而只是一个 dektop 项目,还是基于 Jvm 实现的,所以 JNI 也还是可以使用的。
但是,第一种方式的难点显而易见,需要我们非常懂 C/C++ 或者 JNI 等相关技术,而且还必须对 ffmpeg 源码相当熟悉才行,否则一切都是白搭。
显然,我并不具备这样的能力,哈哈哈。不过感兴趣的可以看看 Interoperability with C 。
那么对于我们来说,最简单的方式莫过于直接使用已经编译好的 FFmpeg 二进制文件了。
这样我们就可以直接使用 ffmpeg 执行相应的命令,例如获取当前 FFmpeg 版本号:
但是,这种方法显而易见的就有一个明显的问题,那就是我们并不能保证所有使用者都已经在自己电脑上安装了 FFmpeg,并且加入了系统变量(PATH)。也就是说,我们无从得知 FFmpeg 二进制可执行文件的位置。
对于这个问题,我一开始想的就是由用户自己指定 FFmpeg 可执行文件的路径,但是显然这样使用起来非常不方便,别说是用户了,我自己用着都觉得很烦,每次都要去设置 FFmpeg 位置。
所以,最简单的方式就是将可执行文件打包到程序或者安装包中,但是我们将所有平台的可执行文件都打包进安装包的话,显然又是不合理的。因此我们应该分平台打包不同的可执行文件。
关于如何分平台打包资源,我们下节再讲,这节先讲如何在我们的程序中调用 FFmpeg 命令。
其实如果是安卓开发的话,对于这个问题也很好解决,同样是获取当前 FFmpeg 版本号,我们只需要:
Runtime.getRuntime().exec("ffmpeg -version")
这个方法来自于 jvm,好在我们这个程序目前只需要运行在桌面端,而所有桌面端都是基于 jvm 的,所以这个方法可以放心大胆的用。
不过,这种方法是没有返回值的直接执行,如果想要获取返回值,我们可以这样:
val p = Runtime.getRuntime().exec("ffmpeg -version")
val returnCode = p.waitFor()
println("exec finish with exit code $returnCode")
注意,这里的 returnCode 只是命令执行完毕后返回的退出代码(一般返回 0 表示成功执行无异常,返回其他数值表示执行失败),如果想要获取实时输出的话需要从 p.inputStream 中实时去读取输入流的数据。(没写错,是输入流)。这里还有一个坑,如果执行出错的话,输出内容就不会再走 p.inputStream ,而是会从 p.errorStream 中输出。
对于我这个程序的需求,我既需要获取程序执行返回结果,也需要获取程序执行实时输出内容,同时如果执行出错,我还需要能拿到错误输出信息。
也就是说,我们可能得造个轮子来优雅的完成这项工作。
但是作为新时代的程序员,当然是要秉承着能不造轮子就不造轮子的风范,所以我直接找来个大佬写的库来使用了: zt-exec 。
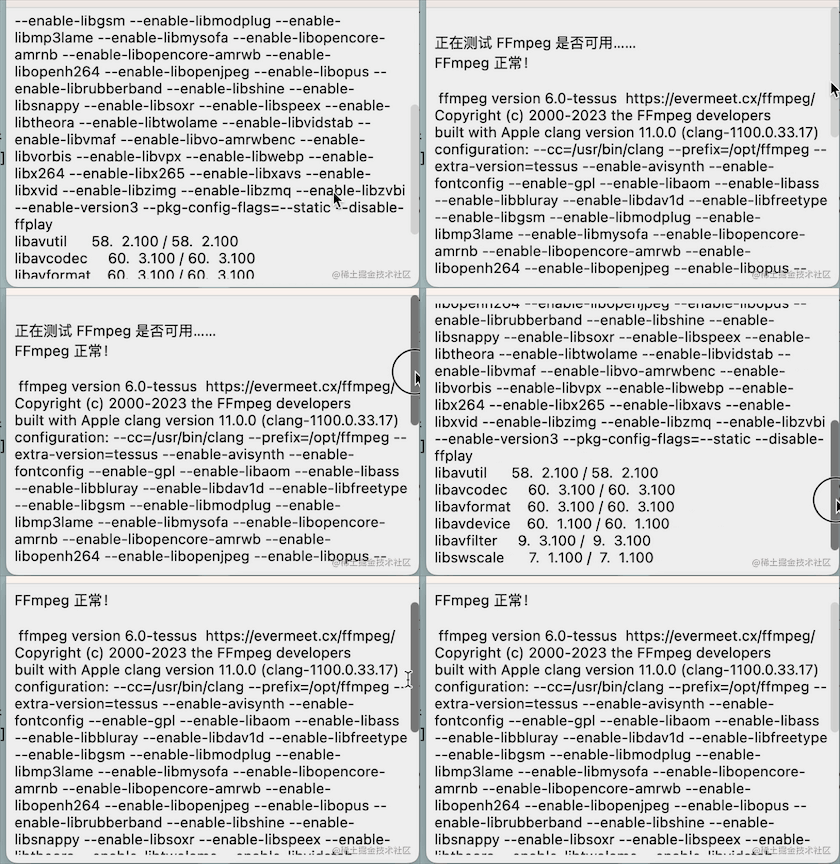
举个例子,如果我们想要验证当前 FFmeg 是否可用,我们可以通过执行 ffmpeg -version 来验证,由于我们只是获取版本号,所以并不需要实时获取输出结果,只需要执行完毕后能拿到最终输出结果和返回值即可:
try {
    val cmd = state.getFfmpegBinaryPath()
    val output = ProcessExecutor().command(cmd, "-version")
        .readOutput(true)
        .exitValues(0)
        .execute()
        .outputUTF8()
    applicationState.changeDialogText("FFmpeg 正常!\n\n $output")
} catch (e: InvalidExitValueException) {
    println("Process exited with ${e.exitValue}")
    val output = e.result.outputUTF8()
    applicationState.changeDialogText("FFmpeg 不可用!\n\n $output")
} catch (tr: Throwable) {
    println("Process exited with ${tr.stackTraceToString()}")
    applicationState.changeDialogText("FFmpeg 不可用!\n\n ${tr.stackTraceToString()}")
}
其中的 .exitValues(0) 表示我们需要返回值为 0 ,如果不为 0 ,则会抛出异常 InvalidExitValueException 。
而在实际使用时,我们既需要实时输出信息,也需要错误信息和最终返回值,那么我们可以这样写:
val cmd = "some cmd".split(" ")

ProcessExecutor()
    .command(cmd)
    .redirectOutput(object : LogOutputStream() {
        override fun processLine(line: String?) {
           println("$line")
        }
    })
    .redirectError(object : LogOutputStream() {
        override fun processLine(line: String?) {
            println("$line")
        }
    })
    .exitValues(0)
    .execute()
通过 redirectOutput 可以注册实时获取输入流(输出信息)和 redirectError 注册实时获取错误信息流。
现在我们已经具备了执行 FFmpeg 的知识,下一步,自然是思考如何才能获取到 FFmpeg 执行文件。
Compose Desktop 分平台获取资源文件
根据 compose-multiplatform 教程 。
我们可以通过将资源文件放到 /src/main/resources 目录下,然后通过调用 Class::getResource 或 Class::getResourceAsStream 来获取到文件或文件流。
只是这样更适合于用来存放和读取一些一般的资源文件,例如文本、媒体文件等,对于我们的可执行文件似乎不太适合。
而且存放在这个目录中的文件是不区分平台的,会打包到所有平台的 jar 包中。
如果想要分平台打包资源,那么我们应该使用 Compose 插件提供的特定资源配置。
首先在 build.gradle.kts 文件中指定资源文件根目录:
compose.desktop {
    // ...
    application {
        // ...
        nativeDistributions {
            // ...
            appResourcesRootDir.set(project.layout.projectDirectory.dir("resources"))
        }
    }
}
在这里我们将资源文件根目录指定为了 resources 文件夹。
注意这里是项目根目录,不要和上面的 /src/main/resources 混淆了,我就是在这里搞混淆了,害得我 debug 了好久。
然后我们可以在这个目录下用不同的文件夹名指定不同平台需要的资源,这些资源将只会为指定的平台打包,例如:
resources/common表示公用资源,即所有平台都会打包。resources/windows表示其中只会打包给 windows 平台。resources/macos表示其中只会打包给macOS 平台。resources/linux表示其中只会打包给 Linux 平台。
我们还可以在不同平台加上架构后缀(x64 、 arm64 ),表示只供特定架构使用,例如,指定某资源只在 arm 架构的 macOS 平台可用,则可以命名为: resources/macos-arm64 。
在我们的项目中,以 macOS 为例,我们的 FFmpeg 可执行文件的放置位置为:
那么,如何获取到这个文件的路径呢?同样很简单:
val ffmpegFile = File(System.getProperty("compose.application.resources.dir")).resolve("ffmpeg")
其中,使用 System.getProperty("compose.application.resources.dir") 可以拿到当前的资源文件目录,对于不同的运行方式,这个目录是不同的.
如果我们不打包,直接在 IDE 中运行程序的话,这个目录是:
如果是打包后运行的话,不同的平台具有不同的目录,例如在 macOS 平台为: xxx.app/Contents/app/resources/ 。其中 xxx.app 就是生成的 macOS 上的 app 文件(夹)。而在 Windows 上则为程序安装目录下的 resources 目录。
另外有一点必须要说明的是,如果直接在 IDE 运行程序的话,不能直接 run MainKt 而是要运行 run 或有 run 前缀的这些 task :
因为如果直接 run MainKt :
的话,并不会触发相应的 task,会导致 System.getProperty("compose.application.resources.dir") 返回 null 。
自此,我们已经可以为不同的平台打包不同的可执行文件了,我们在实际使用时只需要把原先的 ffmpeg 命令改成 ffmpeg 实际的路径即可,例如在 macOS 未打包直接运行时执行查看版本号命令可以写成:
需要注意的是,不同的平台的可执行文件名称是不一样的,例如在 macOS 和 Linux 上可执行文件是没有后缀名的,但是在 windows 上却有后缀名 .exe 。
同时,在 macOS 和 Linux 上,我们打包的可执行文件一般默认是没有执行权限的,所以需要我们额外处理一下。定义一个函数用于获取指定平台的可执行文件路径并且检查是否有可执行权限:
fun getFfmpegBinaryPath(): String {
    val fileName = if (System.getProperty("os.name").lowercase(Locale.getDefault()).contains("win")) "ffmpeg.exe" else "ffmpeg"
    val executableFile = File(System.getProperty("compose.application.resources.dir")).resolve(fileName)
    if (!executableFile.canExecute()) {
        println("没有执行权限,正在尝试授予")
        executableFile.setExecutable(true)
    }
    return executableFile.absolutePath
    }
}
自此,我们已经可以在程序中正常的使用 FFmpeg 了。
唯独还有一个不太合理的地方,那就是显然我们不应该把所有的可执行文件都上传到 GitHub 啊,且不说 git 对二进制文件支持较差,而且这些二进制文件的大小也超出了 GIthub 的大小限制了啊。
所以,我们采用的解决方案是通过编写自定义 Gradle 脚本实现在编译之前自动检查并下载对应平台的 FFmpeg 二进制文件并放到对应的目录下。
编写 Gradle 脚本自动下载并复制资源文件
得益于我们的 Gradle 脚本现在使用的也是 kotlin (.kts)了,所以编写起来毫无压力。
只是我们需要先大致了解一下 Gradle 的工作流程。
Gradle 基础知识
在 Gradle 构建运行时分为了三个阶段:
- 初始化阶段
- 配置阶段
- 执行阶段
在初始化阶段会:
- 检查设置文件(settings.gradle.kts)
- 解析设置文件以确定哪些项目以及包含(include)的项目将参与构建
- 为每个项目创建
Project实例
在配置阶段会:
- 解析参与构建的所有项目的构建脚本 (build.gradle)
- 为需要执行的任务(task)创建任务运行图
在执行阶段:
- 按照依赖关系顺序依次执行每个需要执行的任务
我们可以通过以下方式创建一个任务:
tasks.register("hello") {
    doLast {
        println("Hello world!")
    }
}
这样,我们就创建了一个名为 hello 的 task, 执行它将会输出 Hello world! ,通过以下命令执行:
gradlew hello
运行结果:
需要注意的是,如果我们不把代码包在 doLast 或 doFirst 中,那么每次配置阶段时这些代码都会被执行:
tasks.register("hello") {
    println("Hello world!")
}
上述这个代码,即使我们不运行这个任务,只是同步了一下 Gradle,依旧会输出 “Hello world!"” 。
我们也可以通过 dependsOn 为任务添加依赖,例如:
tasks.register("equationl") {
    doLast {
        println("Hello equationl!")
    }
}

tasks.register("hello") {
    dependsOn("equationl")
    doLast {
        println("Hello world!")
    }
}
此时执行 ./gradlew hello ,输出结果:
> Task :equationl
Hello equationl!

> Task :hello
Hello world!
可以看到,虽然我们运行的是 hello 任务,但是由于 hello 依赖于 equationl ,所以最终结果是先运行了 equationl 再接着运行 hello 。
然后,我们还可以通过 tasks.named 动态的去为已有的任务添加新内容,例如为其他任务添加新的运行依赖:
tasks.register("equationl") {
    doLast {
        println("Hello equationl!")
    }
}

tasks.register("hello") {
    doLast {
        println("Hello world!")
    }
}

tasks.named("hello") {
    dependsOn("equationl")
}
执行 ./gradlew hello ,输出结果:
> Task :equationl
Hello equationl!

> Task :hello
Hello world!
可以看到,在上述的脚本中的 hello 任务中我们并没有添加依赖,但是输出依旧是带上了 equationl 依赖,这是因为我们之后又通过 tasks.named 为 hello 添加了 equationl 依赖。
自此,我们已经大致了解了编写下载不同平台资源所需的基础知识,下一步就是开始正式编写下载脚本。
应该什么时候下载资源?
在正式开始编写脚本之前,我们还需要明确一点,就是我们这个下载资源的代码,应该在什么时候执行?
容易想到,即然我们是为了将资源按照平台放到对应的目录,使其打包时能够读取到就行,那么我只需要在配置资源文件的任务前运行这个任务就可以了。
那么,怎么知道资源文件的任务是哪个呢?其实也很简单,run 一下在看构建输出不就知道了嘛:
Executing 'run'...

> Task :compileKotlin UP-TO-DATE
> Task :compileJava NO-SOURCE
> Task :processResources NO-SOURCE
> Task :classes UP-TO-DATE
> Task :jar UP-TO-DATE
> Task :prepareAppResources UP-TO-DATE
根据这些任务名称,显然 prepareAppResources 就是我们要找的任务了。
因此,我们这样写:
tasks.register("downloadFFmpeg") {
    // 在这里下载文件
    doLast {
        println("假装我在下载文件")
    }
}

tasks.named("prepareAppResources") {
    dependsOn("downloadFFmpeg")
}
如果你这样写的话,大概率会收到报错:
* Exception is:
org.gradle.api.UnknownTaskException: Task with name 'prepareAppResources' not found in root project 'TimelapseHelper'.
	at org.gradle.api.internal.tasks.DefaultTaskCollection.createNotFoundException(DefaultTaskCollection.java:102)

	// ...
什么?prepareAppResources 不存在?怎么可能,通过 ./gradlew tasks --all 查看所有任务也是有这个任务的啊!
哈哈,其实这里并不是这个任务不存在,只是创建这个任务的脚本推迟了这个任务的创建,换句话说就是,在我们调用 tasks.named("prepareAppResources") 时,prepareAppResources 这个任务还没有被创建出来呢。
要解决这个问题也很简单,把这行代码放到 gradle.projectsEvaluated 或 project.afterEvaluate 之后即可:
tasks.register("downloadFFmpeg") {
    // 在这里下载文件
    doLast {
        println("假装我在下载文件")
    }
}

gradle.projectsEvaluated {
    tasks.named("prepareAppResources") {
        dependsOn("downloadFFmpeg")
    }
}
gradle.projectsEvaluated 和 project.afterEvaluate 的意思比较像,都可以简单理解为在配置阶段结束后再运行其中的代码。这样就可以保证我们在 tasks.named("prepareAppResources") 时这个任务已经被创建了。
此时再执行 run 输出如下:
Executing 'run'...

> Task :compileKotlin UP-TO-DATE
> Task :compileJava NO-SOURCE
> Task :processResources NO-SOURCE
> Task :classes UP-TO-DATE
> Task :jar UP-TO-DATE

> Task :downloadFFmpeg
假装我在下载文件

> Task :prepareAppResources UP-TO-DATE
可以看到,我们添加的 downloadFFmpeg 任务已经成功在 prepareAppResources 之前运行了。
接下来只要完成 downloadFFmpeg 中的具体下载资源的实现就可以了。
注意:虽然我在文章中写了应该下载资源的最佳时机,但是我自己实际编写程序时却偷懒了并没有在按照我介绍的编写任务,而是直接在
gradle.afterProject { }中添加了一个下载函数。另外,我的代码中也没有实现缓存和跳过机制,这可能会拖慢构建速度。
开始下载!
该节几乎就不属于 Gradle 的范畴了,完全可以看作是一个普通的 Kotlin 代码了。
只是还有几个点需要了解一下。
判断当前系统
我们可以通过 Os.isFamily(Os.FAMILY_WINDOWS) 判断当前平台是否是 windows,同理 Os.isFamily(Os.FAMILY_MAC) 用于判断是否是 macOS。
从网络下载文件
从网络下载文件使用的是 ant 来实现的:
ant.invokeMethod("get", mapOf("src" to link, "dest" to cachePath))
其中的 get 表示 GET 请求;
src 表示请求网址;
dest 表示储存至哪个文件。
解压文件
kotlin 的 Gradle DSL 提供了一个叫 unzipTo 的函数可以直接用来解压文件:
unzipTo(cacheFile.parentFile, cacheFile)
其中,第一个参数表示解压到哪个文件夹,第二个参数表示需要解压的 zip 文件。
除了以上这几个地方外,其他的语法和普通 kotlin 无异,我就不一一赘述了,直接上代码:
fun downloadFFmpeg() {
println("downloadFFmpeg: Downloading and extracting ffmpeg binary file ...")
if (!System.getProperty("os.arch").contains("64")) {
println("downloadFFmpeg: Not support Current System arch(${System.getProperty("os.arch")}), You may need download for your system by yourself at: https://ffmpeg.org/download.html, then copy to '/', such as `resources/macos/`" )
return
}
val windowsDownloadLink = "https://github.com/BtbN/FFmpeg-Builds/releases/download/latest/ffmpeg-master-latest-win64-gpl.zip"
val macDownloadLink = "https://evermeet.cx/ffmpeg/ffmpeg-6.0.zip"
val cachePath = file("cache")
val windowsFile = "resources/windows/ffmpeg.exe"
val macFile = "resources/macos/ffmpeg"
val ffmpegFile = if (Os.isFamily(Os.FAMILY_WINDOWS)) file(windowsFile) else file(macFile)
println("downloadFFmpeg: Check $ffmpegFile ...")
if (!ffmpegFile.exists()) {
println("downloadFFmpeg: '$ffmpegFile' not exist, start downloading...")
if (!cachePath.exists()) {
mkdir(cachePath)
}
if (Os.isFamily(Os.FAMILY_WINDOWS)) {
executeDownload(windowsDownloadLink, cachePath.resolve("ffmpeg.zip"))
unzipWindowsFFmpeg(cachePath.resolve("ffmpeg.zip"), file(windowsFile))
}
else if (Os.isFamily(Os.FAMILY_MAC)) {
executeDownload(macDownloadLink, cachePath.resolve("ffmpeg.zip"))
unzipMacFFmpeg(cachePath.resolve("ffmpeg.zip"), file(macFile))
}
else {
println("downloadFFmpeg: Not support Current System, You may need download for your system by yourself at: https://ffmpeg.org/download.html, then copy to '/', such as `resources/macos/ffmpeg`" )
}
}
else {
println("downloadFFmpeg: '$ffmpegFile' already exist, all done!\nTip: if you want download again, just remove '$ffmpegFile' then build again.")
}
}
fun executeDownload(link: String, cachePath: File) {
println("downloadFFmpeg: Download from `$link` to `$cachePath` ...")
ant.invokeMethod("get", mapOf("src" to link, "dest" to cachePath))
println("downloadFFmpeg: `$cachePath` downloaded, start unzip...")
}
fun unzipWindowsFFmpeg(cacheFile: File, saveFile: File) {
unzipTo(cacheFile.parentFile, cacheFile)
println("downloadFFmpeg: unzip finish, start copy...")
cacheFile.parentFile.resolve("ffmpeg-master-latest-win64-gpl/bin/ffmpeg.exe").copyTo(saveFile)
println("downloadFFmpeg: copy finish! start remove cache...")
cacheFile.parentFile.deleteRecursively()
println("downloadFFmpeg: All done!")
}
fun unzipMacFFmpeg(cacheFile: File, saveFile: File) {
unzipTo(cacheFile.parentFile, cacheFile)
println("downloadFFmpeg: unzip finish, start copy...")
cacheFile.parentFile.resolve("ffmpeg").copyTo(saveFile)
println("downloadFFmpeg: copy finish! start remove cache...")
cacheFile.parentFile.deleteRecursively()
println("downloadFFmpeg: All done!")
}
最后,只需要在我们创建的任务中调用 downloadFFmpeg() 函数即可:
tasks.register("downloadFFmpeg") {
    // 在这里下载文件
    doLast {
        downloadFFmpeg()
    }
}
Desktop 桌面特有组件
虽然本文的标题叫做 Compose Desktop ,但是前面几节讲的内容似乎都和 Compose 没有太大关系,更多的是业务逻辑上的问题,但是不要急,你看,Compose 这不就来了嘛。
即然我们这个项目是纯桌面项目,那么当然可以放心大胆的用上一些桌面特有组件了。
Tooltips 鼠标悬浮提示框
Tooltips 用于在我们的鼠标移动并停留在某个组件时悬浮显示提示内容:
它的使用方式也很简单,只要将需要添加提示的组件置于 TooltipArea 之下即可:
TooltipArea(
    tooltip = {
        // 提示内容
        Surface(
            modifier = Modifier.shadow(4.dp),
            color = Color(255, 255, 210),
            shape = RoundedCornerShape(4.dp)
        ) {
            Text(
                text = "自定义 FFmpeg 可执行文件路径",
                modifier = Modifier.padding(10.dp)
            )
        }
    },
    modifier = Modifier.padding(start = 40.dp),
    delayMillis = 600,  // 停留多久后才显示
) {
    // 需要添加提示的组件
    Text("自定义")
}
其中的 tooltip 即提示文本内容,一般直接使用一个 Text 即可;content (最后一个 lambda)即需要添加提示的原内容。
Scrollbars 滚动进度条
使用 Scrollbars 可以为可滚动的 Compose 组件添加滚动进度条,并且拖动这个进度条可以快速滚动内容:
可以为 Modifier.verticalScroll 、LazyColumn 、Modifier.horizontalScroll 、LazyRow 等可滚动的组件添加滚动条。
使用方式也很简单,将原本的可滚动组件放到 Box 中,然后在 Box 中添加 VerticalScrollbar 或 HorizontalScrollbar 即可,例如为具有 Modifier.verticalScroll 的组件添加滚动条:
val scrollState  = rememberScrollState()
Box {
    Column(
        modifier = Modifier.fillMaxSize().padding(8.dp).verticalScroll(scrollState),
        verticalArrangement = Arrangement.Center,
        horizontalAlignment = Alignment.CenterHorizontally
    ) {
        Text("text\ntext\ntext\ntext\ntext\ntext\ntext")
    }

    VerticalScrollbar(
        modifier = Modifier
            .align(Alignment.CenterEnd)
            .fillMaxHeight(),
        adapter = rememberScrollbarAdapter(scrollState)
    )
}
可以看到,使用 VerticalScrollbar 的重点在于需要提供一个 adapter 即适配器,这个适配器用于滚动条计算当前大小、滚动位置以及拖动滚动条后同步更新可滚动内容的位置。
而官方已经给几乎所有的可滚动组件内置了可用的适配器:
我们只需要将对应的可滚动组件的滚动状态传入即可,例如上面例子中,我们传入的就是一个 ScrollState 。
虽然说官方提供了几乎所有可滚动组件的适配器,但是好巧不巧的,就是没有提供我所需要的这个可滚动组件 LazyVerticalStaggeredGrid 的适配器。
但是通过查看类似的 LazyGridState 的适配器实现,我发现其实自己写一个挺简单的,不知道是因为 LazyVerticalStaggeredGrid 是刚添加的所以没有适配器还是因为 LazyVerticalStaggeredGrid 的每个 item 高度都不是固定的,导致计算位置时会出现错误,总之现在需要我们自己去实现了。
显然,我们自己实现的也会出现高度计算错误,但是又不是不能用。哈哈哈。
首先,如果要实现自己的适配器,我们需要继承 ScrollbarAdapter 这个接口,然后实现:
scrollOffset: Double当前可滚动组件已经滚动了多少像素contentSize: Double可滚动内容总的大小viewportSize: Double当前可见区域的大小scrollTo(scrollOffset: Double)如果滚动条被拖动,会调用这个方法,我们需要在其中实现滚动内容的方法。
下面我简要介绍一下实现思路,然后直接上代码,这个适配器是修改自 LazyGridState 的适配器。
首先,scrollOffset 我们可以通过将首个可见 item 的序号(index) x 平均每个 item 的高度 - 首个可见 item 的相对于可见区域的偏移量即可得到。
contentSize 可以通过所有项目的数量 x 平均每个项目的高度 得到(当然,还需要将项目之间的间距也加进去)
viewportSize 和 scrollTo 就是可滚动组件的固有属性和方法,我们只需要判断一下方向直接返回就可以了。
完整代码如下:
import androidx.compose.foundation.ExperimentalFoundationApi
import androidx.compose.foundation.gestures.Orientation
import androidx.compose.foundation.gestures.scrollBy
import androidx.compose.foundation.lazy.staggeredgrid.LazyStaggeredGridItemInfo
import androidx.compose.foundation.lazy.staggeredgrid.LazyStaggeredGridState
import androidx.compose.foundation.v2.ScrollbarAdapter
import androidx.compose.foundation.v2.maxScrollOffset
import androidx.compose.runtime.Composable
import androidx.compose.runtime.derivedStateOf
import androidx.compose.runtime.getValue
import androidx.compose.runtime.remember
import kotlin.math.abs

@OptIn(ExperimentalFoundationApi::class)
@Composable
fun rememberLazyFGridScrollbarAdapter(
    scrollState: LazyStaggeredGridState,
): ScrollbarAdapter = remember(scrollState) {
    LazyStaggeredGridAdapter(scrollState)
}

@OptIn(ExperimentalFoundationApi::class)
class LazyStaggeredGridAdapter(
    private val scrollState: LazyStaggeredGridState
) : LazyLineContentAdapter() {
    override val lineSpacing: Int
        get() = scrollState.layoutInfo.mainAxisItemSpacing

    override val viewportSize: Double
        get() = with(scrollState.layoutInfo) {
            if (orientation == Orientation.Vertical)
                viewportSize.height
            else
                viewportSize.width
        }.toDouble()

    override fun firstVisibleLine(): VisibleLine? {
        return scrollState.layoutInfo.visibleItemsInfo
            .firstOrNull { it.index != -1 } // Skip exiting items
            ?.let { firstVisibleItem ->
                VisibleLine(
                    index = firstVisibleItem.index,
                    offset = firstVisibleItem.mainAxisOffset()
                )
            }
    }

    override fun totalLineCount() = scrollState.layoutInfo.totalItemsCount

    override fun contentPadding() = with(scrollState.layoutInfo){
        beforeContentPadding + afterContentPadding
    }

    override suspend fun snapToLine(lineIndex: Int, scrollOffset: Int) {
        scrollState.scrollToItem(lineIndex, scrollOffset)
    }

    override suspend fun scrollBy(value: Float) {
        scrollState.scrollBy(value)
    }

    override fun averageVisibleLineSize()= with(scrollState.layoutInfo.visibleItemsInfo){
        val firstFloatingIndex = 0
        val first = this[firstFloatingIndex]
        val last = last()
        val count = size - firstFloatingIndex
        (last.mainAxisOffset() + last.mainAxisSize() - first.mainAxisOffset() - (count-1)*lineSpacing).toDouble() / count
    }

    private val isVertical = scrollState.layoutInfo.orientation == Orientation.Vertical

    private fun LazyStaggeredGridItemInfo.mainAxisOffset() = with(offset) {
        if (isVertical) y else x
    }

    private fun LazyStaggeredGridItemInfo.mainAxisSize() = with(size) {
        if (isVertical) height else width
    }

}

abstract class LazyLineContentAdapter: ScrollbarAdapter{

    // Implement the adapter in terms of "lines", which means either rows,
    // (for a vertically scrollable widget) or columns (for a horizontally
    // scrollable one).
    // For LazyList this translates directly to items; for LazyGrid, it
    // translates to rows/columns of items.

    data class VisibleLine(
        val index: Int,
        val offset: Int
    )

    /**
     * Return the first visible line, if any.
     */
    protected abstract fun firstVisibleLine(): VisibleLine?

    /**
     * Return the total number of lines.
     */
    protected abstract fun totalLineCount(): Int

    /**
     * The sum of content padding (before+after) on the scrollable axis.
     */
    protected abstract fun contentPadding(): Int

    /**
     * Scroll immediately to the given line, and offset it by [scrollOffset] pixels.
     */
    protected abstract suspend fun snapToLine(lineIndex: Int, scrollOffset: Int)

    /**
     * Scroll from the current position by the given amount of pixels.
     */
    protected abstract suspend fun scrollBy(value: Float)

    /**
     * Return the average size (on the scrollable axis) of the visible lines.
     */
    protected abstract fun averageVisibleLineSize(): Double

    /**
     * The spacing between lines.
     */
    protected abstract val lineSpacing: Int

    private val averageVisibleLineSize by derivedStateOf {
        if (totalLineCount() == 0)
            0.0
        else
            averageVisibleLineSize()
    }

    private val averageVisibleLineSizeWithSpacing get() = averageVisibleLineSize + lineSpacing

    override val scrollOffset: Double
        get() {
            val firstVisibleLine = firstVisibleLine()
            return if (firstVisibleLine == null)
                0.0
            else {
                firstVisibleLine.index * averageVisibleLineSizeWithSpacing - firstVisibleLine.offset
            }
        }

    override val contentSize: Double
        get() {
            val totalLineCount = totalLineCount()
            return averageVisibleLineSize * totalLineCount +
                    lineSpacing * (totalLineCount - 1).coerceAtLeast(0) +
                    contentPadding()
        }

    override suspend fun scrollTo(scrollOffset: Double) {
        val distance = scrollOffset - this@LazyLineContentAdapter.scrollOffset

        // if we scroll less than viewport we need to use scrollBy function to avoid
        // undesirable scroll jumps (when an item size is different)
        //
        // if we scroll more than viewport we should immediately jump to this position
        // without recreating all items between the current and the new position
        if (abs(distance) <= viewportSize) {
            scrollBy(distance.toFloat())
        } else {
            snapTo(scrollOffset)
        }
    }

    private suspend fun snapTo(scrollOffset: Double) {
        val scrollOffsetCoerced = scrollOffset.coerceIn(0.0, maxScrollOffset)

        val index = (scrollOffsetCoerced / averageVisibleLineSizeWithSpacing)
            .toInt()
            .coerceAtLeast(0)
            .coerceAtMost(totalLineCount() - 1)

        val offset = (scrollOffsetCoerced - index * averageVisibleLineSizeWithSpacing)
            .toInt()
            .coerceAtLeast(0)

        snapToLine(lineIndex = index, scrollOffset = offset)
    }

}
监听按键和鼠标事件
在我这个项目中,有一个文件列表,我希望能在这个地方监听键盘的上下方向键,然后以此来快速移动选中项。
为此我们需要为 程序 加上对于键盘事件的接收,对于键盘事件的接收只能写在 Window 的 onKeyEvent 参数中:
Window(
        // ……
        onKeyEvent = {
            applicationState.onKeyEvent(it)
        }
    ) {
    // ……
    }
为了让我的 Compose 组件能够接受到按键事件,我将它的状态提升到了最顶级,也就是和 window 平级的位置。然后在接收到按键事件后就可以使用了:
    fun onKeyEvent(keyEvent: KeyEvent): Boolean {

        if (keyEvent.type == KeyEventType.KeyDown) {
            when (keyEvent.key.nativeKeyCode) {
                37 -> { // 向左箭头
                }

                38 -> { // 向上箭头
                }

                39 -> { // 向右箭头
                }

                40 -> { // 向下箭头
                }
            }
        }

        return false
    }
之后,在我的程序中,有一个查看大图的界面,我希望能够在这个界面通过监听鼠标滚轮来实时缩放图片,那么我就需要监听鼠标的滚动事件:
Modifier
    .onPointerEvent(PointerEventType.Scroll) {
        scaleNumber = (scaleNumber - it.changes.first().scrollDelta.y).coerceIn(1f, 20f)
    }
可以看到,获取鼠标滚轮滚动事件也十分简单,只需要在需要接收事件的组件中添加 Modifier..onPointerEvent() 并将类型指定为 PointerEventType.Scroll 即可。
另外,如果缩放过图片,我们一般还会添加鼠标拖动图片移动:
Modifier
    .onPointerEvent(PointerEventType.Move) {
        if (it.changes.first().pressed) {
            offset -= (it.changes.first().previousPosition - it.changes.first().position)
        }
    }
和接收滚动类似,只是将类型改为 PointerEventType.Move, 并且,这个事件会在鼠标移动始终触发,显然不符合我们的需要,我们需要的是按下并移动,所以这里还要额外加一个判断 it.changes.first().pressed ,如果该值为 true 则表示此时鼠标被按下了。
其他问题
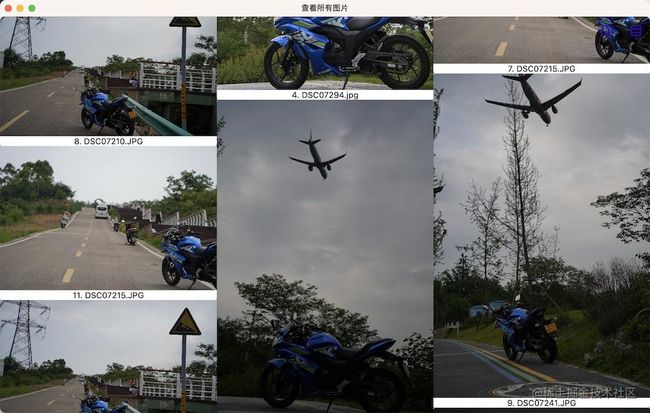
在修改这个程序时,遇到的另外一个大问题就是关于加载图片的问题,在我这个程序中有这么一个界面:
它用于展示当前添加的所有图片,虽然我已经用了 Lazy 组件并且实现了图片的异步加载,但是滑动时还是非常的卡顿。
显然,这是因为这些图片的分辨率都太高了,而加载时又都是以原分辨率加载的,这就会导致滑动时频繁的解码图片,使其非常卡顿。
在安卓端,我们一般会使用 Glide,它实现了按需加载缩略图,加了各种缓存等,但是 Glide 并不支持 Compose。
对于 Compose 来说,有一个类似的框架 Coil ,但是目前 Coil 只支持安卓。
好在,目前 Coil 的作者已经开始添加多平台支持了: Compose Multiplatform support 。
让我们一起期待吧,期望更换为使用 Coil 加载图片后能够改善这个界面的性能。
总结
以上就是我最近在修改使用 Compose 实现的纯桌面端程序时发现的一些问题以及解决方法。
完整的项目源码在此: TimelapseHelper。
其实在修改这个程序时还发现了很多有趣的问题,但是限于这篇文章已经不短了,所以我也就不再继续写了,感兴趣的可以看看源码。
参考资料
- Packaging resources
- Gradle User Manual


