不惑之年的硬件牛人一步一步教你学spring boot完整项目---客户管理模块从前端到后台之pom.xml部分分析(一)
前言:笔者曾经有18年的硬件研发经验,从(1)51单片机到(2)FPGA到(3)嵌入式ARM(ARM9到CORTEX A9)全都研发设计过,产品从(1)B超的整机研发到(2)智能家居系统到(3)无线电监测机到(4)平板电脑研发到(5)路灯智能控制到(5)工业电脑均有涉及,从(1)普通的电子技术工程师到(2)副总工程师到(3)副总经理到(4)事业部总经理。。。今天开始教你学习用spring boot搭建一个我们落地的完整项目模块--客户管理部分。
今天是:2018年6月7日 研究主题:客户管理模块从前端到后台之pom.xml部分分析
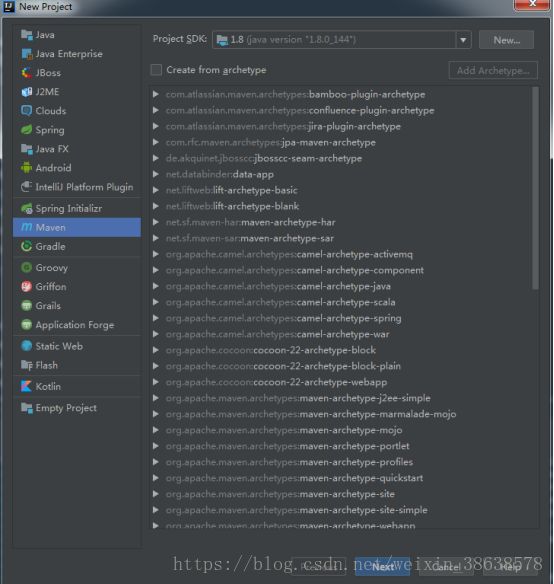
一、新建一个MAVEN项目,取名叫“usrmanager”
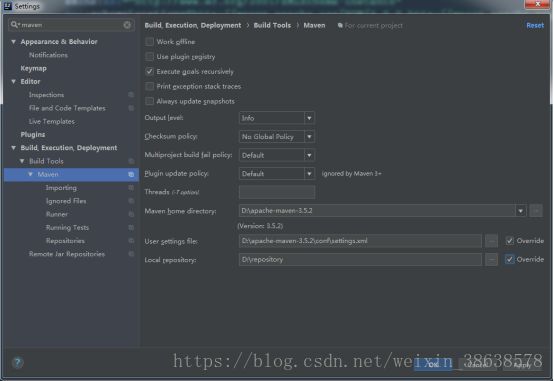
二、进入设置界面,并指定到apache-maven-3.5.2的配置目录下面:
改造pom.xml文件
1、增加打包的类型为JAR
<packaging>jarpackaging>
2、取项目名并描述这个项目的大致目的
<name>usrmanagername>
<description>this my first maven projectdescription>
3、一个spring boot的依赖
<parent>
    <groupId>org.springframework.bootgroupId>
    <artifactId>spring-boot-starter-parentartifactId>
    <version>2.0.1.RELEASEversion>
    <relativePath/>
parent>
4、增加一个properties的全局属性配置,让整个项目统一字符集编码
<properties>
    <project.build.sourceEncoding>UTF-8project.build.sourceEncoding>
    <project.reporting.outputEncoding>UTF-8project.reporting.outputEncoding>
    <java.version>1.8java.version>
properties>
5、增加JPA的依赖
<dependency>
    <groupId>org.springframework.bootgroupId>
    <artifactId>spring-boot-starter-data-jpaartifactId>
dependency>
6、支持JDBC访问数据库
<dependency>
    <groupId>org.springframework.bootgroupId>
    <artifactId>spring-boot-starter-jdbcartifactId>
dependency>
7、增加一个spring boot的WEB应用,并启动一个内嵌的Servlet容器(默认是Tomcat)用于HTTP请求
<dependency>
    <groupId>org.springframework.bootgroupId>
    <artifactId>spring-boot-starter-webartifactId>
dependency>
8、添加mysql的连接依赖,并用scope:runtime表示:dependency不作用在编译时,但会作用在运行和测试时,如JDBC驱动,适用运行和测试阶段
<dependency>
    <groupId>mysqlgroupId>
    <artifactId>mysql-connector-javaartifactId>
    <scope>runtimescope>
dependency>
9、增加项目单元测试依赖(可以去掉)
<dependency>
    <groupId>org.springframework.bootgroupId>
    <artifactId>spring-boot-starter-testartifactId>
    <scope>testscope>
dependency>
10、增加Thymeleaf的模板引擎依赖,其好处在于不用单独编写JSP,可以直接用html来做前端模板引擎。以下是详细记录流程:
<dependency>
    <groupId>org.springframework.bootgroupId>
    <artifactId>spring-boot-starter-thymeleafartifactId>
dependency>
(1).要使用thymeleaf,需要先引入thymeleaf的依赖
pom.xml
(2).添加配置文件
application.properties
#thymeleaf
spring.thymeleaf.cache=false
spring.thymeleaf.prefix=classpath:/templates/
spring.thymeleaf.suffix=.html
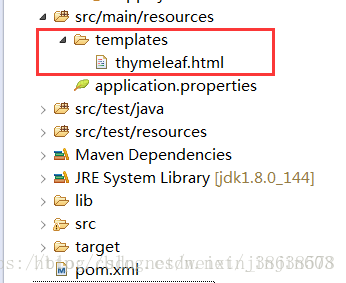
(3).创建文件夹及页面
thymeleaf.html内容如下:
i am first thymeleaf page
(4).创建controller
package com.tang.controller;
import java.util.Map;
import org.springframework.stereotype.Controller;import org.springframework.web.bind.annotation.RequestMapping;
@Controller@RequestMapping(value="/templates")public class TemplateController {
@RequestMapping(value="/thymeleaf")
public String thymeleafTemplate(Map
map.put("mname", "zhangsana");
return "thymeleaf";
}
}
(5).启动服务测试
http://localhost:8080/springboot/templates/thymeleaf
这里面需要注意:在thymeleaf模板文件中,所有的标签需要闭合。
看了上面的内容,发现thymeleaf有点类似于springmvc。只是这里面我们使用的是html文件,而springmvc使用的是jsp页面。
11、增加lombok的依赖,起好处在于:lombok能够达到的效果就是在源码中不需要写一些通用的方法,但是在编译生成的字节码文件中会帮我们生成这些方法。简单来说,比如我们新建了一个类,然后在其中写了几个字段,然后通常情况下我们需要手动去建立getter和setter方法啊,构造函数啊之类的,lombok的作用就是为了省去我们手动创建这些代码的麻烦,它能够在我们编译源码的时候自动帮我们生成这些方法。
<dependency>
    <groupId>org.projectlombokgroupId>
    <artifactId>lombokartifactId>
    <optional>trueoptional>
dependency>
12、添加plugin的依赖,起作用在于:添加了“org.springframework.boot:spring-boot-maven-plugin”插件。在添加了该插件之后,当运行“mvn package”进行打包时,会打包成一个可以直接运行的 JAR 文件,使用“java -jar”命令就可以直接运行。这在很大程度上简化了应用的部署,只需要安装了 JRE 就可以运行。
<build>
    <plugins>
        <plugin>
            <groupId>org.springframework.bootgroupId>
            <artifactId>spring-boot-maven-pluginartifactId>
        plugin>
    plugins>
build>
OK!以上已经完成了一个完整的pom.xml的依赖编写,很实用,在其他地方应该找不到这么完整而且落地的内容,如果喜欢请多多关注,谢谢!!
下一节“application.xml部分分析”继续..........


