在 K8s 环境上 DIY 部署雷池社区版
在 K8s 环境上 DIY 部署雷池社区版
原作者:charnet1019
环境
系统: CentOS Linux release 7.9.2009
内核: 3.10.0-1160.92.1.el7.x86_64
Kubernetes 版本: v1.24.15
safeline-ce 版本: 2.1.2
首先非常感谢长亭科技开源的优秀产品–长亭雷池 WAF
DIY 过程
0. DIY pod 配置文件
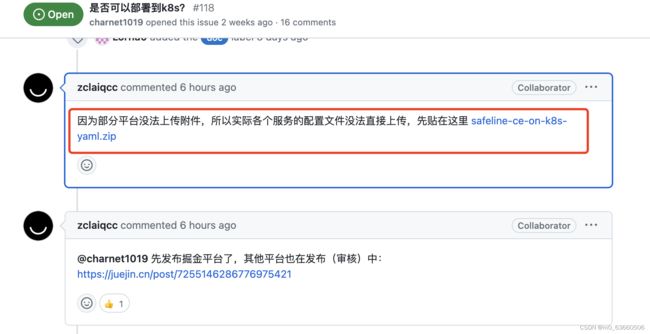
根据官方提供的 compose.yaml 文件,自己做了一份 K8s pod 运行所需要的各个服务配置(详见附件 safeline-ce-k8s-yaml.zip ),直接加载并启动相关 pod 即可。附件链接:https://github.com/chaitin/safeline/issues/118#issuecomment-1635174735

1. 查看 pod 运行状态信息
[root@master safeline-ce]# kubectl get pods,svc,pvc -n waf -o wide
NAME                                     READY   STATUS    RESTARTS   AGE     IP                NODE                 NOMINATED NODE   READINESS GATES
pod/safeline-detector-54bfb6f99c-gtlmt   1/1     Running   0          12m     100.100.246.231   master.k8s.local     <none>           <none>
pod/safeline-mario-779b744447-zq5tc      1/1     Running   0          12m     100.109.175.106   worker01.k8s.local   <none>           <none>
pod/safeline-mgt-api-5d65b8b49-txv4f     1/1     Running   0          6m33s   192.168.5.6       master.k8s.local     <none>           <none>
pod/safeline-tengine-684cff57fb-rtb6m    1/1     Running   0          12m     192.168.5.8       worker02.k8s.local   <none>           <none>

NAME                        TYPE        CLUSTER-IP    EXTERNAL-IP   PORT(S)             AGE   SELECTOR
service/safeline-detector   ClusterIP   10.96.0.142   <none>        8000/TCP,8001/TCP   12m   app=safeline-detector,component=secure
service/safeline-mario      ClusterIP   10.96.3.131   <none>        3335/TCP            12m   app=safeline-mario,component=secure
service/safeline-mgt-api    ClusterIP   10.96.2.16    <none>        1443/TCP,9002/TCP   15m   app=safeline-mgt-api,component=secure
service/safeline-tengine    ClusterIP   10.96.3.135   <none>        65443/TCP           12m   app=safeline-tengine,component=secure

NAME                                           STATUS   VOLUME                                     CAPACITY   ACCESS MODES   STORAGECLASS              AGE   VOLUMEMODE
persistentvolumeclaim/mgr-api-certs            Bound    pvc-0af5dcfb-a3ee-4124-93fa-a437f7addc48   5Mi        RWX            nfs-based-cstor-storage   15m   Filesystem
persistentvolumeclaim/mgr-api-logs             Bound    pvc-70b5e5d7-b1b1-4b14-ab00-c311a638cf07   500Mi      RWO            nfs-based-cstor-storage   15m   Filesystem
persistentvolumeclaim/mgr-api-nginx-conf       Bound    pvc-f6a3bfc7-5354-4897-8719-a03fec03f301   5Mi        RWX            nfs-based-cstor-storage   15m   Filesystem
persistentvolumeclaim/safeline-detector-data   Bound    pvc-1747736b-efb3-4c32-938a-c3992c76a041   1Gi        RWX            nfs-based-cstor-storage   12m   Filesystem
persistentvolumeclaim/safeline-detector-logs   Bound    pvc-0f11ca46-9602-431b-89c7-c2bb3c080f8a   500Mi      RWO            nfs-based-cstor-storage   12m   Filesystem
persistentvolumeclaim/safeline-mario-data      Bound    pvc-92eb78d6-4088-490e-9506-6f4dc0fc6871   10Mi       RWO            nfs-based-cstor-storage   12m   Filesystem
persistentvolumeclaim/safeline-mario-logs      Bound    pvc-5c6d3f20-032d-4966-b706-d97b537de1ad   500Mi      RWO            nfs-based-cstor-storage   12m   Filesystem
persistentvolumeclaim/safeline-tengine-cache   Bound    pvc-429ba174-8c7d-4441-a15a-3d9ab4e744ec   100Mi      RWO            nfs-based-cstor-storage   12m   Filesystem
persistentvolumeclaim/safeline-tengine-logs    Bound    pvc-68cb31d2-54d0-4274-9365-e9b3aeff3193   500Mi      RWO            nfs-based-cstor-storage   12m   Filesystem
2. 修改数据库 postgres 地址
2.1 safeline-mgt-api 容器
进入 safeline-mgt-api 容器的 /app/nginx 目录下,修改 nginx.conf 中 postgres 的外部服务地址(大概在67行)
upstream postgres {
    #server safeline-postgres:5432;
    # 注意替换成自己 K8s 集群的 postgres 地址
    server postgresql-hl.middleware:5432;
}
修改完成 postgresql 地址后,supervisorctl restart nginx 重启 nginx 服务,并通过 supervisorctl status 确认 nginx 服务的运行状态
root@worker01:/app/nginx# supervisorctl status
nginx                            RUNNING   pid 391, uptime 0:11:20
webserver                        RUNNING   pid 49, uptime 0:17:02
2.2 safeline-mario 容器
进入 safeline-mario 容器的 /mario 目录下,修改 config.yml 中的 pg 连接地址,基于运行的容器 docker commit 一个新的镜像,然后修改 deployment 镜像地址后重启服务.
handler:
  plumber: {}
  persistence:
    postgres:
      # 注意替换成自己 K8s 集群的 postgres 地址和密码
      url: postgres://safeline-ce:-password>@postgresql-hl.middleware:5432/safeline-ce
3. 把部分服务间的 unix sock 通信换成 socket 通信
由于 safeline-ce 是部署在 k8s 上的,每个 pod 位于不同的网络命名空间下,所以 safeline-detector 和 safeline-tengine 之间无法通过 domain unix sock 进行通信,只能通过网络 socket 通信(即以 IP + 端口的方式通信)。
3.1 safeline-detector 容器
进入 safeline-detector 容器的 /resources/detector 目录,将修改 snserver.yml 中的配置,如下所示:
- 修改前配置
fusion_sofile: ./config/libfusion2.so
ip_location_db: ./GeoLite2-City.mmdb
bind_addr: unix:///resources/detector/snserver.sock
# bind_addr: 0.0.0.0
# listen_port: 8000
health_check_addr: 0.0.0.0
health_check_port: 8001
mgt_server_addr: ""
log: file:///logs/detector/snserver.log
log_level: warning
# worker: 4
daemon: false
heartbeat_interval: 5000
max_queue_size: 16384
rlimit_nofile: 65536
web_log_interval: 400
web_log: http://safeline-mario:3335/log/envelop
- 修改后配置
fusion_sofile: ./config/libfusion2.so
ip_location_db: ./GeoLite2-City.mmdb
#bind_addr: unix:///resources/detector/snserver.sock
bind_addr: 0.0.0.0
listen_port: 8000
health_check_addr: 0.0.0.0
health_check_port: 8001
mgt_server_addr: safeline-mgt-api:9002
log: file:///logs/detector/snserver.log
log_level: warning
# worker: 4
daemon: false
heartbeat_interval: 5000
max_queue_size: 16384
rlimit_nofile: 65536
web_log_interval: 400
web_log: http://safeline-mario:3335/log/envelop
重新加载配置
kill -1 1
查看服务端口信息
root@safeline-detector-5975fd46f-ksggn:/resources/detector# netstat -nplt
Active Internet connections (only servers)
Proto Recv-Q Send-Q Local Address           Foreign Address         State       PID/Program name
tcp        0      0 0.0.0.0:8000            0.0.0.0:*               LISTEN      -
tcp        0      0 0.0.0.0:8001            0.0.0.0:*               LISTEN      -
3.2 safeline-tengine 容器
进入 safeline-tengine 容器下的 /root/nginx 目录,修改 nginx.conf
修改前:
include /etc/nginx/conf.d/*.conf;
include /etc/nginx/sites-enabled/generated;
include /etc/nginx/sites-enabled/IF_*;
include /etc/nginx/safeline_unix.conf;   # 修改前使用 domain unix sock 模式
修改后:
include /etc/nginx/conf.d/*.conf;
include /etc/nginx/sites-enabled/generated;
include /etc/nginx/sites-enabled/IF_*;
#include /etc/nginx/safeline_unix.conf;
include /etc/nginx/safeline.conf;   # 修改后使用网络 socket 模式
进入 /root/tcontrollerd 目录下修改 config.yml
修改前:
log:
  output: /var/log/nginx/tcd.log # "stdout", "stderr" or file path
  level:  info                   # "debug", "info", "warn" or "error"
mgt_addr: 169.254.0.2:9002
修改后:
log:
  output: /var/log/nginx/tcd.log # "stdout", "stderr" or file path
  level:  info                   # "debug", "info", "warn" or "error"
mgt_addr: safeline-mgt-api:9002
上手使用
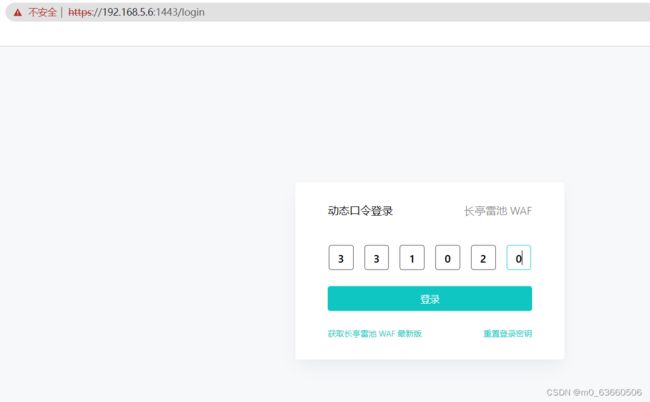
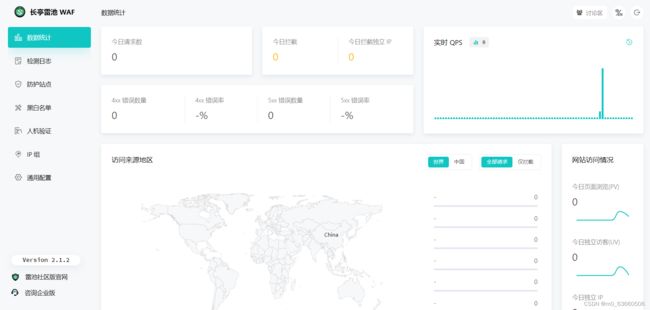
访问 safeline-mgt-api 所在的主机节点 IP + 1443,使用 google authenticator 扫码绑定后输入动态密码登录


总结
优点:
- 开源,可以根据需要进行自定义安装部署
- 基本可以满足绝大部分中小企业对安全的要求指标
缺点:
- 官方文档有点欠缺,没有详细说明每个服务的功能职责及用途,希望后续完善
- 服务调用及配置不清楚,导致部署难度有点大;如服务配置不知道是先读环境变量还是以读配置文件为准,配置方面建议文档说明下,并最好可以以环境变量的方式进行传递。


