用RestTemplate调用第三方提供的API接口
首先按照惯例分享一个提供免费接口的网站:
聚合数据
直接点击去自己注册个账号申请个免费的接口测试
今天用RestTemplate调一个天气预报的接口
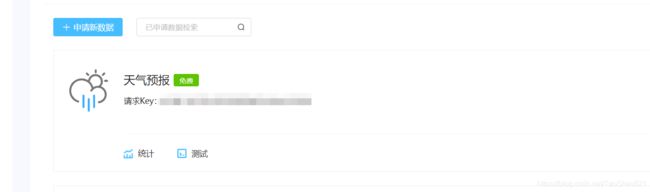
申请之后记住这个key后面拼装url会用
建议直接写在配置文件里
先看API文档介绍
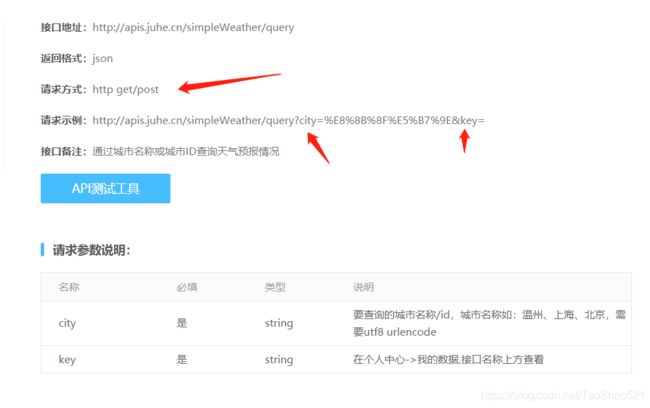
很清晰看到该接口请求方式支持get或者post
在看请求示例 :
后面带着两个请求参数 这个地方这两个参数顺序前后无所谓
下面直接来代码:
先弄个key的属性类
/**
 * 类说明:

 * 〈天气预报接口key〉
 *
 * @Author: wlt
 * @Date: 2021/3/15 10:11
 */
@Data
public class WeatherProp extends BaseBean {
    /**
     * 调用接口key
     */
    private String key;

}
yml配置文件里需要加上
pangu-weather:
    weatherprop:
        key: xxxxxxxxxxxxxxxx
然后配置类
/**
 * 类说明:

 * 〈天气接口属性配置〉
 *
 * @Author: wlt
 * @Date: 2021/3/15 10:36
 */
@Configuration
public class ApplicationWeatherConfig {
    @Bean
    @ConfigurationProperties(prefix = "pangu-weather.weatherprop")
    public WeatherProp weatherProp() {
        return new WeatherProp();
    }
}
以上就可以在启动的时候这个属性类就会当成一个bean注入到容器里了
接下来就是拼装这个url调用了
/**
* 类说明:
* 〈天气预报处理程序〉
*
* @Author: wlt
* @Date: 2021/3/15 10:04
*/
@Slf4j
@Component("weatherHandler")
public class WeatherHandler implements InitializingBean {
/**
* 调用聚合数据接口应答errcode: 0 :请求成功
*/
public static final int RPC_CODE_SUCCESS = 0;
/**
* 调用聚合数据接口应答errcode: 207301 :错误的查询城市名
*/
public static final int RPC_CODE_WRONG_CITY = 207301;
/**
* 调用聚合数据接口应答errcode: 207302 :查询不到该城市的相关信息
*/
public static final int RPC_CODE_NOT_FOUND_CITY = 207302;
/**
* 调用聚合数据接口应答errcode: 207303 :网络错误,请重试
*/
public static final int RPC_CODE_NETWORK_ERROR= 207303;
@Resource(name = "weatherProp")
private WeatherProp weatherProp;
@Resource(name = "restTemplate")
private RestTemplate restTemplate;
/**
* 请求地址
*/
private String url;
@Override
public void afterPropertiesSet() throws Exception {
StringBuilder urlSb = new StringBuilder();
urlSb.append("http://apis.juhe.cn/simpleWeather/query?");
urlSb.append("key=").append(weatherProp.getKey());
this.url = urlSb.toString();
}
/**
* 功能描述:
* <查询天气>
* @Param [city]
* @return 应答消息
* @Author: wlt
* @Date: 2021/3/15 11:10
**/
public WeatherVO weather(String city) {
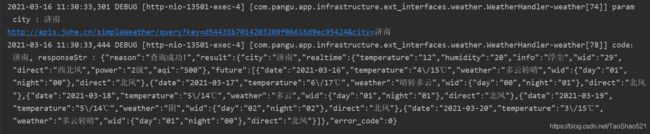
log.debug("param city : {}", city);
String reqUrl = url + "&city=" + city;
System.out.println(reqUrl);
String responseStr = restTemplate.getForObject(reqUrl, String.class);
log.debug("code: {}, responseStr : {}", city, responseStr);
WeatherVO weather = JsonUtil.readValue(responseStr, WeatherVO.class);
return weather;
}
}
其实就是这么一句话完成了调用
String responseStr = restTemplate.getForObject(reqUrl, String.class);
这个地方得注意啊API返回的JSON示例
{
    "reason": "查询成功",
    "result": {
        "city": "苏州",
        "realtime": {
            "temperature": "4",
            "humidity": "82",
            "info": "阴",
            "wid": "02",
            "direct": "西北风",
            "power": "3级",
            "aqi": "80"
        },
        "future": [
            {
                "date": "2019-02-22",
                "temperature": "1/7℃",
                "weather": "小雨转多云",
                "wid": {
                    "day": "07",
                    "night": "01"
                },
                "direct": "北风转西北风"
            },
            {
                "date": "2019-02-23",
                "temperature": "2/11℃",
                "weather": "多云转阴",
                "wid": {
                    "day": "01",
                    "night": "02"
                },
                "direct": "北风转东北风"
            },
            {
                "date": "2019-02-24",
                "temperature": "6/12℃",
                "weather": "多云",
                "wid": {
                    "day": "01",
                    "night": "01"
                },
                "direct": "东北风转北风"
            },
            {
                "date": "2019-02-25",
                "temperature": "5/12℃",
                "weather": "小雨转多云",
                "wid": {
                    "day": "07",
                    "night": "01"
                },
                "direct": "东北风"
            },
            {
                "date": "2019-02-26",
                "temperature": "5/11℃",
                "weather": "多云转小雨",
                "wid": {
                    "day": "01",
                    "night": "07"
                },
                "direct": "东北风"
            }
        ]
    },
    "error_code": 0
}
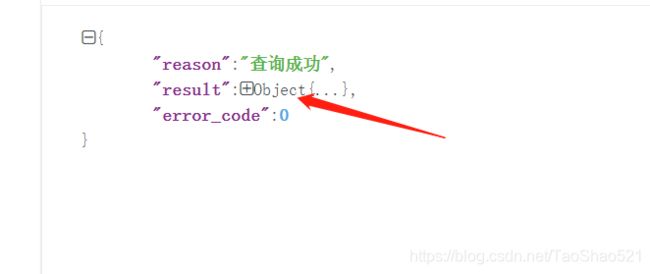
result其实是个Object
返回的实体类
/**
 * 类说明:

 * 〈返回json数据〉
 *
 * @Author: wlt
 * @Date: 2021/3/15 10:02
 */
@Data
public class WeatherVO extends BaseBean {
    private static final long serialVersionUID = 6788688600990722529L;
    /**
     * <返回码,0为查询成功>
     **/
    private int error_code;
    /**
     * <返回说明>
     **/
    private String reason;
    /**
     * <返回结果集>
     **/
    private Object result;
}
接下来就是Controller
注意我用的是DDD领域驱动设计模式写起来很麻烦 我就简单复制下代码你们参考一下即可
 /**
     * 功能描述:

     * <根据城市查询天气>
     * @Param [form]
     * @return 应答消息
     * @Author: wlt
     * @Date: 2021/3/15 14:12
     **/
    @PostMapping(path = "/company/workflow/drivelog/queryCityWeather", produces = MediaType.APPLICATION_JSON_UTF8_VALUE)
    public ResponseMessage<WeatherDTO> queryCityWeather(@RequestBody WeatherForm form) {
        ResponseMessage<WeatherEntity> result = drivelogAppService.queryCityWeather(form);
        if (ResponseCheckUtil.failed(result)) {
            return ResponseMessageUtil.genResult(result.getCode(), result.getMsg());
        }
        WeatherDTO weatherDTO = DrivelogAssembler.toWeatherDTO(result.getData());
        return ResponseMessageUtil.genSuccessResult(weatherDTO);
    }
APPService代码
 /**
     * 功能描述:

     * <根据城市查询天气>
     * @Param [city]
     * @return 应答消息
     * @Author: wlt
     * @Date: 2021/3/15 11:23
     **/
    public ResponseMessage<WeatherEntity> queryCityWeather(WeatherForm form) {
        return drivelogDomainService.queryCityWeather(form);
    }
DomainService代码
 /**
     * 功能描述:

     * <根据城市查询天气>
     * @Param [city]
     * @return 应答消息
     * @Author: wlt
     * @Date: 2021/3/15 11:23
     **/
    public ResponseMessage<WeatherEntity> queryCityWeather(WeatherForm form) {
        //调聚合数据接口查询天气预报
        WeatherVO response = weatherHandler.weather(form.getCity());
        Integer errorCode = Integer.valueOf(response.getError_code());
        if (errorCode != WeatherHandler.RPC_CODE_SUCCESS) {
            Res01012Weather res01012Weather = weatherMap.get(errorCode);
            if (res01012Weather != null) {
                return ResponseMessageUtil.genResult(res01012Weather);
            }
            return ResponseMessageUtil.genFailResult();
        }
        //object转实体类
        Object result = response.getResult();
        ObjectMapper objectMapper = new ObjectMapper();
        WeatherEntity weatherEntity = objectMapper.convertValue(result, WeatherEntity.class);
        return ResponseMessageUtil.genSuccessResult(weatherEntity);
    }

    @Override
    public void afterPropertiesSet() throws Exception {
        weatherMap = new HashMap<>();
        weatherMap.put(WeatherHandler.RPC_CODE_WRONG_CITY,Res01012Weather.RPC_CODE_WRONG_CITY);
        weatherMap.put(WeatherHandler.RPC_CODE_NOT_FOUND_CITY,Res01012Weather.RPC_CODE_NOT_FOUND_CITY);
        weatherMap.put(WeatherHandler.RPC_CODE_NETWORK_ERROR,Res01012Weather.RPC_CODE_NETWORK_ERROR);
    }
我把API上的错误码改成了我们自己项目设定的错误码
前面需要定义一个全局的map
private Map
解释:
afterPropertiesSet这个方法来自接口InitializingBean
源码注释:
设置所有bean属性后,由包含的{@code BeanFactory}调用
并满意{@link BeanFactoryAware},{@ code ApplicationContextAware}等。
此方法允许Bean实例对其整体执行验证 设置了所有bean属性后,进行配置和最终初始化。 如果配置错误(例如无法设置 必要属性),或者如果初始化由于任何其他原因而失败
测试接口:
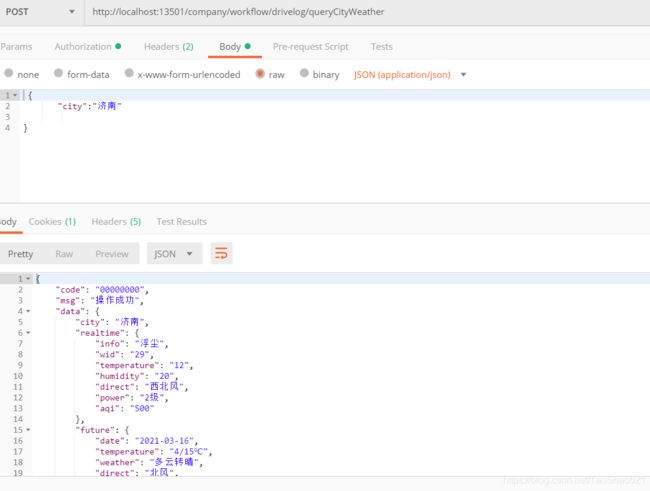
控制台打印日志