在前端html页面中向服务器发送post登录请求
目录
前言
搭建服务器
搭建前端登录页面
获取表单值
使用axios发送post登录请求
前言
一般在html页面中向服务器发送post请求的模块为登录请求,本文将介绍如何向服务器发送post请求
搭建服务器
如何搭建服务器请看JWT认证这篇文章,有详细的解说。这里之所以使用JWT认证是因为在前端html页面发起post请求会有跨域问题。这里直接附上完整代码
// 导入express模块
const express = require('express')
// 创建express服务器实例
const app = express()

// 导入jwt相关的包
const jwt = require('jsonwebtoken')
const expressJWT = require('express-jwt')

// 允许资源跨域共享
const cors = require('cors')
app.use(cors())

// 解析post提交的表单数据
app.use(express.urlencoded({extended:false}))

// 定义secret密钥
const secretKey= 'notbald'

// 登录接口
app.post('/post',(req,res)=> {
    const userinfo = req.body
    if(userinfo.username !=='admin'||userinfo.password!=='000000'){
        return res.send({
            status:400,
            msg:'登录失败',
            hh:userinfo
        })
    }
    const tokenStr = jwt.sign({username:userinfo.username},secretKey,{expiresIn:'60s'})
    res.send({
        status:200,
        msg:'登录成功',
        token:tokenStr
    })
})

// 将JWT字符串还原为JSON对象
app.use(expressJWT.expressjwt({
    secret:secretKey,
    algorithms:["HS256"]
}))

// get请求
app.get('/get',(req,res)=>{
    res.send({
        status:200,
        message:'获取用户信息成功',
        data:{
            username:req.auth.username
        }
    })
})

// 使用全局错误处理中间件,捕获解析 JWT 失败后产生的错误
app.use((err, req, res, next) => {
    // 这次错误是由 token 解析失败导致的
    if (err.name === 'UnauthorizedError') {
      return res.send({
        status: 401,
        message: '无效的token',
      })
    }
    res.send({
      status: 500,
      message: '未知的错误',
    })
  })

// 启动服务器
app.listen(3000,()=> {
    console.log('server running the localhost http://127.0.0.1:3000')
})
注意,这里不要使用80端口,如果使用80端口,当发起post请求时服务器引入了cors仍然会报跨域问题
搭建前端登录页面
html
css
 body {
            background-color: yellowgreen;
        }
        form {
            display: flex;
            flex-direction: column;
            justify-content: space-around;
            align-items: center;
            width: 300px;
            height: 200px;
            border: 1px solid gray;
            margin: 200px auto;
            border-radius: 5px;
            background-color: #fff;
            box-shadow: 15px 15px 15px gainsboro;
        }
        input {
            width: 200px;
            height: 30px;
            border: none;
            border-bottom: 1px solid black;
        }
        input:focus{
            outline: none;
        }
        button {
            width: 60px;
            height: 30px;
            background-color: skyblue;
            cursor: pointer;
            border: none;
            border-radius: 5px;
            margin-left: 40px;
        }
效果图
获取表单值
首先需要先引入axios
获取表单中的值
//获取用户名的value值
const  text = document.querySelector('#name').value

//获取密码框的value值
const pwd = document.querySelector('#pwd').value
给登录按钮绑定点击事件,并在点击登录时打印用户输入的值
 document.querySelector('#login').addEventListener('click', function(e) {
        e.preventDefault()

        console.log(text);
        console.log(pwd);
    })
注意,当提交时,需要阻止默认事件发生,否则会自动刷新页面
e.preventDefault()但当我们点击登录按钮时发现,获取到的是空值
当我们在函数内定义获取到的表单中的值时,然后再打印
 document.querySelector('#login').addEventListener('click', async function(e) {
        e.preventDefault()
        const  text = document.querySelector('#name').value
        const pwd = document.querySelector('#pwd').value
        console.log(text);
        console.log(pwd);
    })
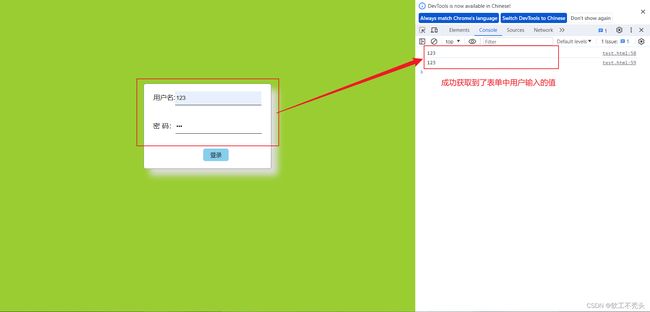
成功获取到了值
原因是如果在函数外定义,那么在页面加载时会运行一次改代码,而此时的表单内是没有任何值的,所以当点击登录时获取到的是空值
使用axios发送post登录请求
打印从服务器发过来的信息
const res = await axios({
            url:'http://127.0.0.1:3000/post',
            method:'post',
            data:({
                    username:text,
                    password:pwd
                })
        })
        console.log(res);
当我们输入正确的账号密码时发现(账号:admin 密码:000000 在服务器中写死的账号密码)
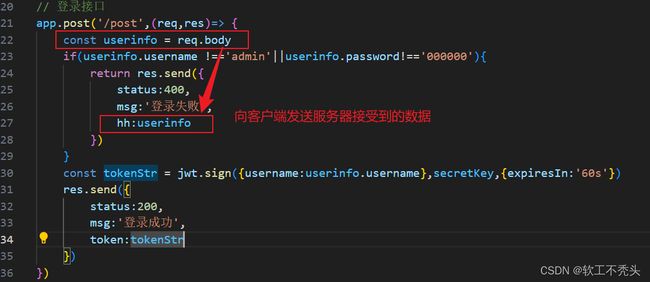
返回来的却是登录失败,所以我们查看一下后端服务器接受到的是什么数据,并向客户端发送
我们发现服务器接受到的是空值
原因是发送过去的数据格式问题,这里需要引入qs.stringfy(data),将传过去的对象格式化为字符串
直接在终端安装qs
npm install qs然后引用
const res = await axios({
            url:'http://127.0.0.1:3000/post',
            method:'post',
            data:Qs.stringify({
                    username:text,
                    password:pwd
                })
        })
        console.log(res);
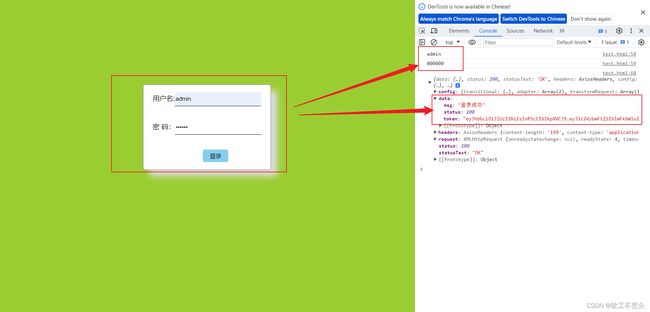
引入qs库以后,服务器可以成功获取到客户端的数据
根据服务器返回的status状态码使用window.location.href='跳转页面路径'来进行页面的跳转
if(res.data.status == 200){
        alert('登录成功')
        window.location.href='退出.html'
       }else {
        alert('登录失败')
       }
完整代码
 document.querySelector('#login').addEventListener('click', async function(e) {
        e.preventDefault()
        const  text = document.querySelector('#name').value
        const pwd = document.querySelector('#pwd').value
        const res = await axios({
            url:'http://127.0.0.1:3000/post',
            method:'post',
            data:Qs.stringify({
                    username:text,
                    password:pwd
                })
        })
        if(res.data.status == 200){
        alert('登录成功')
        window.location.href='退出.html'
       }else {
        alert('登录失败')
       }
    })
这样就完成登录的post请求


